VMware released the UAG (Unified Access Gateway) with a fix for the LOG4J vulnerability
The UAG version is 2111.1
Uncategorized
Log4j, Horizon Connection Server Workaround
We continue to look at how to mitigate the log4j vulnerability, in this post we look at horizon connection servers in detail.
As indicated by the VMware KB
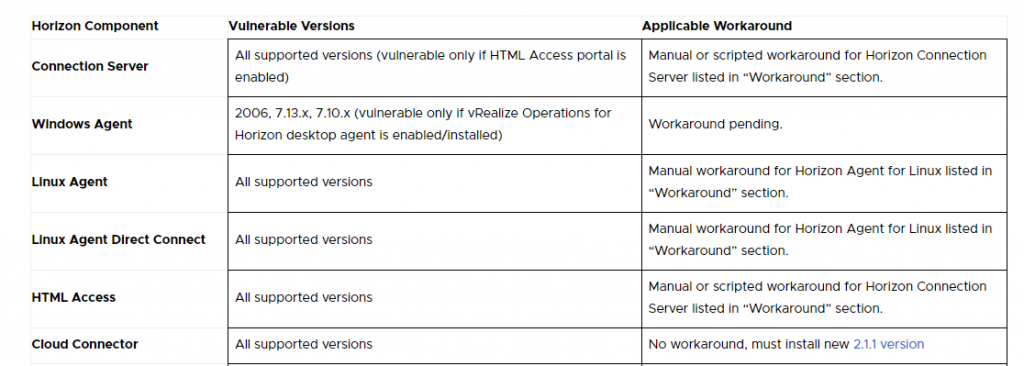
only the connection servers where the HTML Access Portal is active are vulnerable. But all versions are subject to vulnerability.
I recommend applying the workaround even if the HTML Access Portal is not active.
Again as indicated in the previously cited KB we have two possibilities:
- Change the following registry key
1. Edit this registry value:
HKLM\Software\VMware, Inc.\VMware VDM\plugins\wsnm\TomcatService\Params\JVMOptions
2. Append a single space character followed by this text: -Dlog4j2.formatMsgNoLookups=true
3. Exit the registry editor and restart the Connection Server service or reboot the machine
- Run the following script as administrator.
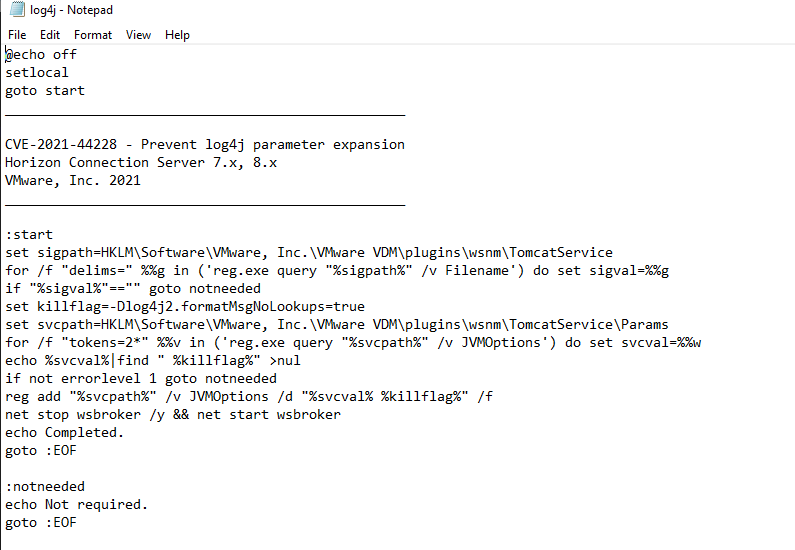
@echo off
setlocal
goto start
__________________________________________________

CVE-2021-44228 - Prevent log4j parameter expansion
Horizon Connection Server 7.x, 8.x
VMware, Inc. 2021
__________________________________________________

:start
set sigpath=HKLM\Software\VMware, Inc.\VMware VDM\plugins\wsnm\TomcatService
for /f "delims=" %%g in ('reg.exe query "%sigpath%" /v Filename') do set sigval=%%g
if "%sigval%"=="" goto notneeded
set killflag=-Dlog4j2.formatMsgNoLookups=true
set svcpath=HKLM\Software\VMware, Inc.\VMware VDM\plugins\wsnm\TomcatService\Params
for /f "tokens=2*" %%v in ('reg.exe query "%svcpath%" /v JVMOptions') do set svcval=%%w
echo %svcval%|find " %killflag%" >nul
if not errorlevel 1 goto notneeded
reg add "%svcpath%" /v JVMOptions /d "%svcval% %killflag%" /f
net stop wsbroker /y && net start wsbroker
echo Completed.
goto :EOF

:notneeded
echo Not required.
goto :EOF
I will proceed with the script.
I create a fix-log4j.bat file in the c: \ temp folder of my connection server and copy the script text to it.
I launch the command from a PowerShell with administrator rights:
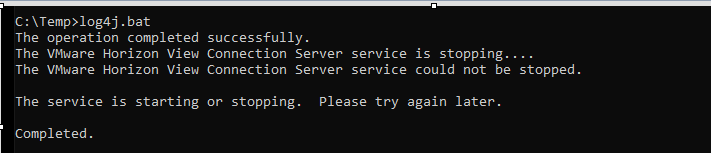
I reboot the server
I verify that the workaround is applied by relaunching the bat file.
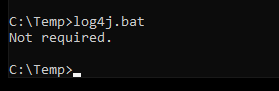
Obviously, I have to do this on all the Horizon Connection Servers present
in the Horizon infrastructure
Automate workaround for mitigating Log4j exploit on VCSA (vCenter Virtual Appliance)
After the post where I apply the VMware workaround for mitigating the Log4j exploit on the UAG appliance, now I suggest using this VMware KB to apply the workaround on vCenter.
The Python script attached at the KB check the vCenter version (6.5, 6.7 and 7) and apply the correct workaround indicate from VMware [see the Workaround instructions to address CVE-2021-44228 in vCenter Server and vCenter Cloud Gateway (87081) (vmware.com)]
Exploit Log4j mitigate on VMware Unified Access Gateway
## UPDATE 20/12/2021 ##
On December 14, 2021 the Apache Software Foundation notified the community that their initial guidance for CVE-2021-44228 workarounds was not sufficient. We believed the previous instructions in this article to be an effective mitigation for CVE-2021-44228, but in the best interest of our customers, we must assume the earlier workaround may not adequately address all attack vectors.
We need to run a script:
#!/bin/bash

# Log contents to file by prefixing timestamp. Maximum file size is 50MB
function log_to_console() {
    echo "$(date +'%Y-%m-%d %T')" "$HOSTNAME" "$@"
}

log_to_console "Running script to remove JndiLookup.class from jars in Unified Access Gateway"

log_to_console "UAG Version: " $(tail -1 /opt/vmware/gateway/logs/version.info 2>/dev/null)

mkdir /tmp/test
mkdir /tmp/bkp

log_to_console "Unpacking archive and removing JndiLookup.class"
cp /opt/vmware/gateway/lib/ab-frontend-0.2.jar /tmp/bkp

unzip -q -o /opt/vmware/gateway/lib/ab-frontend-0.2.jar -d /tmp/test

unzip -q -o /tmp/test/hc.war -d /tmp/test/hc

zip -dq /tmp/test/hc/WEB-INF/lib/log4j-core-*.jar org/apache/logging/log4j/core/lookup/JndiLookup.class

rm /tmp/test/hc.war
cd /tmp/test/hc

zip -r -q ../hc.war .

cd ..
rm -rf hc

log_to_console "Repackaging archive"

zip -r -q ab-frontend-0.2.jar .

chown gateway:users ab-frontend-0.2.jar
mv ab-frontend-0.2.jar /opt/vmware/gateway/lib

log_to_console "Replaced updated ab-frontend-0.2.jar, now looking for jndi in other places"

find / -type f \( -name "*.jar" -o -name *.war \) -exec sh -c "zipinfo -1 {} 2>/dev/null | grep 'JndiLookup.class' && echo {}" \; | grep .jar | while read -r line ; do
    jar_path=$line
    log_to_console "Updating $jar_path"
    zip -dq $jar_path org/apache/logging/log4j/core/lookup/JndiLookup.class
    chown gateway:users $jar_path
done


log_to_console "Restarting authbroker"
supervisorctl restart authbroker

log_to_console "Cleaning up."
cd /tmp
rm -rf /tmp/test

log_to_console "Verification: We are good if no jars are listed below"
find / -type f \( -name "*.jar" -o -name *.war \) -exec sh -c "zipinfo -1 {} 2>/dev/null | grep 'JndiLookup.class' && echo {}" \;

log_to_console "Verification: Grep authbroker-std-out.log for log4j errors, we are good if no exception is displayed below"
cat /opt/vmware/gateway/logs/authbroker-std-out.log | grep log4j

log_to_console "Done!"
Well we need to connect to UAG and create a uag_rm_log4j_jndilookup.sh file
vi uag_rm_log4j_jndilookup.sh
copy into the file the code, and enable it for execution
chmod +x uag_rm_log4j_jndilookup.sh
running the script
./uag_rm_log4j_jndilookup.sh
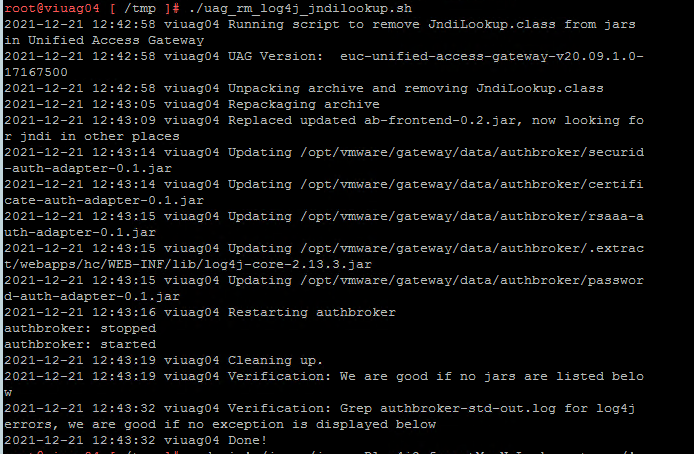
now if the UAG version is between 2009 and 2111 it is also necessary to set the -Dlog4j2.formatMsgNoLookups=true option on the authbroker service with the following commands. Note the space between “s/java /java” and a space after “true /” in the command, these are important to ensure the command works correctly and doesn’t attempt to modify the wrong lines in the configuration file.
sed -i ‘s/java /java -Dlog4j2.formatMsgNoLookups=true /’ /opt/vmware/gateway/supervisor/conf/authbroker.ini
and restart the supervisorctl
supervisorctl update
more info in this VMware KB
#########################
In the middle of December month, we found a “little exploit”……
Ok it is not a joke, for mitigate on UAG (Unified Access Gateway that is a Security Server exposed on the Internet for remote access at Horizon infrastructure) it is necessary (To apply the workaround for CVE-2021-44228 to Unified Access Gateway version 2009 through to 2111):
- Connect to UAG server with SSH Session
Check if SSH is enabled on UAG server to accept root connection.
Connect from WEB console or VMware Remote Console to UAG virtual appliance and modify in /etc/ssh/sshd_config the following line (for modify use vi commands):
PermitRootLogin no
to
PermitRootLogin yes
Save the file
Restart SSHD service with this command:
service sshd restart
now you are able to create an SSH connection to UAG server, REMEMBER TO DISABLE SSH CONNECTION FOR ROOT USER WITH ROLLBACK THE SETTING INTO SSHD_CONFIG FILE
- Append the fix -Dlog4j2.formatMsgNoLookups=true
Type this command:
sed -i ‘s/java /java -Dlog4j2.formatMsgNoLookups=true /’ /opt/vmware/gateway/supervisor/conf/authbroker.ini
Reload the service
supervisorctl update
Check if the fix is applied with this command:
ps -ef | grep ab-frontend
the output of the command should need:
root@viuag03 [ ~ ]# ps -ef | grep ab-frontend
gateway 2799 849 99 09:51 ? 00:00:12 /usr/lib/jvm/zre-8/bin/java -Dlog4j2.formatMsgNoLookups=true -Dfile.encoding=UTF8 -Dport=8877 -Dlog4j.configuration=file:/opt/vmware/gateway/conf/log4j-authbroker.properties -Dspring.profiles.active=accesspoint -jar /opt/vmware/gateway/lib/ab-frontend-0.2.jar
root 2817 2622 0 09:51 pts/0 00:00:00 grep –color=auto ab-frontend
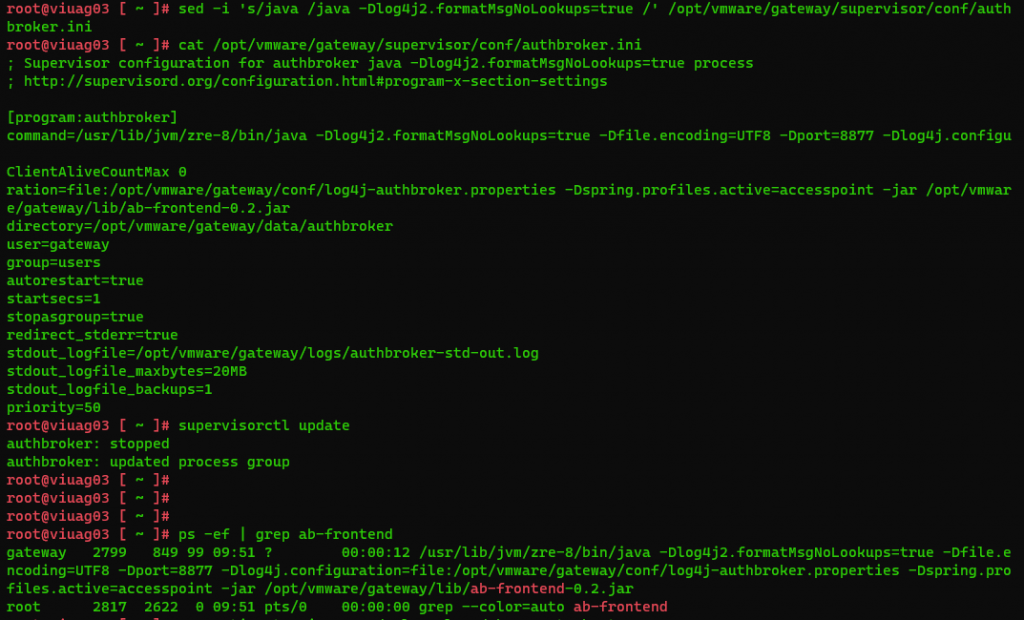
Ref: Workaround instructions to address CVE-2021-44228 in VMware Unified Access Gateway (87092)
VMware, CVE-2021-44228 and log4j (version 2)
Since the end of last week, a new critical vulnerability has spread, present in many programs (Many VMware applications use this Java Logging including vCenter, Horizon, etc.)
“an exploit in the popular Java logging library log4j (version 2) was discovered that results in Remote Code Execution (RCE) by logging a certain string.” as indicated in this link:
https://www.lunasec.io/docs/blog/log4j-zero-day/
After a few hours, the CVE also released its bulletin (CVE-2021-44228).
https://cve.mitre.org/cgi-bin/cvename.cgi?name=2021-44228
On the day of 10/12/2021, VMware released its security advisor (VMSA-2021-0028) with the workarounds to limit the vulnerability pending the release of patched versions to fix it:
https://www.vmware.com/security/advisories/VMSA-2021-0028.html
So good application everyone!

By the way, for the uninitiated:
What is CVE? CVE, short for Common Vulnerabilities and Exposures, is a list of publicly disclosed computer security flaws. When someone refers to a CVE, they mean a security flaw that’s been assigned a CVE ID number.
Security advisories issued by vendors and researchers almost always mention at least one CVE ID. CVEs help IT professionals coordinate their efforts to prioritize and address these vulnerabilities to make computer systems more secure.
Copy-VMGuestFile
I needed to copy a folder to virtual machine on the DMZ network segment.
The firewall rule blocks any access to VM, well I used the Copy-VMGuestFile Powercli Command.
Connect-VIServer <vcenter server FQDN or IP>
$vm = Get-VM -Name <VM target>
Get-Item “<Source Path>” | Copy-VMGuestFile -Destination “<Destination Path on VM>” -VM $vm -LocalToGuest -GuestUser <User VM Guest> -GuestPassword <Password User VM Guest>
After the first tentative I receive this error:
Copy-VMGuestFile : 09/12/2021 11:08:40 Copy-VMGuestFile The request was aborted: The request was cancelled.
At line:1 char:27
Probably it is a time out error and I try to change the WebOperation Timeout Seconds.
PS C:\Windows\system32> Set-PowerCLIConfiguration -WebOperationTimeoutSeconds -1
Scope ProxyPolicy DefaultVIServerMode InvalidCertificateAction DisplayDeprecationWarnings WebOperationTimeout
Seconds
—– ———– ——————- ———————— ————————– ——————-
Session UseSystemProxy Multiple Unset True -1
User Multiple
AllUsers -1
After the change the error it is resolved
VMware Workstation Player and Port Forwarding
To configure a PortForwarding on Windows 10 to a VM hosted on VMware Player it is necessary to proceed as follows:
- Configure a static IP address (not essential but recommended) use the DHCP reservation function present in the virtualization application
- Configure port forwarding.
Configure DHCP Reservation
- Retrieve the MAC Address assigned to the virtual machine to which you want a static IP
- Modify (with Notepad running in Administrator mode) the vmnetdhcp.conf file present in C:\ProgramData\VMware by inserting the following lines:
Host <Name of virtual network> {
hardware ethernet <Mac Address in this format xx:xx:xx:xx:xx:xx;
fixed-address <ip address>*;
}
Example:
#Static IP WIN11 –> Comment to identify the VM
VMnet8 host {
Hardware Ethernet 00: 0C: 29: 41: E8: 0C;
fixed address 192.168.233.10;
}
Where in our case the VMnet8 is the one assigned by default to the “NAT” configuration of the VM network card
- Restart the VMNETDHCP service
net stop vmnetdhcp
net start vmnetdhcp
Port Forwarding Configuration
- Modify (with Notepad running in Administrator mode) the vmnetnat.conf file present in C:\ProgramData\VMware by inserting the following lines:
<tcpPortSource> = <IPaddress VM>:<tcpPortDestination>
Example:
8889 = 192.168.233.10:3389
In this case, we follow an RDP session to the OS system hosting my VM using: 8889 I will access through RDS to my VM with IP 192.168.233.10
*To check the IP range to always use the vmnetdhcp.conf file and identify the correct network segment; In the case of my example the segment is 8 (VMnet8)
# Virtual ethernet segment 8
# Added at 11/10/21 23:49:40
subnet 192.168.233.0 netmask 255.255.255.0 {
range 192.168.233.128 192.168.233.254; # default allows up to 125 VM’s
option broadcast-address 192.168.233.255;
option domain-name-servers 192.168.233.2;
option domain-name “localdomain”;
option netbios-name-servers 192.168.233.2;
option routers 192.168.233.2;
default-lease-time 1800;
max-lease-time 7200;
}
LDAP Identity source and vCenter
Whenever we installed a new vCenter the activity always included integration with Active Directory and normally IWA (Integrated Windows Authentication) was used.
Since vSphere 7.0 version this possibility has been deprecated
so it is good to start with the integration of the vCenter with Active Directory via LDAP.
In our case, we will use LDAPS which uses a certificate
For first the step we need to create the certificate:
- Use SSH to vCenter connection
On shell use this command
openssl s_client -connect <DC FQDN>:636 -showcerts
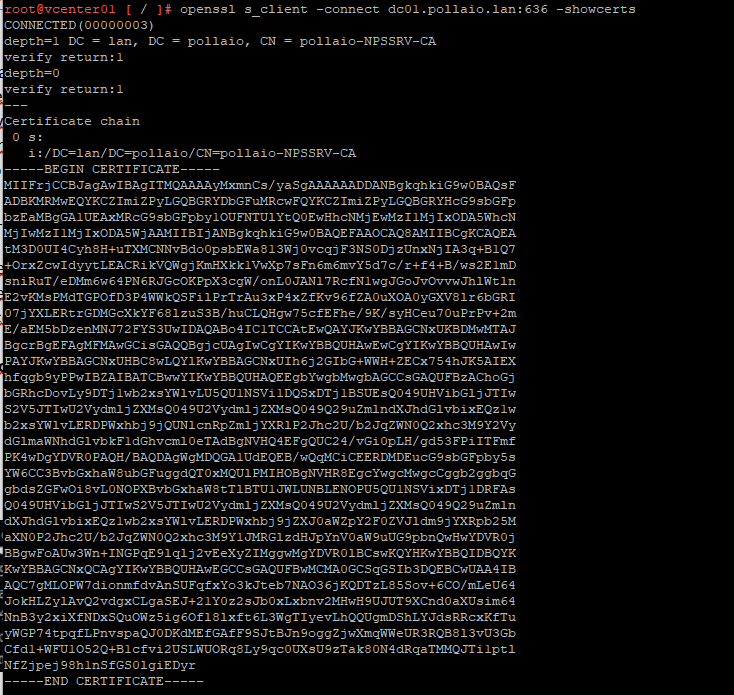
Copy the certificate output with —–BEGIN CERTIFICATE—– and —–END CERTIFICATE—–
Past on Notepad and save with .crt extension
Now we will go to configure the Identity Sources on vCenter:
- Login as Single Sign-On Administrator to vCenter
- Navigate to Menu > Administration > Single Sign-On > Configuration
- In the Identity Provider tab, open Identity Sources
- Click ADD
- Select Active Directory over LDAP or OpenLDAP, depending on your directory type.
Fill out the remaining fields as follows:
Identity Source Name: Label
Base DN for users: The Distinguished Name (DN) of the starting point for directory server searches. Example: “DC=pollaio,DC=lan”.
Base DN for groups: The Distinguished Name (DN) of the starting point for directory server searches.
Domain name: Your domain name. Example: “pollaio.lan”
Domain alias: Your NetBIOS name. Example: “pollaio.lan”
Username: Domain user with at least browse privileges. Example: “pollaio\administrator”.
Connect to: “ldaps://<DC FQDN>”.
- Click Browse next to SSL Certificate
- Select the .cer file created in before step
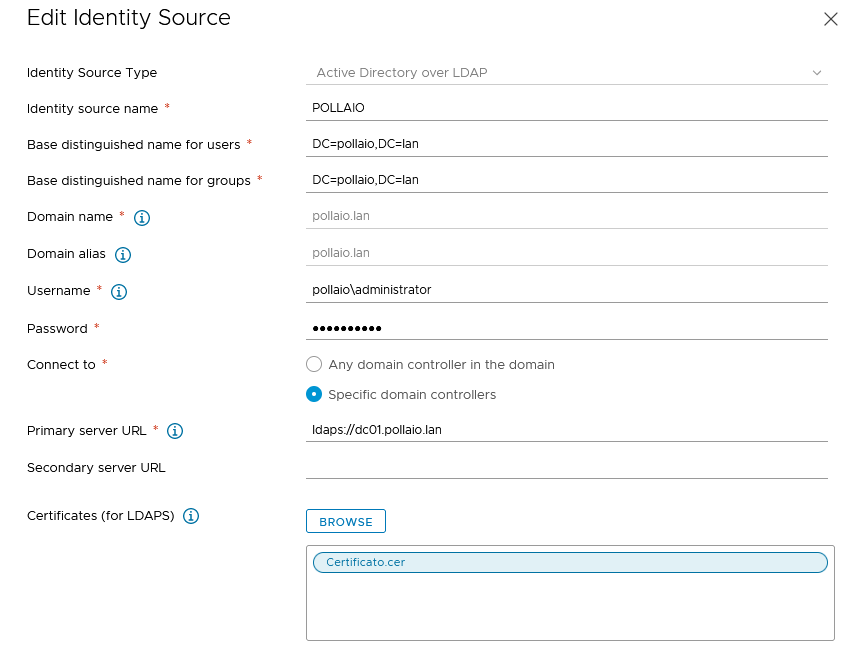
If you want check the correct use of SSL certificate on the authentication to Active Directory with LDAP connection check the websso.log:


VMware Skyline Advisor
VMware has had a product for a while now called VMware Skyline that provides proactive monitoring, analysis, and support for your VMware environment. It monitors your VMware installation and will notify you when issues arise.
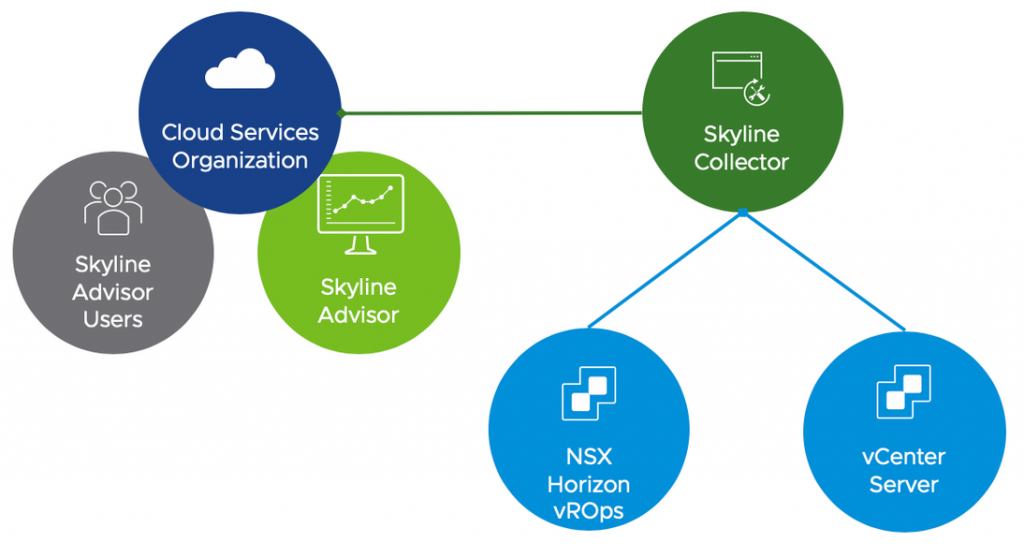
Skyline Advisor will be available to customers and partners with active Production and Premier Support, VMware Success 360 and vRealize Cloud Universal subscriptions at no additional cost.
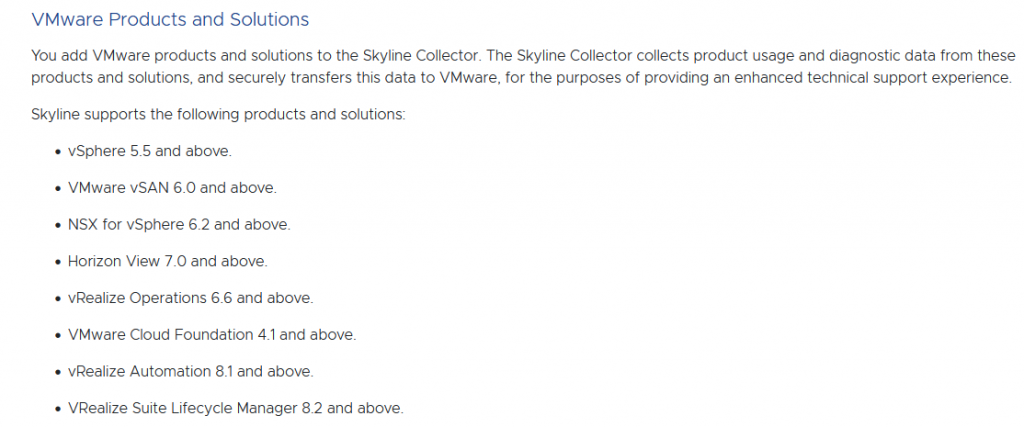
Create a Cloud Services Organization
Login with My VMware account associate to Production and Premier Support on the site:
- After clicking Get Started, a new web browser page, or tab, will open. You will be asked to sign-in
with your VMware account. If you have an existing My VMware account, you can use those same
account details (email address/password) to sign in to Cloud Services.
- If you are existing VMware Cloud Services customer, you can choose an existing Cloud Services
Organization for Skyline. If you have never used VMware Cloud Services, click Create New
Organization.
- Enter a Organization Name.
Name your Organization something meaningful, that can be easily
referenced by both you, and VMware. For example, name your Organization after you Company, or
Business name. You can also append a line-of-business, division, or team, to the end of your
Company or Business name.
The following are example Organization Names:
The company, LOB, Company LOB, Company-vSphere, Company-Desktop
- Enter an Address for your Organization.
Click Add Address. You can also choose an existing
address if one was found for your account. If you choose an existing address, skip to substep f.
During the creation of your Cloud Services Organization, your country currency, and Tax ID, may be
displayed. The displaying of this information is a construct of Cloud Services. Skyline is available at
no additional cost, and you will not be required to enter any payment details while adopting Skyline.
- Select a Country from the drop-down menu.
- Enter your street address on Address Line 1, and Address Line 2 (optional).
- Enter your City.
- Enter your State/Province.
- Enter your Zip/Postal Code.
- Review the Cloud Services Terms of Service. Click the checkbox to agree to the Terms of Service.
- Click Continue.
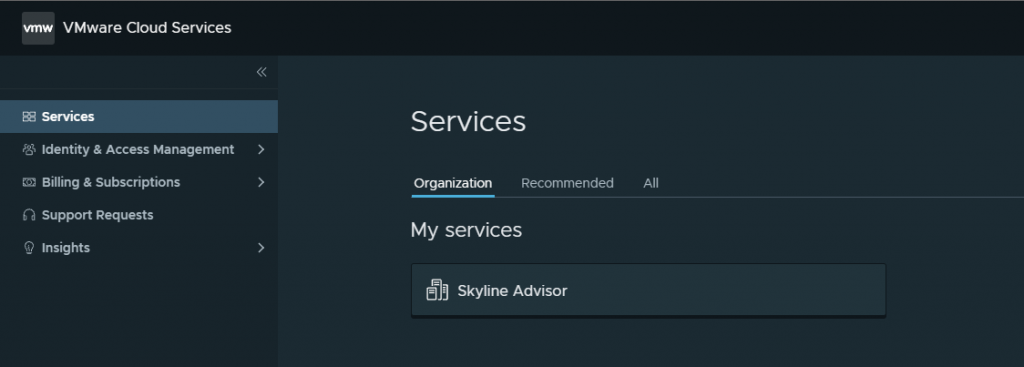
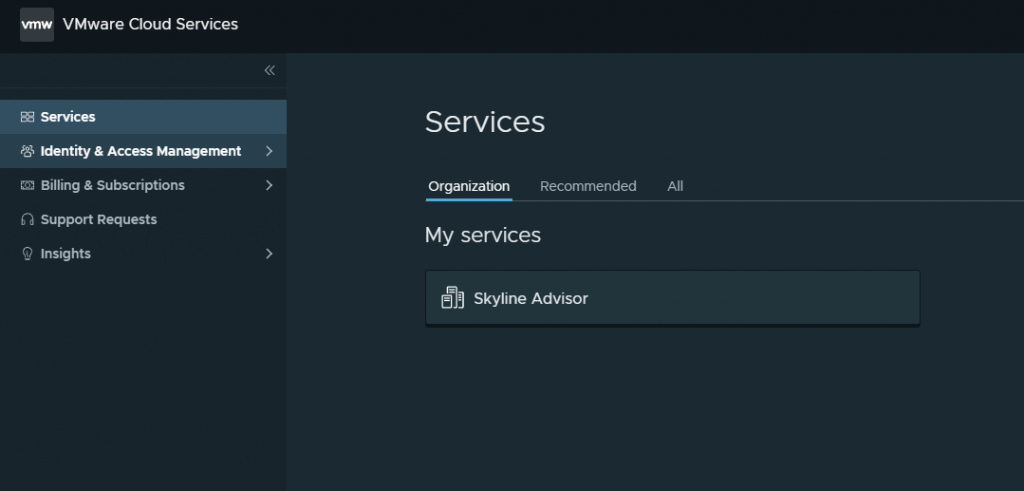
Now on service, we have Skyline Advisor, click on this service
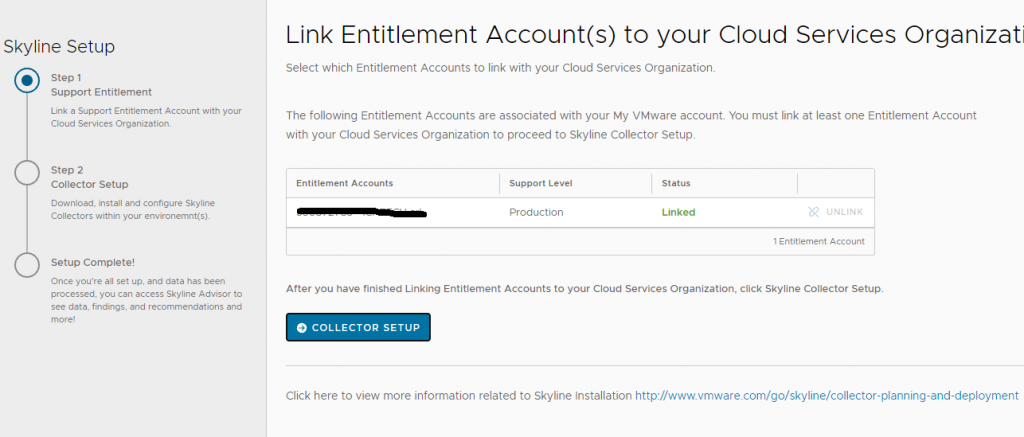
Link the Entitlement
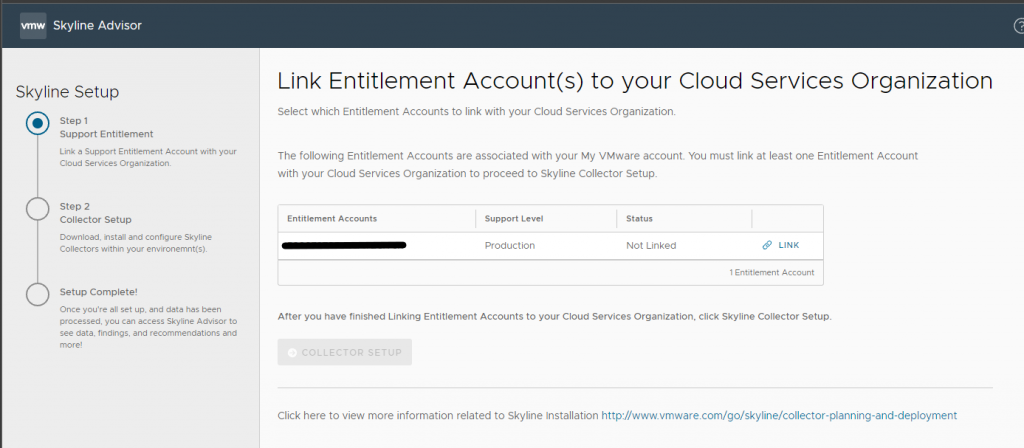
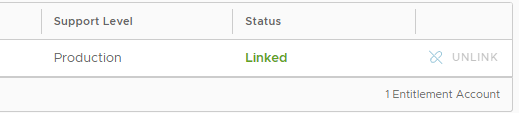
Now, after clicking on LINK, we have the correct status LINKED
Deploy Skyline Collector and configure the connection to Cloud Services
Now we download the Skyline collector
https://vmware.com/go/skyline-collector-download

To deploying the Skyline Collector Virtual appliance on our vSphere infrastructure we have need:

And these are the Network Requirements

Account permission for vCenter, we need to create a Domain Account to use to permit access to vCenter from skyline.

Let’go we are starting with the OVF Deploy


After deployed the Connector virtual appliance we need to configure the Skyline Collector for communicating with Cloud Services


Test the network configuration


And now we have to insert the token create on Cloud Service

Get Token from Vmware Cloud Services Platform
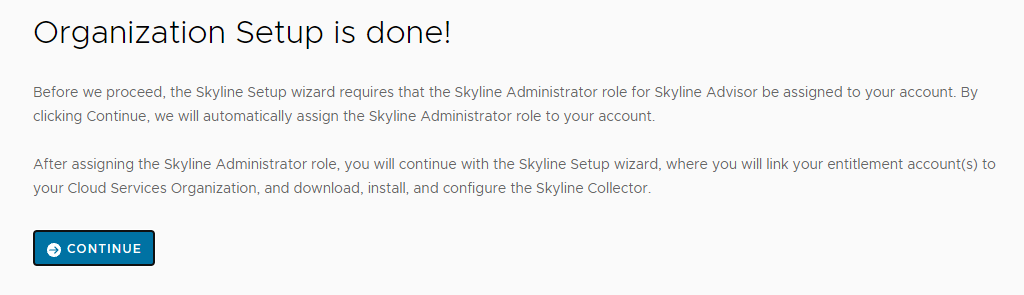
I have already configured my organization
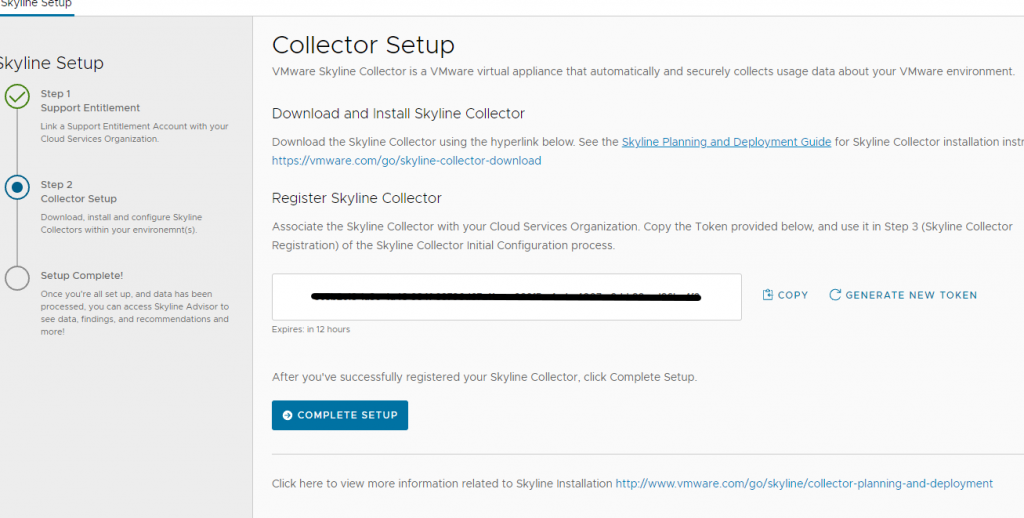
Copy and paste the token on Skyline Connect and register it.
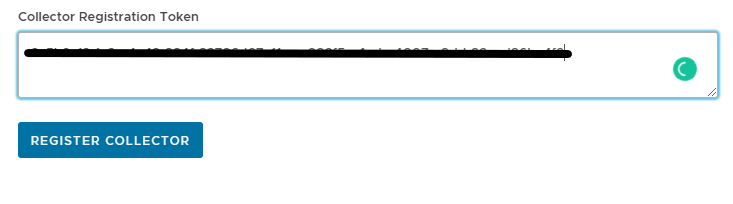

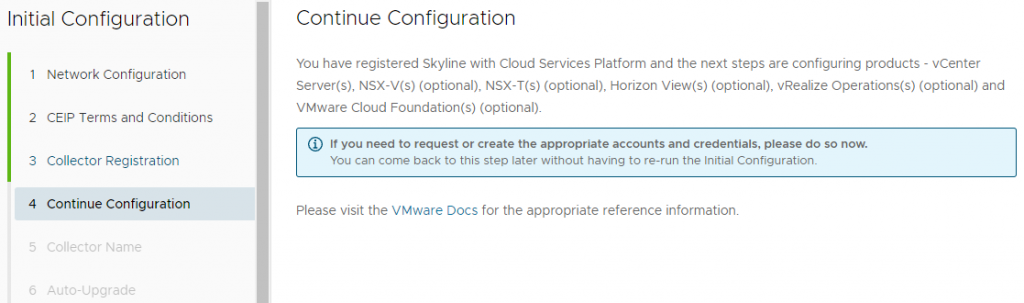
Add source Data to Skyline Advisor
After complete the step 5 and 6 (I suggest to enable the auto-upgrade), we can access to skyline collector to configure the connection to vCenter (or multiple vCenter)
Go to https://<mySkylineCollectorFQDN/
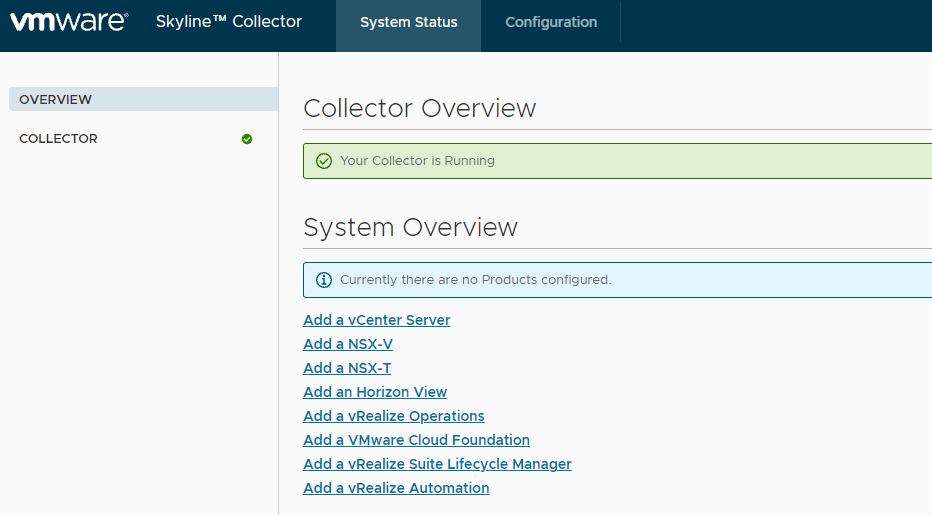
Select Add a vCenter Server
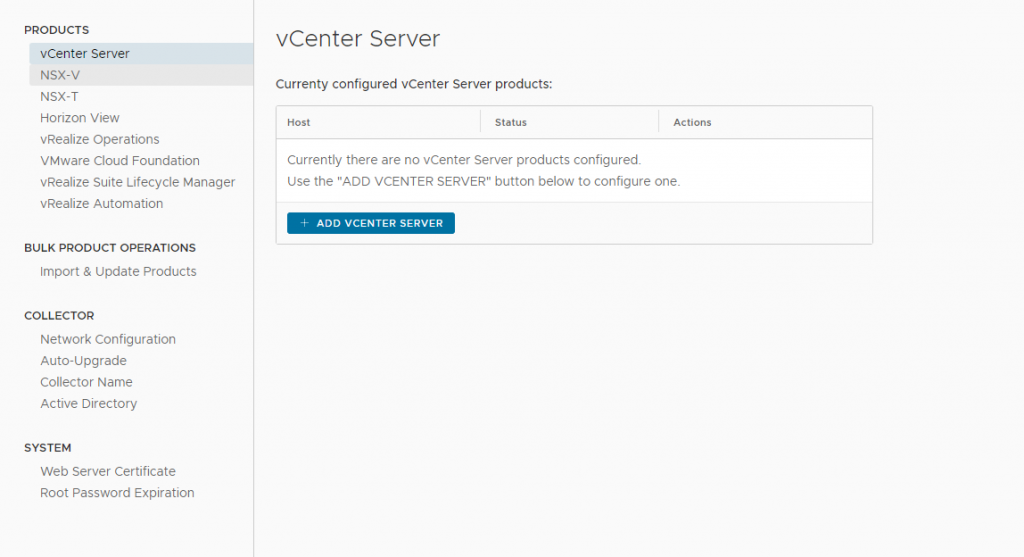
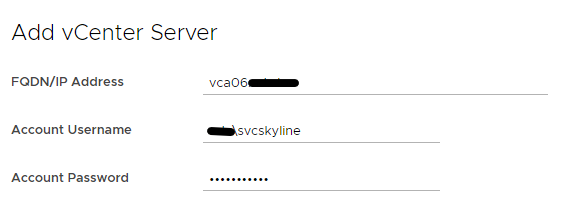
Use the Account AD to whom assign the correct permission on vCenter
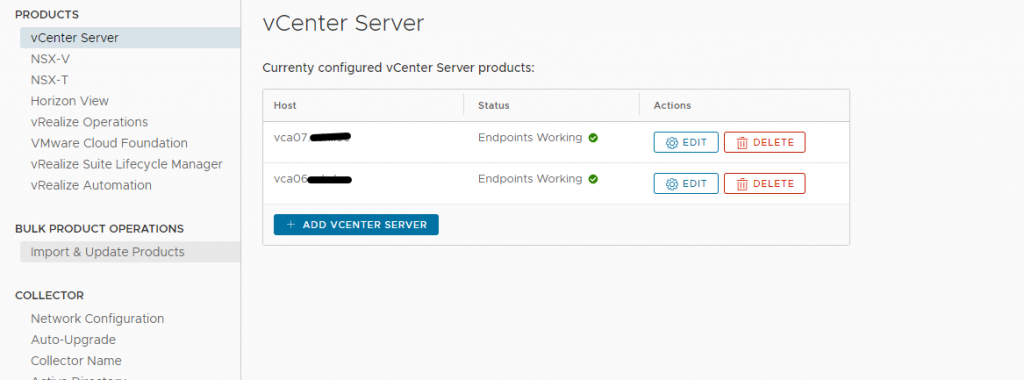
We are able to see the vSphere infrastructures if we access on Skyline Advisor Service on Cloud Service Link
Now we will be waiting….. for data populate (72 hours for Findings)
After 72 hours we are able to see all info (wow I see six Critical alerts :-))
VMware Skyline Frequently Asked Questions (55928)
Skyline Collector User Accounts and Permissions (vmware.com)
VMware vSAN 7 Update 3 New Features
VMware vSAN 7 Update 3 New Features
With the release of VMware vSphere 7 Update 3, this also means there is a new version of vSAN as well. VMware vSAN has been trailblazing in the world of HCI for several years now and with over 30,000 customers and many releases behind it, the solution has certainly grown, matured, and become […]