Whenever we installed a new vCenter the activity always included integration with Active Directory and normally IWA (Integrated Windows Authentication) was used.
Since vSphere 7.0 version this possibility has been deprecated
so it is good to start with the integration of the vCenter with Active Directory via LDAP.
In our case, we will use LDAPS which uses a certificate
For first the step we need to create the certificate:
- Use SSH to vCenter connection
On shell use this command
openssl s_client -connect <DC FQDN>:636 -showcerts
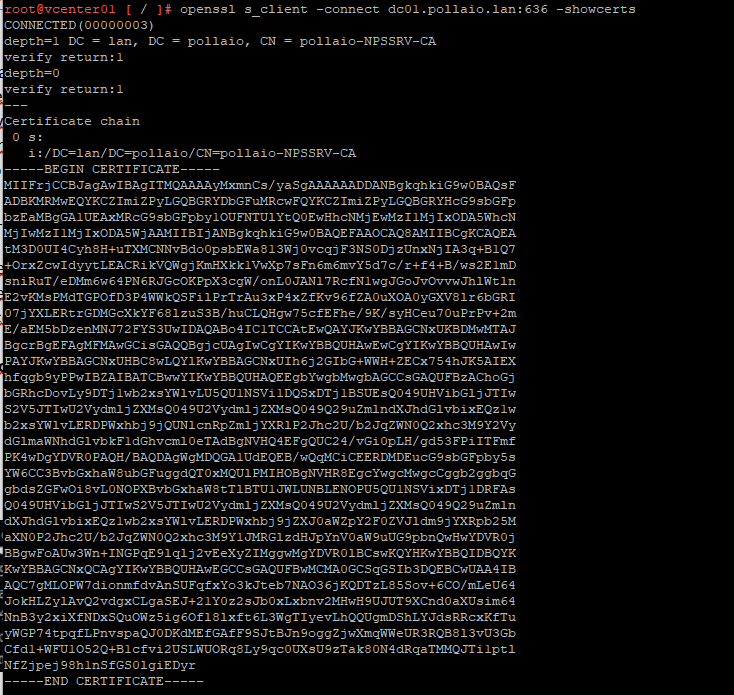
Copy the certificate output with —–BEGIN CERTIFICATE—– and —–END CERTIFICATE—–
Past on Notepad and save with .crt extension
Now we will go to configure the Identity Sources on vCenter:
- Login as Single Sign-On Administrator to vCenter
- Navigate to Menu > Administration > Single Sign-On > Configuration
- In the Identity Provider tab, open Identity Sources
- Click ADD
- Select Active Directory over LDAP or OpenLDAP, depending on your directory type.
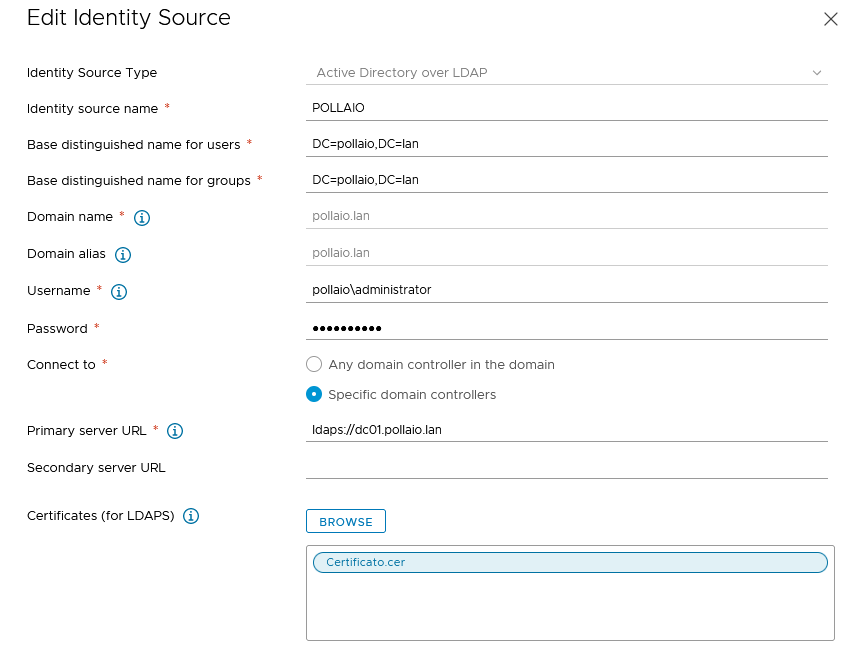
Fill out the remaining fields as follows:
Identity Source Name: Label
Base DN for users: The Distinguished Name (DN) of the starting point for directory server searches. Example: “DC=pollaio,DC=lan”.
Base DN for groups: The Distinguished Name (DN) of the starting point for directory server searches.
Domain name: Your domain name. Example: “pollaio.lan”
Domain alias: Your NetBIOS name. Example: “pollaio.lan”
Username: Domain user with at least browse privileges. Example: “pollaio\administrator”.
Connect to: “ldaps://<DC FQDN>”.
- Click Browse next to SSL Certificate
- Select the .cer file created in before step
If you want check the correct use of SSL certificate on the authentication to Active Directory with LDAP connection check the websso.log:

