Enhancing VDI Security and User Experience with FIDO2/WebAuthn and Omnissa Horizon

In today’s hybrid work environments, Virtual Desktop Infrastructure (VDI) solutions like Omnissa Horizon are critical to ensuring secure and flexible access to corporate resources. Yet, as we continue to shift towards distributed workforces, traditional authentication methods such as passwords and OTP tokens increasingly show their limitations — in both security and user experience.

This is where FIDO2/WebAuthn comes into play. By integrating FIDO2/WebAuthn into your Horizon deployment, you can deliver passwordless, phishing-resistant authentication that simplifies end-user access while dramatically improving security posture.

What is FIDO2/WebAuthn?

FIDO2 is an open standard developed by the FIDO Alliance and W3C. WebAuthn (Web Authentication) is the core API that enables browsers and web applications to leverage strong authenticators such as security keys, biometric devices (like fingerprint readers), or built-in platform authenticators (like Windows Hello or Apple Face ID).

In simple terms: it replaces passwords with secure, device-bound credentials that can’t be phished or reused.

Why combine FIDO2/WebAuthn with VMware Horizon?

Here are the key benefits for Horizon administrators and end users:

1. Stronger Security

Traditional passwords are susceptible to phishing, credential stuffing, and breaches. FIDO2/WebAuthn credentials are cryptographically unique and never leave the user’s device. Even if attackers obtain user data, they cannot reuse it to gain access.

2. Seamless User Experience

Users authenticate with something they have (a device) and something they are (biometrics) or something they know (PIN). The process is fast, intuitive, and eliminates password fatigue. No more forgotten passwords or frequent resets.

3. Simplified Endpoint Management

In distributed VDI environments, especially with BYOD policies, managing traditional credentials across devices is a challenge. FIDO2/WebAuthn allows users to authenticate securely from any compliant device, reducing helpdesk workload and administrative complexity.

4. Phishing Resistance

Unlike OTP or SMS-based 2FA, FIDO2/WebAuthn authentication is bound to the specific origin (domain). Credentials cannot be used on malicious lookalike websites, significantly reducing phishing attack vectors.

5. Future-Proof Compliance

Many modern security frameworks and regulatory guidelines encourage or require phishing-resistant MFA. Deploying FIDO2/WebAuthn puts your organization ahead of compliance mandates.

How does it work with Horizon?

With Horizon’s support for modern authentication protocols (including SAML and integration with identity providers that support FIDO2/WebAuthn), you can deploy passwordless authentication workflows seamlessly:

  • Users access Horizon Client or Workspace ONE with their FIDO2 device (security key, biometrics, or platform authenticator).
  • The identity provider (IdP) validates the FIDO2/WebAuthn credentials.
  • Once authenticated, users are securely provisioned into their Horizon VDI sessions.

No passwords exchanged. No phishable credentials. Just fast, secure, and frictionless access.

Ready to try it?

Integrating FIDO2/WebAuthn with VMware Horizon is a clear step toward a more secure, modern, and user-friendly VDI environment. Whether you’re looking to reduce helpdesk tickets, strengthen security, or improve user experience, this technology is worth exploring.

Now is the time to test and adopt FIDO2/WebAuthn.

(If you want to use FIDO2 for login to VDI, see my post VMware Workspace One Access, VMware Horizon, and FIDO2 device – BIOLNX)

Environment:

  • Horizon 2503
  • Yubikey
  • Windows 11 24H2 (Guest OS for VDI)
  • Firefox and Edge
  • Horizon GPO
  • Use https://webauthn.io for authentication test

0 – Configure an account on WebAuthn.io

Insert the Yubikey on a physical PC

Go to https://webauthn.io

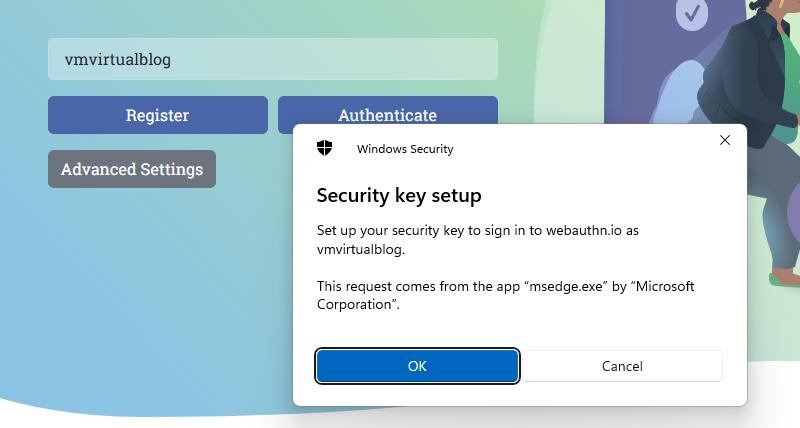
Insert the username and set the preferred authentication method

Select a security key (Yubikey)

Enter the security key assigned to Yubikey

A finger pressing a usb drive into a computer AI-generated content may be incorrect.

1 – Check  Active Directory GPO

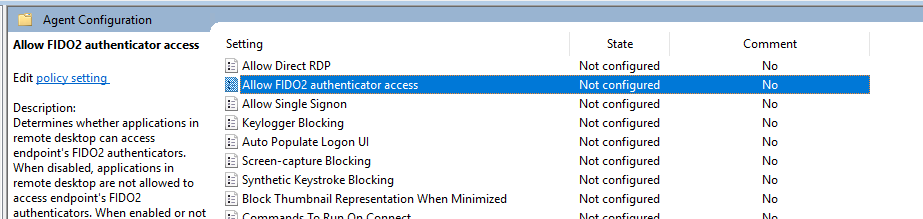
The default configuration for “Allow FIDO2 authenticator access” (under Agent Configuration) is Not Configured, and with this configuration, the FIDO2 WebAuthn is enabled.
2 – Test authentication 

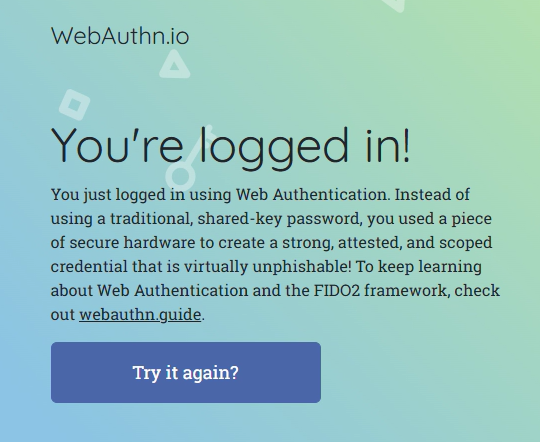
Now we can connect to VDI and access with edge to https://webauthn.io
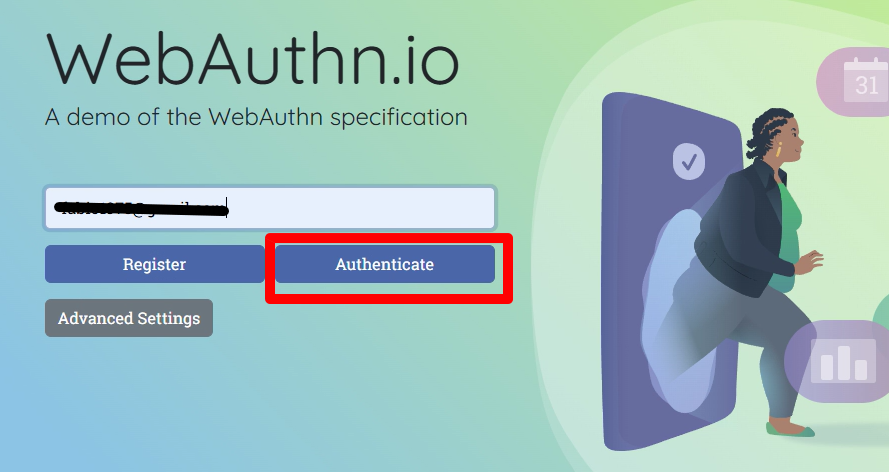
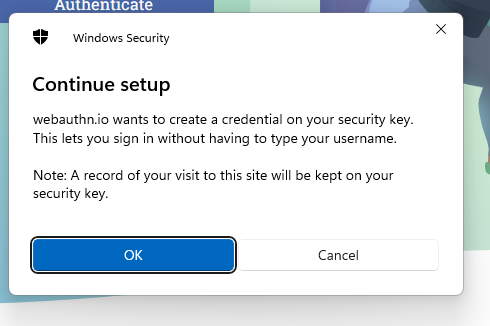
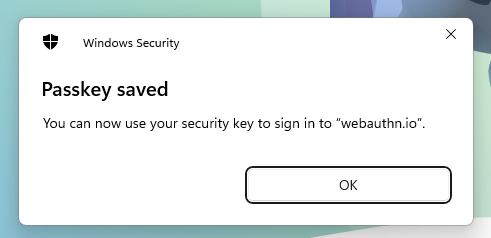
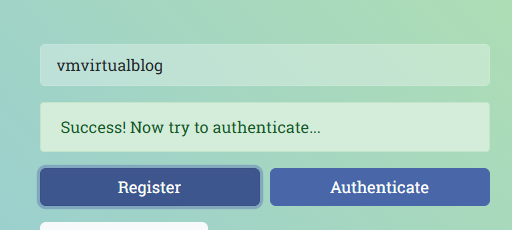
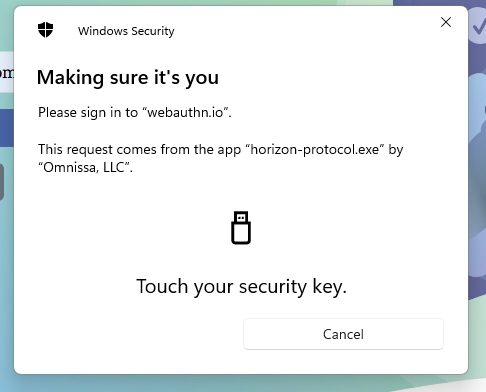
After selecting, authenticate in the next window, select the security key. (This window is up from your client (PC), not from VDI)
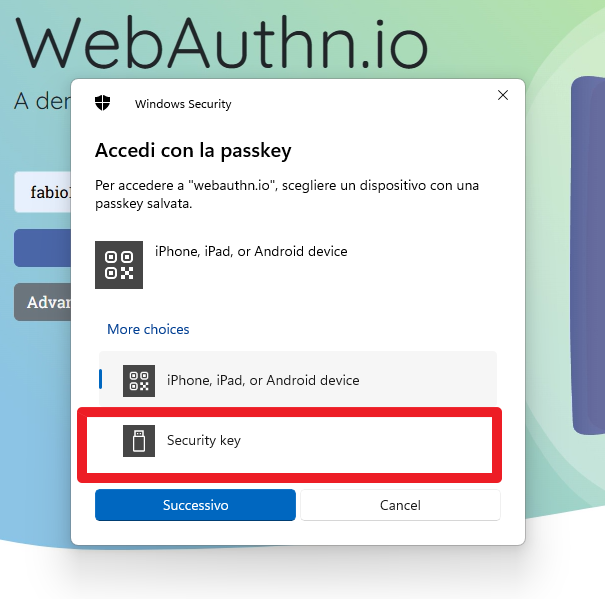
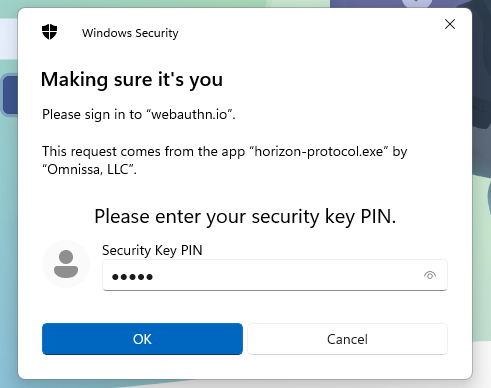
A finger pressing a usb drive into a computer AI-generated content may be incorrect.

Spoiler 1

If you want to disable this function, you need to set the Allow FIDO2 authenticator access GPO with the value “Disabled”
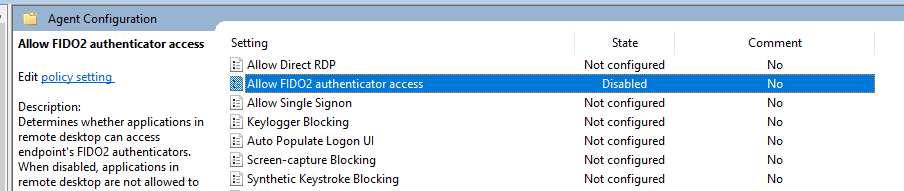
And when you try to connect
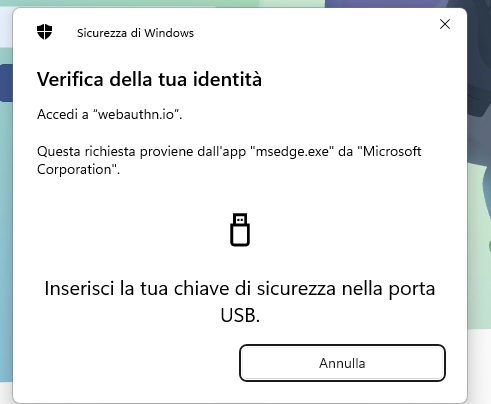
Spoiler 2

We can use the “FIDO2 allow list” GPO to select which browser to use with the WebAuthN and disable another browser.
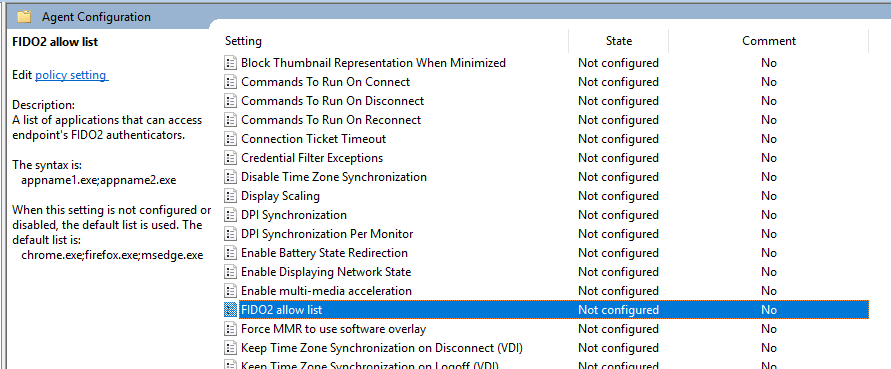
For example, enable only Firefox application

In this video, I show you how FIDO2 WebAuthN works and how to exclude certain browsers

https://youtu.be/cWKBxt8BVXU


Enhancing VDI Security and User Experience with FIDO2/WebAuthn and Omnissa Horizon

How to Test an NVIDIA Video Card with Omnissa VDI: A How-To Guide

Have you just set up a VDI and want to see if your cool NVIDIA video card is doing its job? Don’t worry, I understand you. There’s nothing more frustrating than spending a fortune on hardware and then finding that the GPU sleeps while the processor does all of it. In this article, I explain in a simple (and fast) way how to test the Nvidia video card within a VDI.

Tested environment

NVIDIA Tesla M10 (not the latest model, but still supported by vSphere and NVIDIA and limited cost for my homelab)

vSphere 8.x (thanks to licenses as vExpert)

Omnissa Horizon 2503 (Thanks to licenses like Omnissa Tech Insider and Omnissa community)

Supermicro as HW

Guest OS Windows 11 2412

NVIDIA drivers installed on ESXi and Windows 11 guest VDI

Configuring the NVIDIA Card: Configuring the Card as Direct Shared

Virtual machine HW: Add the desired cut of the NVIDIA card size

In this link, there are more details on the NVIDIA cards’ size

Virtual GPU Software

First question: But can it be done?

Yes, and it must be done. With modern VDI – we are talking about environments such as those managed with Omnissa (formerly VMware EUC) – it is possible to assign GPUs to virtual machines using technologies such as vGPUs. The problem? It is not always clear if the GPU is really used.

Step 1: Verify that the GPU is mapped

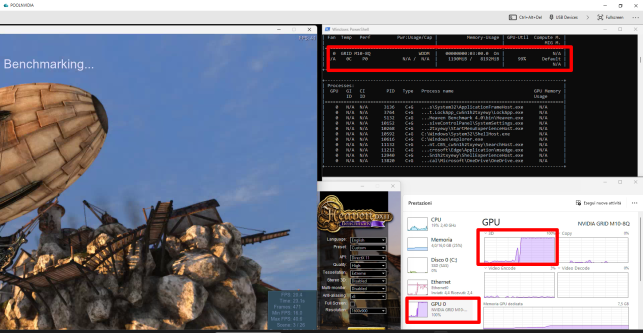
First of all, log in to your VDI (Windows or Linux, little changes) and open the Task Manager or a terminal. In Windows, go to GPU > Performance. If you see “NVIDIA” somewhere, you’re on the right track.

Or use nvidia-smi (yes, it also works in VDI if the drivers are in good shape). It will tell you everything: from the memory used to the temperature, passing through the active processes. It’s like the GPU use.
Step 2: Make the video card work

At this point, test it seriously. What?

  • Open an app that uses graphics acceleration (e.g., a CAD, a 4K video, or even just YouTube at full quality).

A screenshot of a computer AI-generated content may be incorrect.

A screenshot of a computer AI-generated content may be incorrect.

  • On Linux or more closed environments, you can use command-line tools or scripts to make test renders.

During these tests, keep an eye on nvidia-smi or the Task Manager. If the GPU stays at 0%, there’s something wrong (spoiler: it’s often a driver or vGPU assignment issue).

Step 3: Monitor WHIT style

For continuous monitoring, you can install the NVIDIA System Management Interface or use third-party tools built into the Omnissa environment, such as those included in Horizon (Horizon Performance Tracker) or management plug-ins.

Bonus: Don’t forget the logs

Check the host machine and VM logs. Often, there you will find clues to understand if the GPU passage was successful or if there is something blocking everything.

Ultimately?

Testing an Nvidia GPU on a VDI is not complicated, but it takes a method. With the right tools and a keen eye, you can make sure that your graphics assets are really being used, and that the end user (or yourself) doesn’t have to put up with unnecessary lag or jerking.

Want help scripting an automated test? Write. Or… Launch nvidia-smi (with the -l parameter, it goes into automatic refresh) and see if the vGPU wakes up.


Some suggestions


  • To perform top benchmarks, you have to remove the cap present by default on vSphere for FPS (I would recommend keeping FPS equal to or lower than the Hz value of your monitor, otherwise, we may have a non-optimal fluidity of the images). The cap is deactivated by putting this value in the Advanced settings of the VM’s pciPassthru0.cfg.frame_rate_limiter=0

How to Test an NVIDIA Video Card with Omnissa VDI: A How-To Guide

Upgrade to 2503 and migrate ADAM Partition

The new version of Horizon (version 2503) continues the renaming started by Omnissa in version 2412 to remove references to the VMware name.

Let’s see in this guide (with a simple environment consisting of a single connection server) the update to version 2503 (from 2412) and the AD LDS Application Partition Migration (to remove references to VMware as well).

It is important to follow the instructions in this KB for partition migration:

Omnissa Horizon ADLDS Migration (6000797)

Upgrade to the 2503

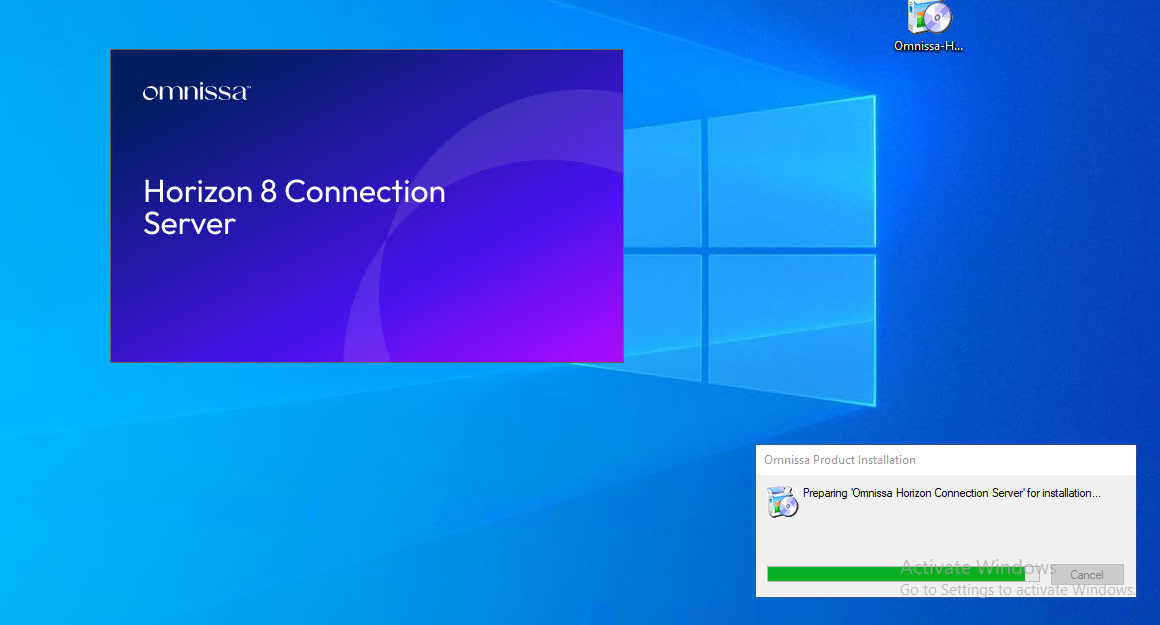
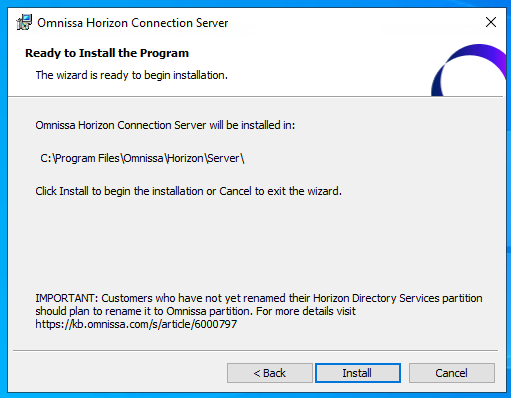
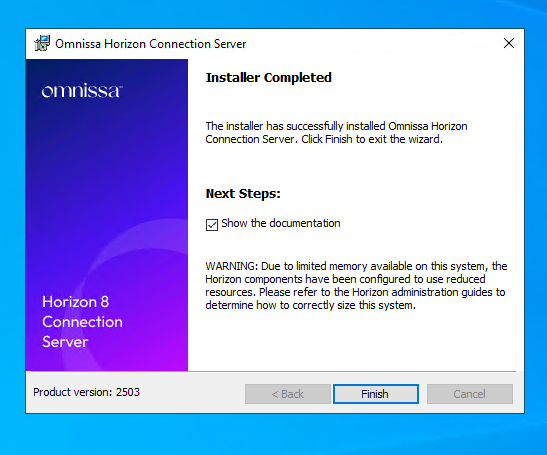
Upgrade to Horizon 2503 from 2412 (I recommend if you are coming from previous versions, to a new installation, whether the target version is 2412 or 2503)

  • Backup ADAM DB
  • Snapshot Connection Servers

A screenshot of a computer AI-generated content may be incorrect.

A screenshot of a computer AI-generated content may be incorrect.

A screenshot of a computer AI-generated content may be incorrect.

A screenshot of a computer program AI-generated content may be incorrect.

A screenshot of a computer error AI-generated content may be incorrect.

A screenshot of a computer AI-generated content may be incorrect.

A screenshot of a computer AI-generated content may be incorrect.

AD LDS Application Partition Migration

Migration of the AD LDS partition (WARNING: at this time, if you have Omnissa Access in your infrastructure, you must wait for the new version of Access before proceeding with the partition migration)

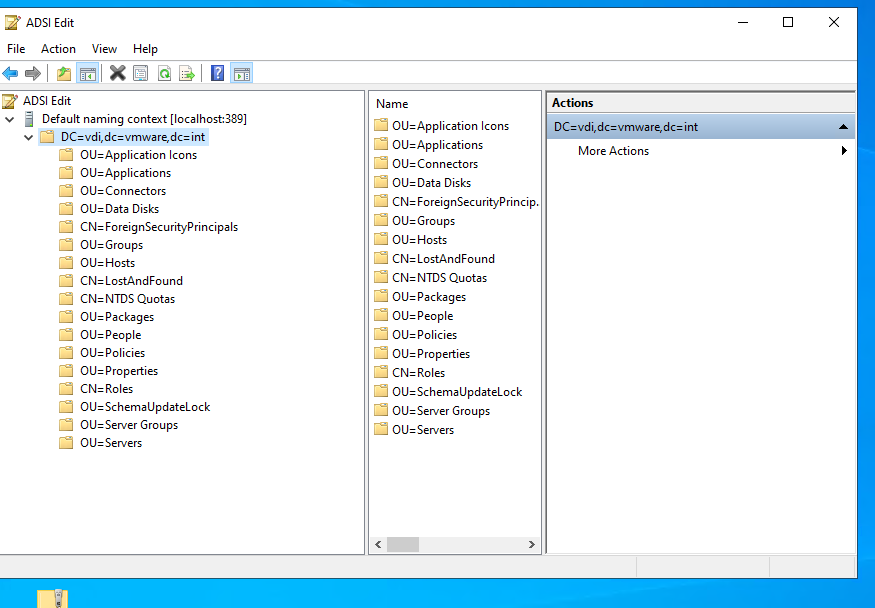
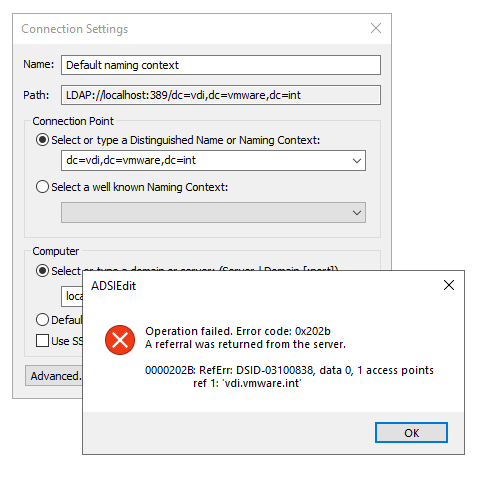
We connect to the LDS AD using the classic references dc=vdi,dc=vmware,dc=int

A screenshot of a computer AI-generated content may be incorrect.

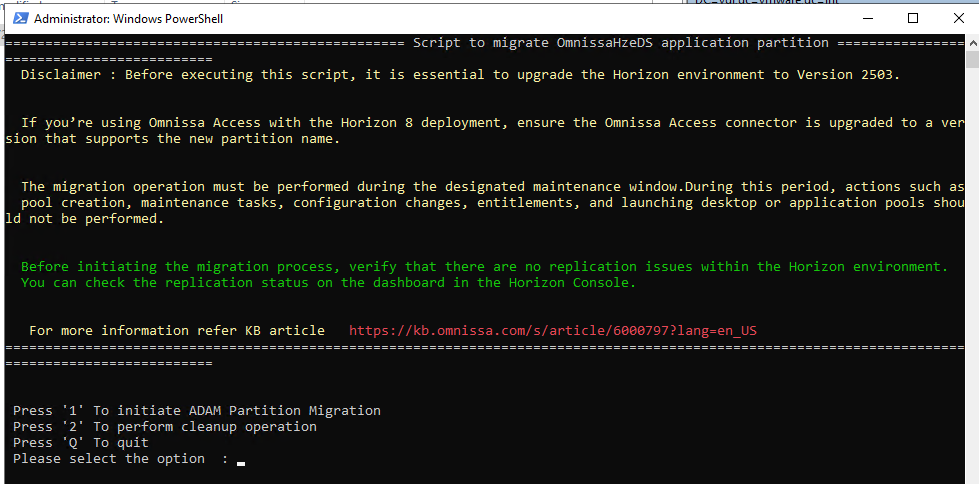
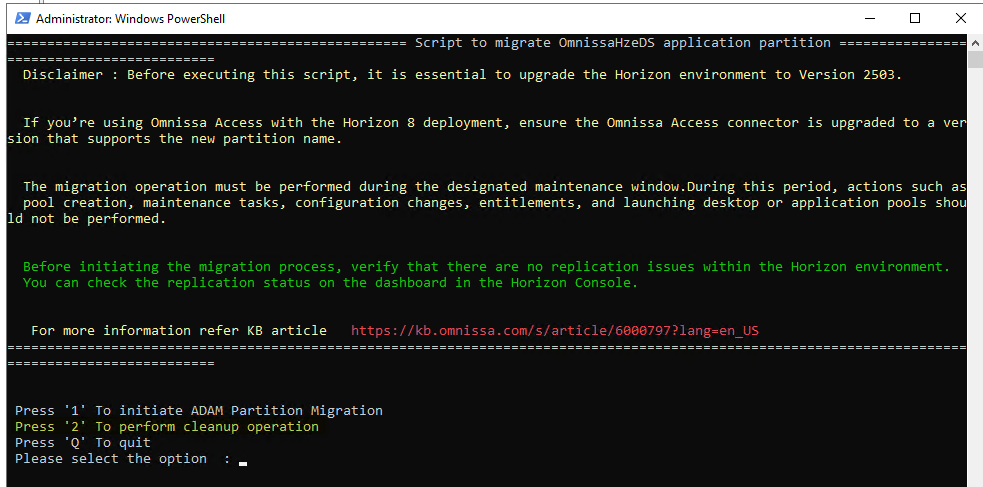
We use the script (OmnissaHorizonPartitionMigration-v1.ps1) attached to the KB previously mentioned (WARNING: you must have a maintenance window)

Run as admin

A black and white text on a black background AI-generated content may be incorrect.

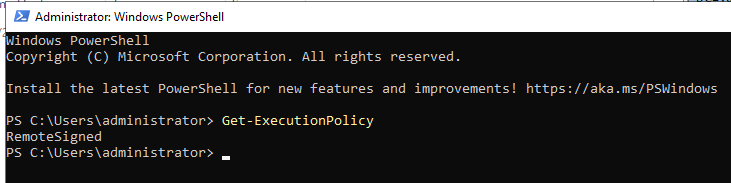
We test script execution at the policy level (must be RemoteSigned)

A screen shot of a computer AI-generated content may be incorrect.

Let’s run the script

A screen shot of a computer AI-generated content may be incorrect.

We have the choice whether to migrate or clean the old partition (obviously, we do the cleaning of the old partition only after the migration and only after verifying that everything is ok)

A screenshot of a computer screen AI-generated content may be incorrect.

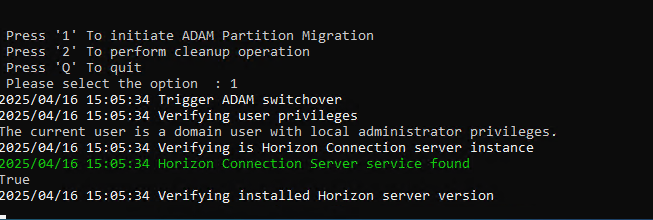
We select 1

A screen shot of a computer AI-generated content may be incorrect.

A computer screen with white and green text AI-generated content may be incorrect.

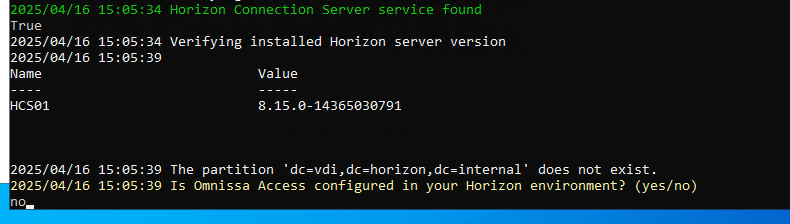
We are asked if we have an Omnissa Access configured in our environment, and in this example, we do not have it (in case you need to update it to the latest version before doing this update)

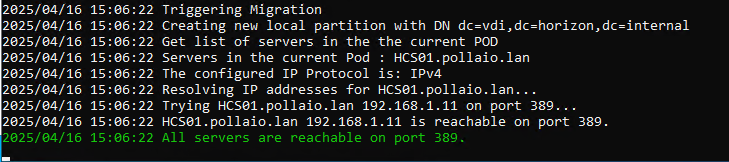
Then check that all the Connection servers are reachable (we have only one, in the case of multiple connection servers in a single POD, it is enough to run the script only once)

A screen shot of a computer AI-generated content may be incorrect.

Backs Up

A computer screen with text on it AI-generated content may be incorrect.

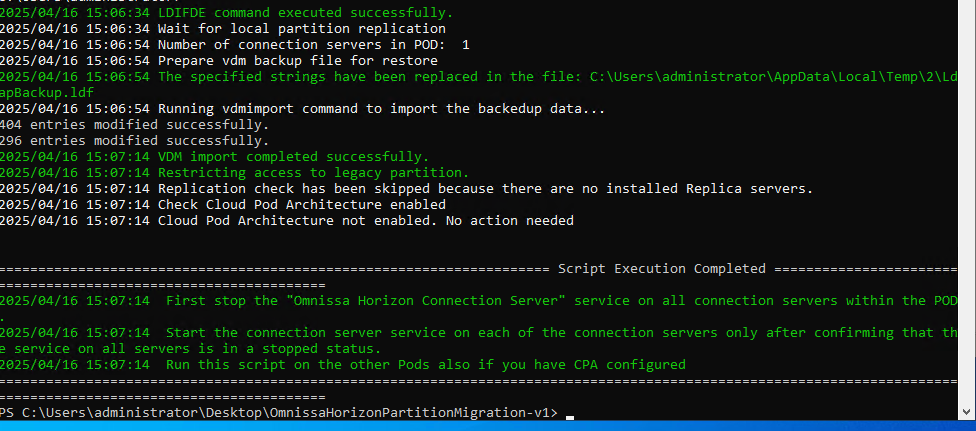
And import the information into the new schema

A screenshot of a computer program AI-generated content may be incorrect.

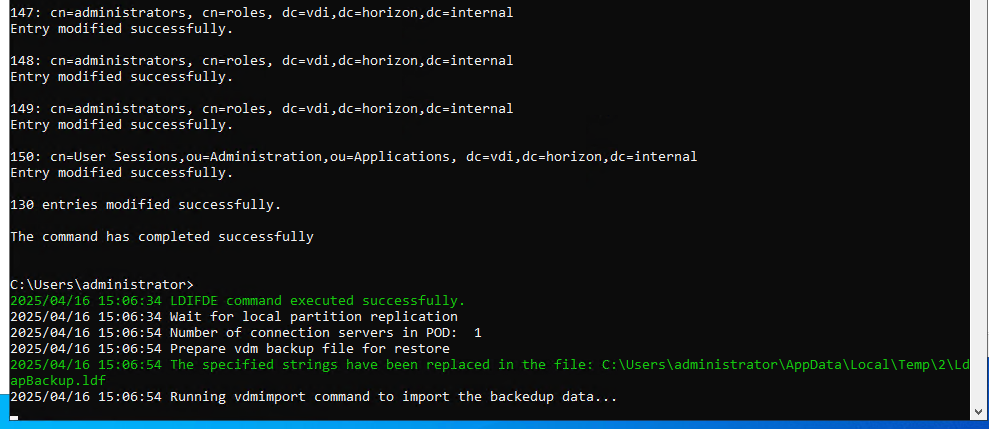
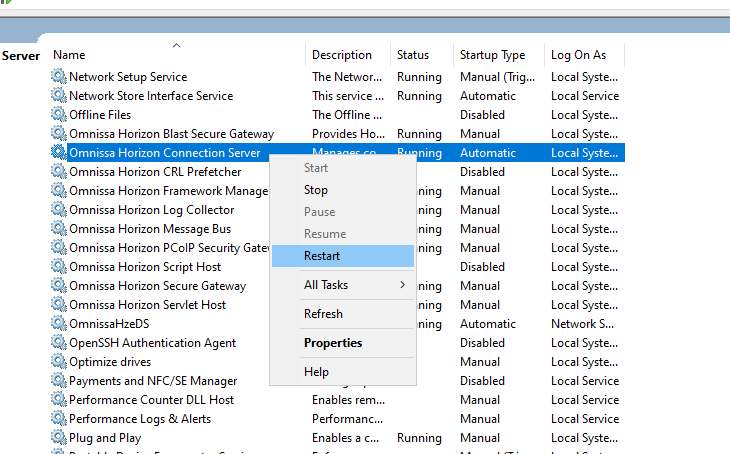
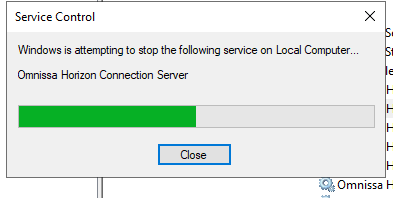
“Once the Script completes execution, stop the “Omnissa Horizon Connection Server” Windows Service on all Connection Servers in the POD. Only once the services on all servers in the pod are stopped, proceed to the next step. Note that rolling service restarts are NOT supported and will result in instability! 

Start the Connection Server Service one at a time on all Connection Servers in the POD.   You do not need to wait for the Connection server service to fully start up to before finish starting of services on remaining servers in the pod. The first service can wait up to 15 minutes per server in the pod to check back in for replication before allowing the service to start up. “

A screenshot of a computer AI-generated content may be incorrect.

A screenshot of a computer error AI-generated content may be incorrect.

Let’s wait for it to come back up

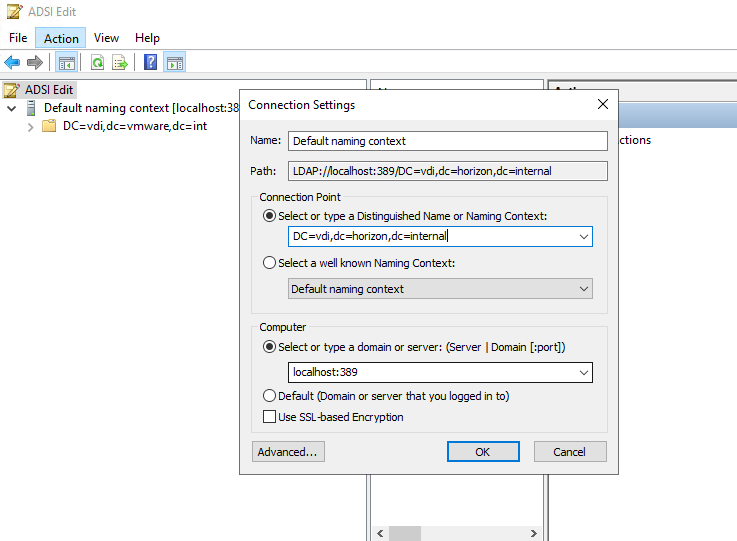
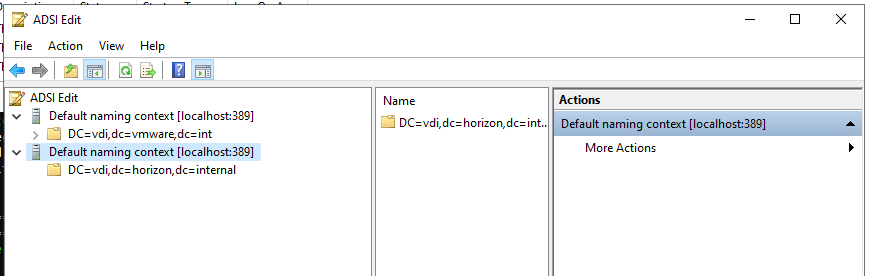
We connect with the ADSI edit using the new scheme dc=vdi,dc=horizon,dc=internal

A screenshot of a computer AI-generated content may be incorrect.

A screenshot of a computer AI-generated content may be incorrect.

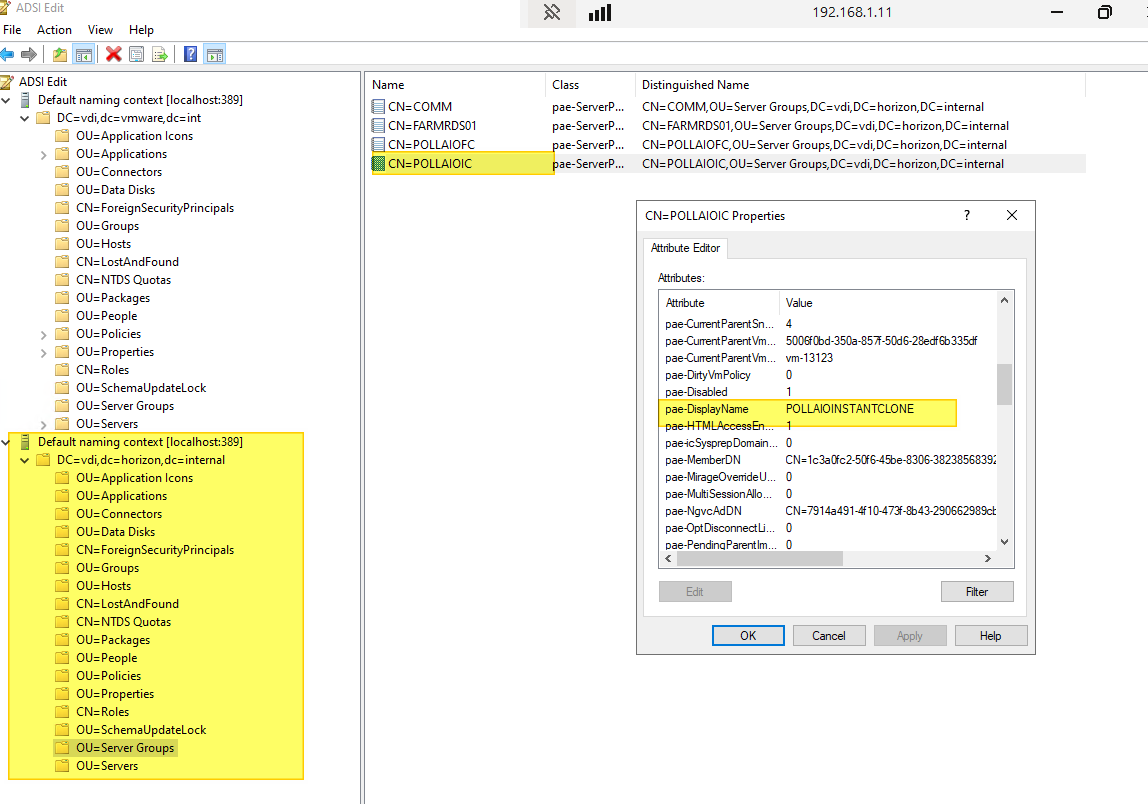
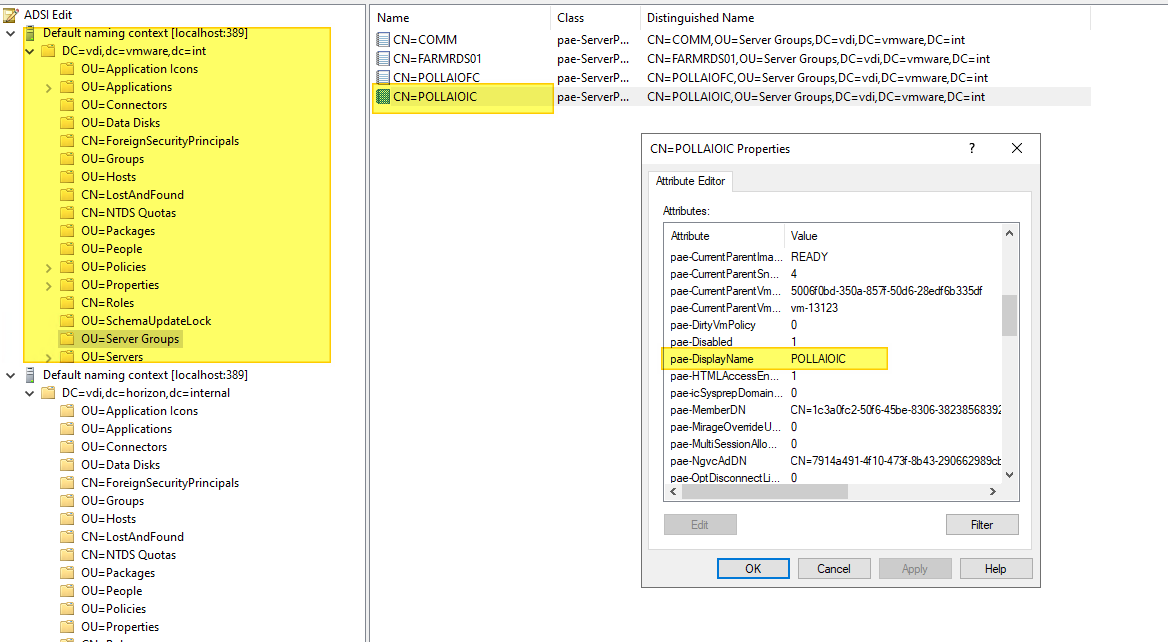
As a test, let’s try to remove a non-existent domain and see which one the change actually applies to (I expect the second)

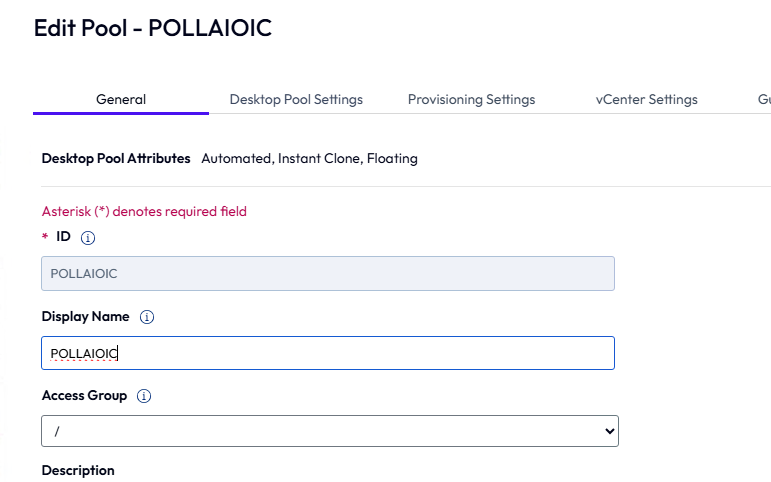
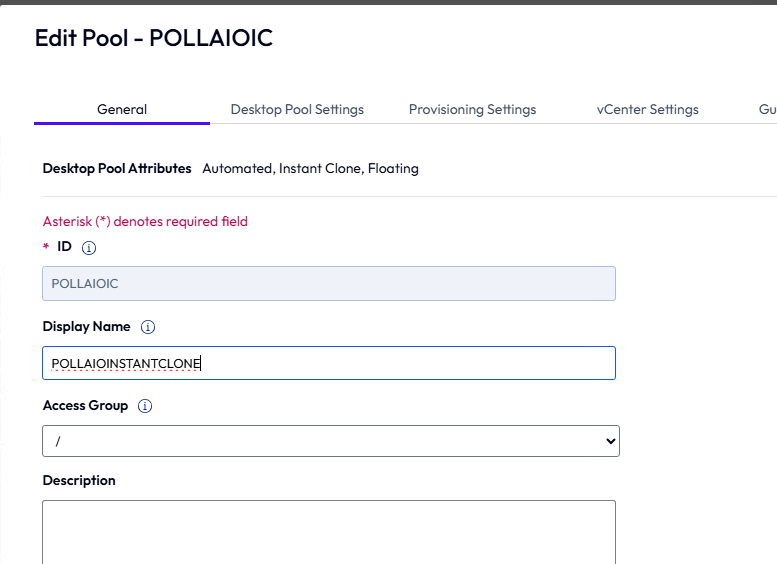
Let’s change the display name of a pool

A screenshot of a computer AI-generated content may be incorrect.

A screenshot of a computer AI-generated content may be incorrect.

The new has changed

A screenshot of a computer AI-generated content may be incorrect.

The old has not changed

A screenshot of a computer AI-generated content may be incorrect.

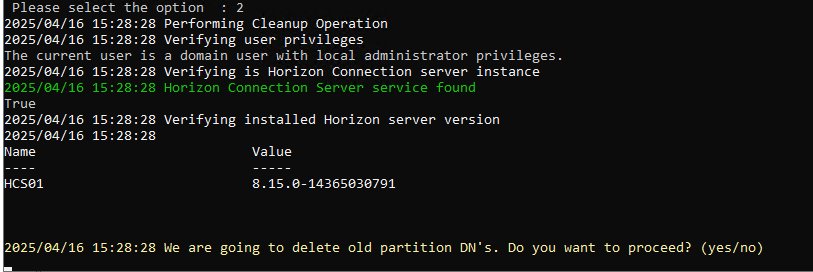
Once we finish the tasks and see that everything is stable, we erase the old pattern

A screenshot of a computer program AI-generated content may be incorrect.

A computer screen with white text AI-generated content may be incorrect.

A computer screen with text AI-generated content may be incorrect.

A screen shot of a computer screen AI-generated content may be incorrect.

The old scheme no longer exists

A screenshot of a computer error message AI-generated content may be incorrect.

Upgrade to 2503 and migrate ADAM Partition

Horizon Applications and strange icon – Horizon client

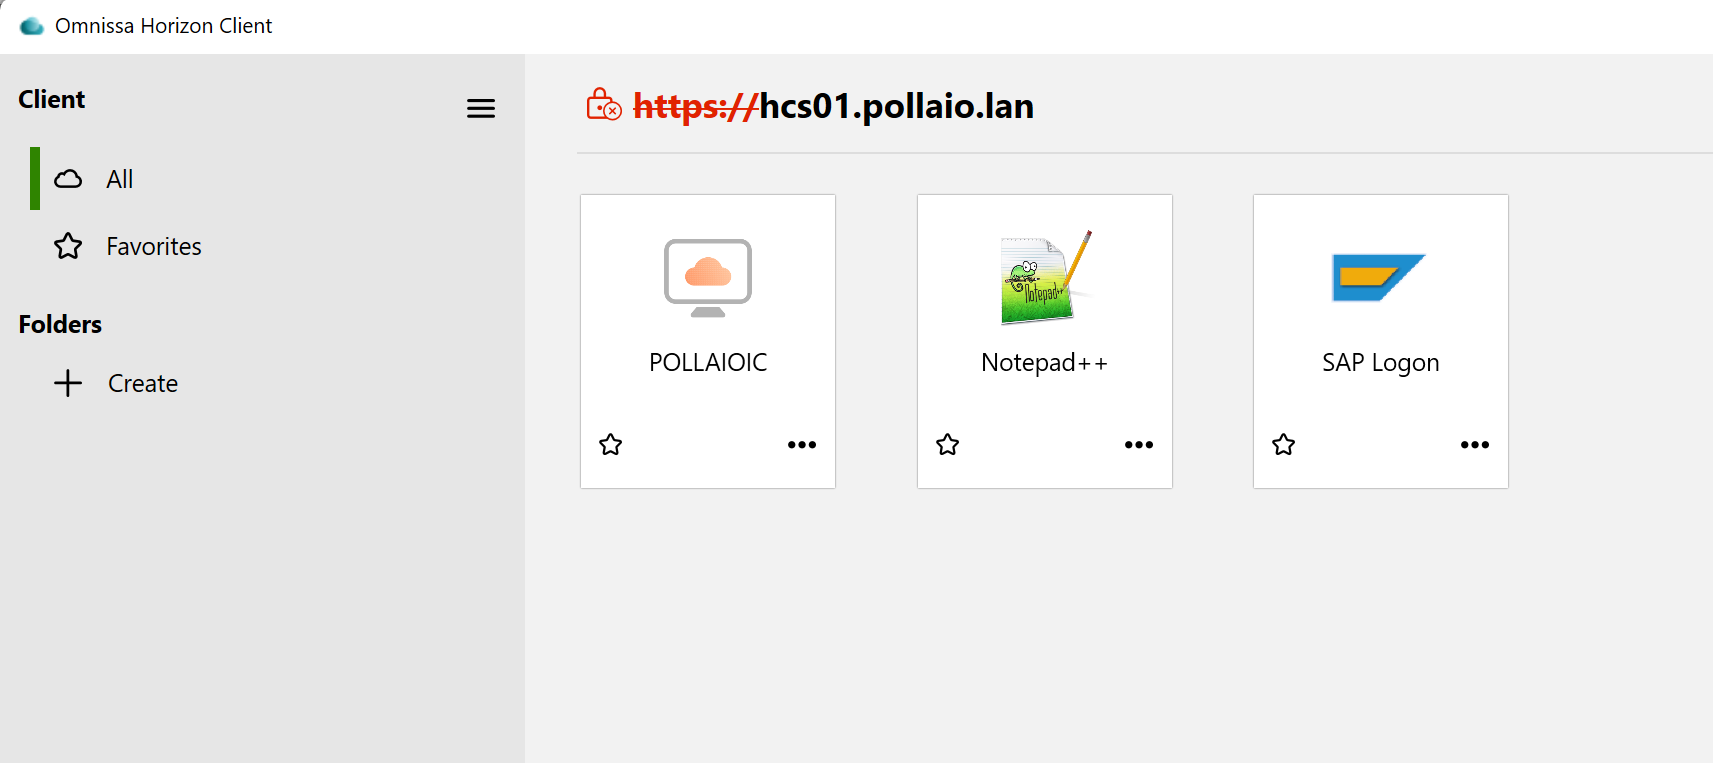
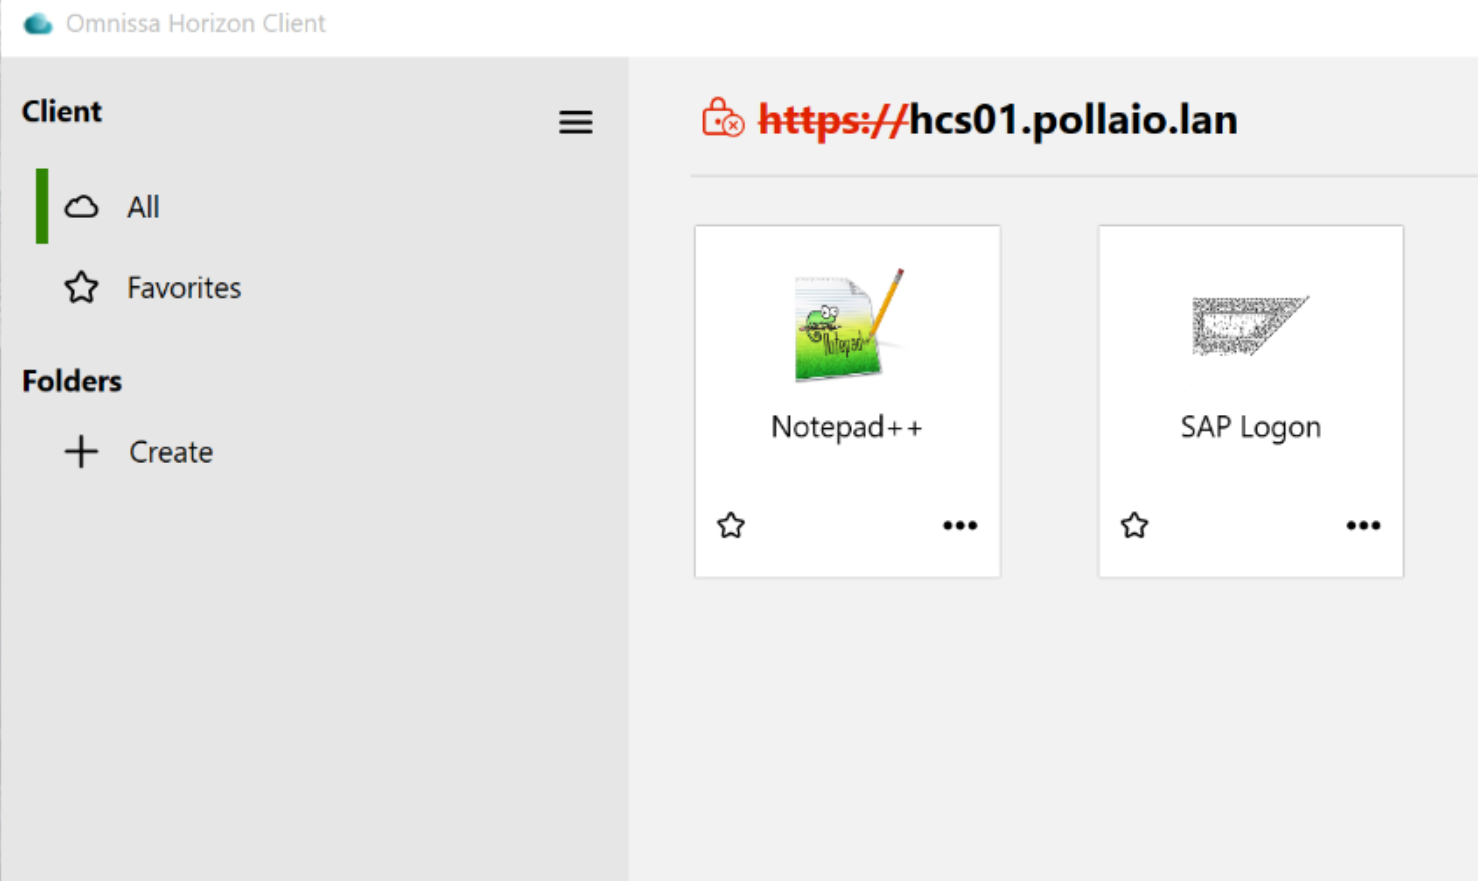
I have encountered an anomaly from a customer regarding the icons displayed for applications published by an RDS farm via Horizon. Specifically SAP LOGON.

The situation was as follows:

A screenshot of a computer

AI-generated content may be incorrect.

Where the SAP LOGON icon was grayed out and not well defined, the same situation was present with access via WEB.

After various analyses and attempts to solve it, I identified in the Horizon ADAM LDAP DB the presence of a mapping between the published application and the icons used

To access the ADAM LDAP DB, follow the instructions in this KB

Connecting to the Horizon Connection Server Local ADAM Database (2012377)

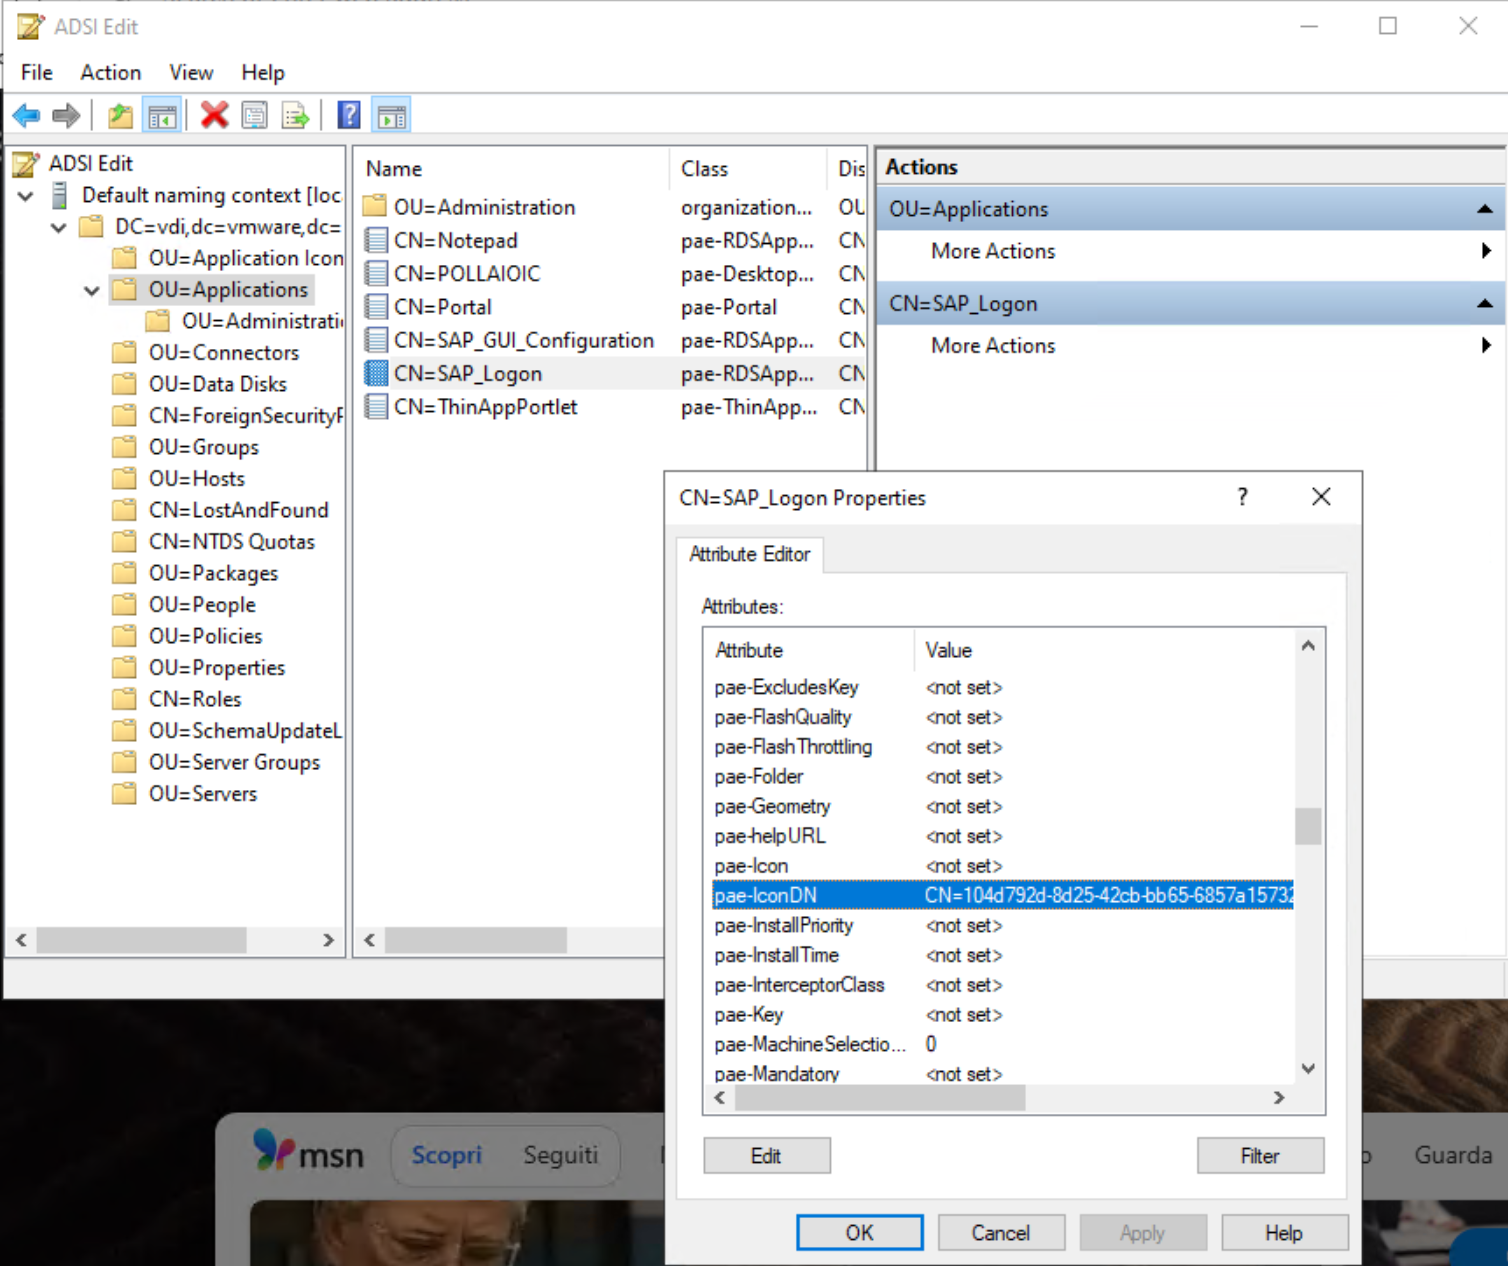
Once connected to the DB, we will be able to find our published application under Applications and check the associated icon or icons in the properties.

A screenshot of a computer

AI-generated content may be incorrect.

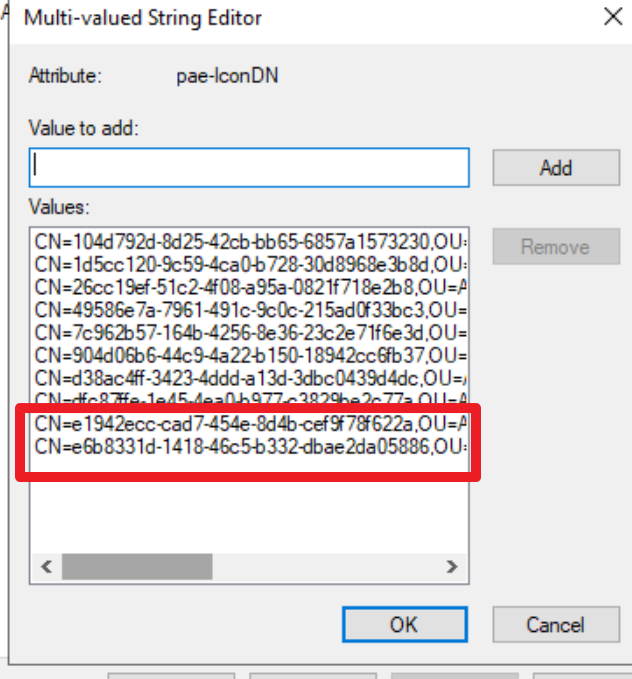
In my case, the pae-IconDN field was populated by 10 entries. In the image below, I show the status of the field

A screenshot of a computer

AI-generated content may be incorrect.

By removing the first 8 Entries (by trial and error), I was able to restore the correct situation

A screenshot of a computer

AI-generated content may be incorrect.

Some points of attention:

  • The icons in question (for example, the 10 of SAP LOGON) are all downloaded to the Horizon client cache located in C:\Users\%USERNAME%\AppData\Local\Omnissa\Omnissa Horizon Client\Icon Cache, but there is no link between the file name with the icon image and the ADAM LDAP DB (at least, I didn’t find it)
  • If we publish another SAP GUI or remove and republish the current one, the problem may recur, and it is necessary to intervene in the same way

Horizon Applications and strange icon – Horizon client