SSL Certificates in an Omnissa Horizon + Omnissa Access World: Why They Matter More Than You Think

.

A red lock on a blue background

AI-generated content may be incorrect.Let’s be honest: certificates are not the most exciting thing in IT. They don’t sparkle, they don’t blink, and they rarely impress your CIO in a slide deck. But if you’re running an Omnissa Horizon environment (also with Omnissa Access integration), SSL certificates are the unsung heroes that make your infrastructure secure, trusted, and usable.

In this post, let’s break down why certificates matter, where they should live in your Horizon world, and how they unlock some pretty cool features like True SSO.

.

.

The Basics: Why SSL Certificates?

At their core, SSL/TLS certificates do three things:

1.Encrypt traffic – so that nobody can sniff your users’ RDP or Blast traffic.
2.Prove identity – so your clients know they’re talking to the real Horizon server, not some sneaky impostor.
3.Build trust – because “untrusted certificate” pop-ups are the fastest way to kill user confidence.

In Horizon, these are not “nice to haves”—they’re essential.

.

Public vs Internal CA: Which Flavor Do You Need?

In most deployments, you’ll be juggling two kinds of certificates:

• Public CA Certificates: Perfect for components exposed to the internet—like your Unified Access Gateways (UAGs). Public certs ensure that external clients (home users, contractors, BYOD devices) connect without scary warnings.
• Internal Microsoft CA Certificates: Handy for internal components—like Connection Servers—especially if all your clients are domain-joined and trust your Microsoft enterprise CA. They’re cheaper (sometimes free) and give you tighter control.

Pro tip: You don’t have to pick one or the other. Most production environments mix both.

.

Certificates in the Horizon Architecture (The Big Picture)
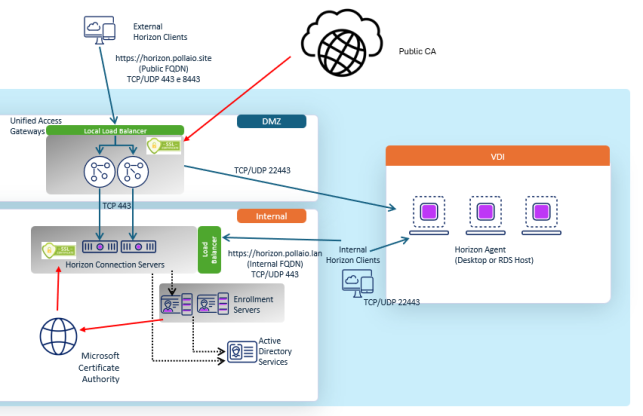
.

A screenshot of a computer

AI-generated content may be incorrect.

.

Think of the certificates as passports:

• The UAG needs a passport recognized globally (public CA).
• The Connection Servers can survive with a local passport (internal CA).
• True SSO hands out temporary passports at the border (short-lived certs) so users don’t need to fumble with passwords.

.

Certificates on Connection Servers

Your Horizon Connection Servers are the brains of the operation. By default, they come with a self-signed certificate. That’s fine for a lab, but in production it’s a recipe for distrust and compatibility issues.

Replacing it with either:

• An internal CA-issued cert (for domain-only environments)

means your Horizon Clients and web browsers connect seamlessly and securely. Bonus: no frantic helpdesk calls about “why does Horizon keep saying untrusted connection?”

Here are more details on how to install the certificates

.

.

Certificates on Unified Access Gateways (UAGs)

The UAG is your secure doorway to Horizon from the outside world (more time behind a load balancer). And here, public CA certs are king. Imagine asking a remote contractor to install your company’s internal root CA certificate just to connect—that’s not going to fly.

With a trusted public certificate:

• Users get smooth experience from the get-go.
• Browsers, Horizon Clients, and even thin clients connect without any fuss.
• You avoid troubleshooting nightmares tied to certificate trust chains.

Here are more details on how to install the certificates

.

The Secret Sauce: Certificates and True SSO

Now, let’s talk about one of Horizon’s coolest features: True SSO.

True SSO lets users log into Horizon desktops and apps with their identity from Omnissa Access—no extra password prompts or integrate with other SAML idP. Behind the scenes, Horizon uses short-lived, smart card-like certificates to authenticate the user to the desktop.

Guess what makes this magic possible? Certificates.

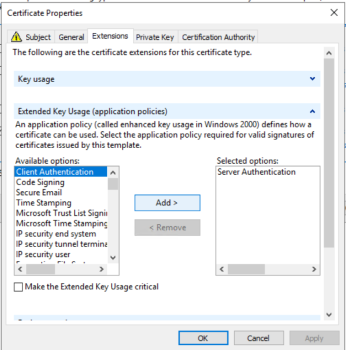
• A trusted internal CA (usually Microsoft AD CS) issues these ephemeral certificates.
• The Horizon infrastructure validates them and grants access seamlessly.
• The user just experiences fast, passwordless login.

So, without properly set up certificates, True SSO doesn’t fly.
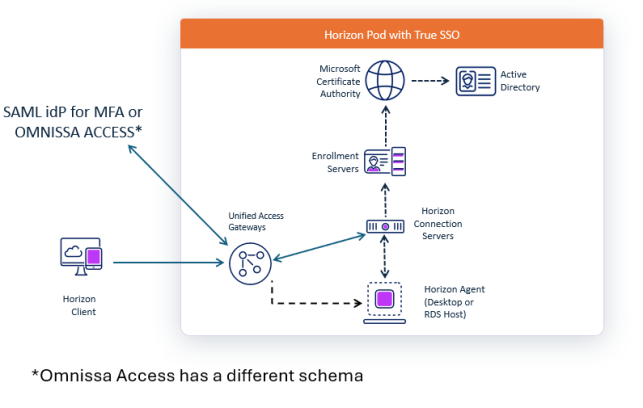
A diagram of a network

AI-generated content may be incorrect.

Here are more details on how to install the certificates (coming soon)

.

.

Wrapping It Up

Certificates might not be glamorous, but in an Omnissa Horizon + Omnissa Access environment they are foundational:

• They secure Connection Servers for internal trust.
• They harden UAGs with public-facing credibility.
• They power True SSO, giving users a smooth, passwordless experience.

Think of them as the quiet guardians of your virtual desktops: invisible when done right, but disastrous if ignored.

So next time you see a certificate renewal reminder, don’t sigh. Smile. Because your Horizon users—and your future self—will thank you.

.

SSL Certificates in an Omnissa Horizon + Omnissa Access World: Why They Matter More Than You Think

Replacing the Public Certificate on Your Omnissa Unified Access Gateways

.

Close-up of a screen with a lock and text

AI-generated content may be incorrect.So, you’ve got your shiny new public SSL certificate, and it’s time to make your Unified Access Gateways (UAGs) happy. Excellent choice — a properly installed certificate keeps your users safe, your browser warnings quiet, and your security team smiling.

.

In this post, I’ll walk you through how to replace or install a new public certificate on your Omnissa Unified Access Gateways.
We’ll use a
PFX (PKCS#12) certificate file, since it neatly bundles the private key, certificate, and intermediates in one convenient package.

.

My Preferred Setup

I like to keep things clean and consistent, so instead of juggling multiple certificates, I use a single public certificate for all Unified Access Gateways in my deployment.

Here’s the trick:
When generating or requesting your certificate, make sure the
Subject Alternative Name (SAN) section includes:

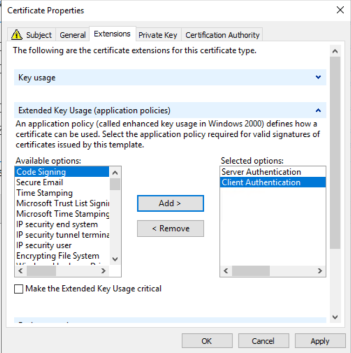
• The VIP used to access the UAGs through the load balancer (Normally, a public FQDN)

If you use the UAGs for internal access (for network segmentation), I suggest adding to SAN the internal UAG FQDN.

.

🔧 Step-by-Step: Installing the Certificate

(Insert screenshots of each step here)

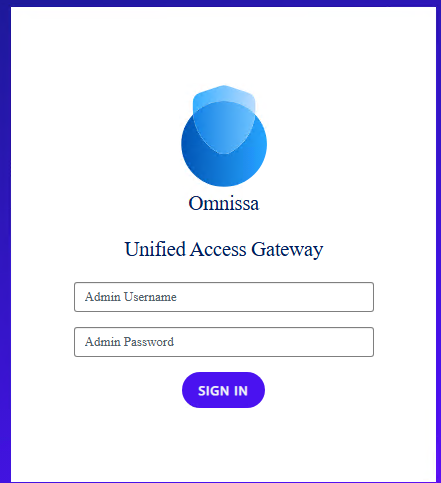
1.Log in to the UAG admin console
Open your browser and connect to the UAG admin interface:
2.https://<UAG-FQDN>:9443/admin

A screenshot of a login form

AI-generated content may be incorrect.

Sign in with your admin credentials.

A screen shot of a computer

AI-generated content may be incorrect.

3.Go to the TLS/SSL Settings
From the left menu, navigate to:

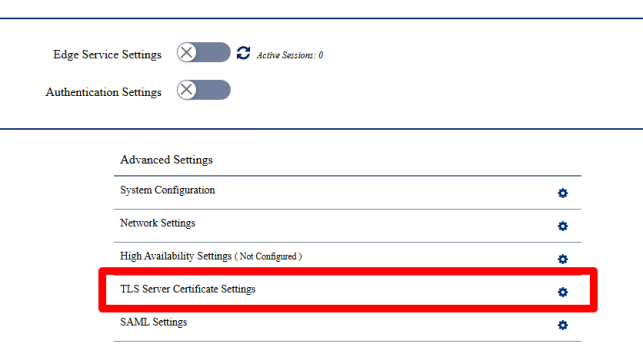
System Configuration → TLS Server Certificate Settings

A screenshot of a computer

AI-generated content may be incorrect.

4. Prepare your PFX file
You should already have your .
pfx file ready, containing:
◦ Your public certificate
◦ Any intermediate certificates
◦ Your private key

You’ll also need the PFX password you set when exporting the file.

5 .Import the new certificate
In the TLS configuration page, click
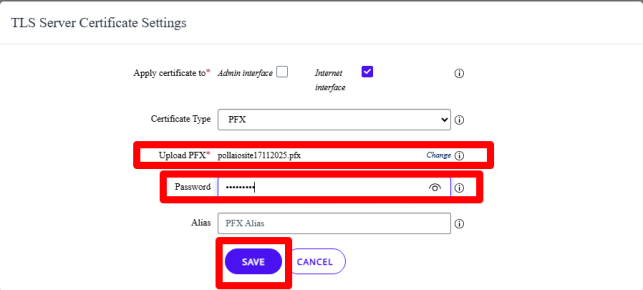
Select PFX, browse to your certificate file, and enter the password.
Then hit
Save at the bottom of the page.

A screenshot of a computer

AI-generated content may be incorrect.

A green rectangle with black text

AI-generated content may be incorrect.

6. Wait for the magic
The Unified Access Gateway will automatically restart the Edge service to apply the new certificate.

Grab a coffee ☕ — it only takes a few seconds.
7 .Verify everything works
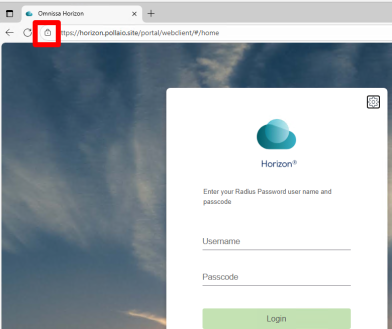
Once the UAG is back online, open the VIP URL in your browser
or Horizon Client and check the certificate details.
Browser

A screenshot of a computer

AI-generated content may be incorrect.

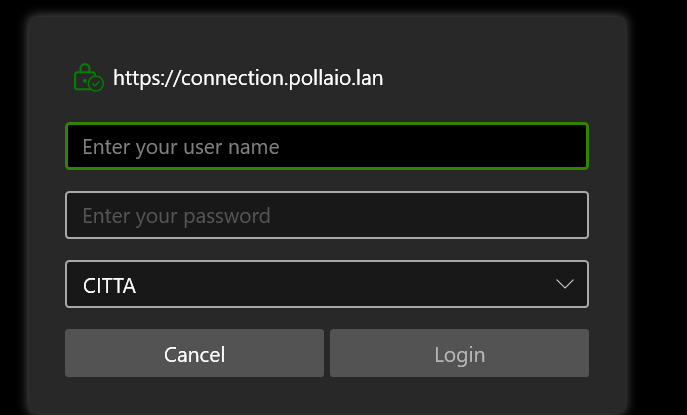
Horizon Client

A screenshot of a login screen

AI-generated content may be incorrect.

.

Bonus Tips

• Consistency is key: Replace the certificate across all your UAGs (behind the same Public FQDN).
• Backup the old cert: Always keep a copy of the previous working certificate — just in case something goes sideways.
• Keep a note of the certificate expiration date and plan your next renewal ahead of time (trust me, future-you will thank you).
IMPORTANT: Once you’ve changed the certificate, always verify that it works. Especially if you have thin clients, make sure they have loaded the necessary certificates (RootCA and SubCA) to validate the new certificate.

. That’s It!

You’ve successfully installed a new public certificate on your Omnissa Unified Access Gateways.
Your users now enjoy secure, trusted access — and you get the satisfaction of another clean green padlock in the browser.

.

Replacing the Public Certificate on Your Omnissa Unified Access Gateways

Replacing the Self-Signed Certificate on Omnissa Connection Server with a Microsoft CA-Issued Certificate (or replacing the certificate to end to validation date)

.

Let’s be honest — that shiny self-signed certificate your Omnissa Connection Server came with is fine… until your browser or Horizon client starts screaming “Untrusted!” at every login. 😅

A screenshot of a computer error AI-generated content may be incorrect.


It’s time to fix that properly — by replacing it with a trusted certificate issued by your internal Microsoft CA.

In this guide, we’ll walk through the process step-by-step, ending up with a PFX certificate you can deploy to all your Connection Servers.

.

Why One Certificate for All Connection Servers?

Because simplicity is beautiful.
Maintaining a single certificate across all your Connection Servers reduces management overhead and avoids those awkward “name mismatch” warnings.

In the certificate, we’ll include all relevant hostnames as Subject Alternative Names (SANs):

• The hostname and FQDN of each Connection Server
• The VIP name (if you’re using a load balancer for internal access)

Example SAN list (2 Connection Servers and 1 VIP):

connection01.company.local

connection02.company.local

horizon-vip.company.local

connection01

connection02

horizon-vip

.

.

Step 1: Require the certificate as a PFX File

1. The certificate will be exported into a PFX file with:
◦ Exporting the private key
◦ Protect it with a strong password
◦ Save it somewhere safe (seriously, treat it like a password)

.

Step 2: Deploy the Certificate on All Connection Servers

Now that you have your shiny, trusted .pfx file, it’s time to put it to work.

Repeat the following steps on each Connection Server:

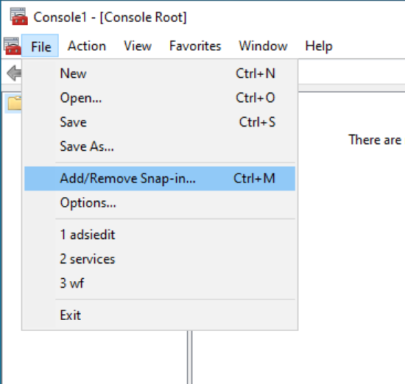
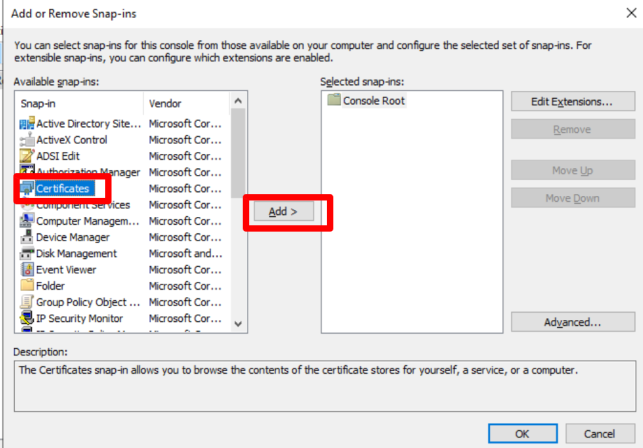
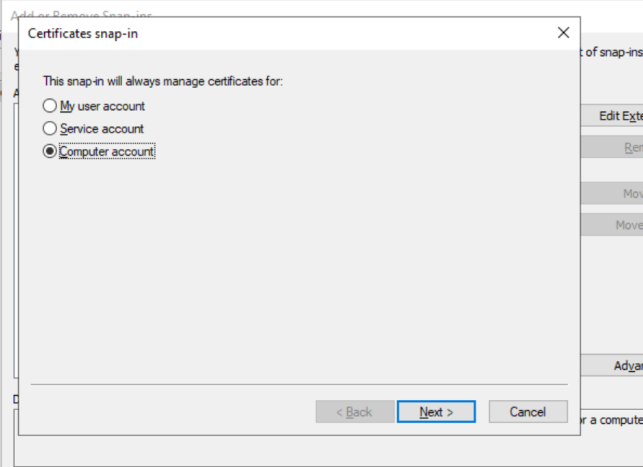
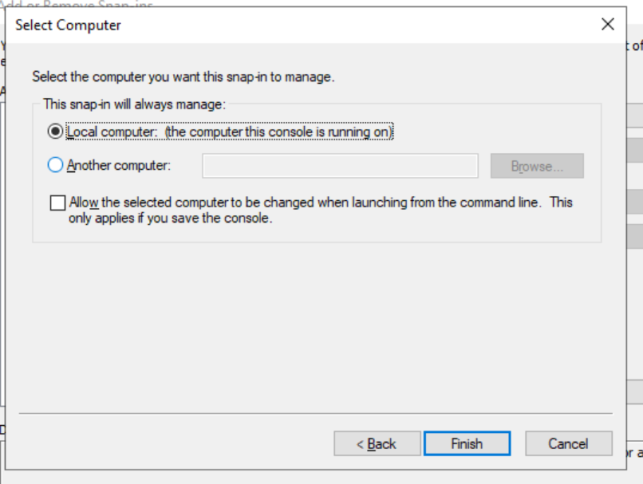
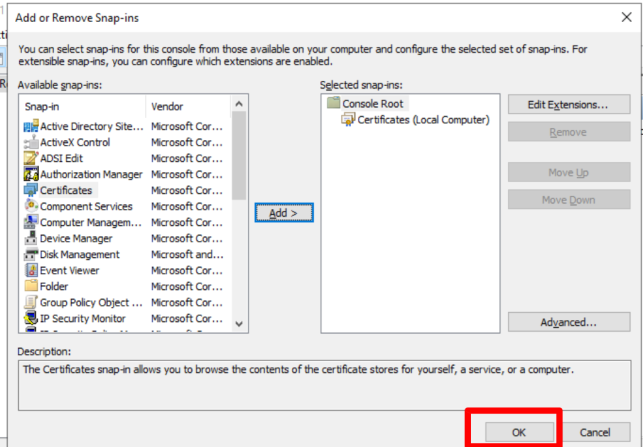
1.Open MMC → Certificates (Local Computer) again.

A screenshot of a computer AI-generated content may be incorrect.

A screenshot of a computer program AI-generated content may be incorrect.

A screenshot of a computer AI-generated content may be incorrect.

A screenshot of a computer AI-generated content may be incorrect.

A screenshot of a computer AI-generated content may be incorrect.

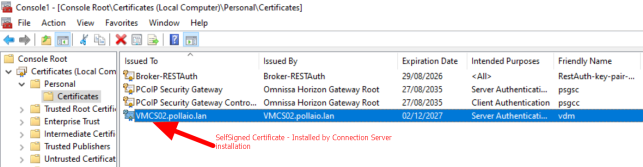
In Personal, there is a self-signed certificate (or an old certificate) installed by the Connection Server installation process

A screenshot of a computer AI-generated content may be incorrect.

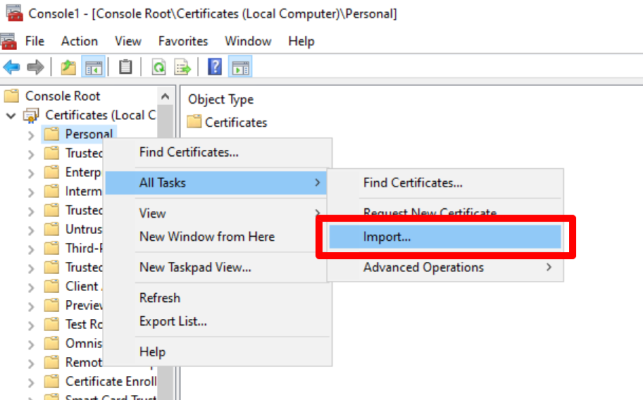
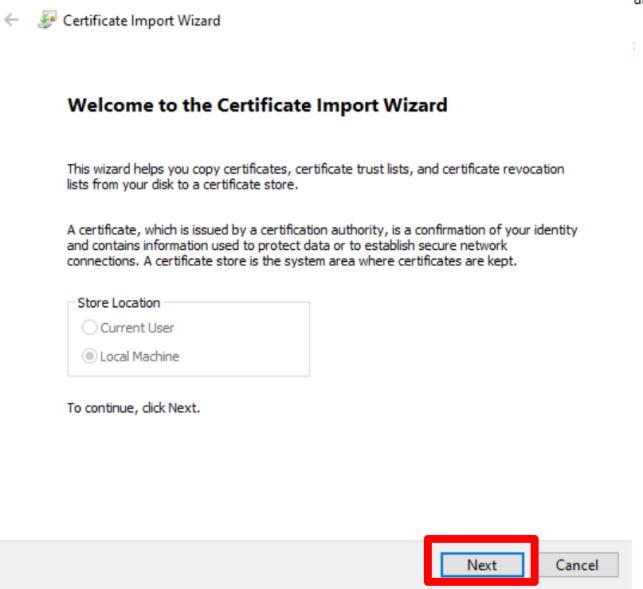
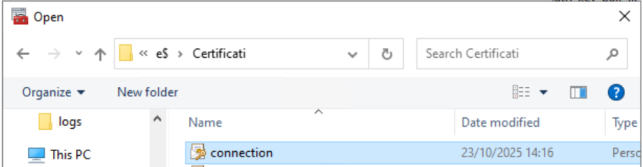
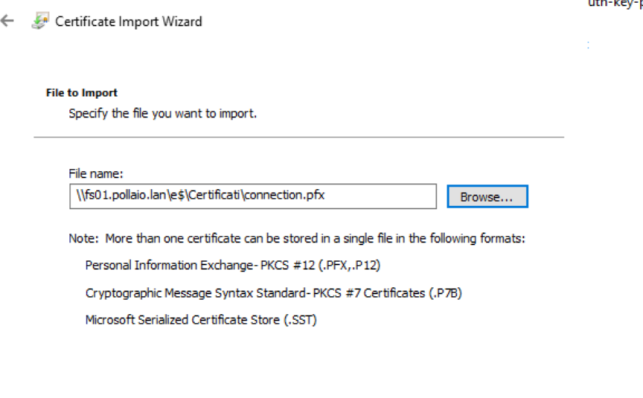
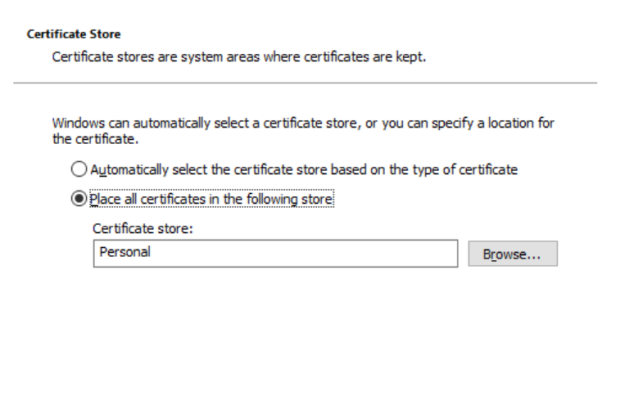
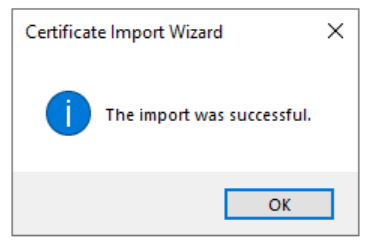
2. Import the .pfx file under:

Personal > CertificatesA screenshot of a computer AI-generated content may be incorrect.

.

A screenshot of a certificate AI-generated content may be incorrect.

A screenshot of a computer AI-generated content may be incorrect.

A screenshot of a computer AI-generated content may be incorrect.

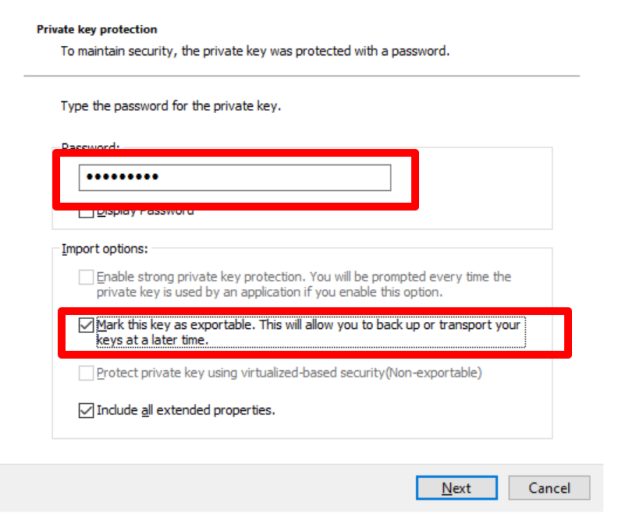
3. When prompted, provide the password you used during export and select “Mark this key as exportable….”

A screenshot of a computer screen AI-generated content may be incorrect.

A screenshot of a certificate AI-generated content may be incorrect.

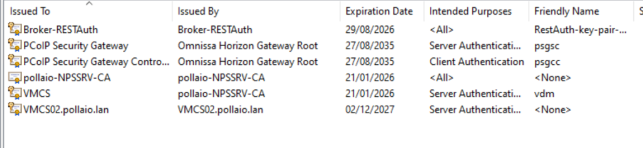
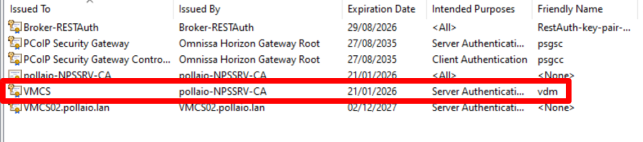
4. Verify that the certificate appears in the list with the private key (the certificate icon has a key)

A screenshot of a computer AI-generated content may be incorrect.

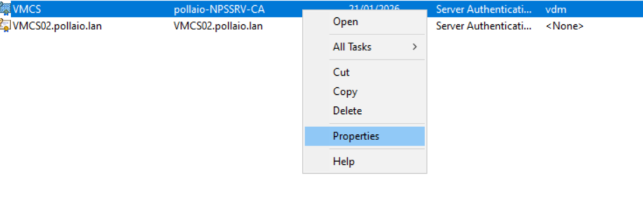
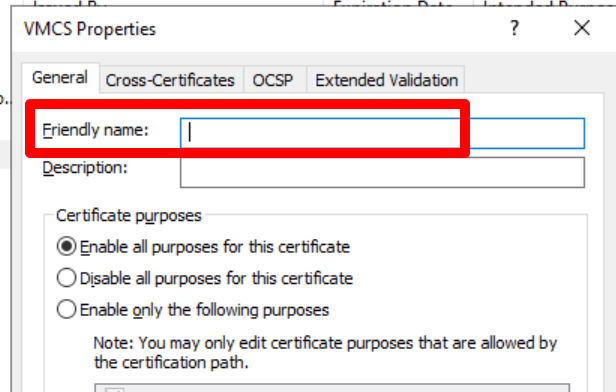
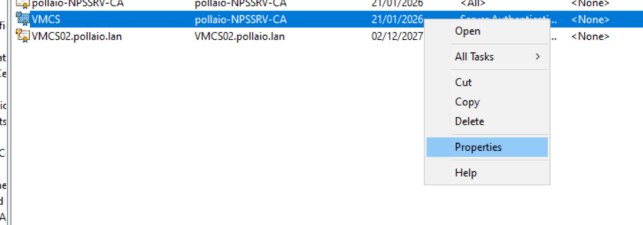
5. Remove the friendly name VDM from the self-signed certificate or the old certificate

A screenshot of a computer AI-generated content may be incorrect.

A screenshot of a computer AI-generated content may be incorrect.

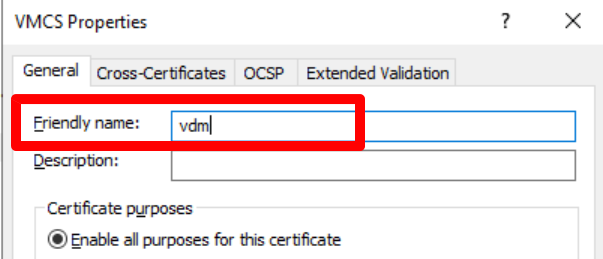
6.Add friendly name VDM to new certificate

A screenshot of a computer AI-generated content may be incorrect.

A screenshot of a computer AI-generated content may be incorrect.

A red lines with black text AI-generated content may be incorrect.

.

.

Step 3: Restart the Horizon Connection Server Service

To make the change effective:

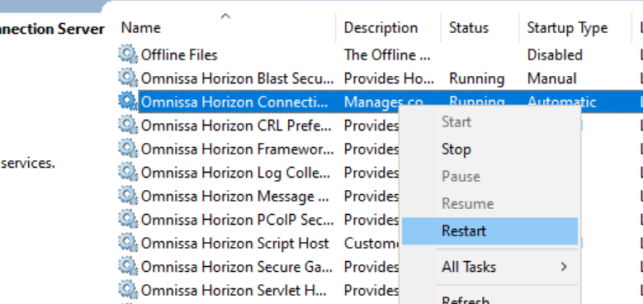
1. Open Services.msc
2 . Restart the VMware Horizon Connection Server service.
3 . Alternatively, you can simply reboot the server if you’re feeling extra cautious.

A screenshot of a computer screen AI-generated content may be incorrect.

Once restarted, the Connection Server should automatically pick up the new certificate.

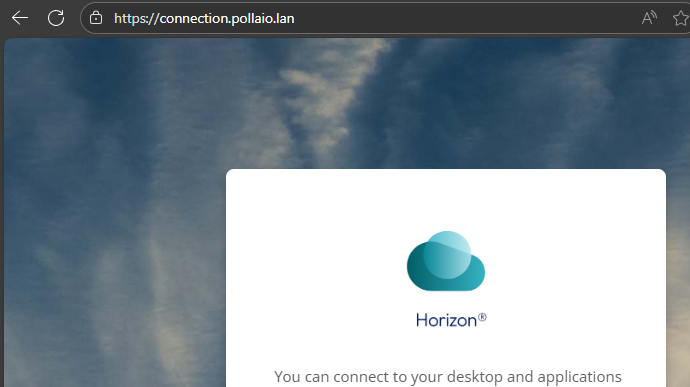
You can confirm by opening the Horizon Administrator Console in your browser and checking that your connection is now secure and trusted ✅

We need to repeat steps 4 and 5 on all Omnissa Connection servers

.

Bonus: Keeping Things Clean

• Make sure all old or expired certificates are removed from the Personal store.
• Keep a note of the certificate expiration date and plan your next renewal ahead of time (trust me, future-you will thank you).
• If the Horizon is behind the Unified Access Gateway (for external connection and network segmentation, remember to change the Thumbprint on the UAG configuration)
IMPORTANT: Once you’ve changed the certificate, always verify that it works. Especially if you have thin clients, make sure they have loaded the necessary certificates (RootCA and SubCA) to validate the new certificate.

.

Done!

You’ve successfully banished the self-signed gremlin and brought your Horizon environment into the trusted world of PKI.

From now on, your users will enjoy clean, warning-free connections — and your security team will silently thank you for doing things the right way.

.

Replacing the Self-Signed Certificate on Omnissa Connection Server with a Microsoft CA-Issued Certificate (or replacing the certificate to end to validation date)