All of VMware’s EUC products were continuously updated (in recent years almost always every 3 months) to add new features, fix bugs and mitigate security vulnerabilities.
The move to Broadcom and the subsequent sell of EUC products in Omnissa has brought a few months of stabilization… but I’m happy to announce that versions 2406 of the App Volumes and Unified Access Gateway products are out.
What do we find new?
App Volumes
Persistent Desktop Support
Expanded Use Cases: New support for classic Windows desktop environments, a significant enhancement to our Apps Everywhere strategy. This new feature extends our efficient one-to-many provisioning model, previously available only for non-persistent desktops, to persistent virtual desktop environments.
And more…
Replicate Application Packages in Specific Stages
We are excited to introduce the Replicate Application Packages in Specific Stages feature, designed to enhance the life cycle management of applications across multiple instances of App Volumes Manager
And more…
Select a specific Package Version when Launching an App (Technology Preview)
Among the various features released for Horizon 8, the most interesting one is Agent Auto Upgrade:
“The agent auto upgrade feature allows customers to automatically initiate upgrades without manual intervention. To utilize this feature, on-premises systems must have access to CDS servers. Customers without CDS access can establish their webserver, host the agent components, and then register the agent build with the connection server to upgrade agents in VDI/RDSH desktops. This feature requires Horizon Plus or Horizon Universal License, and is available for Full Clone Desktops and RDSH Servers only. To upgrade Horizon Agent in Instant Clone Desktop Pools or RDS Farms, upgrade Horizon Agent on the Golden Image and schedule maintenance to push the new image.”
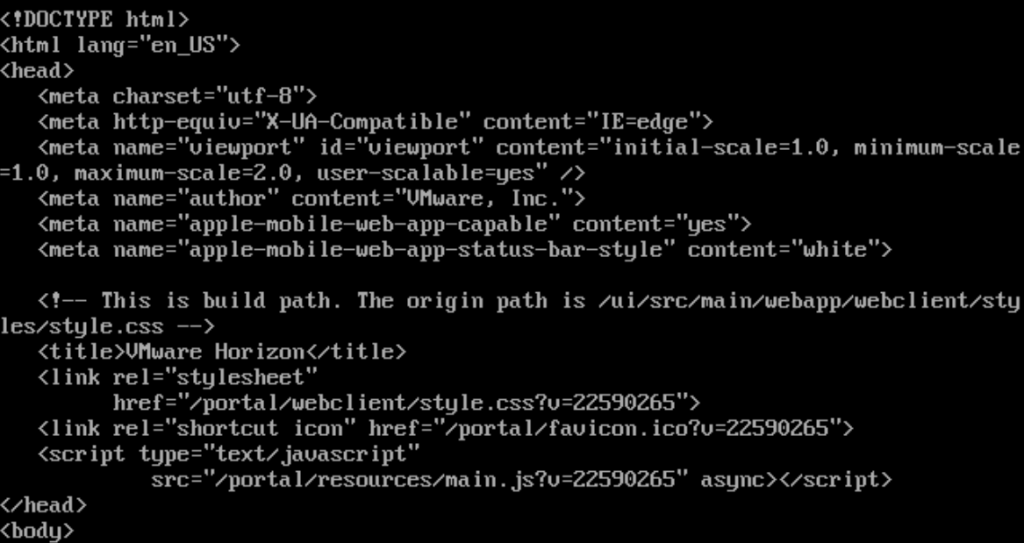
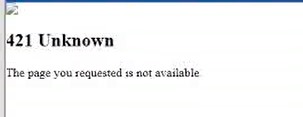
Many times I found myself having to demonstrate that the communication between the Unified Access Gateway and the Connection Servers was not working due to problems with poorly configured firewall rules. A very useful test is to connect to the UAG console and launch the classic CURL command:
curl -v -k https://<FQDN or IP ADDRESS CS>:443/
the outcome of which is as follows if the connection is ok (HTML output)
or the following if the connection is not enabled on the firewall
2021-09-24T22:05:34.738-07:00 DEBUG (1B08-1A58) <SimpleDeamonThread> [v] (ajp:admin:Request190) Response 404 Not Found [close]
The fast solution is to set allowUnexpectedHost to true on the locked.properties file. This is located on each connection server in c:\program files\vmware\VMware View\Server\sslgateway\conf. and restart the horizon connection services
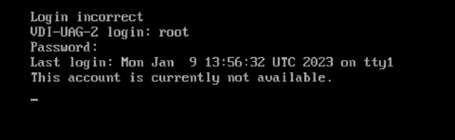
It often happens to forget the existence of UAG (Unified Access Gateway) in a VMware Horizon infrastructure and consequently also of root and admin passwords.
Let us remember that the UAG is the object of a Horizon infrastructure, exposed to the outside and therefore more subject to informed attacks. So, it is good and right to keep it constantly updated.
So if we forgot the root and admin passwords of our virtual appliance VMWare has the necessary documentation to reset these accounts, which you can find in these links:
Lately, it happened to me on a customer that even if the root user’s password had been reset, he still did not log in, the error was as follows:
The cause of the problem is the deactivation of the root user shell, evidence of this situation is in the /etc/passwd file of the virtual appliance which is thus configured for the root user
(The following commands can be executed by accessing the virtual appliance console in the manner indicated for changing the root user’s password and are available at this link)
cat /etc/passwd
To fix the situation, simply run the following command:
At this point, we restart with the command reboot -f and we will be enabled to access.
VMware Horizon infrastructures often have the Unified Access Gateway (UAG) component to enable a secure connection from outside your corporate network to VDI.
This positioning makes the UAG subject to frequent updates, today we will see how to update it.
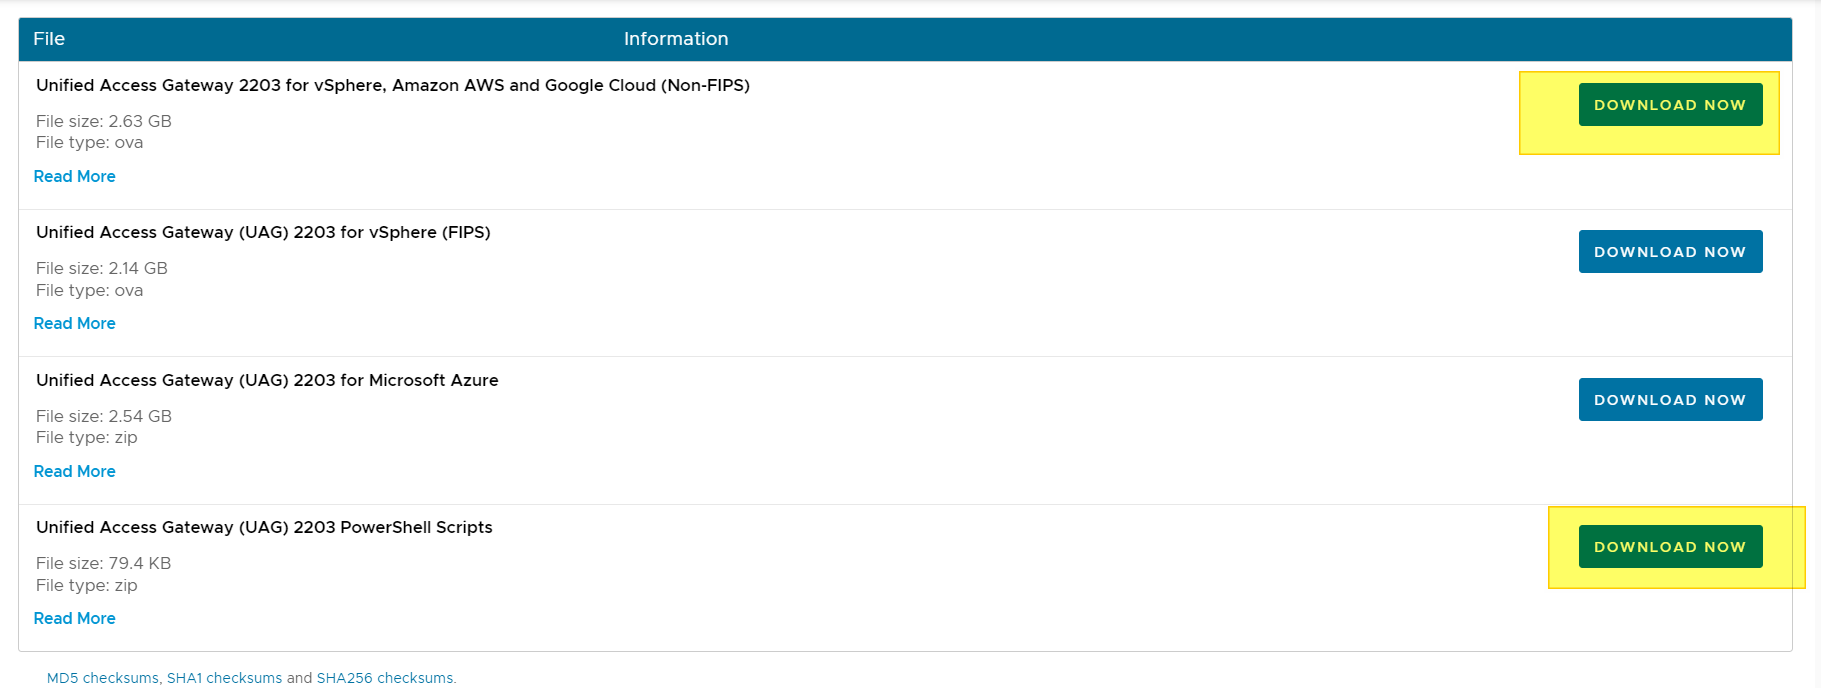
Download the ISO file of the version we want to update from the VMware Customer Site:
Check compatibility with your Horizon infrastructure:
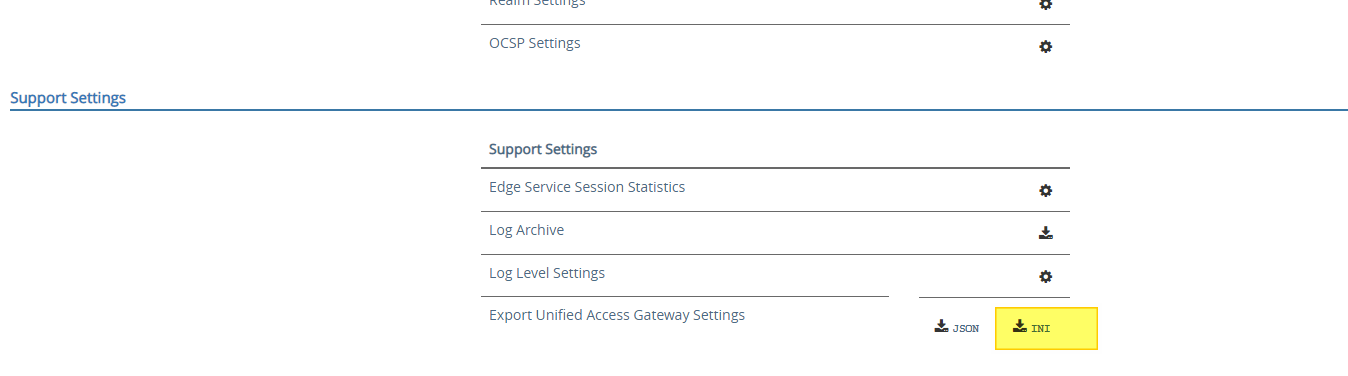
Download the INI file containing the current UAG configuration
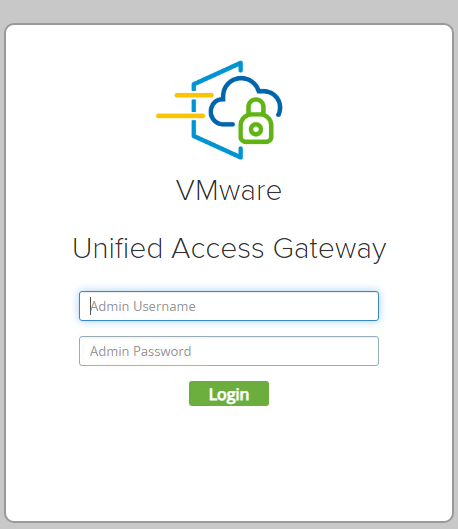
Access the Unified Access Gateway interface
HTTPS://<fqdnUAG>:9443
Using the credentials of the admin user
Once logged in, download the .ini file
Retrieving the information needed to complete the configuration file:
Certificate for public access and password
Certificate for the admin center and its password
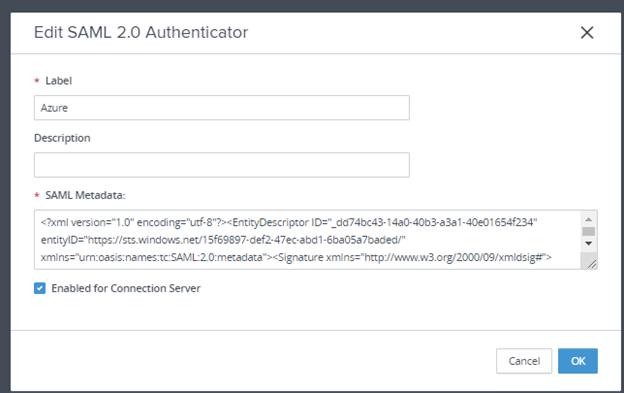
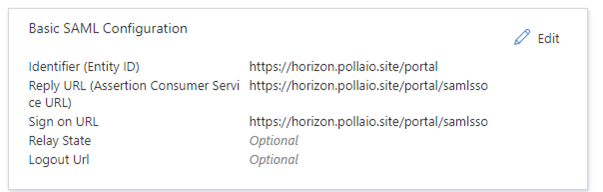
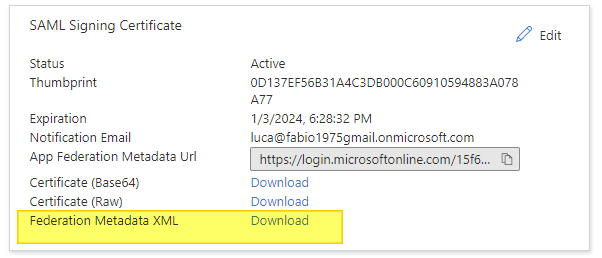
SAML component XML if integration with AZURE MFA
Information on where to deploy (vCenter, Cluster, virtual network, datastore ) the Virtual Appliance of the new UAG
The data indicated will serve me to fill in the fields of the downloaded ini file
I summarize the info required in this table
Sector
Field
Description
General
netInternet
PortGroup on which to certify the network card that communicates to the internet world *
General
diskmode
Thin or Thick
General
Source
Absolute path where the ISO resides
General
Target
Path of the vSphere infrastructure where we will deploy the virtual appliance
General
Ds
Datastore where the VM will be created
General
netManagementNetwork
Portgroup on which to certify the network adapter for UAG management *
General
netBackendNetwork
Portgroup on which to certify the network adapter for UAG management *
General
Name
Virtual Machine Name
General
uagName
Hostname of the UAG (normally to be left that of the UAG to be replaced)
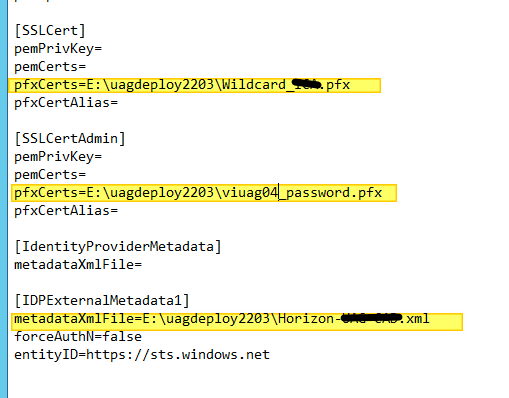
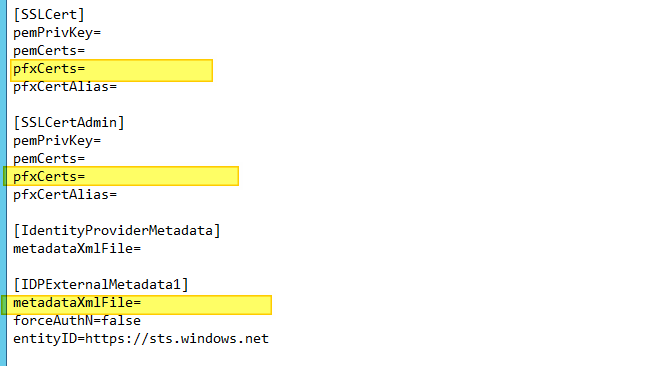
SSLCert
pfxCerts Property
Path where the SSL Certificate generated by a public CA in password protected PFX format used to access VDI by Horizon Clients resides
SSLCertAdmin
pfxCerts Property
Path where the SSL Certificate generated by a CA (normally Microsoft and Private) used to secure and validate access to the UAG Management Interface resides
IDPExternalMetadata1
metadataXmlFile Property
XML file of the Identity Provider (In this case Azure AD) to enable Azure MFA for access
*VMware recommends at least two network adapters in two different segments for production environments
One for internet traffic (I call it the EXT-DMZ)
One for traffic to the internal LAN (I call it the INT-DMZ)
It is possible to create environments with 1 or 3 network adapters, in the first case VMware recommends only one card only for test environments, and in the second to also differentiate the management traffic that otherwise, in the two-card configuration would pass through the card that communicates with the internal LAN.
At this point we can proceed with the deployment of the virtual appliance:
The first step is Shutdown the old UAG Virtual Appliance (I suppose do you have at least two UAGs with a Load Balancer in front and at least a DNS round-robin for balancing the traffic to the Connection server)
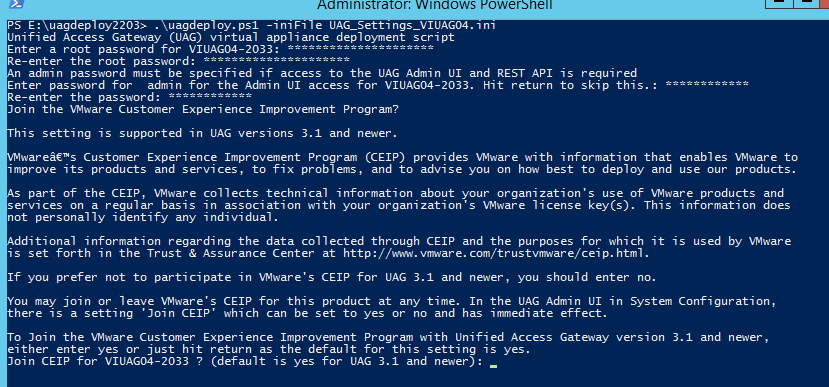
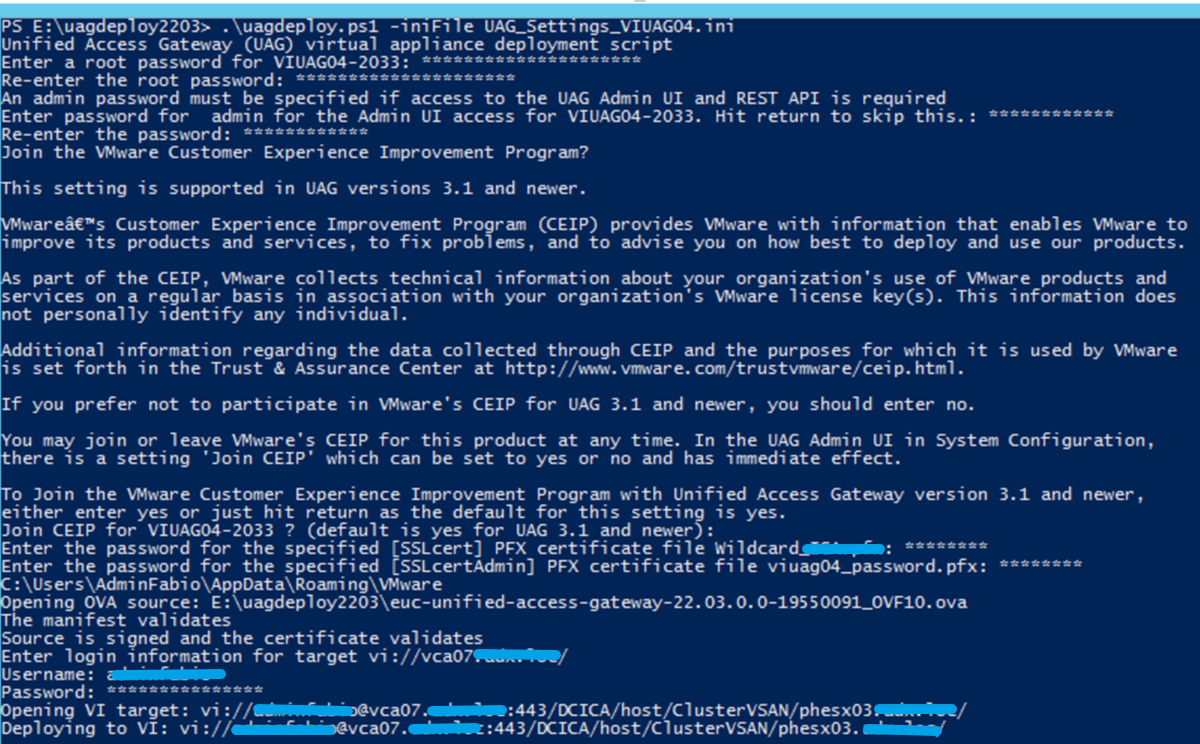
.\uagdeploy.ps1 -iniFile UAG_Settings_VIUAG04.ini
Allow CEIP
Insert password for PFX Certificate File
Insert a new (or reuse the old) password for the Root account (for access to UAG OS) and Admin account (for access to UAG WEB admin console)
Waiting to complete the UAG Deploy (You can check the process from the vCenter task)
Now the new UAG virtual appliance is up and running!! Test it and apply the same step for all UAG virtual appliances of your VMware Horizon Infrastructure.
On December 14, 2021 the Apache Software Foundation notified the community that their initial guidance for CVE-2021-44228 workarounds was not sufficient. We believed the previous instructions in this article to be an effective mitigation for CVE-2021-44228, but in the best interest of our customers, we must assume the earlier workaround may not adequately address all attack vectors.
We need to run a script:
#!/bin/bash

# Log contents to file by prefixing timestamp. Maximum file size is 50MB
function log_to_console() {
    echo "$(date +'%Y-%m-%d %T')" "$HOSTNAME" "$@"
}

log_to_console "Running script to remove JndiLookup.class from jars in Unified Access Gateway"

log_to_console "UAG Version: " $(tail -1 /opt/vmware/gateway/logs/version.info 2>/dev/null)

mkdir /tmp/test
mkdir /tmp/bkp

log_to_console "Unpacking archive and removing JndiLookup.class"
cp /opt/vmware/gateway/lib/ab-frontend-0.2.jar /tmp/bkp

unzip -q -o /opt/vmware/gateway/lib/ab-frontend-0.2.jar -d /tmp/test

unzip -q -o /tmp/test/hc.war -d /tmp/test/hc

zip -dq /tmp/test/hc/WEB-INF/lib/log4j-core-*.jar org/apache/logging/log4j/core/lookup/JndiLookup.class

rm /tmp/test/hc.war
cd /tmp/test/hc

zip -r -q ../hc.war .

cd ..
rm -rf hc

log_to_console "Repackaging archive"

zip -r -q ab-frontend-0.2.jar .

chown gateway:users ab-frontend-0.2.jar
mv ab-frontend-0.2.jar /opt/vmware/gateway/lib

log_to_console "Replaced updated ab-frontend-0.2.jar, now looking for jndi in other places"

find / -type f \( -name "*.jar" -o -name *.war \) -exec sh -c "zipinfo -1 {} 2>/dev/null | grep 'JndiLookup.class' && echo {}" \; | grep .jar | while read -r line ; do
    jar_path=$line
    log_to_console "Updating $jar_path"
    zip -dq $jar_path org/apache/logging/log4j/core/lookup/JndiLookup.class
    chown gateway:users $jar_path
done


log_to_console "Restarting authbroker"
supervisorctl restart authbroker

log_to_console "Cleaning up."
cd /tmp
rm -rf /tmp/test

log_to_console "Verification: We are good if no jars are listed below"
find / -type f \( -name "*.jar" -o -name *.war \) -exec sh -c "zipinfo -1 {} 2>/dev/null | grep 'JndiLookup.class' && echo {}" \;

log_to_console "Verification: Grep authbroker-std-out.log for log4j errors, we are good if no exception is displayed below"
cat /opt/vmware/gateway/logs/authbroker-std-out.log | grep log4j

log_to_console "Done!"
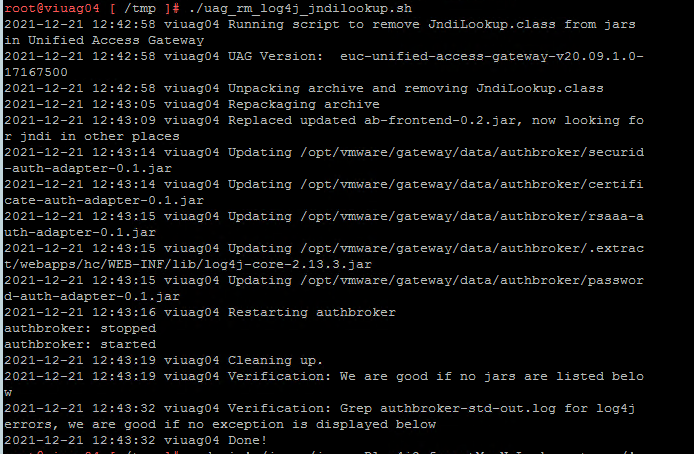
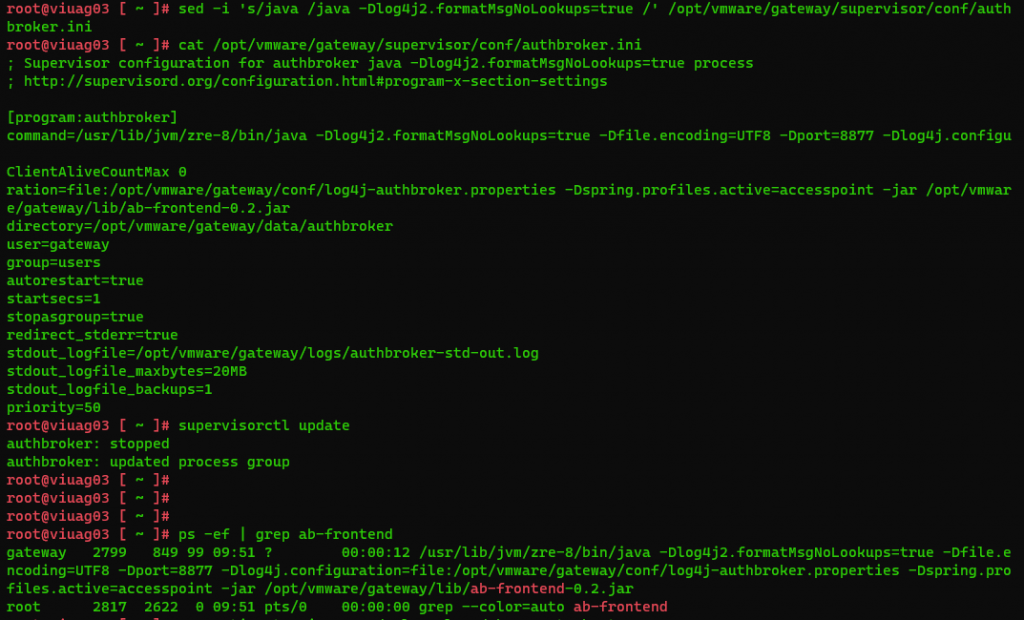
Well we need to connect to UAG and create a uag_rm_log4j_jndilookup.sh file
vi uag_rm_log4j_jndilookup.sh
copy into the file the code, and enable it for execution
chmod +x uag_rm_log4j_jndilookup.sh
running the script
./uag_rm_log4j_jndilookup.sh
now if the UAG version is between 2009 and 2111 it is also necessary to set the -Dlog4j2.formatMsgNoLookups=true option on the authbroker service with the following commands. Note the space between “s/java /java” and a space after “true /” in the command, these are important to ensure the command works correctly and doesn’t attempt to modify the wrong lines in the configuration file.
sed -i ‘s/java /java -Dlog4j2.formatMsgNoLookups=true /’ /opt/vmware/gateway/supervisor/conf/authbroker.ini
In the middle of December month, we found a “little exploit”……
Ok it is not a joke, for mitigate on UAG (Unified Access Gateway that is a Security Server exposed on the Internet for remote access at Horizon infrastructure) it is necessary (To apply the workaround for CVE-2021-44228 to Unified Access Gateway version 2009 through to 2111):
Connect to UAG server with SSH Session
Check if SSH is enabled on UAG server to accept root connection.
Connect from WEB console or VMware Remote Console to UAG virtual appliance and modify in /etc/ssh/sshd_config the following line (for modify use vi commands):
PermitRootLogin no
to
PermitRootLogin yes
Save the file
Restart SSHD service with this command:
service sshd restart
now you are able to create an SSH connection to UAG server, REMEMBER TO DISABLE SSH CONNECTION FOR ROOT USER WITH ROLLBACK THE SETTING INTO SSHD_CONFIG FILE
Append the fix -Dlog4j2.formatMsgNoLookups=true
Type this command:
sed -i ‘s/java /java -Dlog4j2.formatMsgNoLookups=true /’ /opt/vmware/gateway/supervisor/conf/authbroker.ini
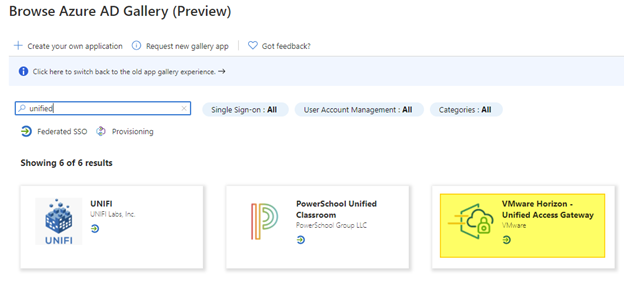
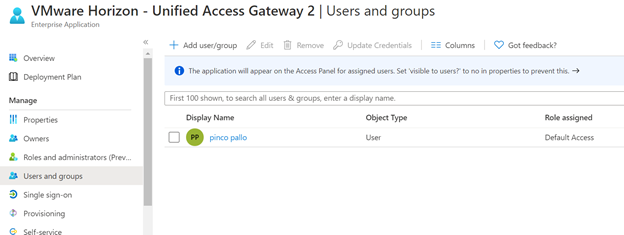
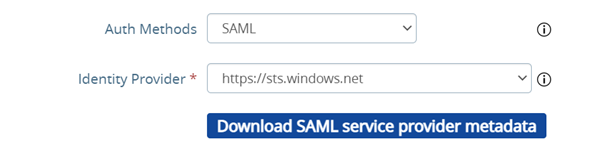
Assign Users or Groups permission to Enterprise application
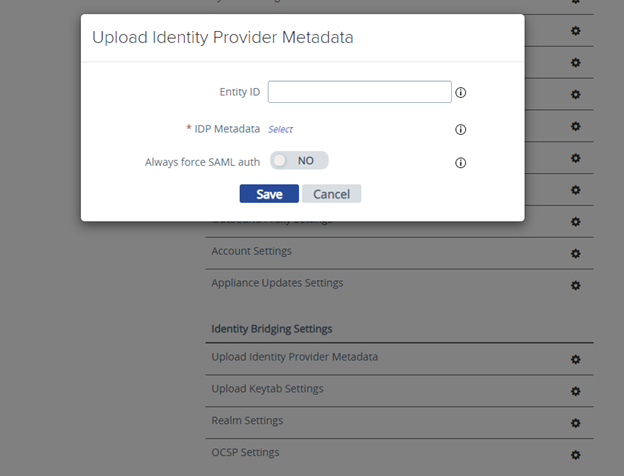
Import XML on UAG and configure it
Import Identity Provider Metadata, select the file XML downloaded from the Enterprise Application data
Select the identity provider
Select More Option
And select SAML e the correct Identity provider (with SAML+PASSTROUGHT the identity token will not passed to horizon Server and it will required a new autentication)


![Notepad
File Edit Format
[General]
netlnternet=
View
Help
ipø=192.168.247.54
diskMode=
ip1=192,168,246.54
defaultGateway=192.168.247.1
target=
ds=
routes
2.168.246.1,192.168.4.0/24 192.168.246.1,172.25.2.0/23 192.168.246.1,172.25.6
netmaskØ=255.255.255. or
netManagement etwor
net3ackendNetwork
• pØA110cationMode=STATICV4
name=
deploymentOption=twonic
forceNetmaskØ=255.255.255. or
forceNetmask1=255.255.255. or](https://vmvirtual.blog/wp-content/uploads/2022/05/notepad-file-edit-format-general-netlnternet.png)
![Notepad
File Edit Format View Help
l[Generate1]
net Internet—DPG - EXT•4Zjjj)
ipe=192.168.247.55
diskMode—thick
source—E : - unified - access - gateway- 22.03. 1955Ø 91_OVFI Ø. Ova
ip1=192,168,246.55
default-Gateway=192.168.247.1
target—vi : / /vcaØ7
ds=vsanDatastore
routes1=172.16.e.Ø/16 192.168.246.1,192.168.4.0/24 192.168.246.1,172.25.2.0/23 192.168.246.1,172
netmaskØ=255.255.255. and
netManagementUetwork
net8ackendNetwork=DPG - INT - C*IZ
ipeA110cationMode=STATICV4
name-VilJAGØ3-22Ø3
deploymentOption=twonic
forceNetmaskØ=255.255.255. and
forceNetmask1-255.255.255. and
ip1A110cationMode=STATICV4
net-maski=255,255,255. and
authenticationT imeout—3ØØØØe
fipsEnab1ed—fa1se
sys L ogType=UDP
uagName=viuage3
clockSkewT01erance=6Øe](https://vmvirtual.blog/wp-content/uploads/2022/05/notepad-file-edit-format-view-help-lgenerate1.png)