App Volumes: VHD in-Guest vs Standard Mode

Technical comparison and recommended use cases

.

.

INTRODUCTION

Omnissa App Volumes provides two distinct modes for delivering applications to Horizon users: the standard mode (VMDK/VMFS-based) and VHD in-guest mode, introduced to support non-persistent OS scenarios and advanced Instant Clone environments.

The choice between the two modes directly affects performance, scalability, and infrastructure requirements.

MODE COMPARISON

Standard Mode (VMDK)

• VMDK disk attach via vCenter API

• Mandatory needs a vSphere infrastructure as a prerequisite

• Limited support for multi-hypervisor environments

• Dependency on shared vSphere datastores

• Compatible with all Horizon desktop types

VHD in-Guest

• VHD mounted directly inside the guest OS

• Hypervisor-independent

• Compatible with Azure, AVD and physical environments

• VHD exposed via SMB share or UNC path

• Application packages and writable volumes are stored in a high-performance file share

• Compatible with all Horizon desktop types

TAKE NOTE! We can select the mode (VMDK or VHD) when installing the first App Volumes Manager. We can’t switch from VMDK to VHD mode, or from VHD to VMDK mode, after the first configuration.

VHD IN GUEST ARCHITECTURE

In this mode, the App Volumes Agent inside the guest mounts the VHD file from the configured UNC path using native Windows APIs. The AppStack content is then layered onto the filesystem via the App Volumes kernel filter driver, making applications available without extraction.

.

.

Note: In VHD in guest mode, the AppStack .vhd file must be reachable via UNC path from the guest. Network latency to the share directly affects mount times.

WHEN TO CHOOSE VHD IN-GUEST

1

Reducing vCenter dependency

Environments with restrictive policies on vCenter API access or multi-cloud architectures.

.

2

Physical desktops or RDSH

Scenarios where the workload runs on bare metal or RDS servers without vSphere hypervisor.

.

3

Azure Virtual Desktop (AVD) environments

Non-vSphere infrastructure; inability to attach VMDK via vCenter.

.

.

App Volumes: VHD in-Guest vs Standard Mode

Microsoft Azure Edge and Omnissa-Managed Enterprise App Registration

My Initial Experience

During the preparation activities for deploying a new Horizon Cloud on Azure environment, I was reading the official documentation at

https://docs.omnissa.com/bundle/UsingManagingHorizonCloud/page/DeployingaMicrosoftAzureEdge.html

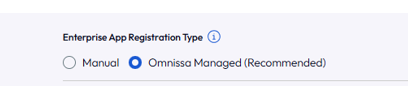
and discovered the presence of a new and recommended deployment method: the “Omnissa-managed” mode.

I immediately wanted to test it, but in my Omnissa Connect console, this option wasn’t yet available.

.

I contacted support and they informed me that the feature would be released soon, but if I wanted to use it immediately, they could enable it through a Feature Flag. Obviously, I couldn’t say no to that opportunity! Once they provided my ORG ID and enabled the flag, the new option appeared while I was creating the EDGE in the Primary Provider section.

This is my journey with the Omnissa-managed method, and I’d like to share what I learned about this game-changing approach.

.

.

Introduction

Horizon Cloud on Microsoft Azure is evolving, and Omnissa has introduced a significant security enhancement that every administrator should know about. The new Omnissa-managed Enterprise App registration method represents a paradigm shift in how organizations handle service principal credentials. If you’re planning a Horizon Cloud deployment on Azure, understanding the difference between this new approach and the traditional manual method could be crucial for your security posture.

The Security Challenge

Historically, deploying Horizon Edge in Horizon Cloud on Azure required organizations to create and manage their own Azure Enterprise Applications. This approach meant handling sensitive service principal secrets—credentials that need to be carefully managed, rotated, and protected. The more systems that have access to these secrets, the higher the security risk.

The traditional single-tenant deployment method (Manual Enterprise App registration) placed the responsibility of secret management squarely on the customer organization. While this approach continues to be supported, it introduces additional operational overhead and potential security vulnerabilities.

Enter Omnissa-Managed

Omnissa has introduced a new Enterprise App registration method that fundamentally changes who manages the service principal secrets.

Key Benefits

1. Enhanced Security

Organizations no longer need to provide their sensitive secrets key information to Omnissa or manage it themselves in the context of Horizon Cloud deployment. The credentials remain under Omnissa’s direct management, reducing the attack surface and potential points of compromise.

2. Simplified Administration

Say goodbye to manual Enterprise Application creation and complex permission configurations. With Omnissa-managed registration, the setup process is streamlined. Omnissa handles the heavy lifting—you focus on deployment.

3. Reduced Operational Overhead

No more worrying about secret rotation schedules, credential lifecycle management, or complex authentication flows. Omnissa manages these operational concerns, freeing your team for other critical tasks.

4. Enterprise-Grade Security

By centralizing secret management with Omnissa, organizations benefit from enterprise-grade security practices, regular audits, and dedicated security expertise that Omnissa brings to the table.

Manual Registration: Still Available

For organizations with specific requirements or legacy configurations, the traditional single-tenancy method remains available. This manual Enterprise App registration approach allows organizations to maintain full control over their authentication setup if needed. However, unless you have specific compliance or architectural reasons, the manual approach introduces unnecessary complexity.

The Recommendation

Omnissa-managed is the recommended method for all new Horizon Cloud deployments on Azure. Omnissa has taken the guesswork out of enterprise app management and elevated the security baseline for everyone using Horizon Cloud.

If you’re currently on the manual registration path, consider planning a migration to the Omnissa-managed approach. The transition offers immediate security benefits with reduced administrative overhead.

Getting Started

Ready to leverage Omnissa-managed registration for your deployment? The process is straightforward:

1.Initiate your Horizon Edge deployment in Omnissa Connect
2.Select the Omnissa-managed option during the Primary Provider setup

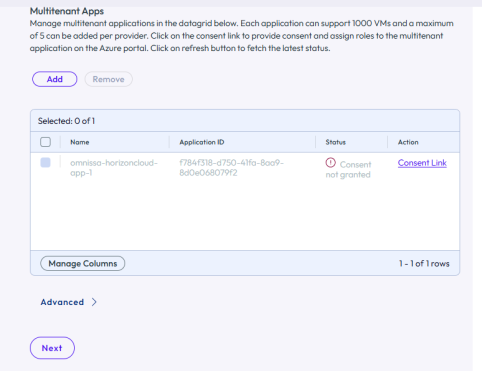
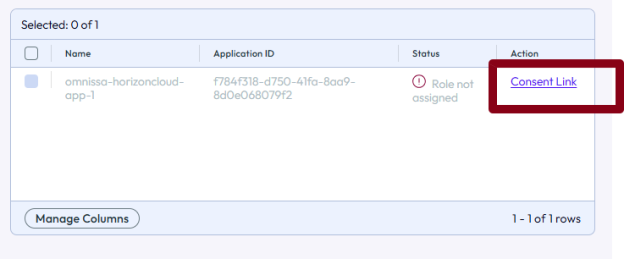
3.Link your Azure subscription using the consent flow (click Consent Link)

4.Authorize Omnissa to create the Enterprise Application

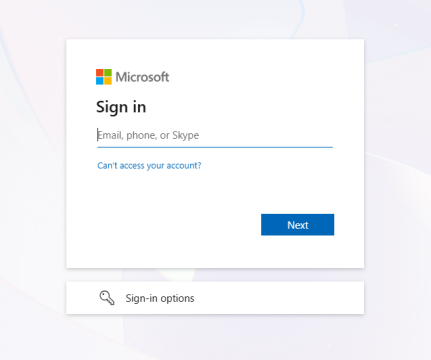
Insert Azure Subscription credentials (in my case Global Admin User)

Now we can see the new enterprise application with Omnissa Logo.

.

.

.

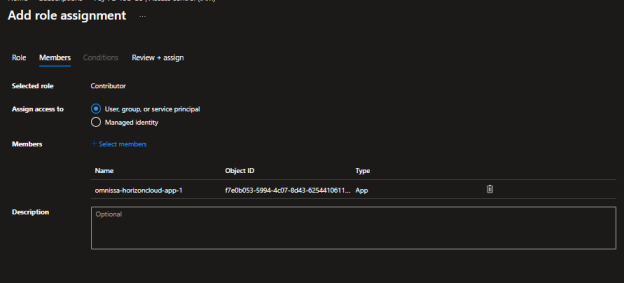
5.Assign necessary roles (Contributor or appropriate custom roles) to the subscription

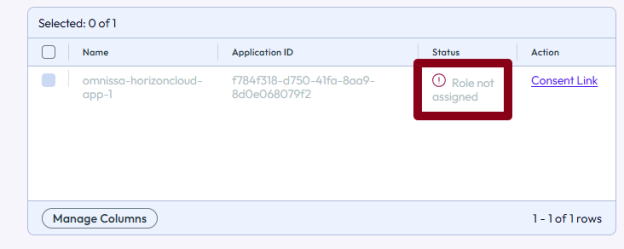
First, verify the role assignment status in Omnissa Connect:

.

.

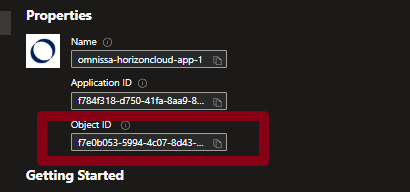
Get the Object ID from the Omnissa Enterprise App:

.

.

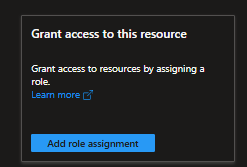
Go to your subscription and select IAM (Identity & Access Management):

.

Select add role assignment

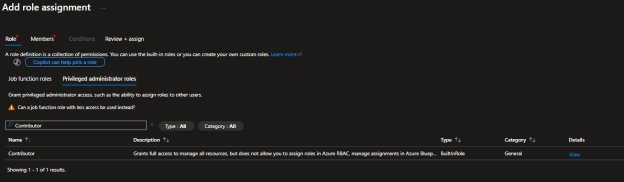
Search Contributor in Previleged admnistrator Role

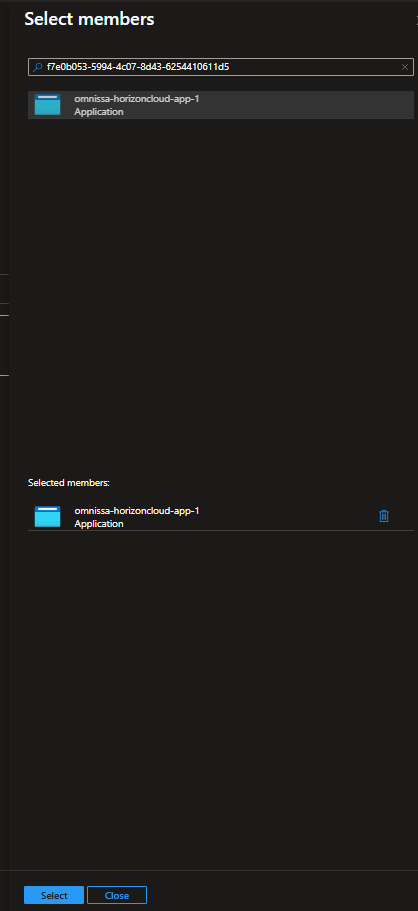
Select Member and ad the Enterprise Application Object ID or name

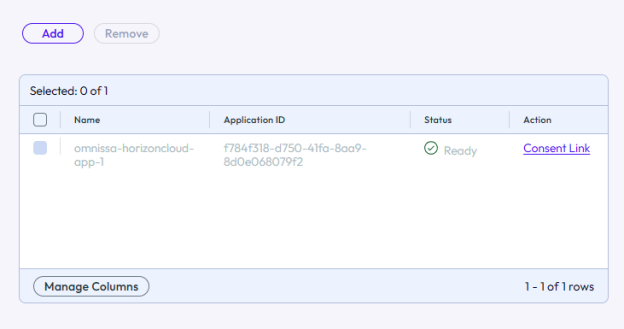
6.Refresh and verify the role assignment in Omnissa Connect

Return to the Omnissa Connect wizard. If the role is still showing as “Role not Assigned”

.

Go back to the previous step and return to refresh (Omnissa Engineer should add a refresh button)

.

.

.

At this point, you’re ready to choose whether your EDGE will be an AKS (Azure Kubernetes Service) or a Virtual Machine.

The Omnissa-managed Enterprise Application has been successfully created and configured with the naming convention omnissa-horizoncloud-app-1, marked with Omnissa’s branding for easy identification.

.

.

Conclusion

The shift to Omnissa-managed Enterprise App registration represents a meaningful step forward in cloud security practices. By removing the burden of service principal secret management from customer organizations, Omnissa enables secure, simplified, and scalable Horizon Cloud deployments on Microsoft Azure.

Whether you’re planning a new deployment or evaluating your current infrastructure, the Omnissa-managed method deserves your attention. It’s security and simplicity working in harmony—exactly what modern cloud deployments should be.

Microsoft Azure Edge and Omnissa-Managed Enterprise App Registration

Streamline Your Enterprise with Omnissa Connect and Microsoft Entra ID

A guide to enterprise federation, single sign-on, and modern identity management

What is Omnissa Connect?

Omnissa Connect is a centralized platform service that provides IT administrators and users with a single sign-on (SSO) gateway to access and manage all Omnissa services, such as Workspace ONE and Horizon. It streamlines workflows by unifying access, identity management, and service onboarding into one intuitive interface.

Key features of Omnissa Connect include:

•Unified Identity: Single sign-on capabilities and seamless integration with third-party identity providers like Microsoft Entra ID and Okta through the Omnissa Identity Service
•Centralized Administration: IT owners can securely assign roles, set multi-factor authentication (MFA) policies, and manage OAuth applications or API tokens across the entire Omnissa ecosystem
•Subscription Management: Visibility into all Omnissa service subscriptions from a single location

What is Microsoft Entra ID?

Microsoft Entra ID (formerly Azure Active Directory) is Microsoft’s cloud-based identity and access management service. It’s the foundation that millions of organizations use to manage employee identities, secure access to applications, and protect their digital assets.

Entra ID is likely already at the heart of your organization if you use:

•Microsoft 365 (Office 365, Teams, SharePoint)
•Azure cloud services
•Dynamics 365 or other enterprise applications
•Single sign-on (SSO) solutions for SaaS applications

Why Integrate Omnissa Connect with Microsoft Entra ID?

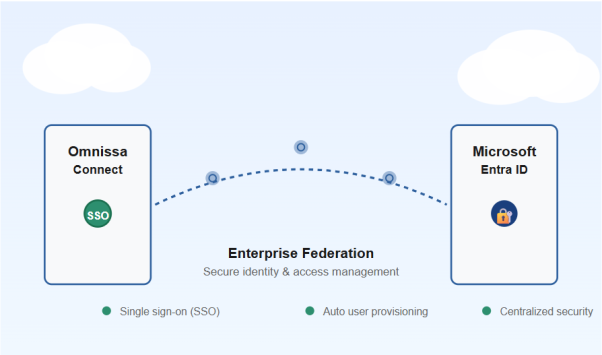
Connecting Omnissa Connect with Microsoft Entra ID through enterprise federation creates a powerful identity ecosystem. Here’s what you gain:

Single Sign-On (SSO)

Your users log in once with their corporate credentials and automatically gain access to Omnissa Connect—no separate usernames or passwords to remember.

Automatic User Provisioning

When you add or remove users in Entra ID, they’re automatically synced to Omnissa Connect. No manual account creation, no forgotten deprovisioning, no stale user accounts cluttering your systems.

Centralized Security

Manage all user access, permissions, and security policies from one central location. Apply multi-factor authentication (MFA), enforce password policies, and monitor access across your entire organization from Entra ID.

Reduced IT Overhead

Your IT team spends less time managing separate identity systems, resetting passwords, and troubleshooting access issues. Everything is automated and synchronized.

Improved Compliance

Maintain detailed audit logs of who accessed what and when. Meet regulatory requirements for access control and identity management with confidence.

A Real-World Example

Before Federation:

Sarah joins your company. The IT team manually creates accounts in Omnissa Connect, Microsoft 365, and four other systems. Sarah has to memorize 5 different passwords. When Sarah leaves three years later, the team forgets to deactivate her Omnissa Connect account, leaving a security gap.

After Federation:

Sarah’s first day: HR adds her to Entra ID. Omnissa Connect automatically creates her account and grants the right permissions. She logs in with her corporate email and password—the same one she uses for everything else. On her last day: HR removes her from Entra ID. Within seconds, Omnissa Connect and all other connected systems automatically deactivate her access. No manual steps. No forgotten accounts. No security gaps.

Is This Right for Your Organization?

Enterprise federation between Omnissa Connect and Entra ID is ideal if your organization:

•Already uses Microsoft Entra ID or Azure Active Directory
•Wants to simplify identity management and reduce IT burden
•Has multiple employees and wants to automate user provisioning
•Needs strong security controls and audit capabilities
•Is undergoing digital transformation and standardizing on cloud-based identity solutions

What’s Involved?

Configuring enterprise federation requires several steps—from verifying your domain to setting up the connection between systems to testing everything works smoothly. The process typically involves:

•Domain verification to prove your organization owns the domain
•Creating and configuring an Enterprise Application in Microsoft Entra ID
•Setting up authentication protocols and user attribute mapping
•Testing the setup before activating federation for all users
•Notifying users and helping them transition to the new authentication method

The Complete Step-by-Step Guide

While this overview covers the benefits and concepts, implementing enterprise federation involves detailed technical configuration. The complete guide is a comprehensive document with in-depth instructions, detailed screenshots, and step-by-step walkthroughs for both Omnissa Connect and Microsoft Entra ID configuration. Due to its length and technical depth, I share it directly with clients and organizations ready to implement the solution.

The complete guide includes:

•Detailed screenshots and instructions for each configuration step
•Exact fields to fill in on both Omnissa Connect and Entra ID

.

Ready to streamline your organization’s identity management?

If your organization is ready to implement enterprise federation between Omnissa Connect and Microsoft Entra ID, I’m here to help. Whether you need guidance on setup, troubleshooting during configuration, or best practices for managing the transition, I can provide a complete, step-by-step implementation guide tailored to your needs.

Get in touch to request the full technical guide and start your journey toward simplified, centralized identity management.

.

📧 Contact me for the complete implementation guide

Let’s simplify your organization’s identity and access management together.

Streamline Your Enterprise with Omnissa Connect and Microsoft Entra ID

Horizon 2603 is here!

A new version of Omnissa Horizon has just been released, and 2603 is not just another update — it’s an ESB (Extended Service Branch) release and marks an important transition point for many environments.

🔗 Release Notes:
https://docs.omnissa.com/bundle/horizon8-rnV2603/page/Horizon8-ReleaseNotes.html


First things first: end of support for vSphere 7

Let’s start with something critical:

Horizon 2603 ESB no longer supports vSphere 7.x

  • Horizon 2512 was the last release supporting vSphere 7
  • Starting from 2603, vSphere 8 is the required platform

This means one thing:
If you’re planning to move to this ESB, your vSphere upgrade is no longer optional — it’s mandatory

This is a key architectural checkpoint, especially for environments that have been delaying the jump to vSphere 8. (vSphere 7 is end of support)


Event Database + Integrated Authentication (finally!)

Now, let’s talk about one of my favorite new features.

Horizon 2603 introduces the ability to configure the Event Database on Microsoft SQL Server using Active Directory identities (Domain User with Integrated Authentication).

No more SQL authentication.

Why this matters:

  • Eliminates stored SQL credentials
  • Aligns with enterprise security best practices
  • Simplifies credential lifecycle management
  • Improves compliance and auditability

From a design perspective, this is a very welcome step toward a more secure-by-default architecture.

 Final thoughts

This release is not just about new features — it’s about setting a new baseline:

  • ✔️ ESB = long-term stability
  • ✔️ vSphere 8 as the standard
  • ✔️ Stronger security integration

If you were waiting for the “right moment” to modernize your Horizon platform… this is probably it.


 In the next posts, I’ll dive deeper into the other new features and changes introduced in Horizon 2603 — stay tuned 👀


Need help testing or upgrading?

If you’re planning to:

  • Test Horizon 2603
  • Upgrade your existing environment
  • Move from vSphere 7 to vSphere 8 or 9

Feel free to reach out — happy to help with assessments, design, and upgrade strategies.


Have you already started testing Horizon 2603?
Or are you still planning your vSphere 8 migration?

Let’s discuss 

Horizon 2603 is here!

Migrating Horizon from VMware to Omnissa: Why a Parallel Connection Server Deployment Is Often the Safest Approach

The transition from VMware Horizon to Omnissa Horizon introduced more than just a branding change. Starting with Horizon 2412 and continuing with later releases such as 2503 and 2506, several architectural and configuration elements have been modified.

These changes include licensing format updates, ADAM/AD LDS database modifications, registry key renaming, folder restructuring, and updated group policy templates.

While the official upgrade path works, in many environments a parallel deployment strategy can significantly reduce risk and allow end users to validate the new platform before switching production workloads.

This article outlines the key changes introduced by Omnissa and explains why building a new Horizon pod alongside the existing one can be a practical migration strategy.

.

Key Changes Introduced with Omnissa Horizon

1. New Licensing Model

Beginning with Horizon 2412, Omnissa introduced a new licensing mechanism and licensing portal.

During the transition phase, both VMware and Omnissa license keys are temporarily accepted, but this compatibility window is limited. Later releases, such as 2503.1 ESB and 250,6 rely entirely on the Omnissa License Module (OLM).

If a valid Omnissa license key is not installed after upgrading, the Horizon Console may enter a restricted or degraded mode.

Relevant KB and documentation references include:

• KB 6000212 – Horizon licensing transition guidance
• KB 6000745 – Omnissa rebranding changes and affected components

.

2. ADAM / AD LDS Database Changes

One of the most important backend changes affects the Horizon LDAP (ADAM/AD LDS) database.

Historically, Horizon used application partitions referencing the VMware namespace.
With the Omnissa rebranding, new environments now use the
horizon namespace.

Example:

Old partition naming:

dc=vdi,dc=vmware,dc=int

dc=vdiglobal,dc=vmware,dc=int

New partition naming:

dc=vdi,dc=horizon,dc=internal

dc=vdiglobal,dc=horizon,dc=internal

Omnissa provides a migration script to update the partition names after upgrading all pods to newer versions, such as 2503.

Relevant documentation:

• KB 6000797 – ADLDS partition migration for Horizon

.

3. Registry Key and File System Changes

The rebranding also impacted multiple components of the Horizon installation:

Component

Previous Location

New Location

Installation folder

C:\Program Files\VMware\VMware View

C:\Program Files\Omnissa\Horizon

Logs

C:\ProgramData\VMware\VDM\logs

C:\ProgramData\Omnissa\Horizon\logs

Registry keys

HKLM\Software\VMware, Inc.\VMware VDM

HKLM\Software\Omnissa\Horizon

ADAM DB instance

VMwareVDMDS

OmnissaHzeDS

Because registry paths changed, Group Policy templates (ADMX) were also updated and must be replaced during upgrades.

Failure to update the ADMX files can lead to policies silently no longer applying.

.

Why a Parallel Horizon Deployment Can Be a Better Migration Strategy

Although a direct upgrade of the Connection Servers is supported, the number of changes introduced with the Omnissa transition makes a greenfield-style deployment attractive.

Instead of upgrading the existing servers, consider deploying new Connection Servers alongside the current environment.

Advantages include:

1. Opportunity to Upgrade Windows Server

New Connection Servers allow administrators to deploy a modern operating system, such as:

• Windows Server 2022 or later (Windows 2025 is a like option)

This avoids performing multiple upgrades on the same system.

.

2. User Acceptance Testing

With a parallel deployment, you can:

• publish test desktop pools
• provide pilot users access
• validate authentication flows
• verify DEM and App Volumes integration

Users can test the environment before the production switch.

.

3. Reduced Upgrade Risk

Upgrading in place modifies:

• ADAM database
• registry keys
• services
• folder paths

A clean installation avoids potential issues caused by legacy configurations.

.

Example Parallel Migration Architecture

A typical migration architecture might look like this:

Existing Environment

• Horizon Connection Servers
• Unified Access Gateways
• Instant Clone pools
• DEM and App Volumes

New Environment

• New Omnissa Connection Servers
• New Omnissa Unified Access Gateways
• Same vCenter Server
• Same Active Directory
• Same desktop images
• Same DEM*
• Same App Volumes*

*After migration, it will be upgraded.

This allows a staged migration.

Key points:

• vCenter Server can remain unchanged
• Desktop pools can be recreated or migrated
• User profiles continue to work through DEM

.

Migrating Instant Clone Desktop Pools

In environments heavily using Instant Clones, rebuilding pools manually can be time-consuming.

Automation scripts can accelerate the process by exporting and recreating pools through the Horizon APIs.

In my environment, I use a PowerShell-based migration script that reads the configuration of Instant Clone pools and recreates them on the new pod.

This allows administrators to migrate:

• pool configuration
• entitlements
• naming patterns
• provisioning settings

with minimal manual effort.

This is the link to the script

OMNISSA/OMNISSA – Export and Import Desktop and Entitlements v7.ps1 at main · fabio1975/OMNISSA

.

Reusing DEM and App Volumes

Existing deployments of

• Omnissa Dynamic Environment Manager
• Omnissa App Volumes

can usually remain unchanged during migration.

However, compatibility must always be validated using the official interoperability matrix.

Relevant documentation:

• Horizon interoperability matrix
• App Volumes compatibility with Horizon
• DEM compatibility with Horizon

Official documentation:

These matrices confirm supported combinations between:

• Horizon versions
• App Volumes
• Dynamic Environment Manager
• vCenter Server
• ESXi

.

Suggested Migration Workflow

A practical migration process could look like this:

    1. Deploy new Connection Servers with Omnissa Horizon
    2. Deploy new Unified Access Gateways
    3. Connect the new pod to the existing vCenter
    4. Validate App Volumes and DEM compatibility
    5. Recreate or migrate Instant Clone pools
    6. Perform pilot user testing
    7. Switch production access
    8. Decommission legacy Connection Servers
    9. Create the news GPO for Horizon (we need use the new GPO Templates)
    10. Upgrade the Horizon Agent, DEM and App Volumes

    .

    Final Thoughts

    The transition from VMware Horizon to Omnissa Horizon introduces several structural changes that go beyond simple branding.

    Changes in licensing, LDAP partitions, registry paths, and policy templates can complicate traditional upgrade workflows.

    For many environments, especially large VDI deployments, deploying new Connection Servers in parallel offers a safer and more flexible migration strategy.

    It provides an opportunity to modernize the infrastructure, validate compatibility with components such as App Volumes and DEM, and allow users to test the platform before the final cutover.

    .

    .

    Migrating Horizon from VMware to Omnissa: Why a Parallel Connection Server Deployment Is Often the Safest Approach

    Horizon – Agent Update – Unable to see the last version

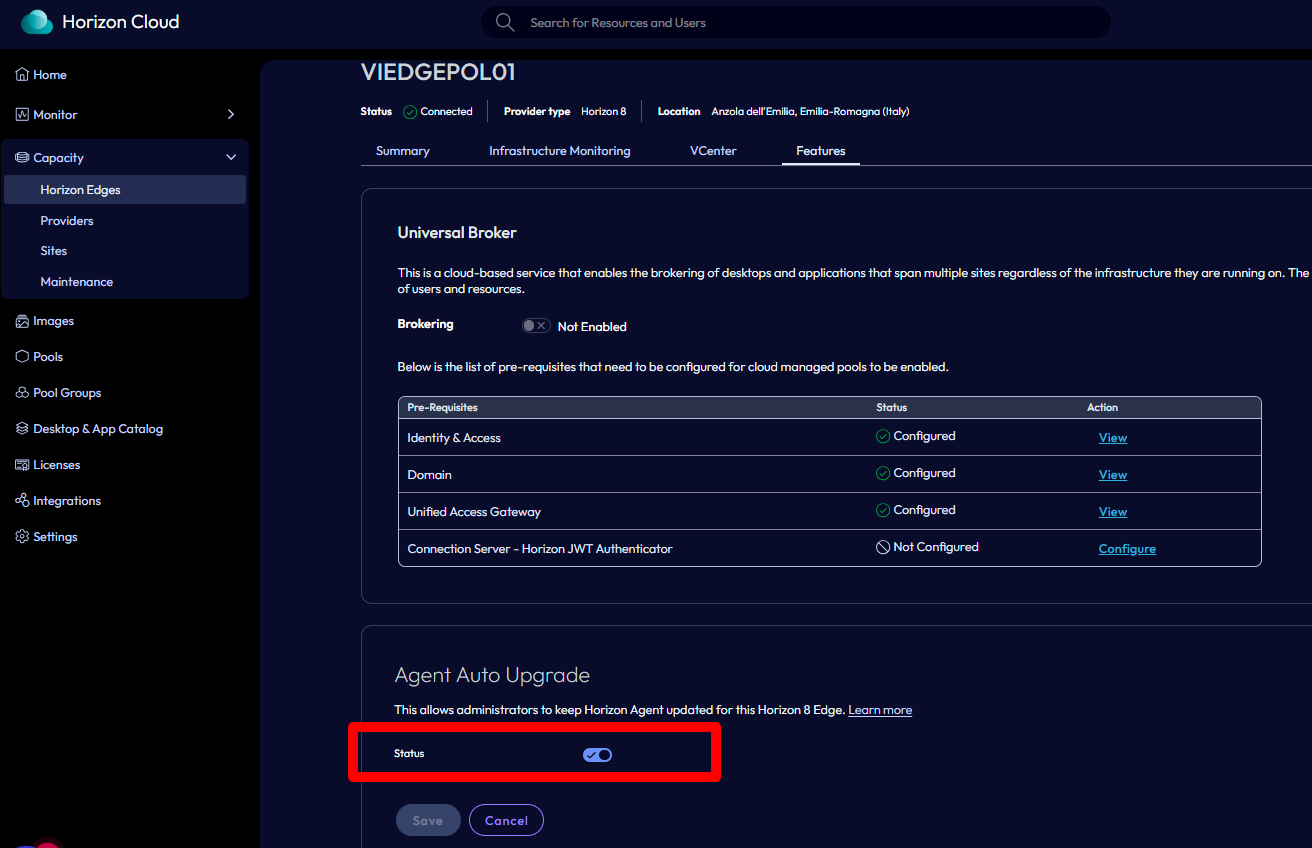
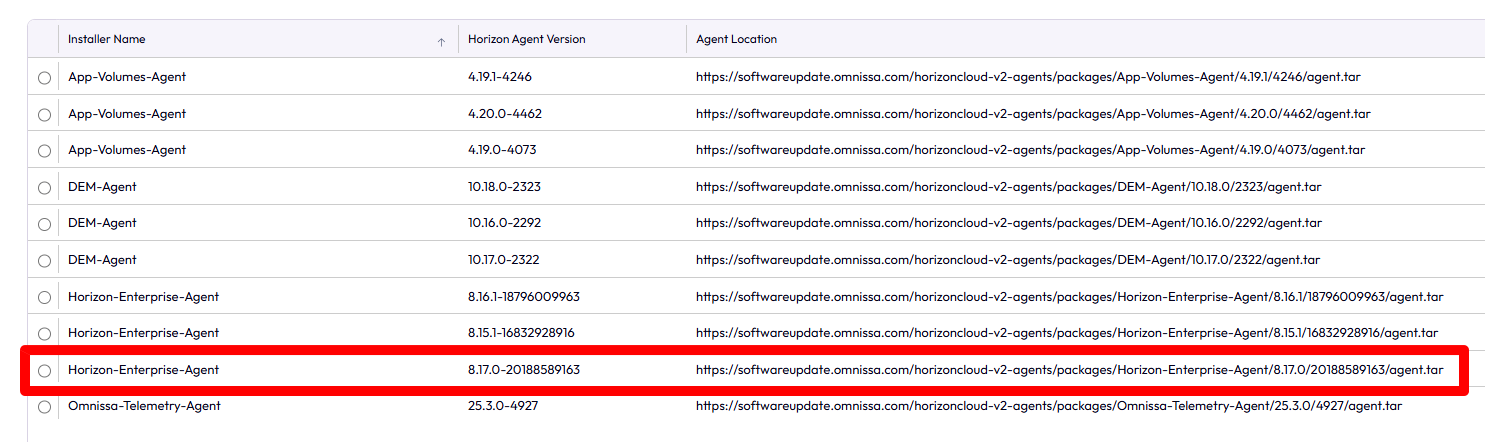
    After updating Horizon to version 2512, I noticed that the latest versions (8.17) weren’t being displayed in the Agent Updates section.


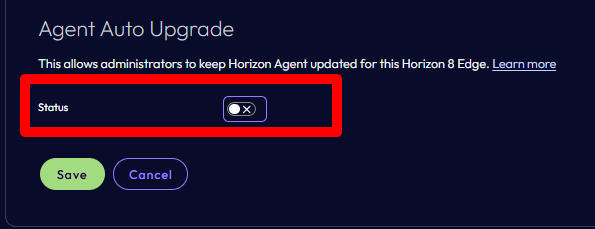
    To see the latest versions, I had to disable the Agent Update service on the Omnissa Connect side. Simply go to the Capacity section, select the relevant edge gateway,

    and disable the specific option in the Features section.


    Re-enable it after a few minutes.

    After a few minutes, the latest versions also appeared in the Horizon console.

    Horizon – Agent Update – Unable to see the last version

    Migrate VMware Horizon Client settings to Omnissa Horizon Client with DEM

    With the rebranding of VMware Horizon Client to Omnissa Horizon Client, one of the often overlooked aspects is the migration of user settings.

    In the context in which I had to operate, the main need was to replicate the Horizon Client settings (from VMware to Omnissa version) in a VDI context. The basic settings to be copied were those of “Drive & Folder Sharing”

    In enterprise environments – especially non-persistent VDI managed with Omnissa Dynamic Environment Manager (DEM) – it is critical to ensure that:

    • The user’s settings are retained

    • The migration takes place only once

    • There is no impact on subsequent logons

    In this article, we look at how to automatically migrate Horizon client settings:

    • by:

    %AppData%\VMware\VMware Horizon View Client

    •at:

    %AppData%\Omnissa\Omnissa Horizon Client

    using a PowerShell script that is properly integrated into Omnissa DEM.

    Prerequisites

    Configuring DEM to export customizations of:

    • VMware Horizon Client
    • Omnissa Horizon Client
    • Audit registry key

    Precisely:

    .

    .

    Approach

    The solution is based on three key concepts:

    1.PowerShell script in user context

    2.Logon Task in Flex Configuration (DEM)

    3.Condition based on HKCU registry key to ensure one-time execution

    The registry key is saved in the user profile and managed by DEM, making the solution compatible with:

    • Floating VDI

    • Non-persistent desktops

    • DEM profiles

    .

    PowerShell Scripts

    The following script:

    • Check if the migration has already taken place

    • Copy settings, if any

    •writes a registry key to block subsequent executions

    # ==============================
    # Omnissa Horizon Client Migration
    # ==============================
    
    $SourcePath = Join-Path $env:APPDATA "VMware\VMware Horizon View Client"
    $DestinationPath = Join-Path $env:APPDATA "Omnissa\Omnissa Horizon Client"
    
    # Registry key (per-utente)
    $RegPath = "HKCU:\Software\Omnissa\Migrations"
    $RegName = "HorizonClientSettingsMigrated"
    
    # ---- Controllo se già eseguito ----
    if (Test-Path $RegPath) {
        $Migrated = Get-ItemProperty -Path $RegPath -Name $RegName -ErrorAction SilentlyContinue
        if ($Migrated.$RegName -eq 1) {
            exit 0
        }
    }
    
    # ---- Verifica sorgente ----
    if (-not (Test-Path $SourcePath)) {
        # Scriviamo comunque la chiave per evitare retry inutili
        New-Item -Path $RegPath -Force | Out-Null
        New-ItemProperty -Path $RegPath -Name $RegName -Value 1 -PropertyType DWORD -Force | Out-Null
        exit 0
    }
    
    # ---- Creazione destinazione ----
    New-Item -Path $DestinationPath -ItemType Directory -Force | Out-Null
    
    # ---- Copia contenuto ----
    Copy-Item -Path "$SourcePath\*" `
              -Destination $DestinationPath `
              -Recurse `
              -Force `
              -ErrorAction SilentlyContinue
    
    # ---- Scrittura chiave di completamento ----
    New-Item -Path $RegPath -Force | Out-Null
    New-ItemProperty -Path $RegPath -Name $RegName -Value 1 -PropertyType DWORD -Force | Out-Null
    
    exit 0
    

    We place the script in the DEM Config share by creating a folder calling it script. In my case

    C:\DEMConfig\Script

    .

    Configuration in Omnissa DEM

    The script must be configured as a Logon Task so from the DEM console:

    • User Environment→ Logon Tasks

    • Name:

    Migrate Horizon Client Settings (VMware → Omnissa)

    • Command:

    powershell.exe -ExecutionPolicy Bypass -NoProfile -File \\fs02.poultry.lan\DEMConfig\Scripts\Migrate-HorizonClientSettings.ps1

    Condition (fundamental)

    • Hive: HKEY_CURRENT_USER

    • Key: Software\Omnissa\Migrations

    • Value: HorizonClientSettingsMigrated

    is not equal to 1

    This is the video where I try all the steps

    .

    Migrate VMware Horizon Client settings to Omnissa Horizon Client with DEM

    Migrazione delle impostazioni di Horizon Client da VMware a Omnissa con Omnissa DEM

    Con il rebranding di VMware Horizon Client in Omnissa Horizon Client, uno degli aspetti spesso sottovalutati è la migrazione delle impostazioni utente.

    Nel contesto in cui ho dovuto operare la necessità principale era replicare le impostazioni dell’Horizon Client (dalla versione VMware a quella Omnissa) in un contesto di VDI. Le impostazioni fondamentale da copiare erano quelle del “Drive & Folder Sharing”

    In ambienti enterprise – specialmente VDI non persistenti gestiti con Omnissa Dynamic Environment Manager (DEM) – è fondamentale garantire che:

    • le impostazioni dell’utente vengano mantenute
    • la migrazione avvenga una sola volta
    • non ci siano impatti sui logon successivi

    In questo articolo vediamo come migrare automaticamente le impostazioni del client Horizon:

    • da:

    %AppData%\VMware\VMware Horizon View Client

    • a:

    %AppData%\Omnissa\Omnissa Horizon Client

    utilizzando uno script PowerShell integrato correttamente in Omnissa DEM.


    Prerequisiti

    Configurazione di DEM per esportare le personalizzazioni di:

    • VMware Horizon Client
    • Omnissa Horizon Client
    • Chiave di registro di controllo

    Precisamente:

    .

    .

    Approccio

    La soluzione si basa su tre concetti chiave:

    1.Script PowerShell in contesto utente
    2.Logon Task in Flex Configuration (DEM)
    3.Condition basata su chiave di registro HKCU per garantire l’esecuzione una sola volta

    La chiave di registro viene salvata nel profilo utente e gestita da DEM, rendendo la soluzione compatibile con:

    • VDI floating
    • desktop non persistenti
    • profili DEM

    .

    Script PowerShell

    Lo script seguente:

    • verifica se la migrazione è già avvenuta
    • copia le impostazioni se presenti
    •scrive una chiave di registro per bloccare le esecuzioni successive
    # ==============================
    # Omnissa Horizon Client Migration
    # ==============================
    
    $SourcePath = Join-Path $env:APPDATA "VMware\VMware Horizon View Client"
    $DestinationPath = Join-Path $env:APPDATA "Omnissa\Omnissa Horizon Client"
    
    # Registry key (per-utente)
    $RegPath = "HKCU:\Software\Omnissa\Migrations"
    $RegName = "HorizonClientSettingsMigrated"
    
    # ---- Controllo se già eseguito ----
    if (Test-Path $RegPath) {
        $Migrated = Get-ItemProperty -Path $RegPath -Name $RegName -ErrorAction SilentlyContinue
        if ($Migrated.$RegName -eq 1) {
            exit 0
        }
    }
    
    # ---- Verifica sorgente ----
    if (-not (Test-Path $SourcePath)) {
        # Scriviamo comunque la chiave per evitare retry inutili
        New-Item -Path $RegPath -Force | Out-Null
        New-ItemProperty -Path $RegPath -Name $RegName -Value 1 -PropertyType DWORD -Force | Out-Null
        exit 0
    }
    
    # ---- Creazione destinazione ----
    New-Item -Path $DestinationPath -ItemType Directory -Force | Out-Null
    
    # ---- Copia contenuto ----
    Copy-Item -Path "$SourcePath\*" `
              -Destination $DestinationPath `
              -Recurse `
              -Force `
              -ErrorAction SilentlyContinue
    
    # ---- Scrittura chiave di completamento ----
    New-Item -Path $RegPath -Force | Out-Null
    New-ItemProperty -Path $RegPath -Name $RegName -Value 1 -PropertyType DWORD -Force | Out-Null
    
    exit 0
    

    Lo script lo posizioniamo nella share Config di DEM creando una cartella chiamandola script. Nel mio caso

    C:\DEMConfig\Script 

    .

    Configurazione in Omnissa DEM

    Lo script deve essere configurato come Logon Task per cui dalla console di DEM:

    • User Environment→ Logon Tasks
    • Name:

    Migrate Horizon Client Settings (VMware → Omnissa)

    • Command:

    powershell.exe  -ExecutionPolicy Bypass -NoProfile -File \\fs02.pollaio.lan\DEMConfig\Scripts\Migrate-HorizonClientSettings.ps1

    Condition (fondamentale)

    • Hive: HKEY_CURRENT_USER
    • Key: Software\Omnissa\Migrations
    • Value: HorizonClientSettingsMigrated 
    non è uguale a 1 


    Qui il video dove replico tutti i passaggi e provo il tutto:

    .

    Migrazione delle impostazioni di Horizon Client da VMware a Omnissa con Omnissa DEM

    Replacing the Self-Signed Certificate on Omnissa Connection Server with a Microsoft CA-Issued Certificate (or replacing the certificate to end to validation date)

    .

    Let’s be honest — that shiny self-signed certificate your Omnissa Connection Server came with is fine… until your browser or Horizon client starts screaming “Untrusted!” at every login. 😅

    A screenshot of a computer error AI-generated content may be incorrect.


    It’s time to fix that properly — by replacing it with a trusted certificate issued by your internal Microsoft CA.

    In this guide, we’ll walk through the process step-by-step, ending up with a PFX certificate you can deploy to all your Connection Servers.

    .

    Why One Certificate for All Connection Servers?

    Because simplicity is beautiful.
    Maintaining a single certificate across all your Connection Servers reduces management overhead and avoids those awkward “name mismatch” warnings.

    In the certificate, we’ll include all relevant hostnames as Subject Alternative Names (SANs):

    • The hostname and FQDN of each Connection Server
    • The VIP name (if you’re using a load balancer for internal access)

    Example SAN list (2 Connection Servers and 1 VIP):

    connection01.company.local

    connection02.company.local

    horizon-vip.company.local

    connection01

    connection02

    horizon-vip

    .

    .

    Step 1: Require the certificate as a PFX File

    1. The certificate will be exported into a PFX file with:
    ◦ Exporting the private key
    ◦ Protect it with a strong password
    ◦ Save it somewhere safe (seriously, treat it like a password)

    .

    Step 2: Deploy the Certificate on All Connection Servers

    Now that you have your shiny, trusted .pfx file, it’s time to put it to work.

    Repeat the following steps on each Connection Server:

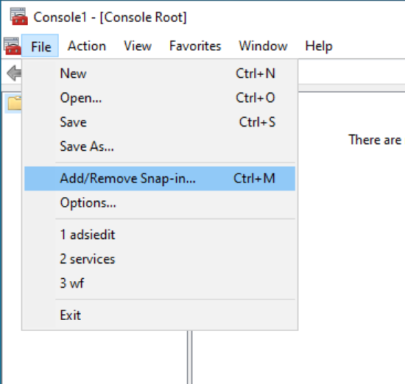
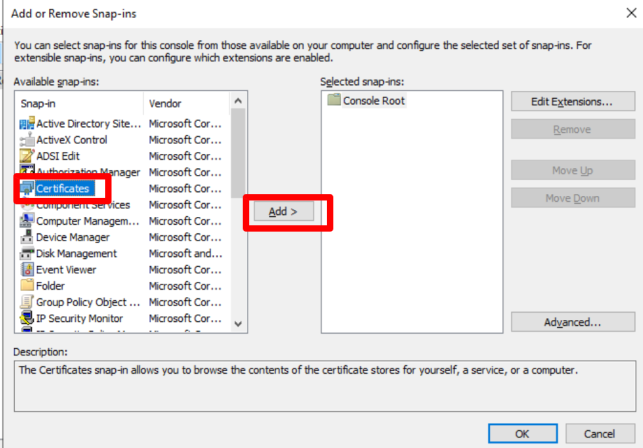
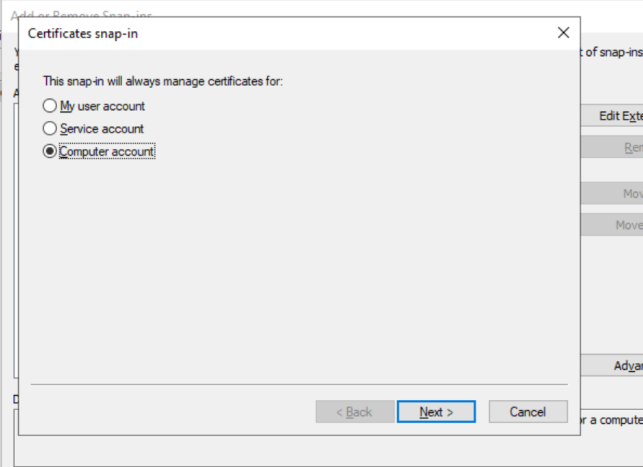
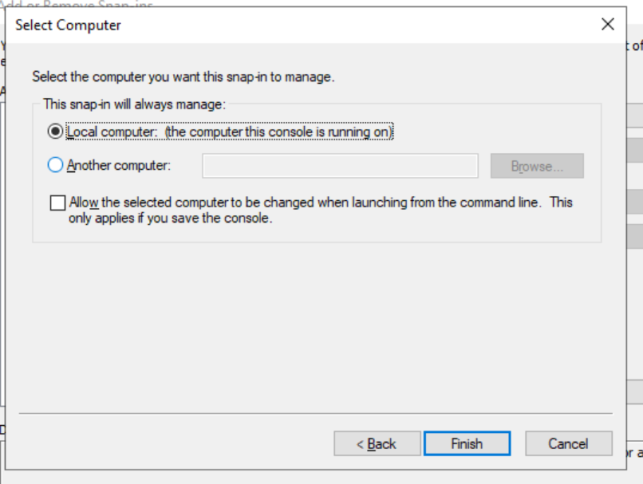
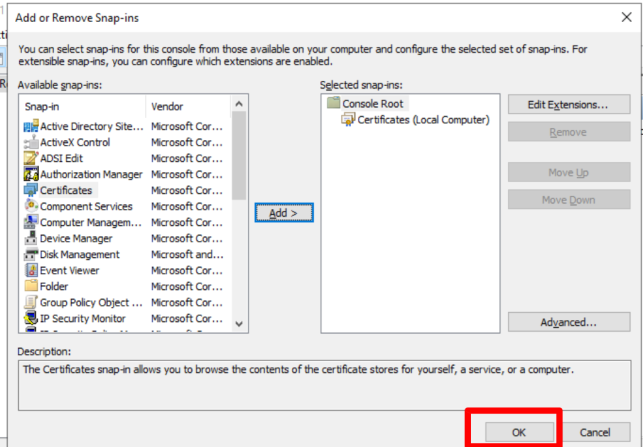
    1.Open MMC → Certificates (Local Computer) again.

    A screenshot of a computer AI-generated content may be incorrect.

    A screenshot of a computer program AI-generated content may be incorrect.

    A screenshot of a computer AI-generated content may be incorrect.

    A screenshot of a computer AI-generated content may be incorrect.

    A screenshot of a computer AI-generated content may be incorrect.

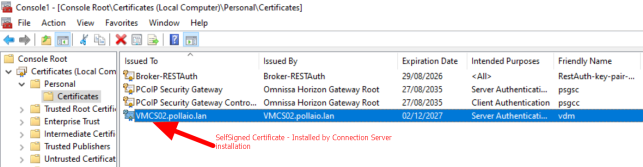
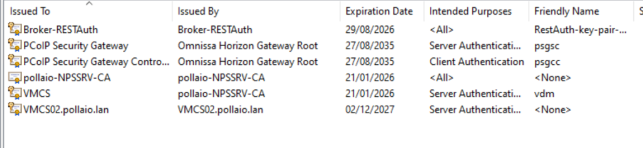
    In Personal, there is a self-signed certificate (or an old certificate) installed by the Connection Server installation process

    A screenshot of a computer AI-generated content may be incorrect.

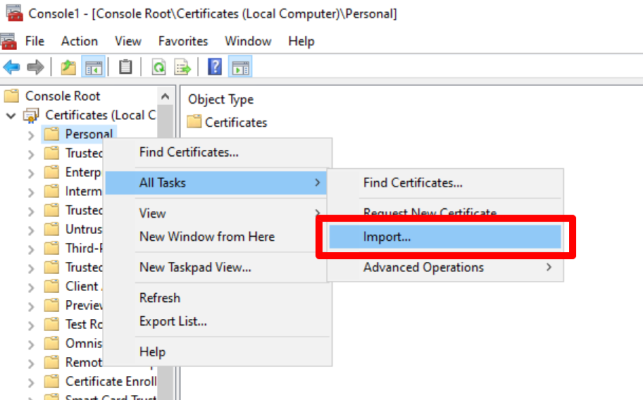
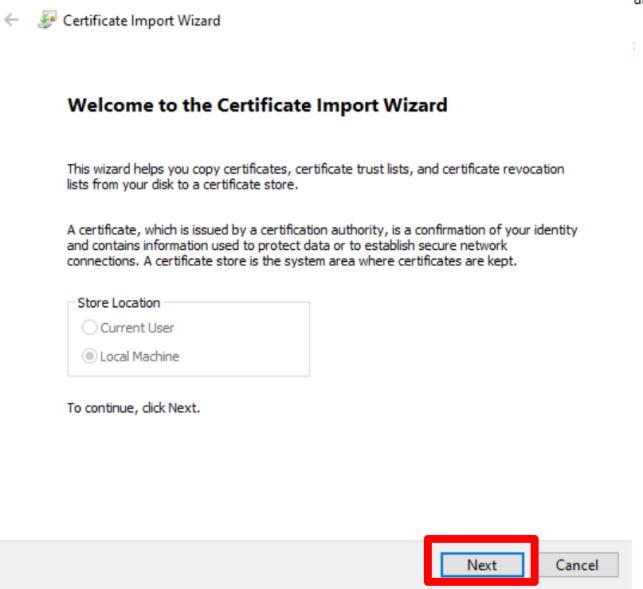
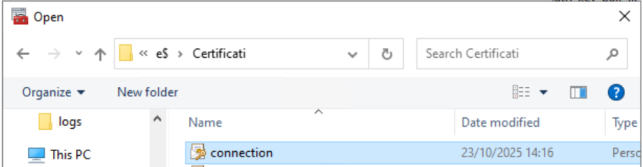
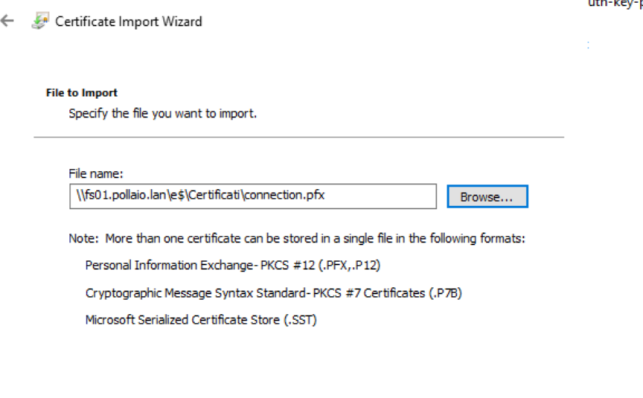
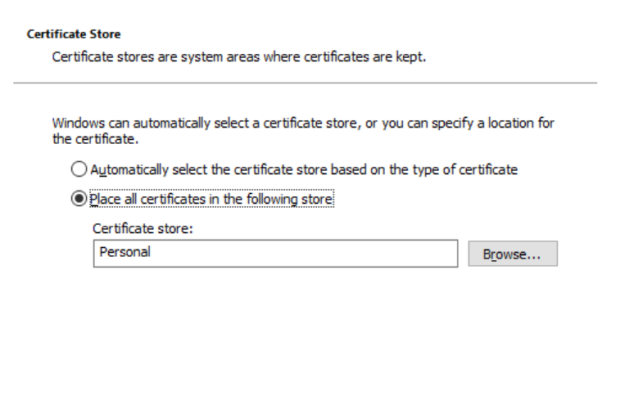
    2. Import the .pfx file under:

    Personal > CertificatesA screenshot of a computer AI-generated content may be incorrect.

    .

    A screenshot of a certificate AI-generated content may be incorrect.

    A screenshot of a computer AI-generated content may be incorrect.

    A screenshot of a computer AI-generated content may be incorrect.

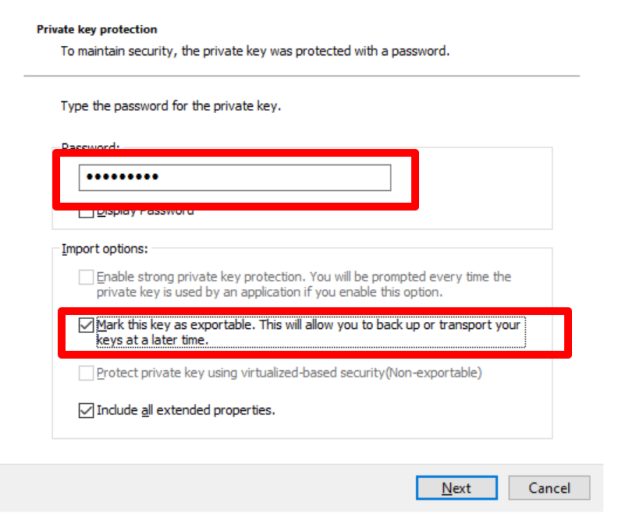
    3. When prompted, provide the password you used during export and select “Mark this key as exportable….”

    A screenshot of a computer screen AI-generated content may be incorrect.

    A screenshot of a certificate AI-generated content may be incorrect.

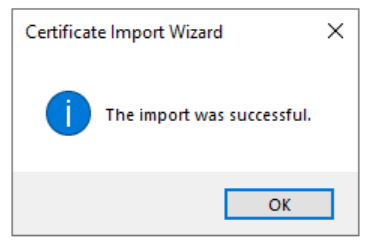
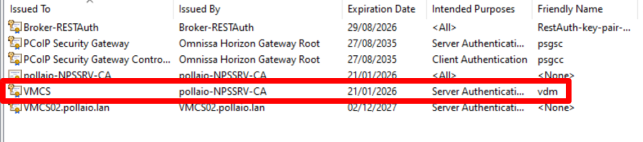
    4. Verify that the certificate appears in the list with the private key (the certificate icon has a key)

    A screenshot of a computer AI-generated content may be incorrect.

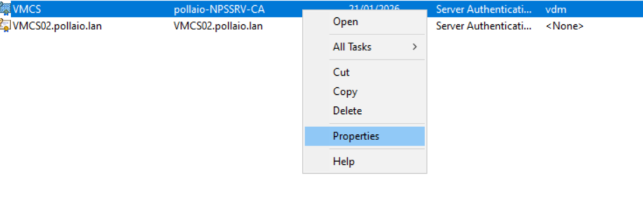
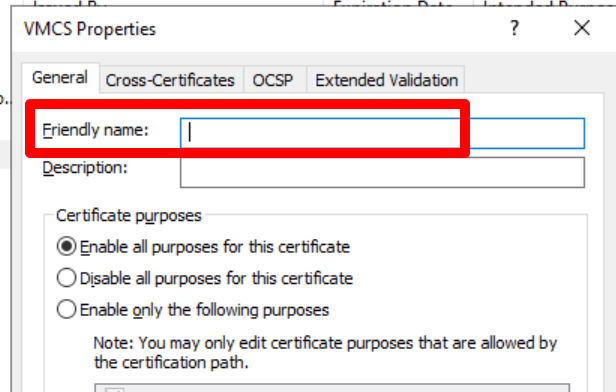
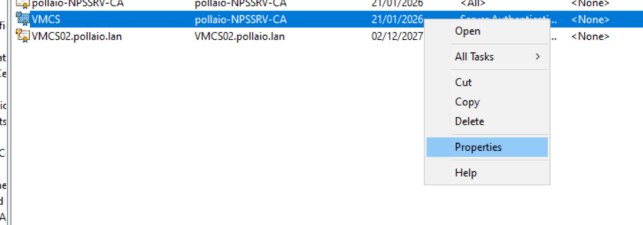
    5. Remove the friendly name VDM from the self-signed certificate or the old certificate

    A screenshot of a computer AI-generated content may be incorrect.

    A screenshot of a computer AI-generated content may be incorrect.

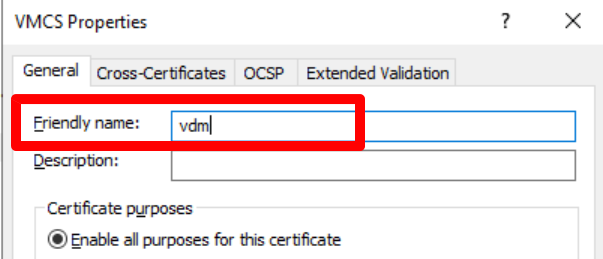
    6.Add friendly name VDM to new certificate

    A screenshot of a computer AI-generated content may be incorrect.

    A screenshot of a computer AI-generated content may be incorrect.

    A red lines with black text AI-generated content may be incorrect.

    .

    .

    Step 3: Restart the Horizon Connection Server Service

    To make the change effective:

    1. Open Services.msc
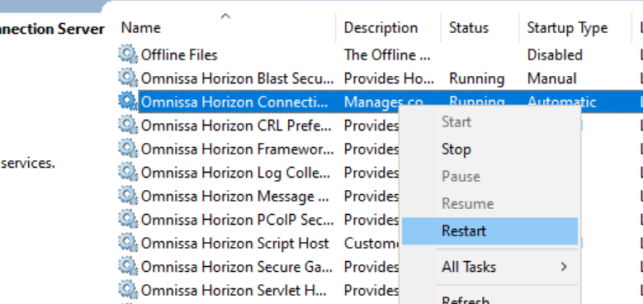
    2 . Restart the VMware Horizon Connection Server service.
    3 . Alternatively, you can simply reboot the server if you’re feeling extra cautious.

    A screenshot of a computer screen AI-generated content may be incorrect.

    Once restarted, the Connection Server should automatically pick up the new certificate.

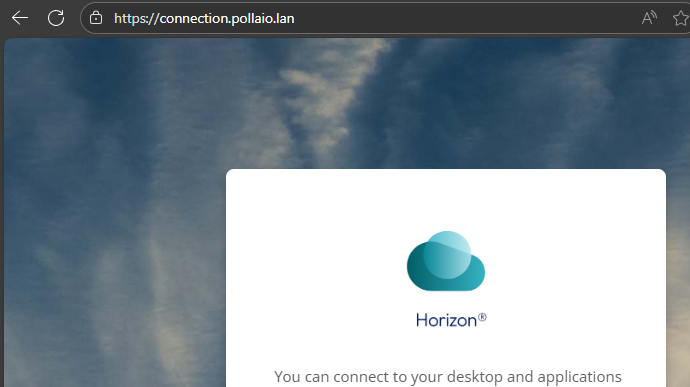
    You can confirm by opening the Horizon Administrator Console in your browser and checking that your connection is now secure and trusted ✅

    We need to repeat steps 4 and 5 on all Omnissa Connection servers

    .

    Bonus: Keeping Things Clean

    • Make sure all old or expired certificates are removed from the Personal store.
    • Keep a note of the certificate expiration date and plan your next renewal ahead of time (trust me, future-you will thank you).
    • If the Horizon is behind the Unified Access Gateway (for external connection and network segmentation, remember to change the Thumbprint on the UAG configuration)
    IMPORTANT: Once you’ve changed the certificate, always verify that it works. Especially if you have thin clients, make sure they have loaded the necessary certificates (RootCA and SubCA) to validate the new certificate.

    .

    Done!

    You’ve successfully banished the self-signed gremlin and brought your Horizon environment into the trusted world of PKI.

    From now on, your users will enjoy clean, warning-free connections — and your security team will silently thank you for doing things the right way.

    .

    Replacing the Self-Signed Certificate on Omnissa Connection Server with a Microsoft CA-Issued Certificate (or replacing the certificate to end to validation date)