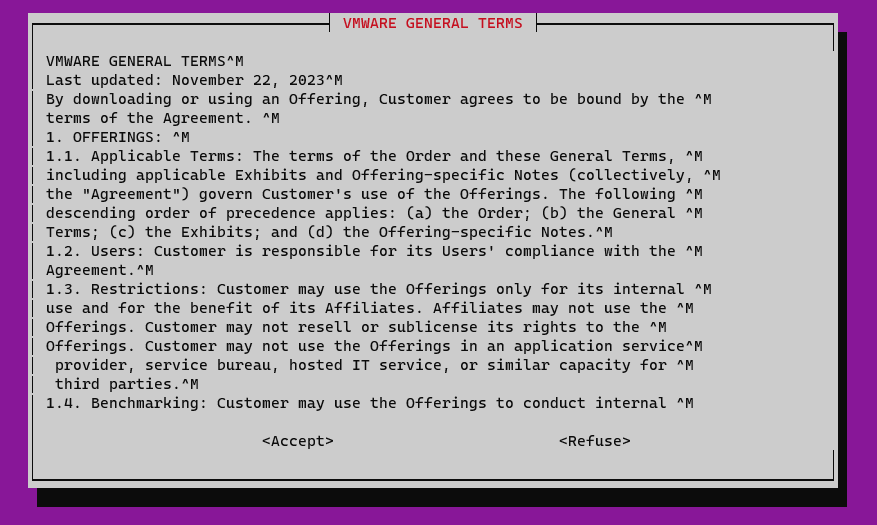
VMware Workspace One Access, VMware Horizon, and FIDO2 device

Publishing VDI outside our company network is an activity that has become a necessity for many companies since COVID-19 (employee smart working, workstations dedicated to consultants, etc.). In all the implementations, that I have done in recent years, one of the key points of my installations is the need to implement MFA solutions to increase the level of security.

In this post, I want to explain how to configure the integration of Workspace One Access WS1A, Horizon, and FIDO2 devices (I use a Yubikey 5 Series with NFC and Fingerprint)
A black usb flash drive with a yellow circle and a gold circle

Description automatically generated A hand holding a phone with a sign in the screen

Description automatically generated A hexagon with arrow

Description automatically generated A green computer with a white cloud in the screen

Description automatically generated

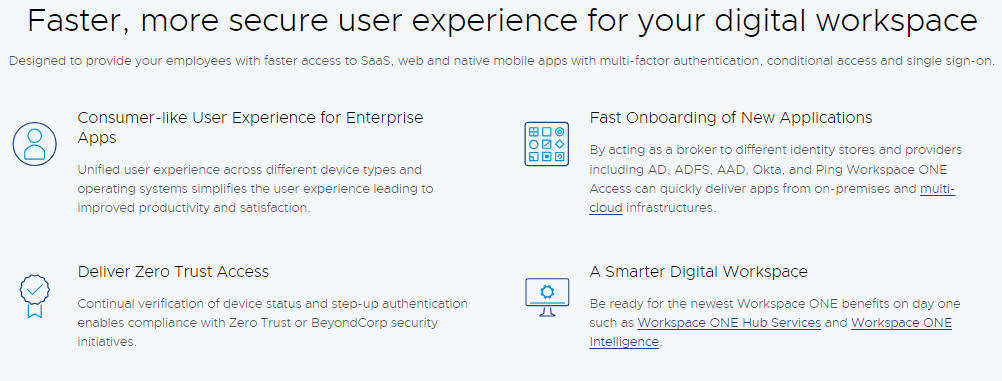
What is VMware WorkSpace One Access?
A screenshot of a computer

Description automatically generated

Workspace ONE Access (vmware.com)

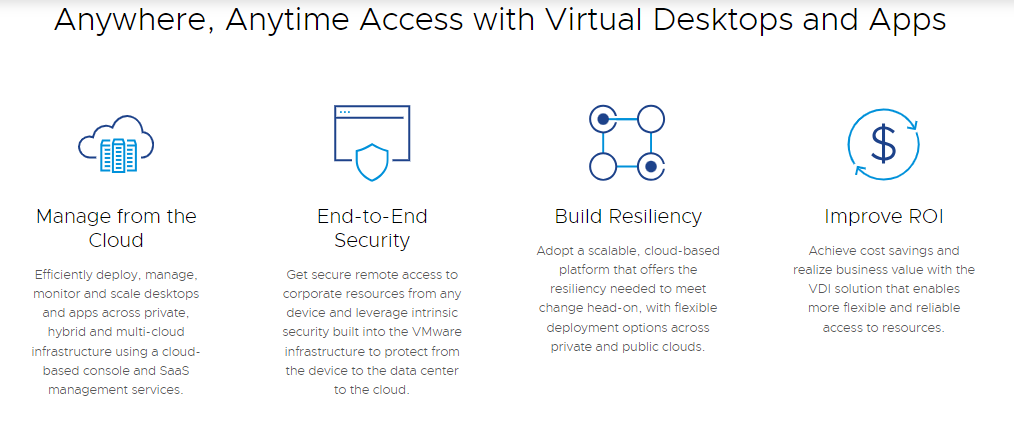
What is VMware Horizon?
A screenshot of a computer

Description automatically generated

VMware Horizon | VDI Software Solutions | VMware

What is FIDO2?

FIDO2 enables users to leverage common devices to easily authenticate to online services in both mobile and desktop environments.

The FIDO2 specifications are the World Wide Web Consortium’s (W3C) Web Authentication (WebAuthn) specification and FIDO Alliance’s corresponding Client-to-Authenticator Protocol (CTAP).

FIDO2 – FIDO Alliance

What is Yubikey 5 Series?

Multi-protocol security key, eliminate account takeovers with strong two-factor, multi-factor, and passwordless authentication, and seamless touch-to-sign. Multi-protocol support allows for strong security for legacy and modern environments. A full range of form factors allows users to secure online accounts on all of the devices that they love, across desktops and mobile.

  • Multi-protocol support; FIDO2, U2F, Smart card, OTP, OpenPGP 3
  • USB-A, USB-C, NFC, Lightning
  • IP68 rated, crush resistant, no batteries required, no moving parts

USB-A YubiKey 5 NFC Two Factor Security Key | Yubico

Configure Workspace one Access(WS1A) SaaS for use FIDO2 authentication

Enable Authentication methods on WS1A.

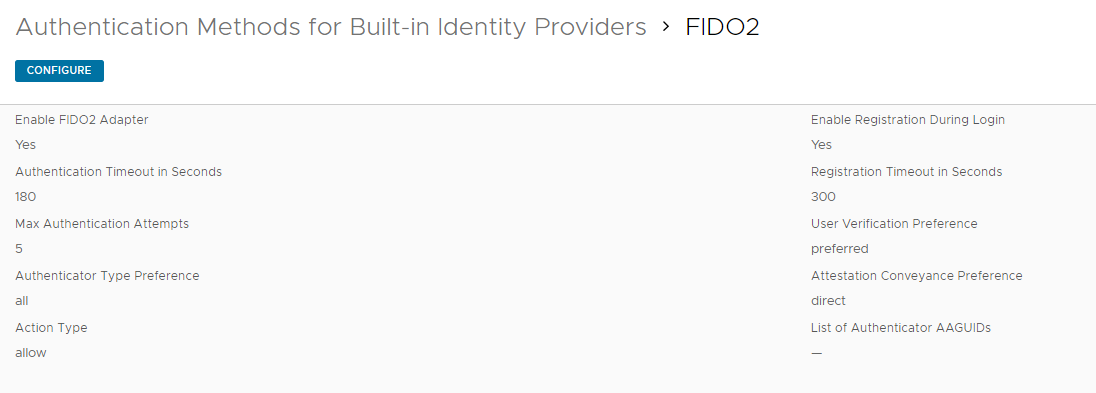
Go to integrations -> Authentication Methods -> Click on FIDO2 -> Enable FIDO2 Adapter

A screenshot of a computer

Description automatically generated

A screenshot of a computer

Description automatically generated

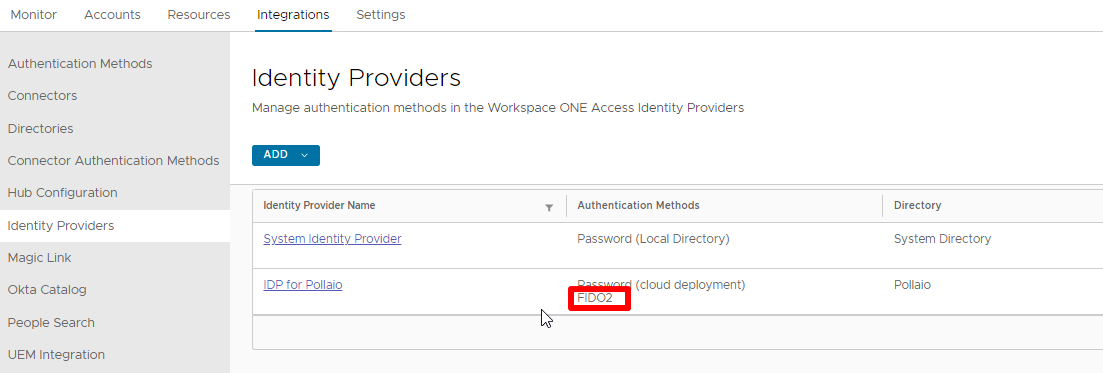
Now we need to associate the authentication method to Identity provider (created to integrate WS1A with Active Directory)

Go to integrations -> Identity providers -> Click on correct IdP -> Flag FIDO2

A screenshot of a computer

Description automatically generated

A screenshot of a computer

Description automatically generated

After associating the FIDO2 to IdP we need to create the policy to enable self-services FIDO2 device registration (it is possible to pre-configure the FIDO2 device registration)

Go to resources -> Policies -> Click on default_access_policy_set -> Edit

A screenshot of a computer

Description automatically generated

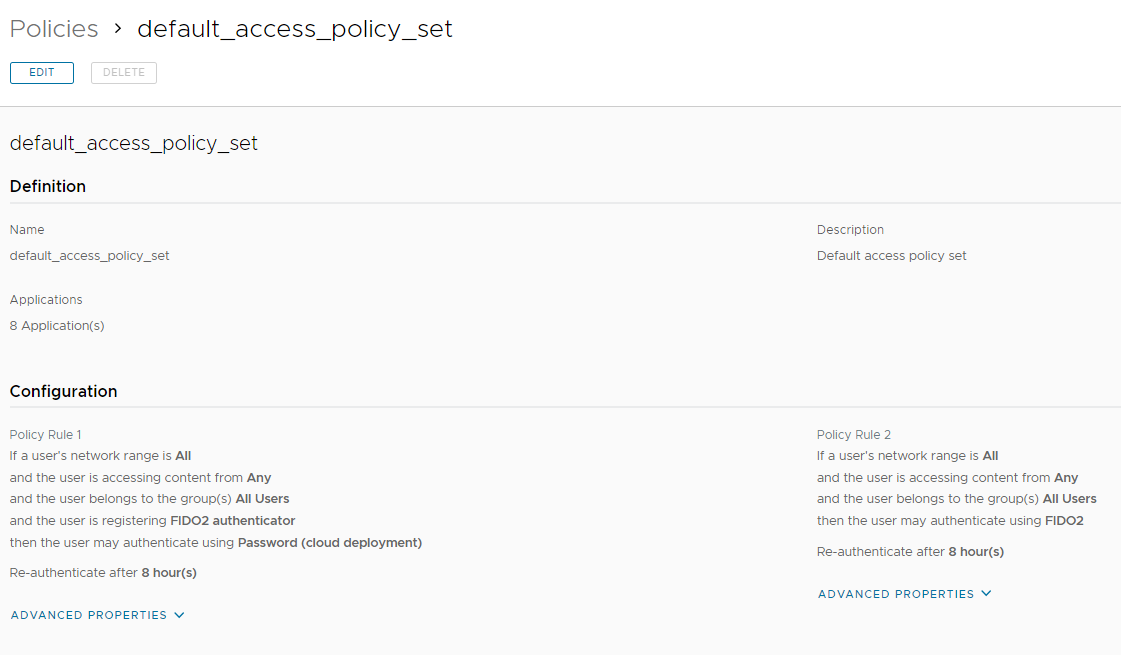
Create to rule:

Rule 1 -> enable self-service registration FIDO2 Device

Rule 2 -> enable the login with only FIDO2 Device

In the next image, there are the Policy Rule configurations
A screenshot of a computer

Description automatically generated

Self-service registration key

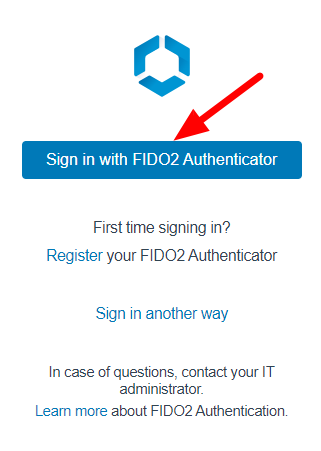
Insert the Yubikey 5 into to USB port and log to the Workspace One Access portal.

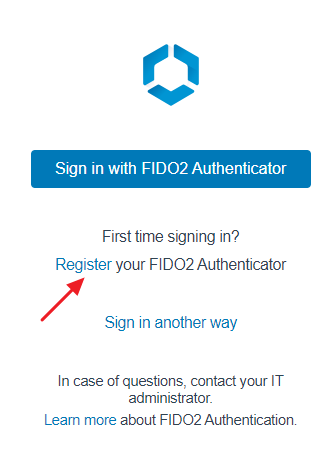
Now the web portal requires two choices:

  • Sign in with Fido2 Authenticator
  • Register your Fido2 Authenticator

To register the device we need to select Register
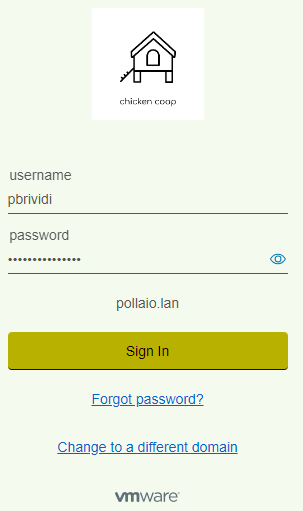
Login with the correct domain name account
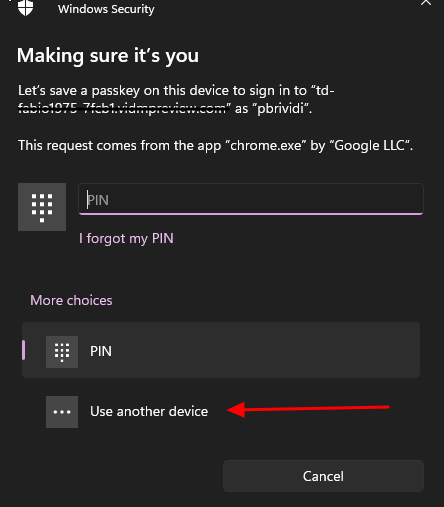
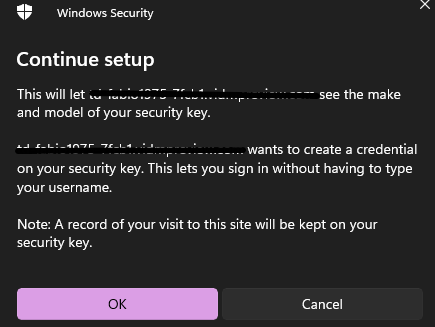
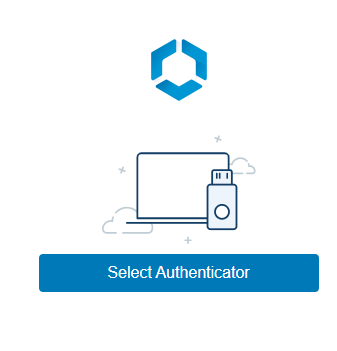
Now we need to select the authenticator
A screen shot of a computer

Description automatically generated

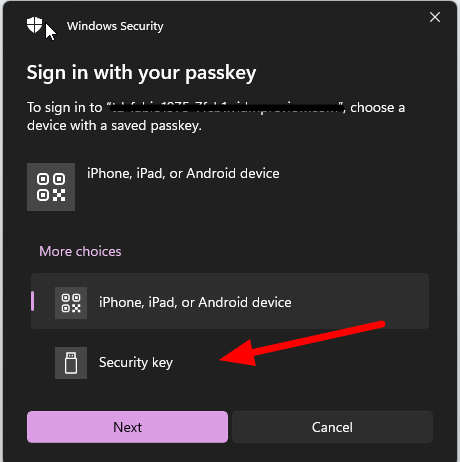
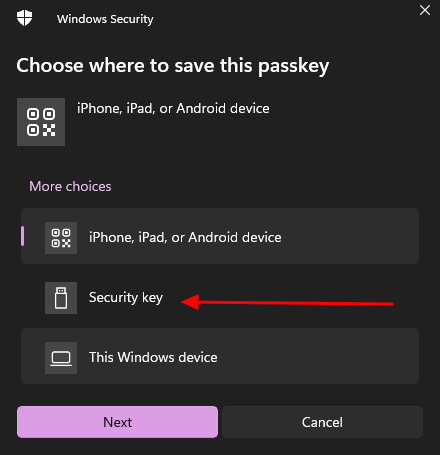
Select another device

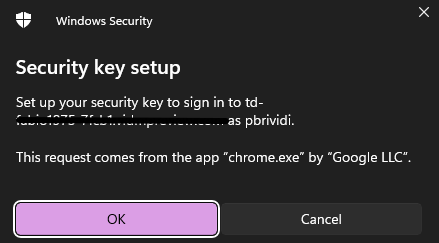
Select Security Key where store the passkey
A screenshot of a computer security system

Description automatically generated

A screenshot of a computer security system

Description automatically generated

A screenshot of a computer security system

Description automatically generated

Insert the security pin

A screenshot of a computer

Description automatically generated

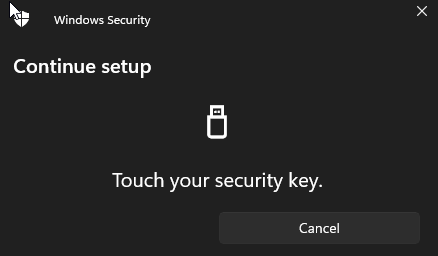
Touch the key (there is a fingerprint ….)
A screenshot of a computer

Description automatically generated

A screen shot of a computer security

Description automatically generated

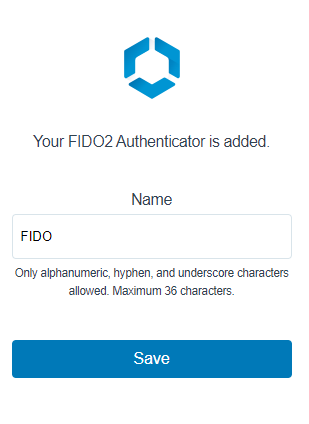
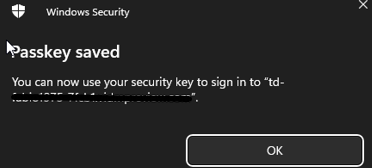
Add a name for the Security Key

A screenshot of a phone

Description automatically generated

Now you are ready to log in with the security key

User Experience login

Access to company workspace one access website
A screen shot of a sign

Description automatically generated

A screenshot of a computer security

Description automatically generated

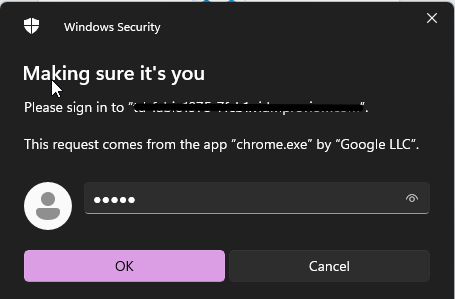
Insert PIN number associated with FIDO2
A screenshot of a computer security

Description automatically generated

Now touch the key for fingerprint authentication Chiara2013!
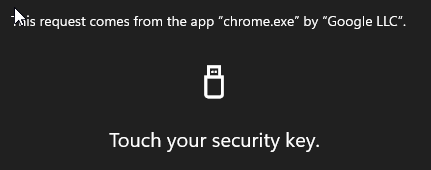
A black and white screen with white text

Description automatically generated

You are redirected to Workspace One catalog portal
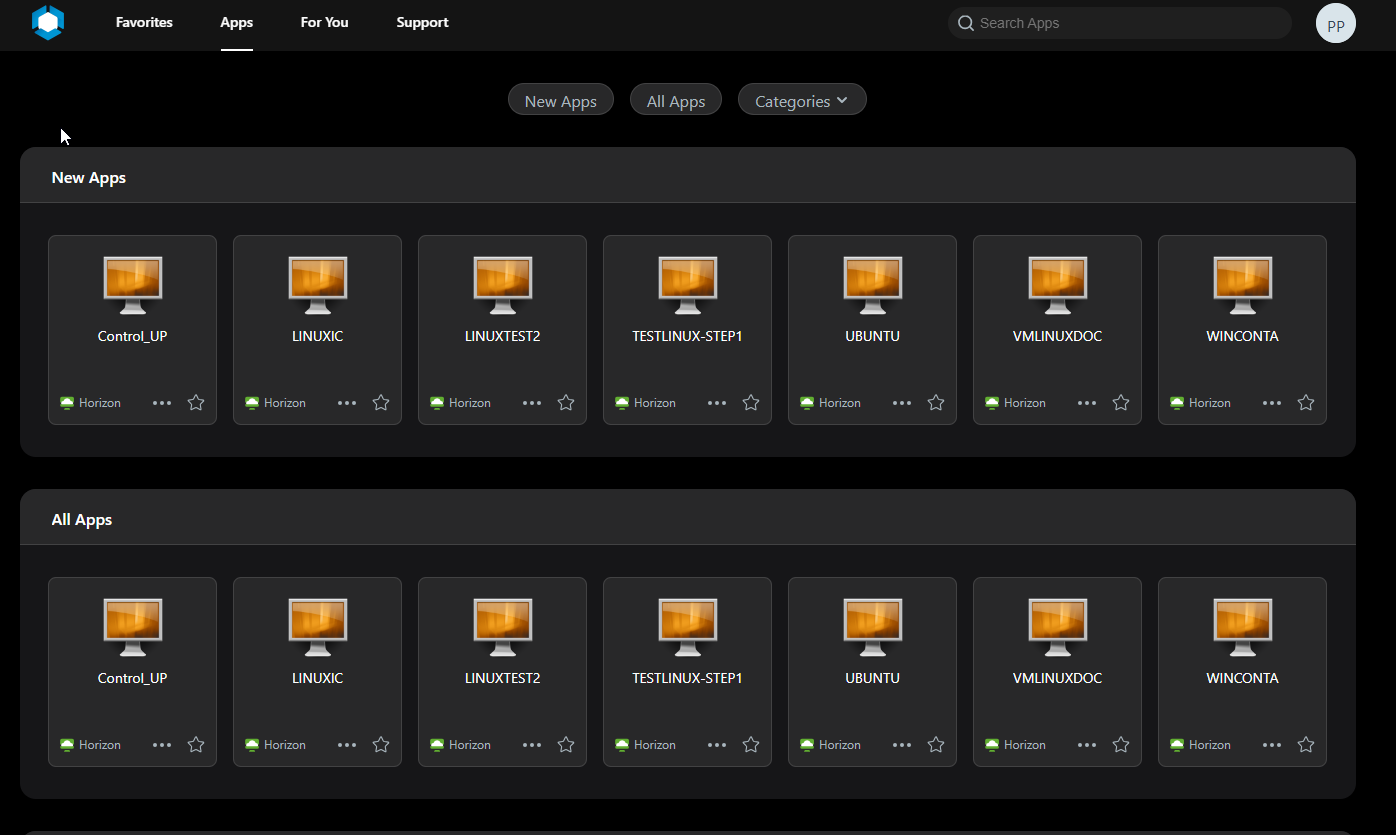
A screenshot of a computer

Description automatically generated

If you want to show and reset the User FIDO2 device you need to:

Login to Workspace One Access SaaS admin console, go to Accounts, Users and click on the user that you want to reset the device association
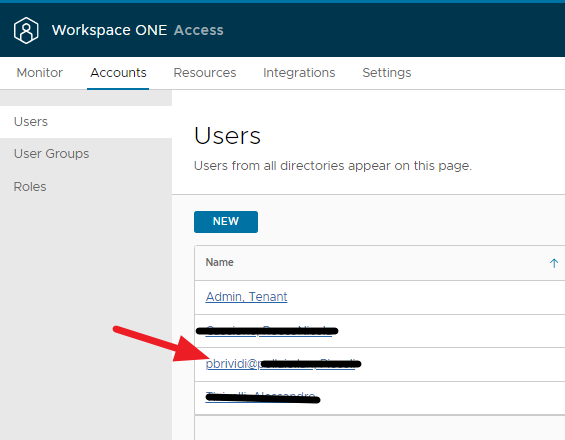
A screenshot of a login page

Description automatically generated

Select two-factor authentication

A red arrow pointing to a white background

Description automatically generated

A white and blue rectangle

Description automatically generated

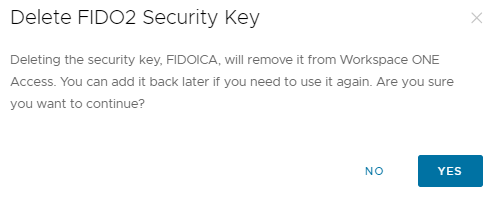
And delete the FIDO2 security key

A screenshot of a computer security key

Description automatically generated

Otherwise, the administrator can associate the new device with the user.

VMware Workspace One Access, VMware Horizon, and FIDO2 device

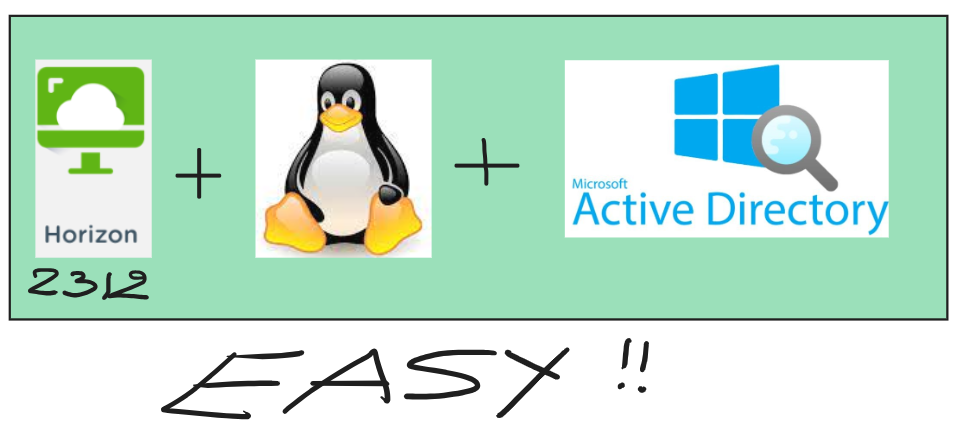
Horizon 2312, new feature to simplify the Gold Image Linux Configuration

A penguin and microsoft active logo

Description automatically generated

Few people know that it is possible use Linux Distribution to create VDI desktop or Stream Application (Like RDS) to publish it with Horizon.

The desktop pool can to be Instant Clone or Full Clone.

In the last Horizon version (2312) there is a new functionality to configure the agent, the function have to objective to simplify the installation and also configure the OS ((Like the joined to Active Directory domain).

In the Horizon Agent for Linux package there is a new command file:

easyinstall_viewagent.sh

We can use this command for:

  • Configure Linux OS template
  • Install Horizon Agent

For complete all previous steps you can start this command (with root privileges)

./easyinstall_viewagent.sh

The command do:

Platform check

A black screen with white text

Description automatically generated

Now you need to insert information like DNS, Hostname, Domain and Account to join to domain

A screenshot of a computer

Description automatically generated

Now the script check and install missed packages (SSSD etc.…) and make the domain join

A screen shot of a black screen

Description automatically generated

After joined the template to AD domain the script start to install the horizon agent

A screenshot of a computer

Description automatically generated

A black screen with white text

Description automatically generated

Now the Linux GoldI mage is ready to use for create a Horizon instant clone desktop pool or used for Full Clone Desktop Pool.

It is possible to configure the OS and install Horizon Agent in two different steps

  • Configure OS
    • For configure user Linux OS use this command:

./easyinstall_viewagent.sh -c

  • Install Agent
    • After configure the OS we can install the Horizon agent with this command:

./easyinstall_viewagent.sh -i

With this command we can to use some switch value:

Default (Hostname, Domain FQDN, DOMAIN Join User, DOMAIN Join PASSWORD …)

Advanced (The same option of DEFAULT with NTP, HORIZON AGENT FEATURE and other)

Expert (The same option of Advanced with another function)

In this link more information

Use the Easy Setup Tool to Prepare a Linux Machine (vmware.com)

Horizon 2312, new feature to simplify the Gold Image Linux Configuration

Configure Proxy Server for Horizon for SAML integration

When we need to integrate a Horizon infrastructure to the cloud identity provider (like Workspace One Access SaaS solution) sometimes we need to manage firewall and proxy configuration.

For the Firewall rule, there is much information (KB link) while for the proxy server, we are not able to use Windows server configuration because Horizon ignores it.

To use a proxy server to permit communication to the IdP URL from Horizon Connection servers we need to configure some values on ADAM DB:

pae-SAMLProxyName

pae-SAMLProxyPort

To connect to ADAM DB and where modify the correct value

  • Connect with RDP session to Connection Server OS
  • Start from PowerShell adsedit

A close-up of a computer screen

Description automatically generated

  • In the console tree select Connect to..

A screenshot of a computer

Description automatically generated

  • Configure the connection with this information.

dc=vdi,dc=vmware,dc=int

localhost:389

A screenshot of a computer

Description automatically generated

  • Expand ADAM ADSI tree under the object path: dc=vdi,dc=vmware,dc=int,ou=Properties,ou=Global
  • Click on value Common and modify the following value

pae-SAMLProxyName -> With Proxy URL

pae-SAMLProxyPort -> With Proxy Port

Now we can configure the SAML integration from Horizon and IdP

Some information about why we need to integrate and use Workspace One Access with Horizon:

Integration between VMware Horizon and VMware Workspace ONE Access (formerly called Workspace ONE) uses the SAML 2.0 standard to establish mutual trust, which is essential for single sign-on (SSO) functionality. When SSO is enabled, users who log in to VMware Workspace ONE Access or Workspace ONE with Active Directory credentials can launch remote desktops and applications without having to go through a second login procedure.

Configure Proxy Server for Horizon for SAML integration

VMware Horizon 2312

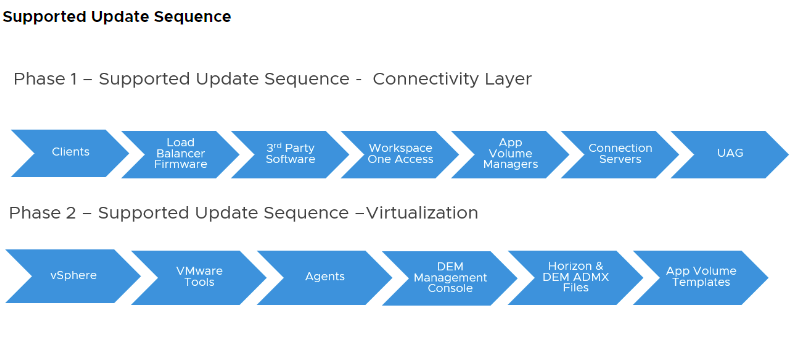
As usual, every 3 months VMware releases a new version of Horizon (and also of almost all EUC applications)
The following have been available for a few days:
Horizon 8 2312
App Volumes 4 2312
Dynamic Environment Manager 2312
ThinApp 2312

Among the various features released for Horizon 8, the most interesting one is Agent Auto Upgrade:

“The agent auto upgrade feature allows customers to automatically initiate upgrades without manual intervention. To utilize this feature, on-premises systems must have access to CDS servers. Customers without CDS access can establish their webserver, host the agent components, and then register the agent build with the connection server to upgrade agents in VDI/RDSH desktops. This feature requires Horizon Plus or Horizon Universal License, and is available for Full Clone Desktops and RDSH Servers only. To upgrade Horizon Agent in Instant Clone Desktop Pools or RDS Farms, upgrade Horizon Agent on the Golden Image and schedule maintenance to push the new image.”

VMware Horizon 2312

Failed to save domains. Resolving domains with the directory server failed with reason: [MyDomain – Kerberos authentication failed for domain.]

If we have a problem with the Identity directory on Workspace One Access like that:

Failed to save domains. Resolving domains with the directory server failed with reason: [fienile.lan – Kerberos authentication failed for domain.]

A close-up of a computer screen

Description automatically generated

In the situation where we have an Active Directory with Multi-Forest Active Directory Environment with Trust Relationships (The trust needs to be two-way and direct (non-transitive)).

There may be a problem with the Trust configuration, and you can find this error on DC (the DC of the user configuration for the connection)

The solution is to change the trust configuration and add:

A screenshot of a computer

Description automatically generated

Failed to save domains. Resolving domains with the directory server failed with reason: [MyDomain – Kerberos authentication failed for domain.]

Check TCP port 443

During the maintenance and updating of the Horizon Connection server components, one aspect is the necessary wait for the connection servers to correctly resume responding on TCP port 443.
During one of the many activities on Horizon my customer created a simple and effective door test script.
Even though it is very simple and intuitive, I want to share the code with you:

do {
    $check = netstat -ano | findstr 0.0.0.0:443
    "Waiting 5 seconds and retry" 
    sleep 5
} while (!$check)
$check

Check TCP port 443

DRS and HPE SimpliVity

In recent days, a customer reported an anomaly on an HPE SimpliVity cluster hosting instant clone Horizon VDIs. In detail:

  • vSphere with seven hosts present, two were always at 98% CPU utilization and 90% RAM utilization.
  • Continuous vMotion generated by the VM DRS to and from those two HOSTS.

After a careful analysis, we identified that there were no problems at the vSphere infrastructure level.
The issue was due to a Simplivity feature called IWO.

By disabling IWO and keeping DRS active (Full automatic) I have an optimal balance of CPU and RAM load between hosts at the expense of a slight increase in I/O trip times

Scenario – Even VM Load Distribution

I want even VM load across my cluster in terms of CPU and memory. Data locality and I/O performance are not top priorities. Most applications are CPU and memory intensive, and adding 1ms to 2ms to I/O trip times will not impact application performance.

In this scenario, IWO can be disabled thus ensuring no DRS affinity rules are populated into vCenter server. Suppressing DRS affinity rules will allow VMware DRS or allow you to directly distribute VMs across the cluster as desired to ensure all VMs are adequately resourced in terms of CPU and memory. The ‘Data Access Not Optimized’ alarm can be suppressed within vCenter server.
More information:

https://community.hpe.com/t5/around-the-storage-block/how-vm-data-is-managed-within-an-hpe-simplivity-cluster-part-3/ba-p/7033153

DRS and HPE SimpliVity

How to test communication between UAG and CS

Many times I found myself having to demonstrate that the communication between the Unified Access Gateway and the Connection Servers was not working due to problems with poorly configured firewall rules. A very useful test is to connect to the UAG console and launch the classic CURL command:
curl -v -k https://<FQDN or IP ADDRESS CS>:443/

the outcome of which is as follows if the connection is ok (HTML output)

or the following if the connection is not enabled on the firewall

More info and tools here:

https://docs.vmware.com/en/Unified-Access-Gateway/2309/uag-deploy-config/GUID-390D3A2A-0CB7-4A82-9B0F-D525B74CF55B.html

How to test communication between UAG and CS

Configure ControlUp for VMware Horizon Instant Clone VDI monitoring

In this guide, we will analyze how to configure ControlUP COP (ControlUP on-Premise) to monitor a VMware Horizon 2309 infrastructure with Instant Clone Desktop Pools (we will not cover the installation part of the product)

The following steps are required:

  • Control UP COP Server Component Installation (Optionally use an external SQL instance or SQL EXPRESS present in the Server component installation)
  • Installing the Control UP Console (Can also be installed on the same server)
  • Installing Agent Control Up on the GoldImage
  • Horizon Infrastructure Inventory
  • VirtualMachine Inventory (For this step we can also implement an automatism)

Requirements for the server part:


COP Server
COP Server Console Machine
Machine Windows Server Windows Server orWindows
Operating System Windows Server supported versions:2022,2019,2016 Windows Server supported versions:2022,2019,2016
OR Windows 11, 10
CPU* 2 CPUs 2 CPUs
Memory* 8 GB RAM 8 GB RAM
Disk Space* 10 GB 10 GB
Required Software & Permissions
  • .NET Framework 4.8 or later
  • PowerShell 5.x or later
.NET Framework 4.5 or later

Requirements for Part DB:

MSSQL Versions (Standard, Enterprise, or Express) Maximum Database Size Collation
2022,2019,2017,2016,2014 10 GB SQL_Latin1_General_CP1_CI_AS

Requirements for the VDI part:


ControlUp Agent
ControlUp Agent
Machine No server installation necessary. Deployed onto Windows machines that are monitored by ControlUp(Linux monitored via API).
Operating system Windows Server supported versions:
202220192016 (Core or Full)ORWindows 11, 10
Required installed software .NET 4.5 or later
TCP PORT 40705

A Service Account to access the Horizon infrastructure:

The Read-Only role is sufficient for all monitoring purposes. If you want to perform built-in Horizon actions, then the service account needs the following permissions:

  • Enable Farm and Desktop Pools
  • Manage Machine
  • Manage Sessions
  • Manage Global Sessions (Cloud Pod architecture only)

So what is needed is:

Download the version of ControlUP COP from the VMware site

Log in to the customer portal and in the product area under Desktop & End-User Computing

A screenshot of a computer

Description automatically generated

Log in to OEM Addons

A screenshot of a computer

Description automatically generated

Download the on-premise version

Perform the basic installation

Once the COP version is installed and the console is installed, log in to our ControlUP installation

A screenshot of a computer

Description automatically generated

How to install the agent on the GoldImage:

  1. The agent MSI file is on the downloaded file zip from VMware Portal
  2. Open the Real-Time Console and go to Agent Settings and copy your Agents Authentication Key. The key is used to connect the Agent to your ControlUp environment.

A screenshot of a computer

Description automatically generated

  1. Run the installation of the MSI package on the machine where you want to install the Agent.
  2. During the installation, paste the authentication key that you copied from the Real-Time Console.

A screenshot of a computer

Description automatically generated

  1. Complete the installation. The Agent is installed on the machine and the machine can be monitored from the Real-Time Console.
  2. Take the snapshot
  3. Deploy the new master image on Desktop Pool

Now from the ControlUp Management console, we are able to:

  • Connect our Vmware Horizon infrastructure
  • Connect the instant clone machine

Add Horizon infrastructure:

A screenshot of a computer

Description automatically generated

Add the infrastructure info

A screenshot of a computer

Description automatically generated

Click on OK

A screen shot of a computer

Description automatically generated

Add the pod to the console

A screenshot of a computer

Description automatically generated

Now on the left panel, we have our Horizon infrastructure added.

A screenshot of a computer

Description automatically generated

To monitor correctly our instant clone (after adding the agent) we need to discover the VM like a Machine

A screenshot of a computer

Description automatically generated

Search with the partial name of the VDI machines

A screenshot of a computer

Description automatically generated

Select cancel

A screenshot of a computer error message

Description automatically generated

We are VM on the left control panel in black status

A screenshot of a computer

Description automatically generated

After a few seconds the VDI VM Goes to Green

A screenshot of a computer

Description automatically generated

Auto connect state must be enabled (this function is important when the instant clone VDI is removed and recreated).

A screenshot of a computer

Description automatically generated

Now we can monitoring the Instant-Clone VDI

Check the VDI logon duration

Now we can manage and control the infrastructure, for example, to check the logon duration

A screenshot of a computer

Description automatically generated

A screenshot of a computer

Description automatically generated

What happens when VDI instant clones are regenerated?

If a user disconnects from his VDI of the instant clone type, it is destroyed and recreated, on the ControlUp side this is put in the Red -> Yellow state until it returns to Green

When recreating

A screenshot of a computer

Description automatically generated

After recess

A screenshot of a computer

Description automatically generated

Dynamic inventory

For a dynamic inventory of VDI, we can use Synchronization with Universal Sync Script (I’ll talk about this in a future post)

EUC Synchronization with Universal Sync Script (controlup.com)

After installation, we can schedule or start manually the script to sync my ControlUP with my EUC infrastructure.

References:

How to Deploy the Agent on Your Master Image for PVS/MCS/Linked/Instant Clones (controlup.com)

EUC Synchronization with Universal Sync Script (controlup.com)

ControlUp On-Premises

Configure ControlUp for VMware Horizon Instant Clone VDI monitoring