Move vSAN cluster from a unavailable vCenter to new vCenter

A cartoon character with text

Description automatically generated

Our customer had a big problem with a vCenter that managed a vSAN cluster.

The unique solution was to restore the vCenter form backup……but the customer doesn’t have a backup for this virtual appliance or vCenter backup from VAMI (Argghhhhh…).

We have resolved this with a new vCenter installation and this VMware KB.

Moving a vSAN cluster from one vCenter Server to another

An attention point (step 3 of the KB) is the vDS configuration, for bypassing this attention point we have migrated the vDS (in this situation only the vSAN network for our luck) to vSphere Standard Virtual Switch (vSS).

We have used this command on each ESXi to remove the vmkernel from vDS to vSS.

(You need to change your value, vDS Name…IP address etc..)

#Check the vDS and vSS configuration and identify vmnic

esxcfg-vswitch -l

#Remove a vmnic from vDS
esxcfg-vswitch -Q vmnic5 -V 12 DS1vSAN1

#Create a new vSS
esxcli network vswitch standard add –vswitch-name=VSAN

#Assign a vmnic to vSS
esxcli network vswitch standard uplink add –uplink-name=vmnic5 –vswitch-name=VSAN

#Create a PortGroup to vSS
esxcli network vswitch standard portgroup add –portgroup-name=VMK_VSAN –vswitch-name=VSAN

#Assign a vLAN to PortGroup
esxcli network vswitch standard portgroup set -p VMK_VSAN –vlan-id xxx

This is the critical point, we need to move the vmkernel vSAN (Where there is the vSAN traffic) from vDS to vSS.

It is important to check the vSAN status before and after the vmkernel move with this command and wait for the object to rebuild.

The command is

esxcli vsan health cluster

#Remove vmkernel for the vSAN from vDS
esxcli network ip interface remove –interface-name=vmk2

#Add the vmkernel interface to vSS
esxcli network ip interface add –interface-name=vmk2 –portgroup-name=”VMK_VSAN”

#Assign the IP address to vmkernel interface
esxcli network ip interface ipv4 set –interface-name=vmk2 –ipv4=x.x.x.x –netmask=x.x.x.x –type=static

#Assign the interface for vSAN service
esxcli network ip interface tag add –interface-name=vmk2 –tagname=VSAN

#Check if there is communication to other ESXi vmkernel vSAN interfaces IP with vmkping
vmkping -I vmk2 x.x.x.x

#Verify the vSAN status

esxcli vsan health cluster

When the vSAN cluster is all healthy repeat the same operation on all other vSAN cluster ESXi node

After this, you can continue following the link

Moving a vSAN cluster from one vCenter Server to another

Move vSAN cluster from a unavailable vCenter to new vCenter

vSAN ESA and vSAN File Service

Requirements

Enable vSAN File Service

Limitations and Considerations

Limitations and Considerations of vSAN File Service

Networking Considerations for vSAN File Service

After deploying and configuring the vSAN ESA we are ready to enable and configure the vSAN file services.

Enable File Service

A screenshot of a computer

Description automatically generated

A screenshot of a computer service

Description automatically generated

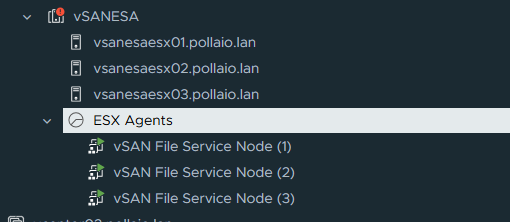
After Enabling the service we will see on the vCenter a new Resource Pool to allocate the File Service Node VM. (One for Each host ESXi)

A screenshot of a computer

Description automatically generated

Configure vSAN File service

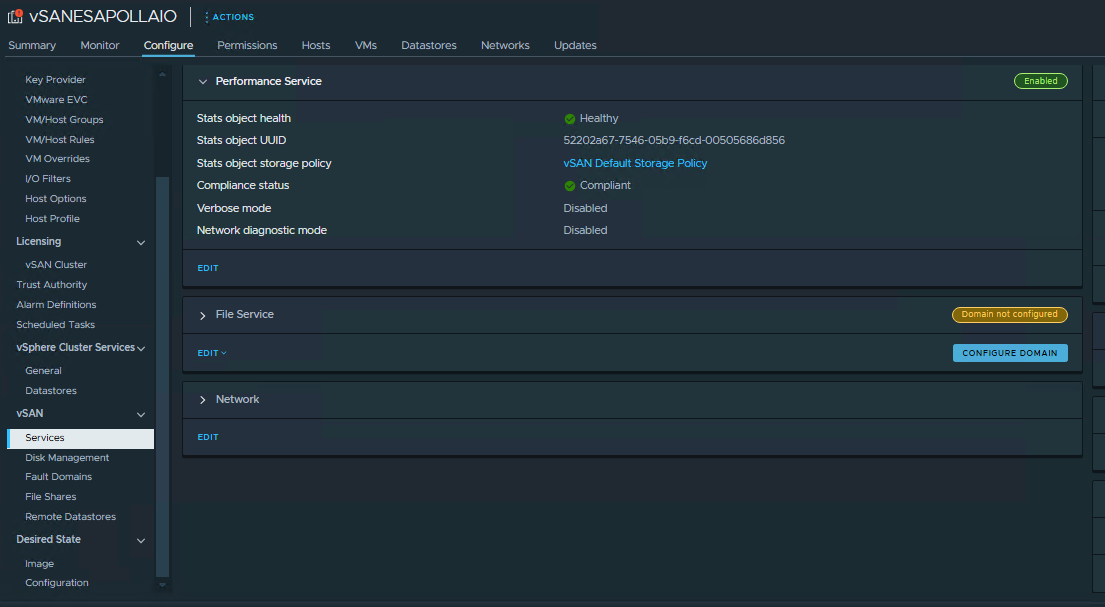
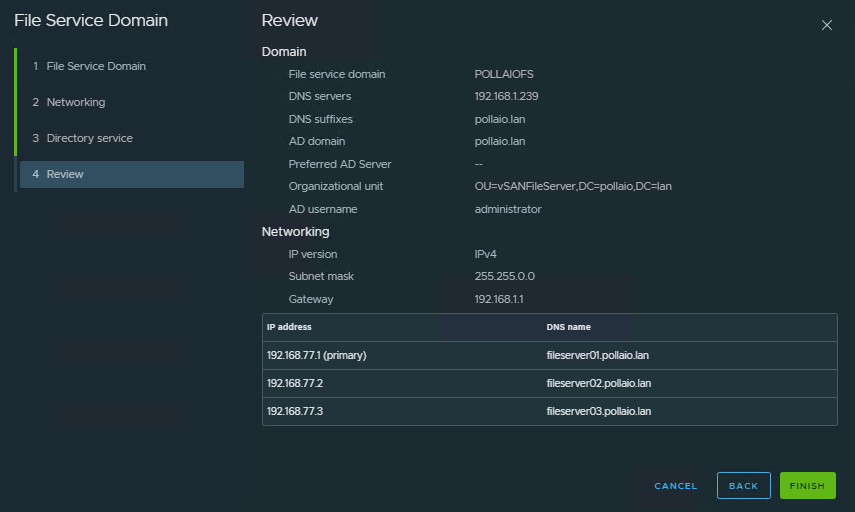
Go to vSAN, Services and under File Service click CONFIGURE DOMAIN

A screenshot of a computer

Description automatically generated

A screenshot of a computer

Description automatically generated

A screenshot of a computer

Description automatically generated

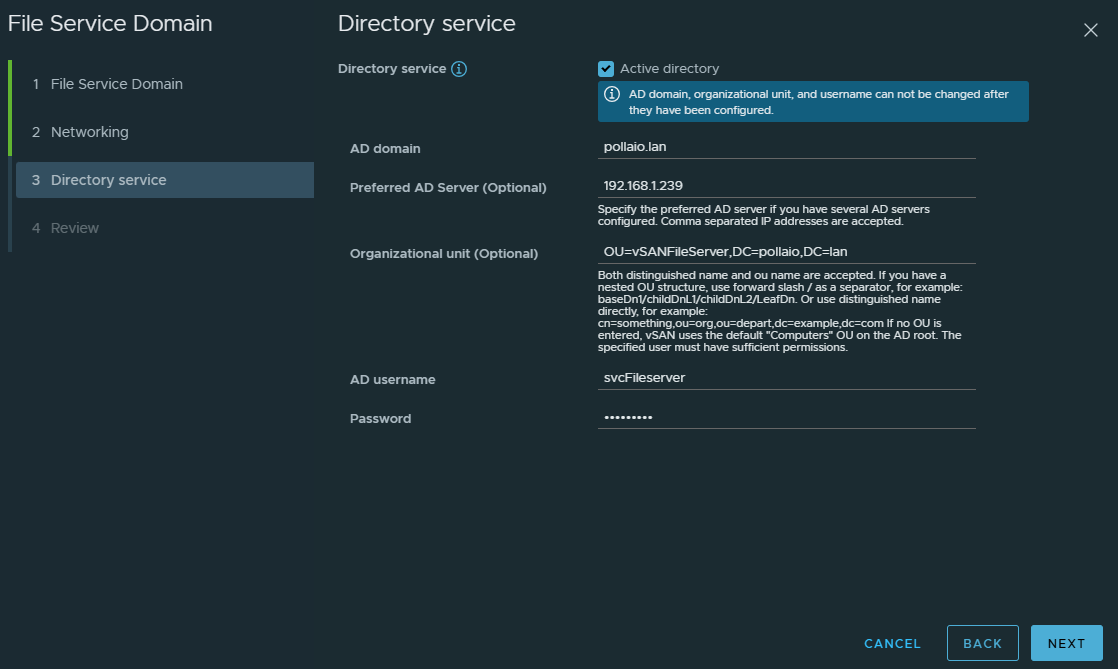
We need to configure the Directory Service to enable SMB share and NFS Kerberos Authentication.

The user identity for configuring the directory service must have the correct permission to do a join AD.

A screenshot of a computer

Description automatically generated

A screenshot of a computer

Description automatically generated

A screenshot of a computer

Description automatically generated

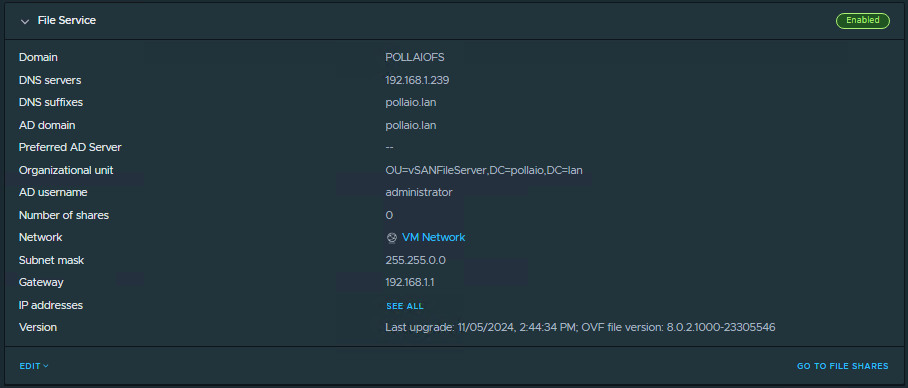
After completing the domain configuration we see the computer accounts in the OU select.

A screenshot of a computer

Description automatically generated

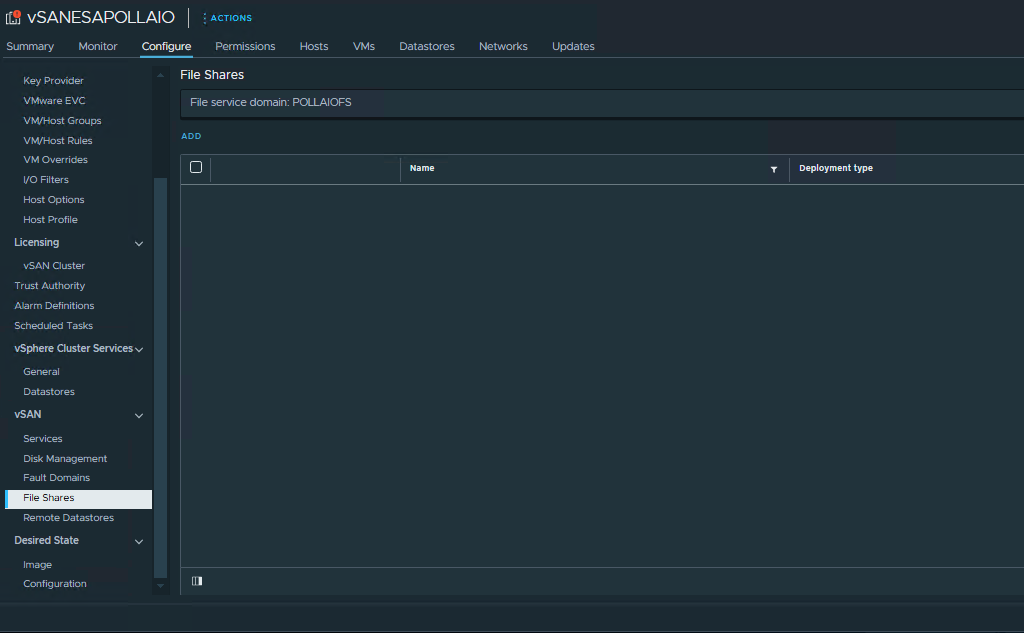
Create File Share

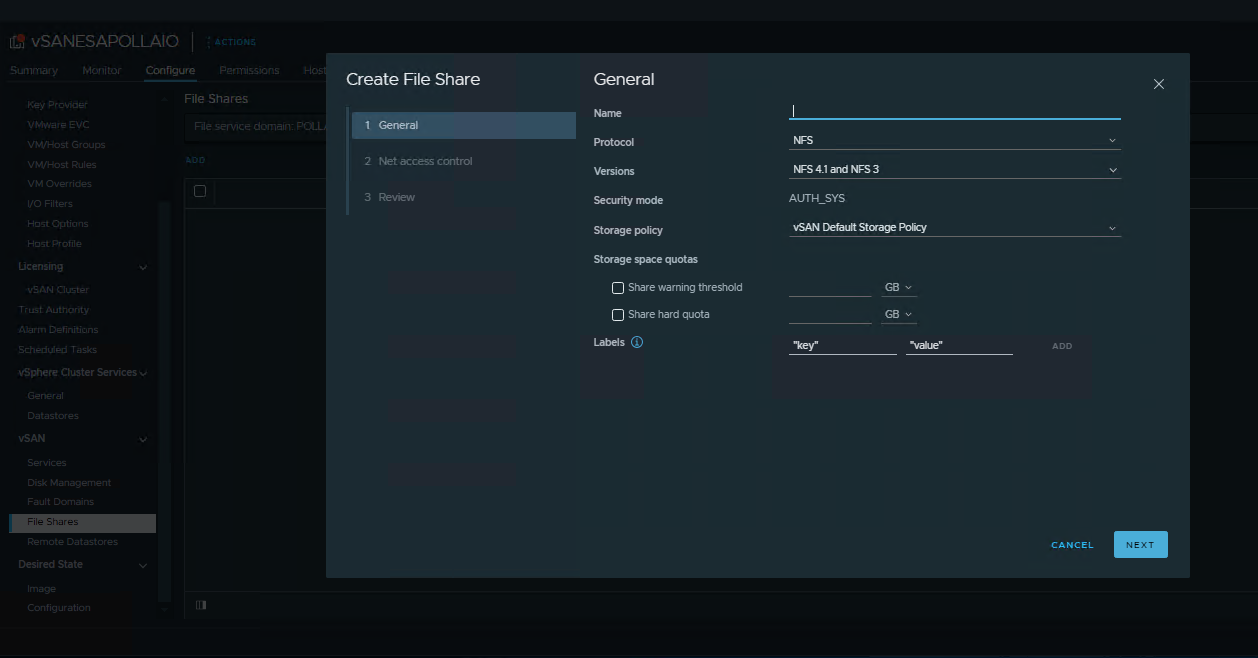
Now we can create the file share

A screenshot of a computer

Description automatically generated

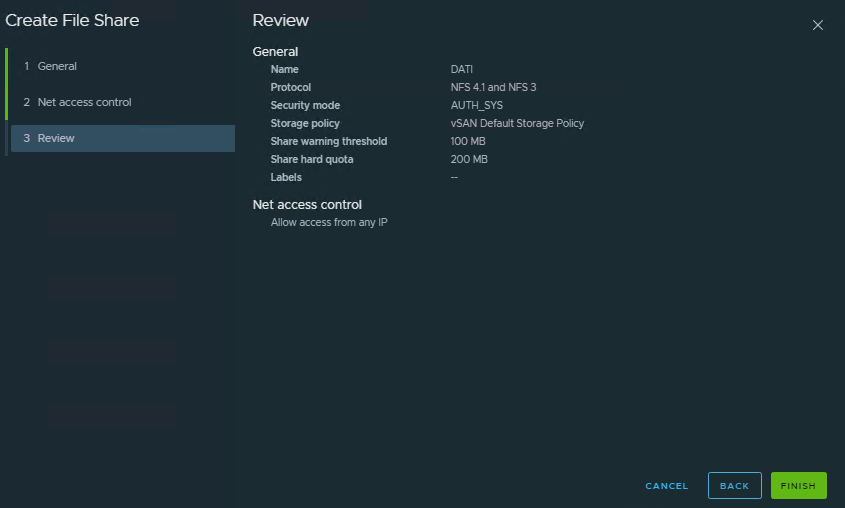
Will can create a NFS share with AUTH_SYS or Kerberos Authentication

A screenshot of a computer

Description automatically generated

A screenshot of a computer

Description automatically generated

A screenshot of a computer

Description automatically generated

A screenshot of a computer

Description automatically generated

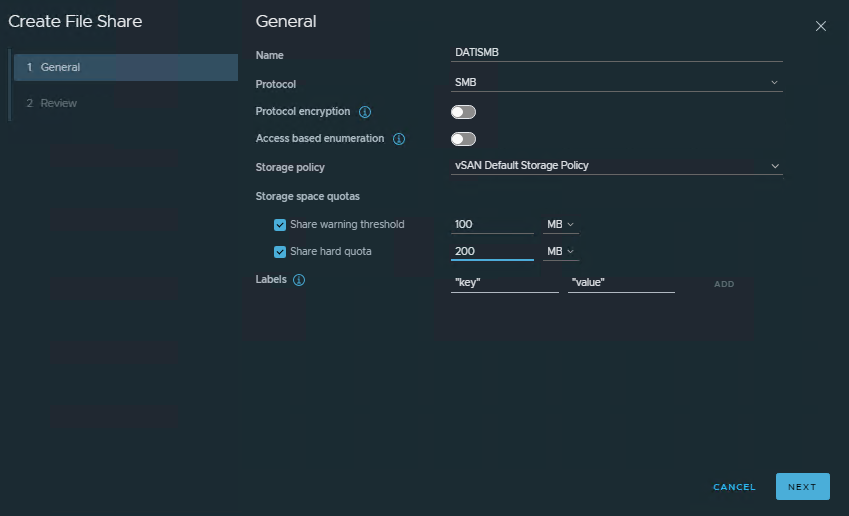
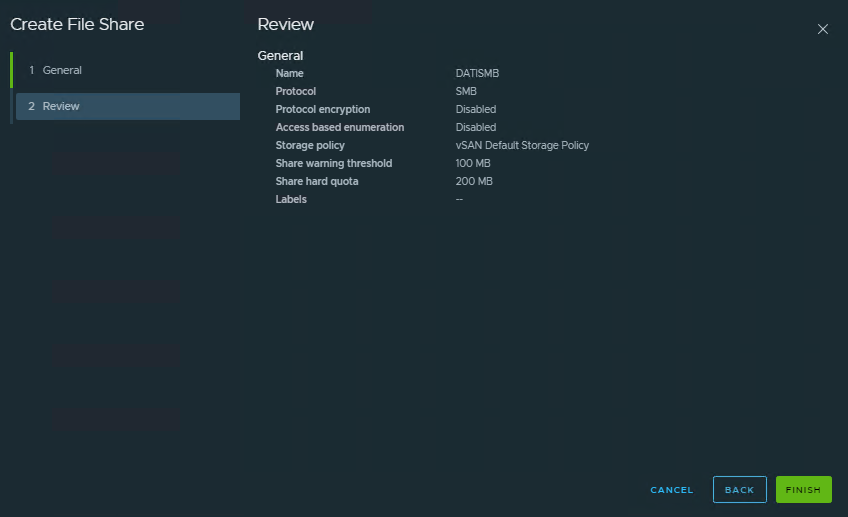
Will can create an SMB share

A screenshot of a computer

Description automatically generated

A screenshot of a computer

Description automatically generated

Configure ACL permission

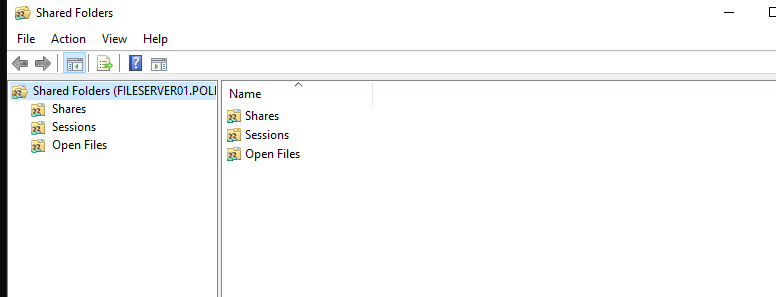
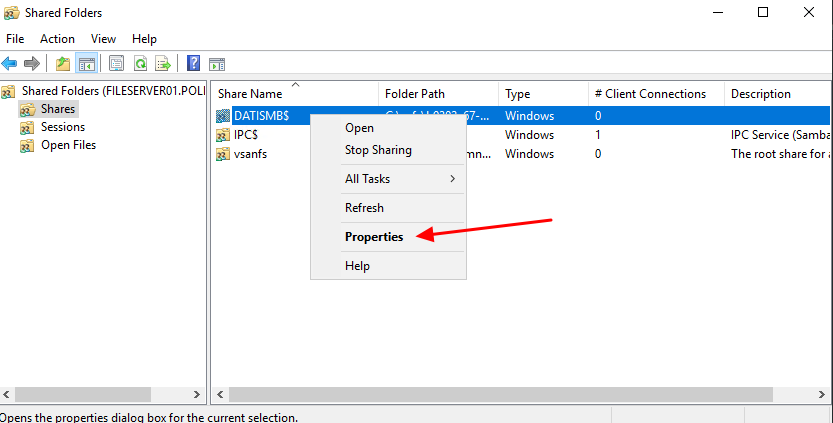
SMB SHARE can configure ACL for access use the FSM MMC from a windows OS.

A screenshot of a computer

Description automatically generated

A black background with white text

Description automatically generated

A screenshot of a computer

Description automatically generated

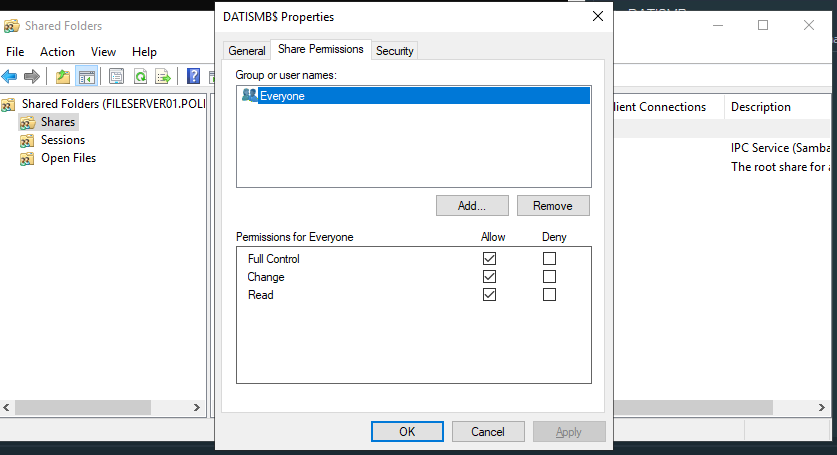
From best practices Microsoft it suggest to user Everyone on Share permission

A screenshot of a computer screen

Description automatically generated

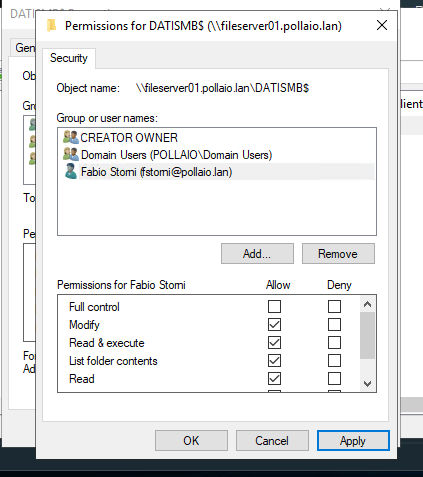
And set the permission on File Level (Security TAB)

A screenshot of a computer screen

Description automatically generated

Mount Share

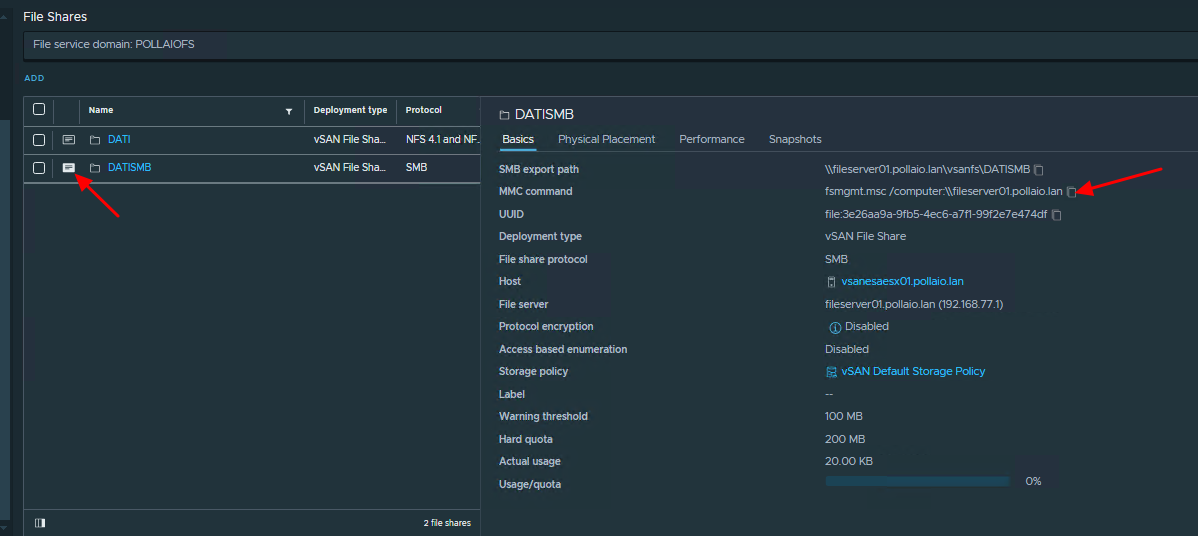
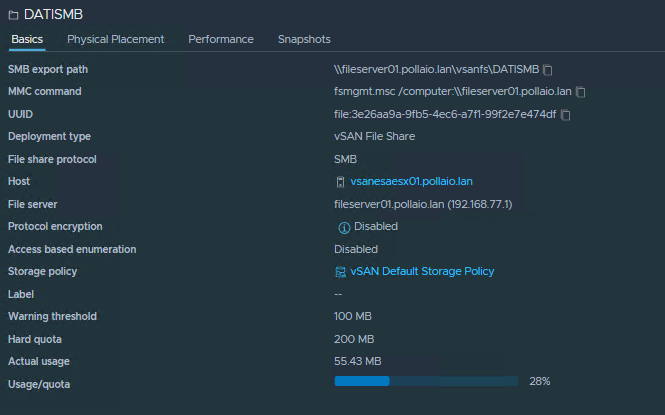
On every share proprieties, we can find the path to use for mounting the share (The SMB Export Path)

A screenshot of a computer

Description automatically generated

Share quota

The quota control if a specified Share exceed the max space add for it.

A screenshot of a computer

Description automatically generated

We can control the state of all share quotas from the vSphere console.

A screenshot of a computer

Description automatically generated

A screenshot of a computer

Description automatically generated

SMB Export Path -> The path to use for mounting the share

MMC Command -> The command to use for configuring the ACL

A screenshot of a computer

Description automatically generated

vSAN ESA and vSAN File Service

VMware App Volumes 4, version 2312.2

The 28 March VMware released a new version of App Volumes (it is a minor version) to fix some known Issues of previous versions.

VMware App Volumes 4, version 2312.2 Release Notes

In this case, it’s a relief for me because I just happened to find a bug in version 2312 on a customer with vSAN and App Volumes storage group. This version should fix the following issue: In the next few days, I will install the update and possibly update the post.

VMware App Volumes 4, version 2312.2

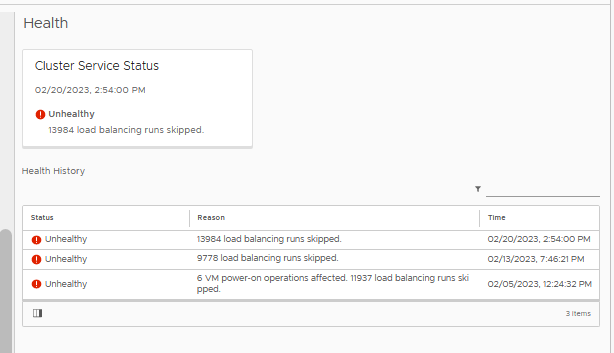
vSphere DRS functionality was impacted due to an unhealthy state vSphere Cluster Service

If you see such an error on the Cluster object of a vSAN (in my case it appeared on two vSAN clusters managed by the same vCenter)

vSphere DRS functionality was impacted due to an unhealthy state vSphere Cluster Service …….

an unhealthy state of the Service cluster

Graphical user interface, text, application, email

Description automatically generated

Errors such as the following in the EAM log. vCenter LOG

EAM.log:

2023-01-26T13:16:39.996Z |  INFO | vim-monitor | VcListener.java | 131 | Retrying in 10 sec.
2023-01-26T13:16:41.432Z | ERROR | vlsi | DispatcherImpl.java | 468 | Internal server error during dispatch
com.vmware.vim.binding.eam.fault.EamServiceNotInitialized: EAM is still loading from database. Please try again later.
        at com.vmware.eam.vmomi.EAMInitRequestFilter.handleBody(EAMInitRequestFilter.java:57) ~[eam-server.jar:?]
        at com.vmware.vim.vmomi.server.impl.DispatcherImpl$SingleRequestDispatcher.handleBody(DispatcherImpl.java:373) [vlsi-server.jar:?]
        at com.vmware.vim.vmomi.server.impl.DispatcherImpl$SingleRequestDispatcher.dispatch(DispatcherImpl.java:290) [vlsi-server.jar:?]
        at com.vmware.vim.vmomi.server.impl.DispatcherImpl.dispatch(DispatcherImpl.java:246) [vlsi-server.jar:?]
        at com.vmware.vim.vmomi.server.http.impl.CorrelationDispatcherTask.run(CorrelationDispatcherTask.java:58) [vlsi-server.jar:?]
        at java.util.concurrent.ThreadPoolExecutor.runWorker(ThreadPoolExecutor.java:1149) [?:1.8.0_345]
        at java.util.concurrent.ThreadPoolExecutor$Worker.run(ThreadPoolExecutor.java:624) [?:1.8.0_345]
        at java.lang.Thread.run(Thread.java:750) [?:1.8.0_345]
2023-01-26T13:16:50.007Z |  INFO | vim-monitor | ExtensionSessionRenewer.java | 190 | [Retry:Login:com.vmware.vim.eam:b55a7f93b59f0f7e] Re-login to vCenter because method: currentTime of managed object: null::ServiceInstance:ServiceInstance failed due to expired client session: null
2023-01-26T13:16:50.007Z |  INFO | vim-monitor | OpId.java | 37 | [vim:loginExtensionByCertificate:913aec585658e328] created from [Retry:Login:com.vmware.vim.eam:b55a7f93b59f0f7e]
2023-01-26T13:16:51.440Z | ERROR | vlsi | DispatcherImpl.java | 468 | Internal server error during dispatch
com.vmware.vim.binding.eam.fault.EamServiceNotInitialized: EAM is still loading from database. Please try again later.


And you see the lack of vCLS VMs in the two vSANs

To resolve the anomaly you must proceed as follows:

  • vCenter Snapshots and Backup
  • Log in to the vCenter Server Appliance using SSH.
  • Run this command to enable access the Bash shell:

shell.set --enabled true

  • Type shell and press Enter.
  • Run this command to retrieve the vpxd-extension solution user certificate and key:

mkdir /certificate

/usr/lib/vmware-vmafd/bin/vecs-cli entry getcert --store vpxd-extension --alias vpxd-extension --output /certificate/vpxd-extension.crt

/usr/lib/vmware-vmafd/bin/vecs-cli entry getkey --store vpxd-extension --alias vpxd-extension --output /certificate/vpxd-extension.key

  • Run this command to update the extension’s certificate with vCenter Server.

python /usr/lib/vmware-vpx/scripts/updateExtensionCertInVC.py -e com.vmware.vim.eam -c /certificate/vpxd-extension.crt -k /certificate/vpxd-extension.key -s localhost -u "Administrator@domain.local"

Note: If this produces the error “Hostname mismatch, certificate is not valid for ‘localhost'”, change ‘localhost’ to the FQDN or IP of the vCenter. The process is checking this value against the SAN entries of the certificate.

Note: The default user and domain is Administrator@vsphere.local. If this was changed during configuration, change the domain to match your environment. When prompted, type in the Administrator@domain.local password.

  • Restart EAM and start the rest of the services with these commands:

service-control --stop vmware-eam

service-control --start --all

vSphere DRS functionality was impacted due to an unhealthy state vSphere Cluster Service

I updated my Home Lab with the gift of Cohesity and the vEXPERT community

Immagine che contiene testo, interni

Descrizione generata automaticamente

Until a few weeks, my Home Lab was composed of two physical ESXi nodes (respectively an INTEL NUC NUC8i3BEH and an HP Desktop HP ProDesk 600 G2 DM), with 32 GB of RAM each and 5 TB of total disk.

For my testing activities, especially in VDI (Horizon) and some vSAN (implemented a 2-node cluster to test the operation of Shared Disks for Microsoft clusters) could be enough.

But the desire to test vSphere 8 (vSAN etc …) and the possibility of trying the Kubernetes world was pushing me to evaluate an expansion of my Home LAB ……….

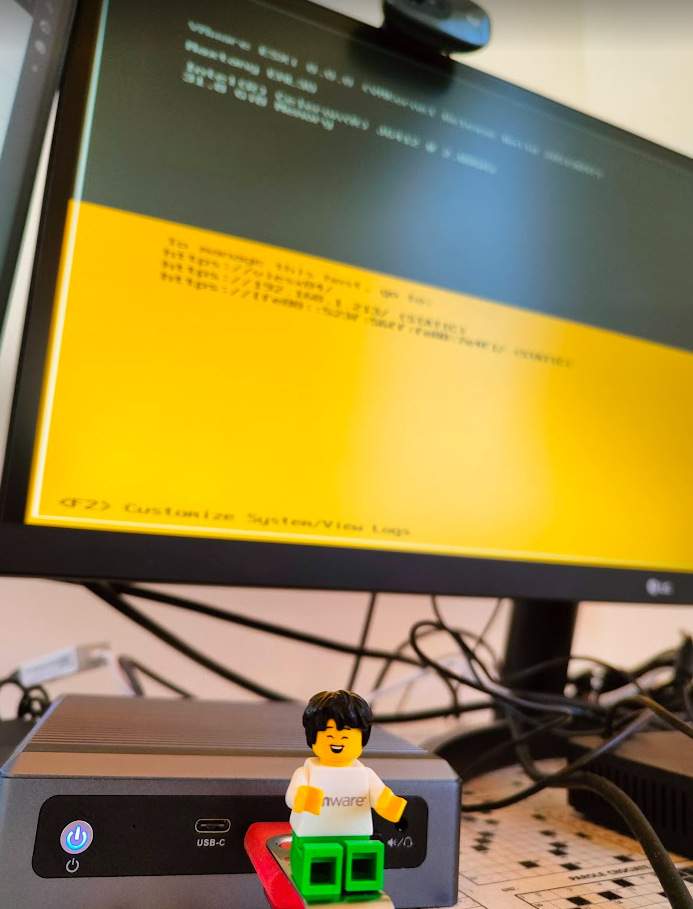
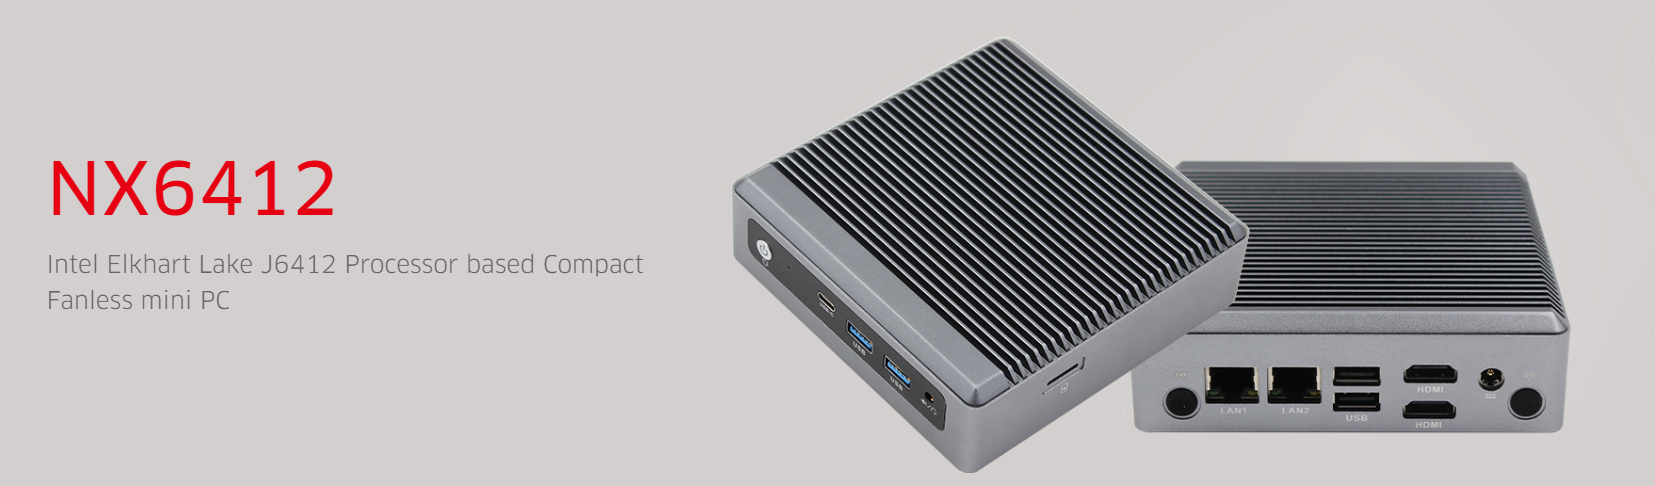
………. And thanks to COHESITY and the vEXPERT community at VMware EXPLORER in Barcelona I was able to have my expansion…. a beautiful Maxtang NX6412 NX6412-Maxtang-A premier manufacturer (maxtangpc.com)

Image containing electronic, projector

Auto-generated description

here’s how I activated the new HW:

  • Equipment
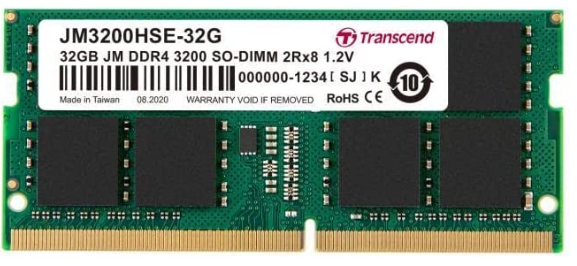
    • Being barebones I had to buy RAM and DISK, taking advantage of Black Friday I bought:
      • Timetec 1TB SSD 3D NAND TLC SATA III 6Gb/s M.2 2280 NGFF 512TBW
      • Transcend JM3200HSE-32G 32GB DDR4 3200MHz SO-DIMM 2Rx8 1.2V

Image containing text, electronic, circuit

Auto-generated description

For the RAM I will proceed to evaluate an expansion with an additional 32GB bank

  • Installation
    • Updated vCenter to version 8
    • Installed ESXi version 8 on a USB stick (Using VMware Workstation and installing ESXi from an ISO on my USB stick) and used it to boot from Maxtang.

At this point I encountered the first problem, the two network cards are not compatible… I had to use a USB dongle -> Ethernet and I managed to start everything (Thanks also to the community drivers USB Network Native Driver for ESXi | VMware Flings

    • I finally added ESXi to my vCenter
  • First use
    • The first thing I did was use William Lam’s script to deploy a vSAN 8

Automated vSphere & vSAN 8 Lab Deployment Script (williamlam.com)

    • I configured the HA of my vCenter
    • Now I’m trying to improve my know-how on Tanzu and WorkSpace One

So THANK YOU vEXPERT, VMware and COHESITY

I updated my Home Lab with the gift of Cohesity and the vEXPERT community

vSAN Skyline Health History

VMware with vSAN 7.0u2 introduced an interesting functionality on Skyline for reviewing the state of vSAN in the past time

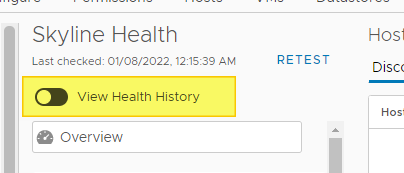
The functionality is disabled by default, if I want to see the Health History I need to only check the correct option.

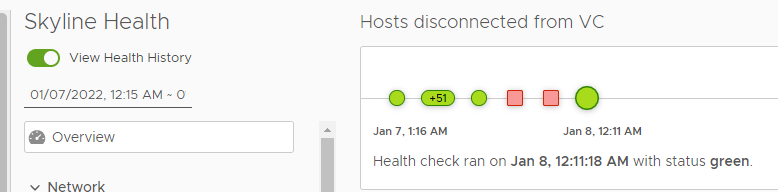
After enable it I can see all history

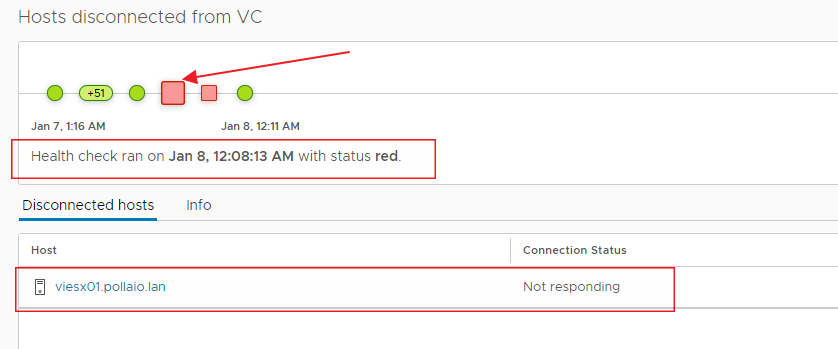
and I can select the red icon for to see what happened

On Jan 8, 12:08 we encountered a problem on a vSAN cluster HOST

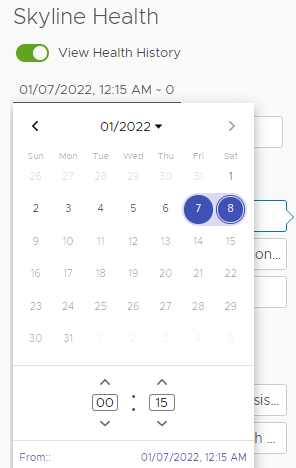
It is possible to select the day to check the vSAN status, just select the correct date and time

vSAN Skyline Health History

VMware vSAN 7 Update 3 New Features

VMware vSAN 7 Update 3 New Features

With the release of VMware vSphere 7 Update 3, this also means there is a new version of vSAN as well. VMware vSAN has been trailblazing in the world of HCI for several years now and with over 30,000 customers and many releases behind it, the solution has certainly grown, matured, and become […]


VMware Social Media Advocacy

VMware vSAN 7 Update 3 New Features

VMware Skyline Health Diagnostics

Last Year VMware release a Diagnostic Tool for Analyze vCenter, vSAN and ESXi infrastructure.

VMware Skyline Health Diagnostic is a Virtual Appliance (based on Photon OS) for analyzing our vSphere infrastructure.

In this link major info for install:

Introducing VMware Skyline Health Diagnostic Tool

but what can it be useful for?

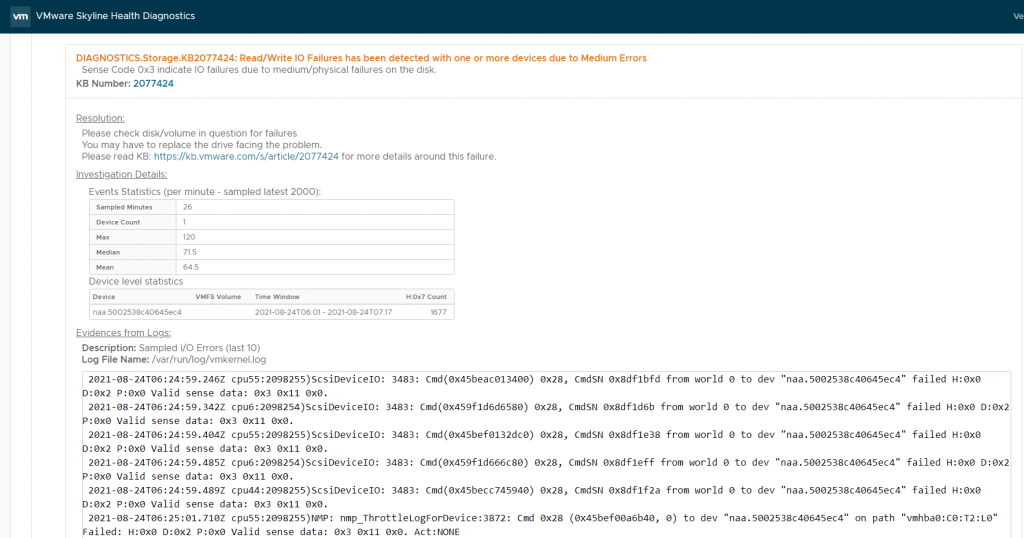
Imagine you have a vSAN infrastructure and at some point, a diskgroup fails but errors are reported on the disks. With this tool, we can analyze the logs exported from the ESXi host on which the diskgroup resides and identify on which physical disks I / O errors have been highlighted

VMware Skyline Health Diagnostics

Horizon Cloud on Azure 1 di 5

Attualmente è disponibile la possibilità di utilizzare una  trial della soluziona Horizon Cloud di VMware su cloud AZURE. 

La trial è disponibile per 90 giorni (prima del covid-19 erano meno estesa). 
Per procedere nell’utilizzo della trial è necessario eseguire una serie di semplici step:
  1. Acquire Horizon Cloud Service on Microsoft Azure
  2. Prepare Microsoft Networking and AD
  3. Azure Deploy Horizon Cloud Service On Microsoft Azure 
  4. Deploy Microsoft Azure-Based RDS Host and VDI Desktop 
  5. Install Applications and Assign Users 
Procediamo con ordine e partiamo da Acquire Horizon Cloud Service on Microsft Azure  dove:
– Attiviamo le licenze Trial e gli step che consiglio sono:
  • Crearsi un account GMAIL 
  • Registrarsi al sito  MyVMware con il nuovo account GMAIL 
  • Compilare l’apposito FORM (Request Form-Horizon Universal License Free Trial*)

       Le credenziali create per accedere MyVMware saranno anche quelle che ci permetteranno l’accesso al portale https://cloud.horizon.vmware.com

Nell’apposito FORM verrà richiesto:
– Tipologia di trial (Azure, On-Premises, AWS, Azure VMware Solutions, Google Cloud VMware Engine)
– Numero e tipologia (Concurrent o user) delle licenze Horizon Universal 
– Location della VMware Horizon Panel (America, Europa ecc..)
– Azure Region del deploy dell’ambiente 
– Utilizziamo una Microsoft Azure Subscription 

 Dal portale azure attiviamo la nostra Subscription dove andremo a crare i servizi necessarei per il deploy dei componenti (Horizon, VM ecc)
*Horizon Universal License sono le nuove licenze Horizon che posso essere utilizzate sia per ambienti on-premises o su cloud
Horizon Cloud on Azure 1 di 5

vSphere Skyline Health

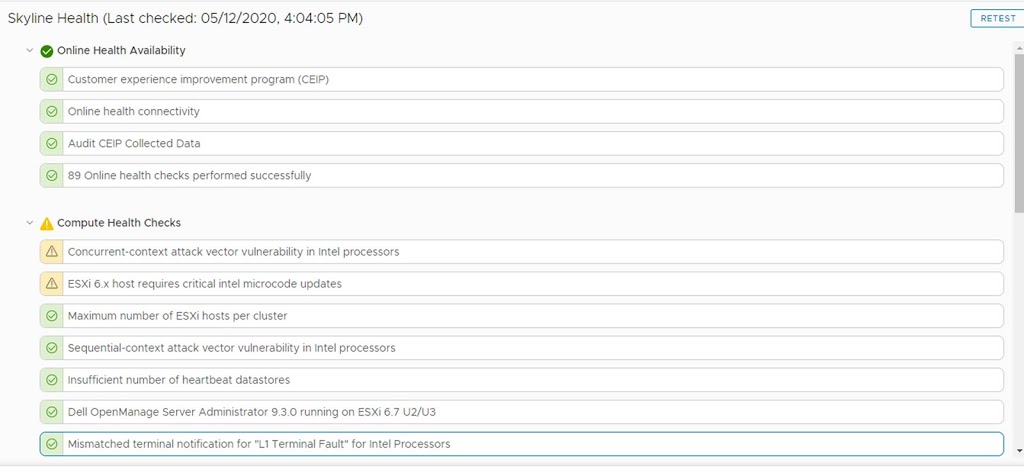
Uno degli aspetti che mi spingono a proporre di aggiornare le infrastrutture VMware vSphere alle versione 6.7u3 è anche la presenza dello skyline health. Strumento indispensabile per monitorare lo stato della infrastruttura


Le informazioni che possiamo velocemente individuare analizzare sono relative a oggetti come i singoli host ESXi, il vCenter e lo stato della vSAN.

Che informazioni possiamo trovarci? Dalle vulnerabilità di sicurezza  presenti nella nostra infrastruttura a versioni di firmware da aggiornare. Ovviamente correlate da collegamenti a pagine della KB VMware con informazioni specifiche su come  gestirle.  


Per poter avere queste informazioni è necessario abilitare il CEIP (Customer Experience Improvement Program).


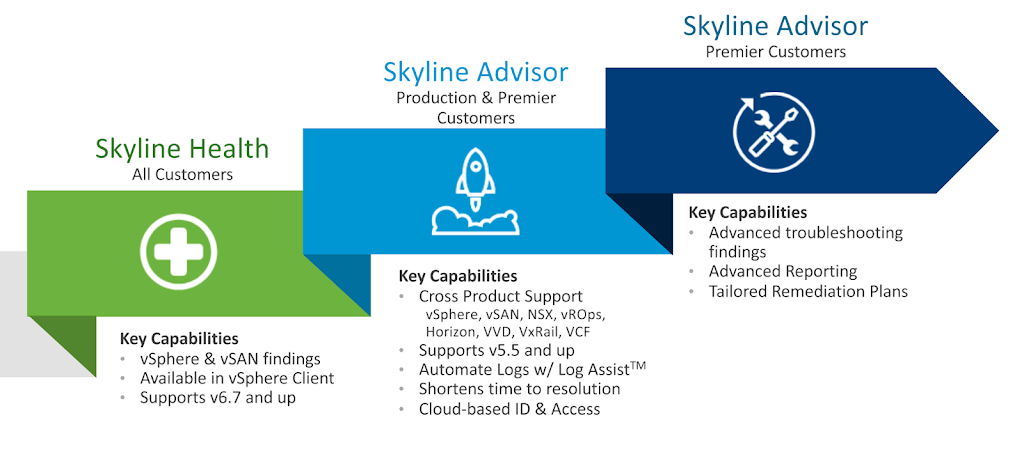
VMware investe da sempre nella soddisfazione dei clienti e per cui tutto il flusso di gestione e assistenza con l’avvento di skyline ha guadagnato   ulteriormente in efficienza.


vSphere Skyline Health