Converge vSphere 8 to VMware vSphere Foundation 9.1.x

.

ATTENTION!!

This is a document that was created from a Home Lab.

My Home Lab:

vSphere 8u3i

One vCenter

Two ESXi hosts (Nested)

One NFS datastore (TrueNAS)

Official Documentation

Source Converge a vCenter Instance and ESX Hosts to vSphere Foundation

Verify upgrade path from Product Interoperability Matrix

Requirements

Prepare a temporary IP for vCenter

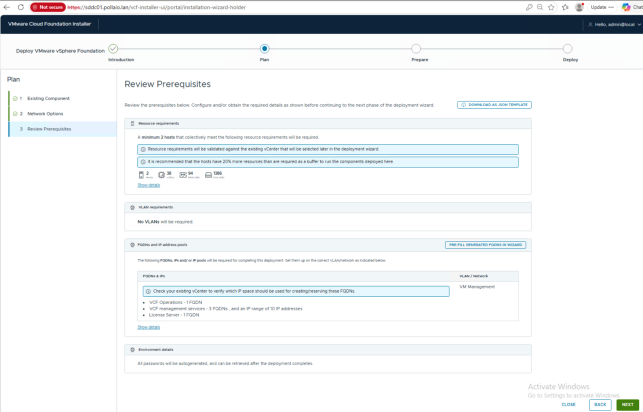
Prepare five FQDNs and register on DNS (with reverse) for:

1 VCF Operation

3 VCF Management Services

1 VCF License server

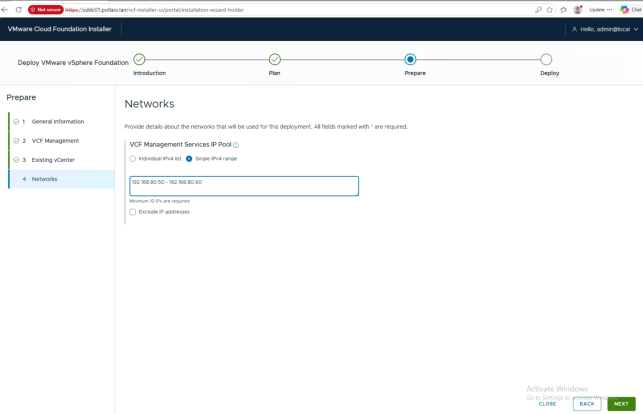
And ten IP addresses (minimum) for Management Services

.

UPGRADE STEP

• vCenter Upgrade
• Install VCF Installer
◦ Install VCF Operations
◦ Install VCF Management Services
• Upgrade ESXi
◦ Upgrade ESXi Hosts
◦ Upgrade vDS
◦ Upgrade VMware Tools
◦ Upgrade Virtual HW

.

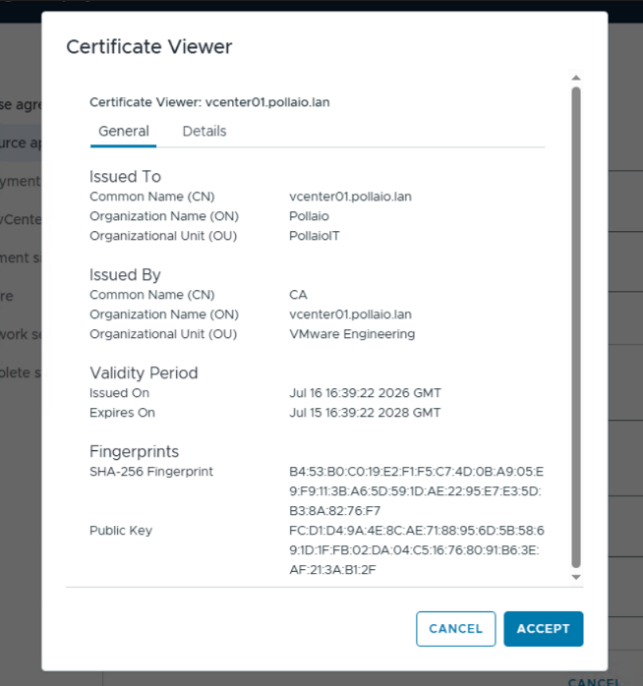
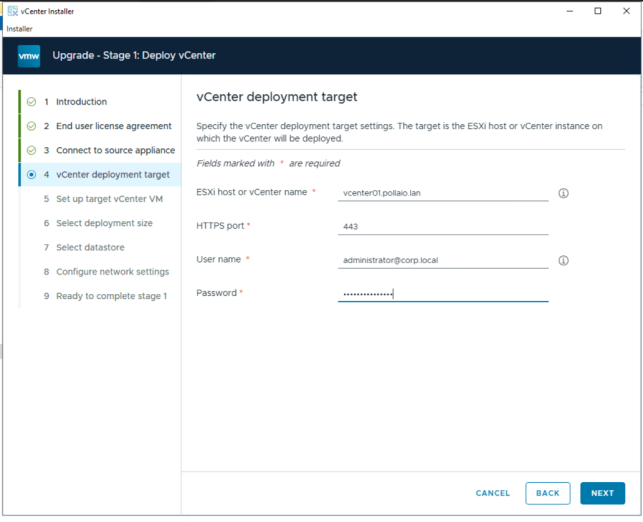
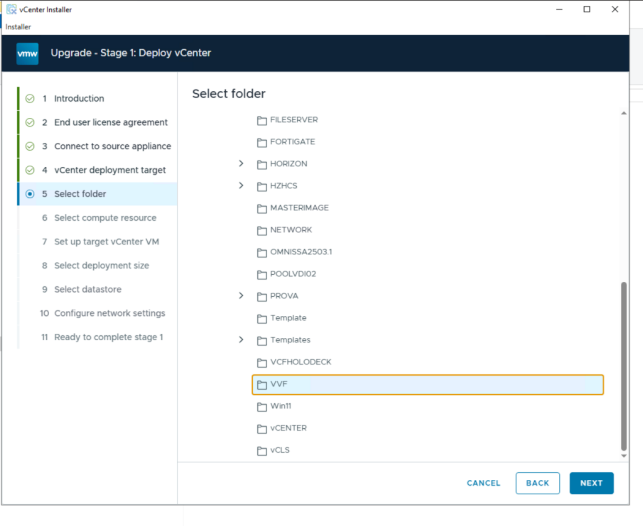
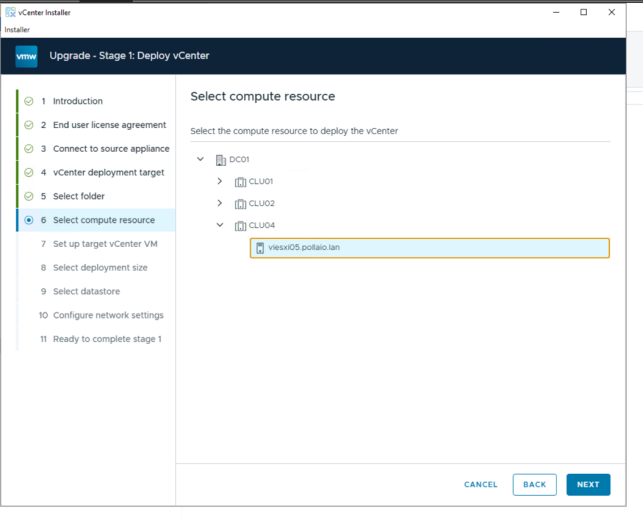
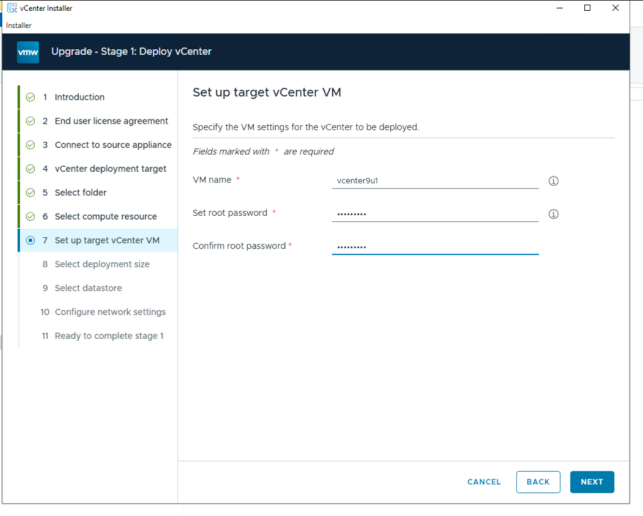
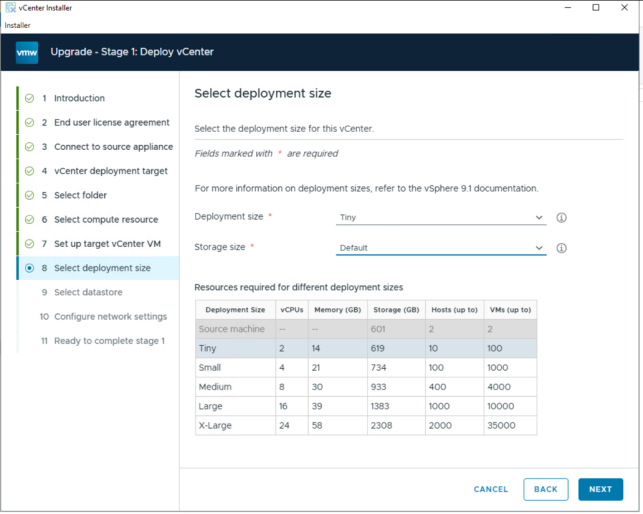
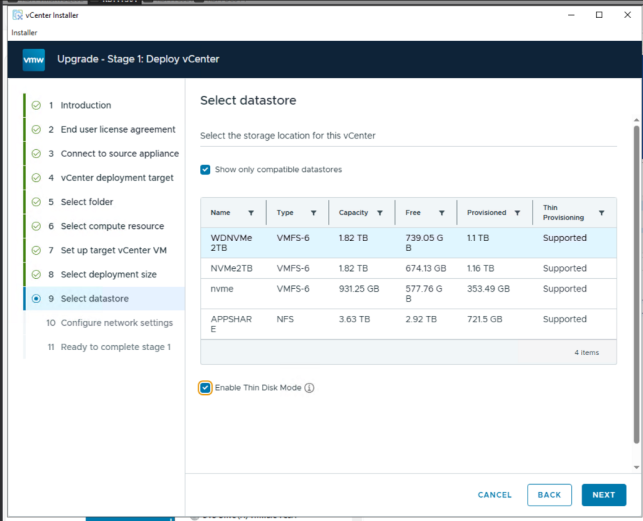
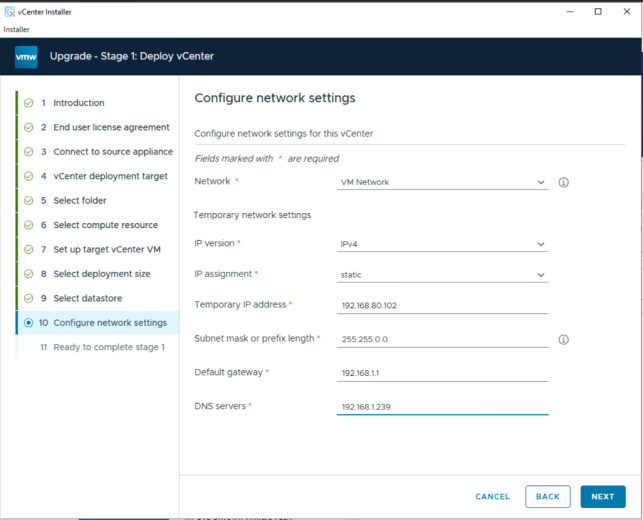
vCenter Upgrade

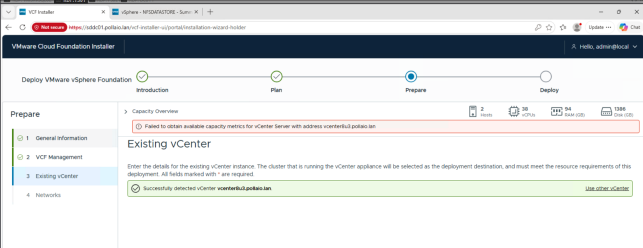
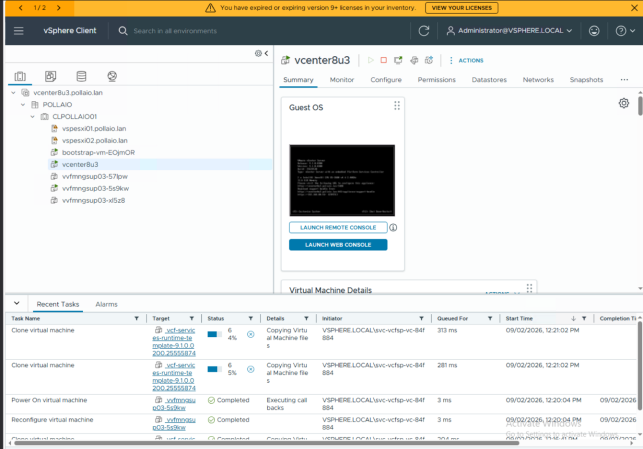
You must deploy the new vCenter in the vSphere Cluster that you need to upgrade at VVF. In my test, I deployed the new vCenter in another vSphere infrastructure, and the VCF Installer reports an error.

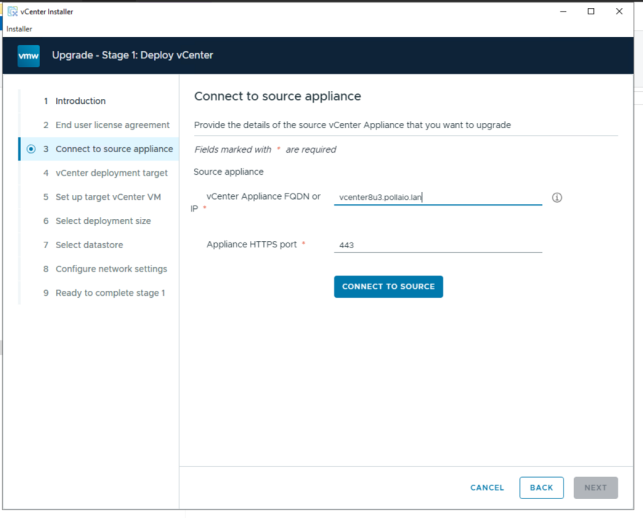
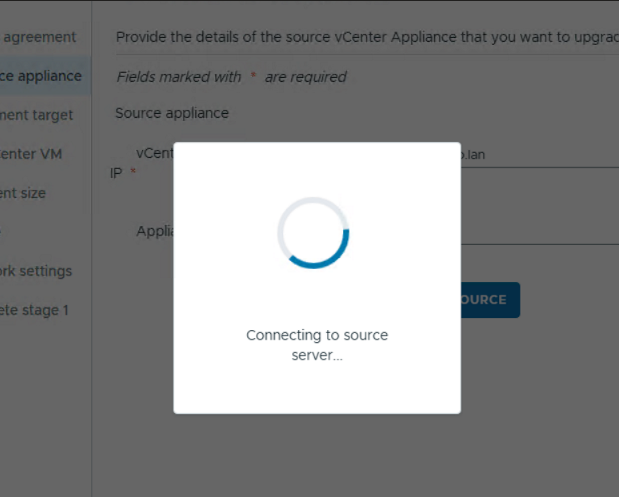
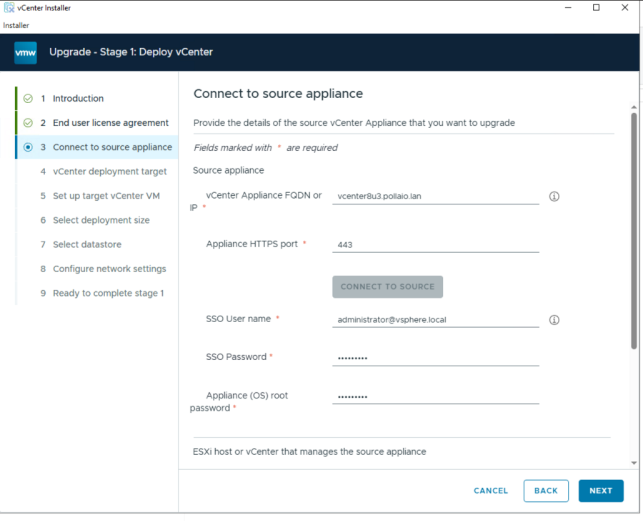
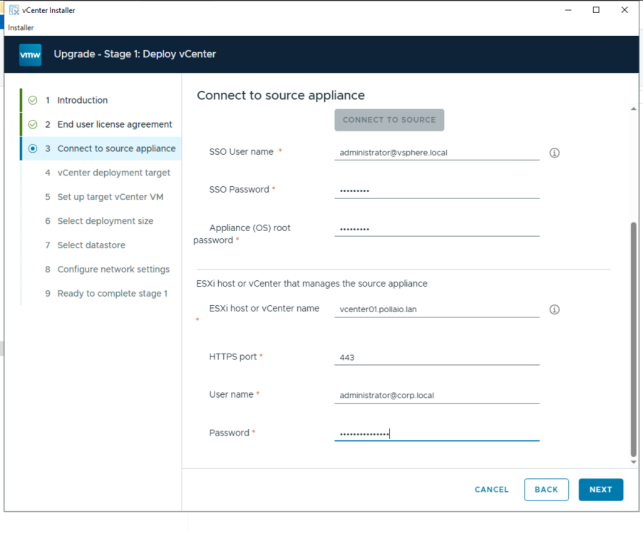
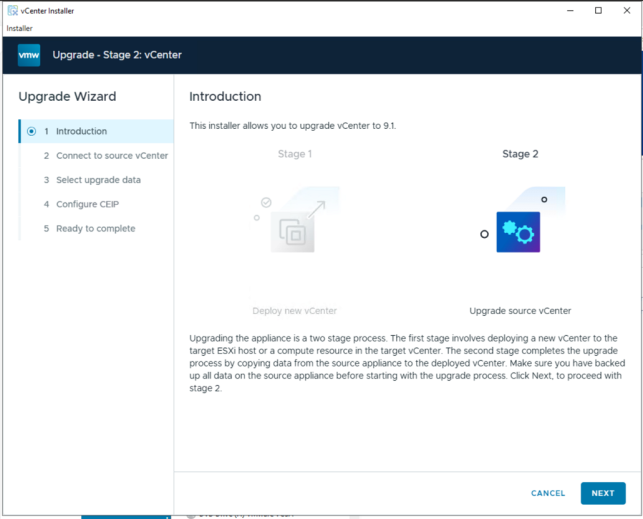
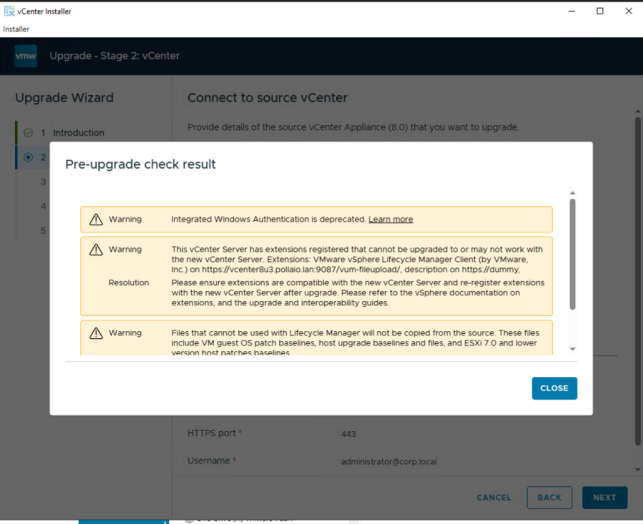
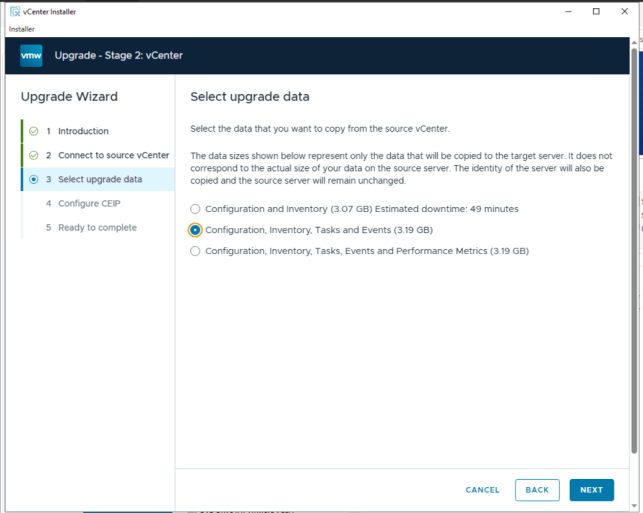
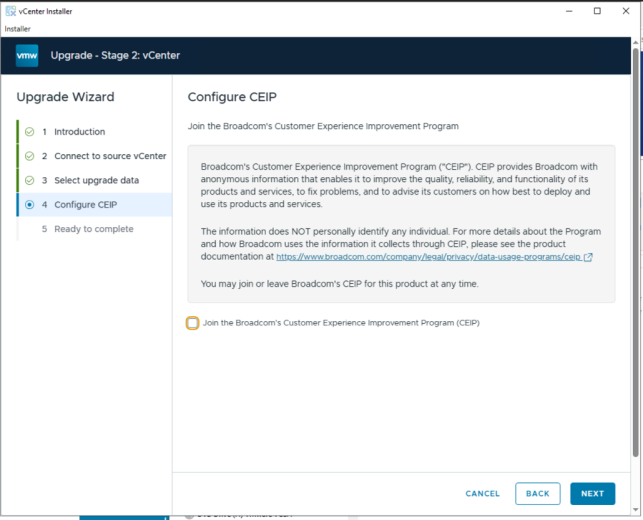
The vCenter upgrade process is a classic vCenter upgrade.

.

Download vCenter 9.1 from the Broadcom Support Portal

Dedicate a temp IP address and FQDN name (need to register in DNS) for deployment

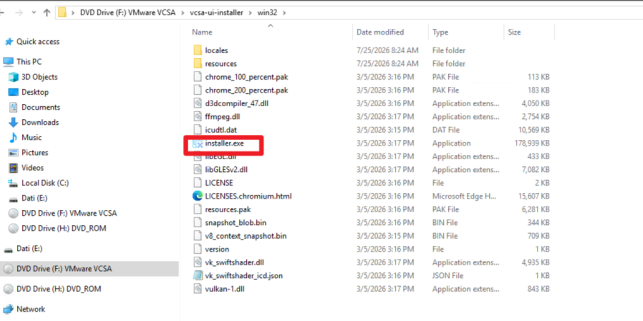
Mount the downloaded ISO on a bridge PC or Virtual Machine

Start the UI installer

 .

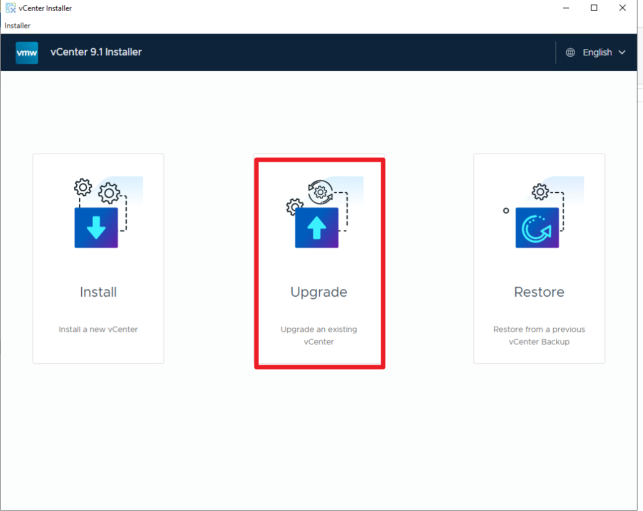
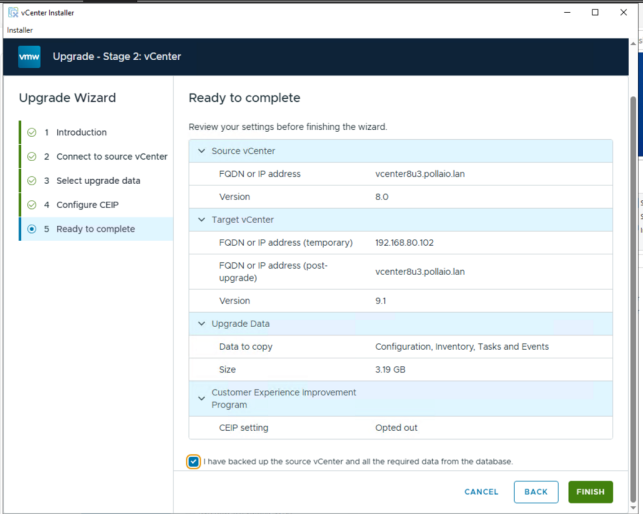
Select upgrade

 .

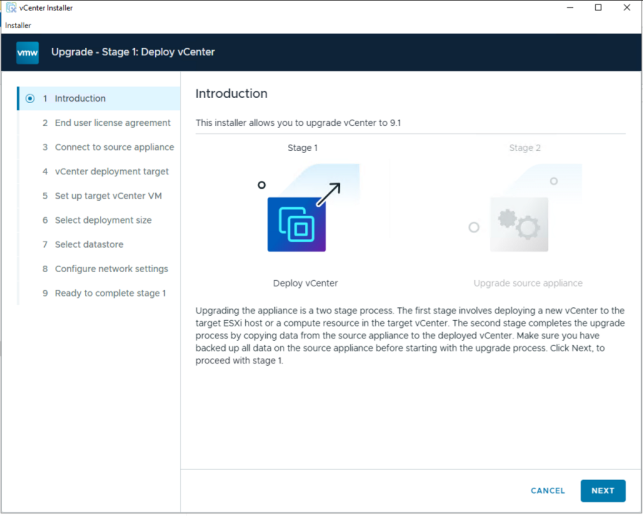
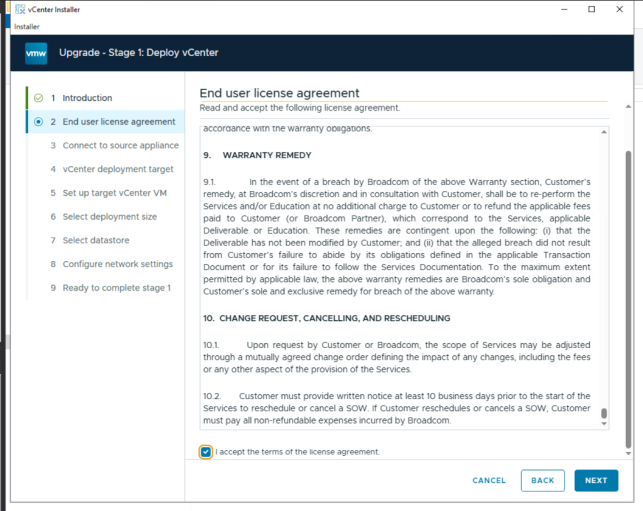
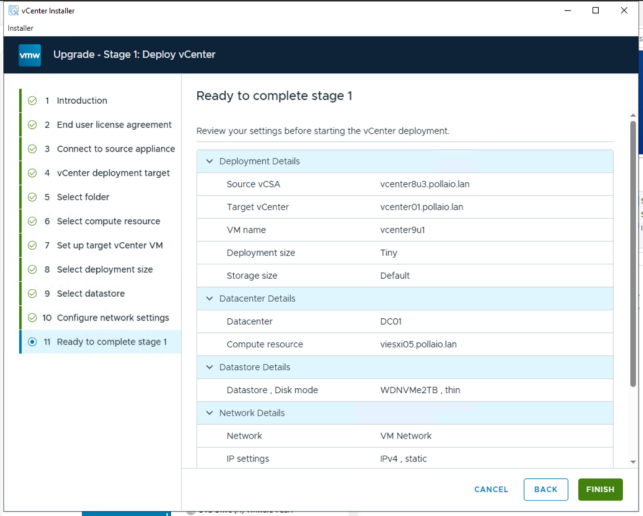
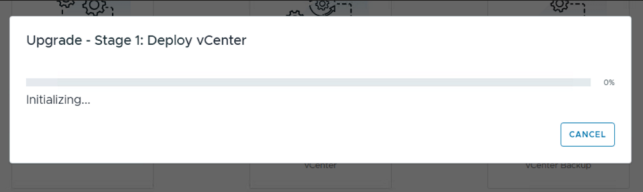
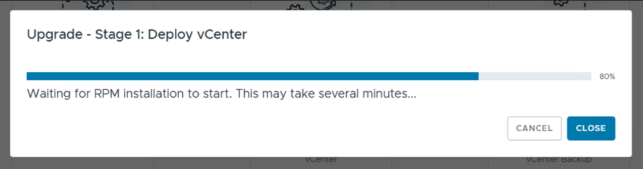
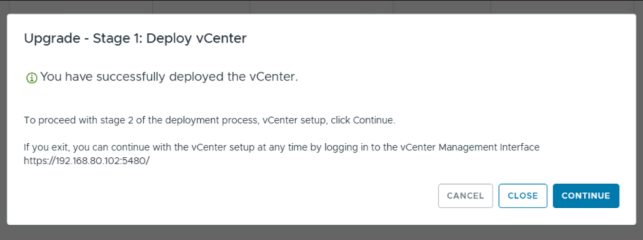
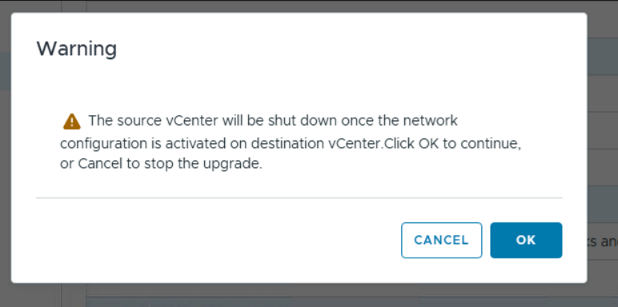
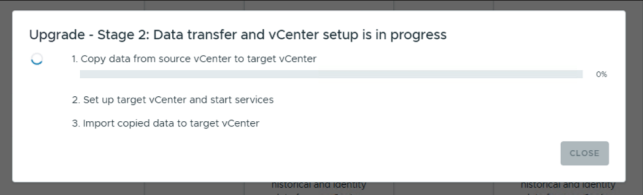
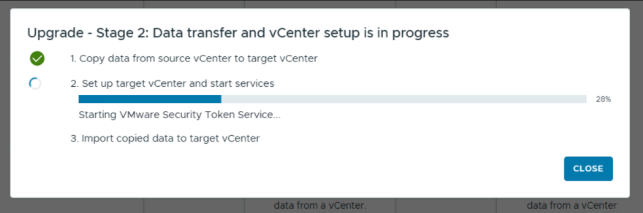
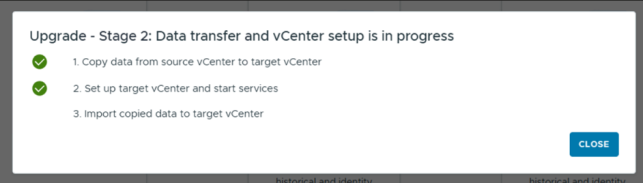
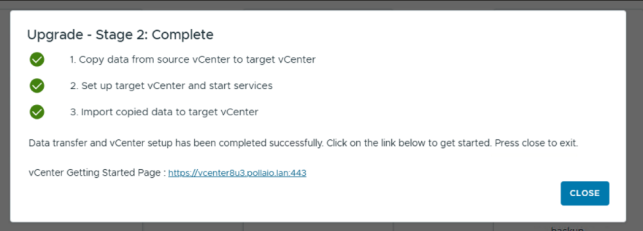
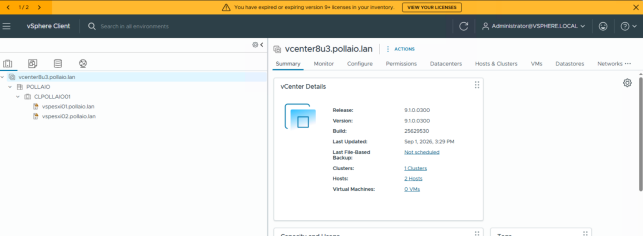
Start the deployment

.

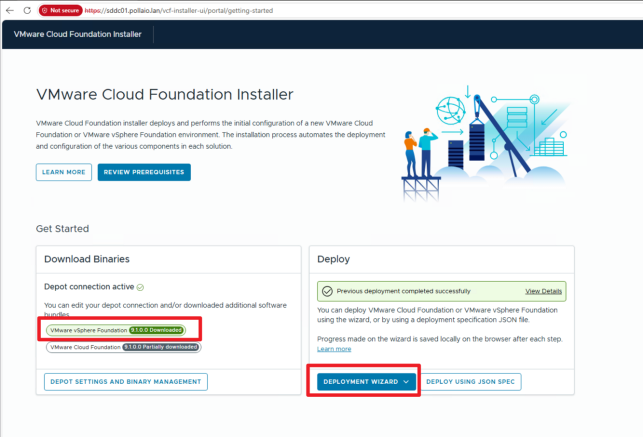
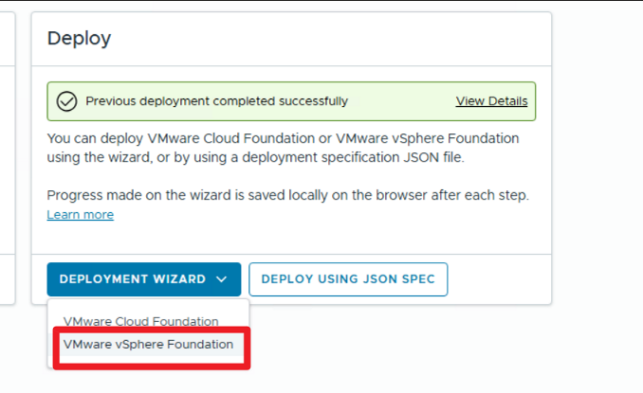
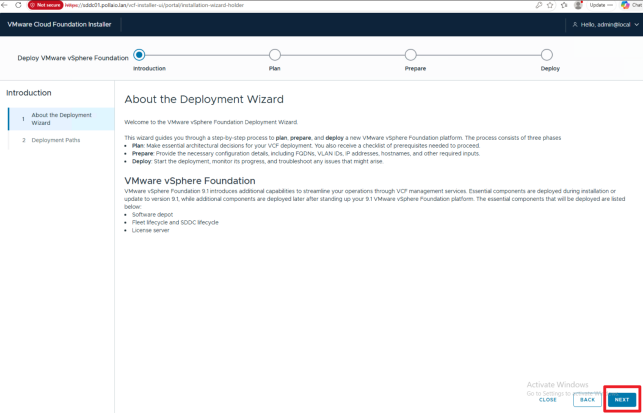
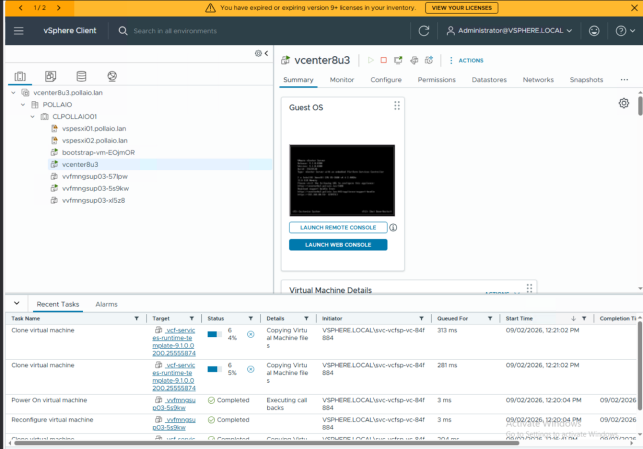
Deploy the VCF Installer appliance.

I covered this installation in another Post; read this post:

Start a New vSphere Foundation Deployment by Using the VCF Installer Deployment Wizard – BIOLNX

Deploy VCF Operations

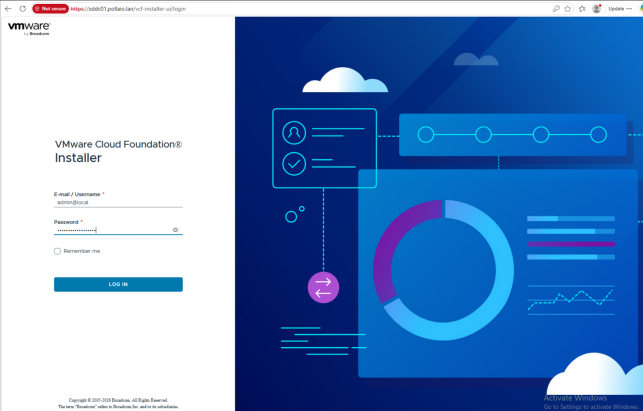
Log in to VCF Installer

Download bundles for the VCF Installer appliance (Read this post: Start a New vSphere Foundation Deployment by Using the VCF Installer Deployment Wizard – BIOLNX)

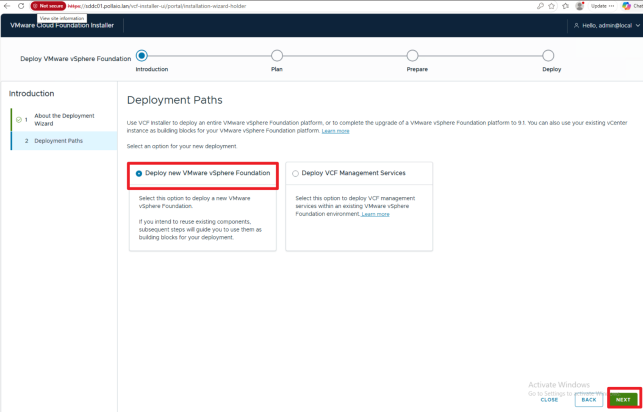
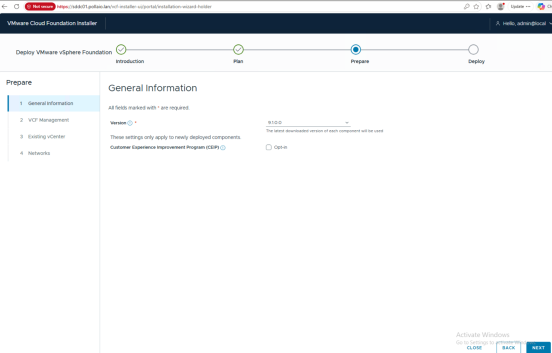
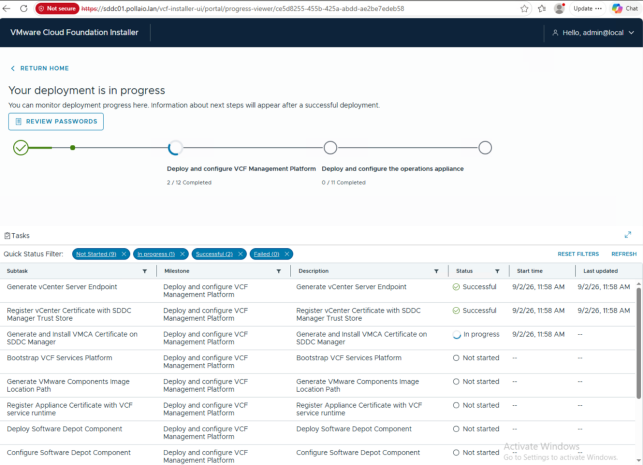
Use VCF Installer to deploy your vSphere Foundation platform.

.

.

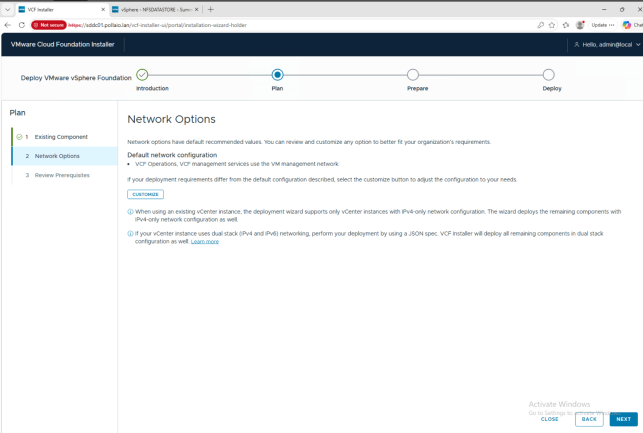
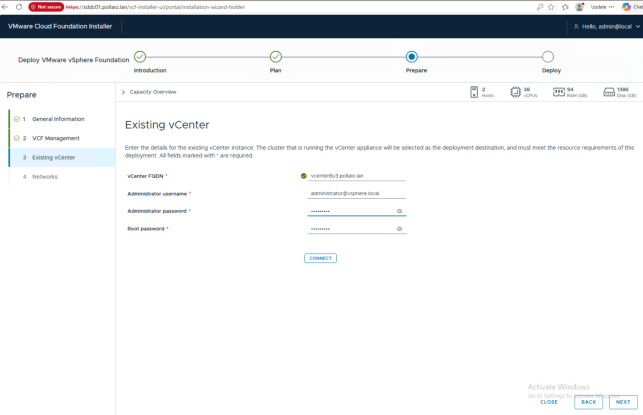
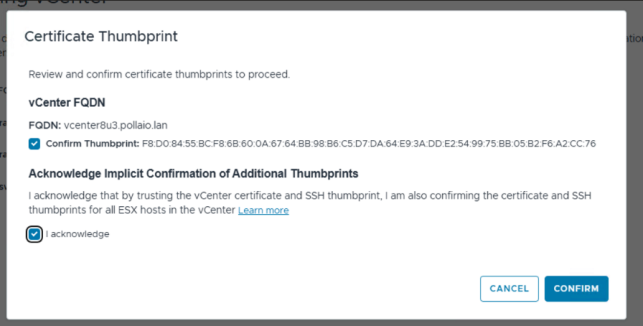
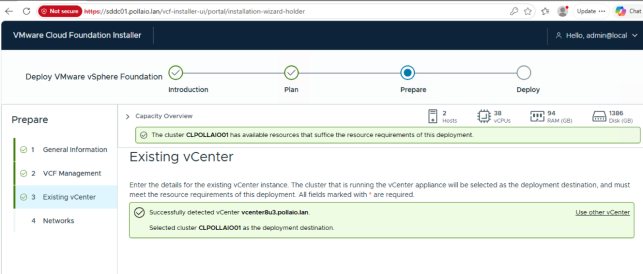
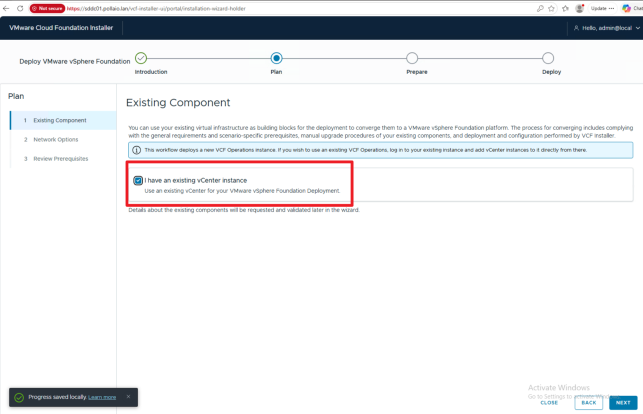
Select I have an existing vCenter

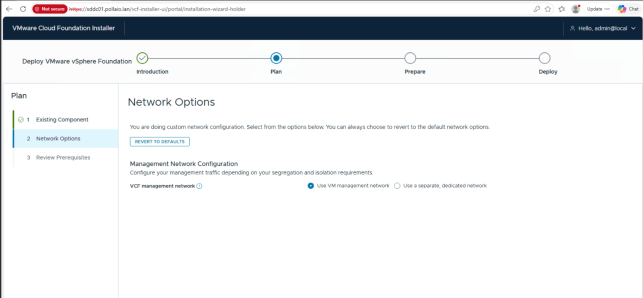
Select the network infrastructure for the Management Services and Operations component in my Home Lab. I choose the network where the VM is deployed (otherwise, create a dedicated network; check the firewall configuration in the official documentation)

.

.

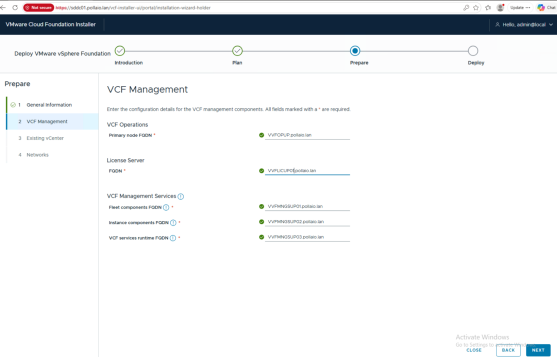
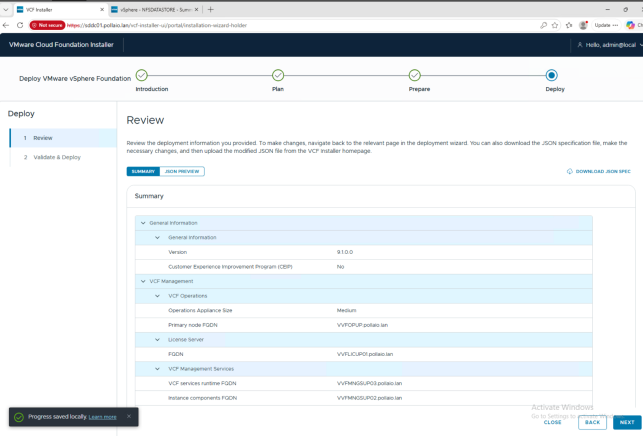
Dedicate IP address and FQDN (with reverse)

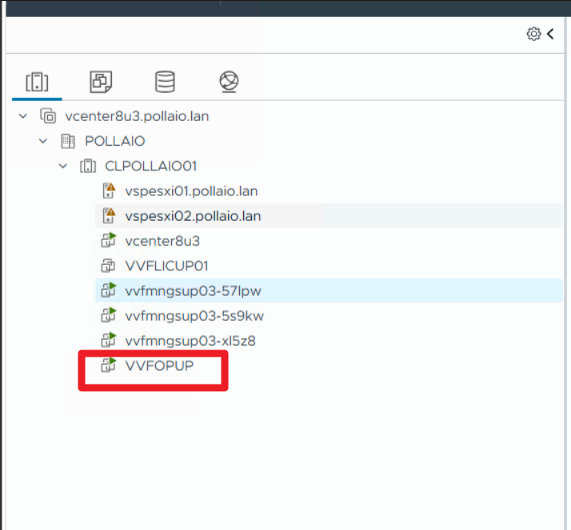
VVFOPUP.pollaio.lan 192.168.80.110

VVFMNGSUP01.pollaio.lan 192.168.80.111

VVFMNGSUP02.pollaio.lan 192.168.80.112

VVFMNGSUP03.pollaio.lan 192.168.80.113

VVFLICUP01 192.168.80.114

.

.

We enter the FQDN names of the objects; if entered correctly in the DNS (with the reverse), they have a green tick

.

In my case, if the new vCenter is not deployed in the cluster that we want upgrade, we see an error.

.

After vCenter migrating to the vSphere cluster object for the upgrade

.

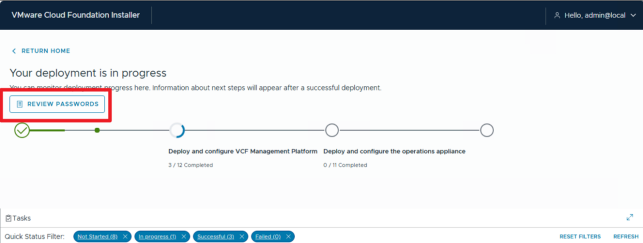
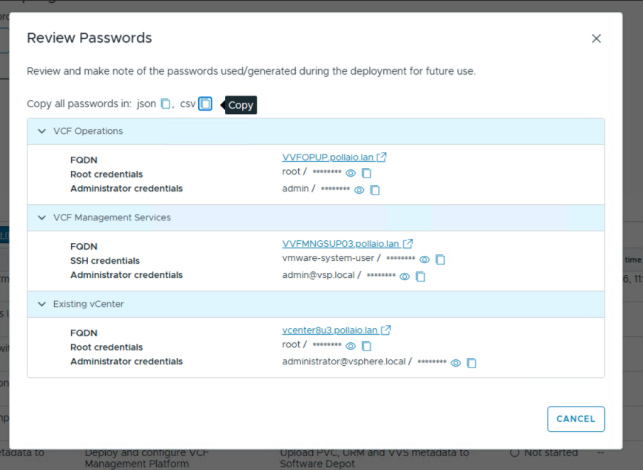
Save the Password!!!!

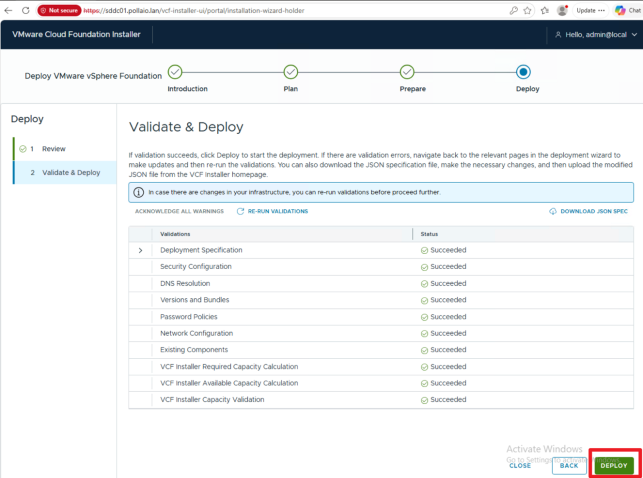
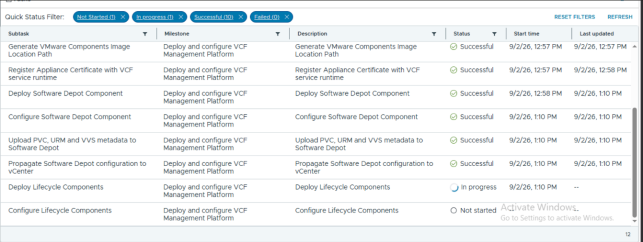
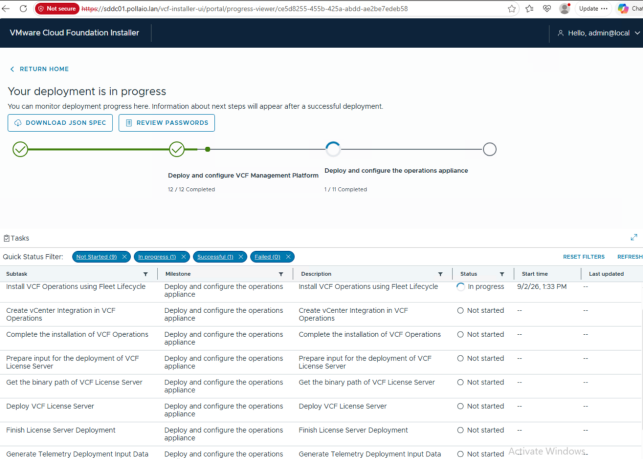
Start the VCF Operation appliance installation

.

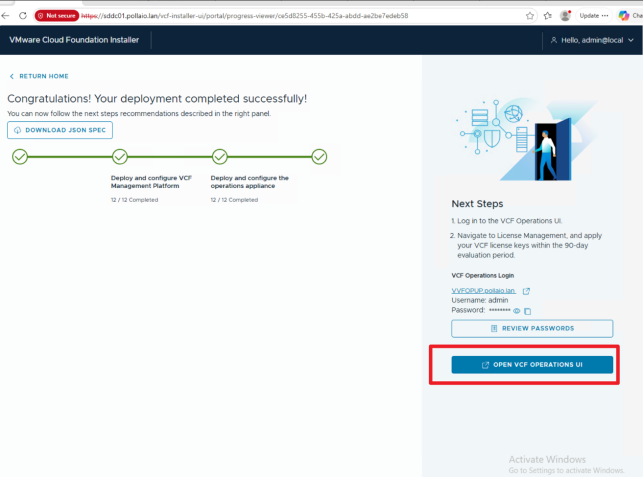
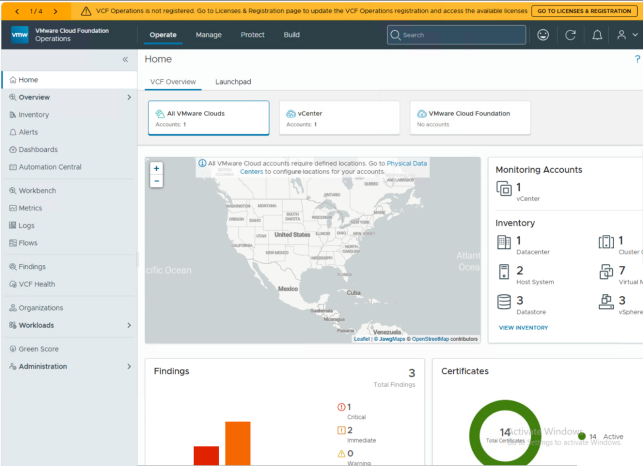
At the end of VCF operation Installation, we can log in to the VCF Operations UI

Now we can configure the License (See this post)

Register VCF Operations and Your License Server in Connected Mode – BIOLNX

.

Upgrade ESXi

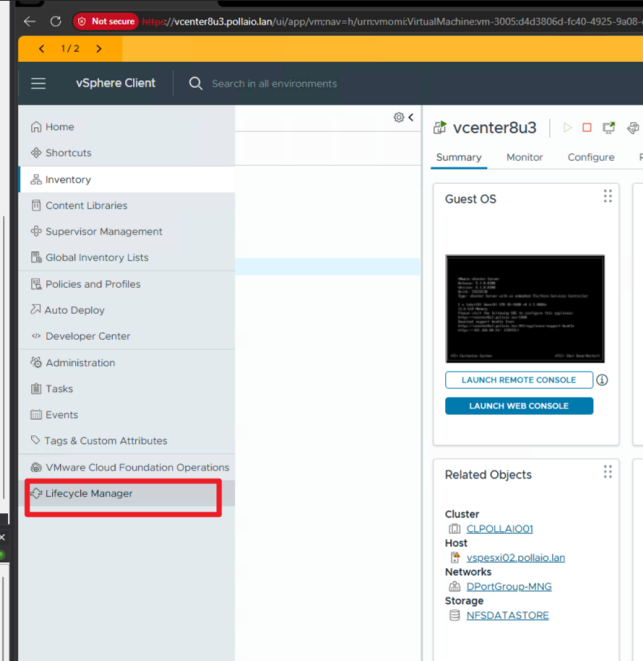
Log in to vCenter and select the Lifecycle Manager

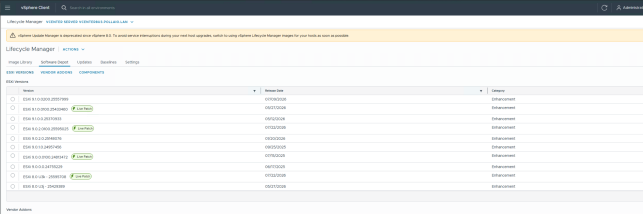
After some time, under Software Depot, the new ESXi version appears

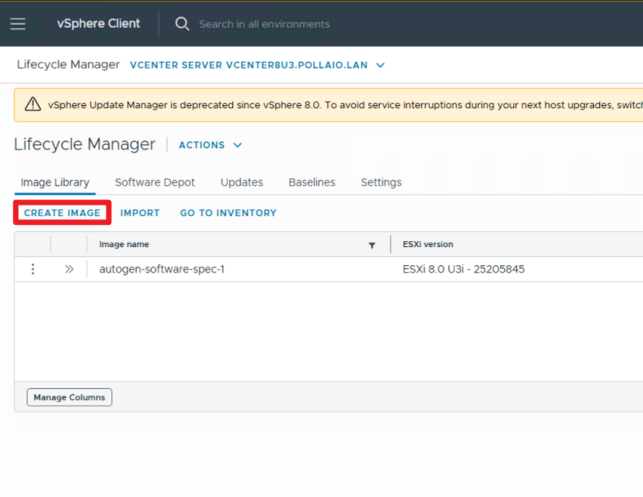
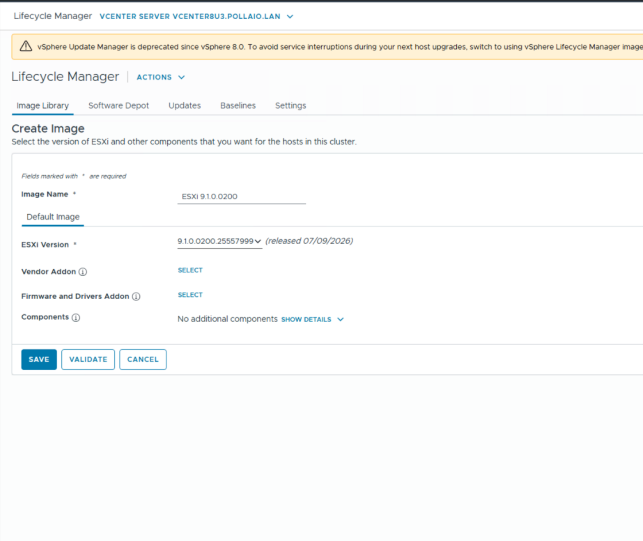
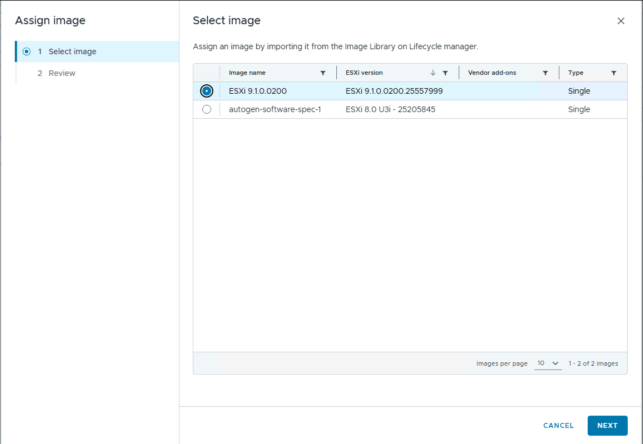
Now we create a new Image; go to Image Library and select Create Image


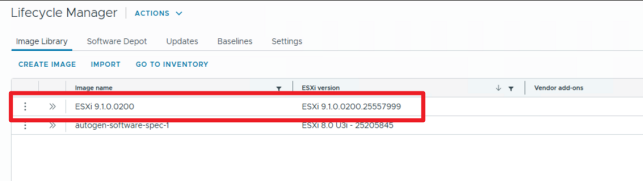
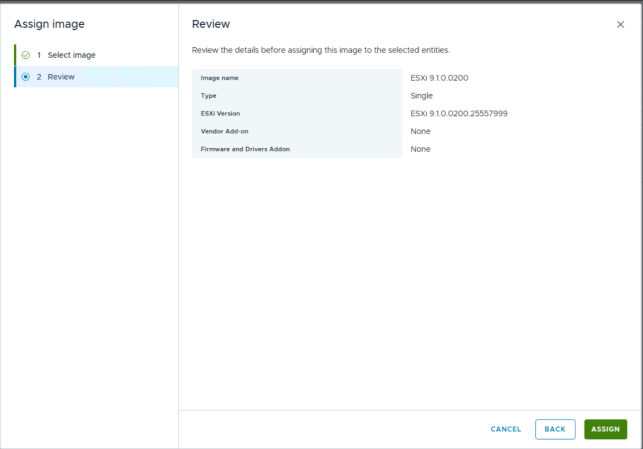
Validate and save

.

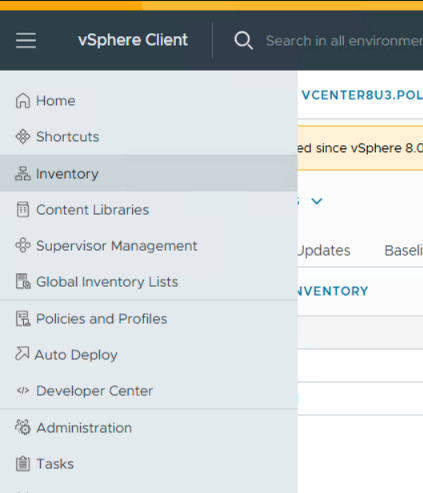
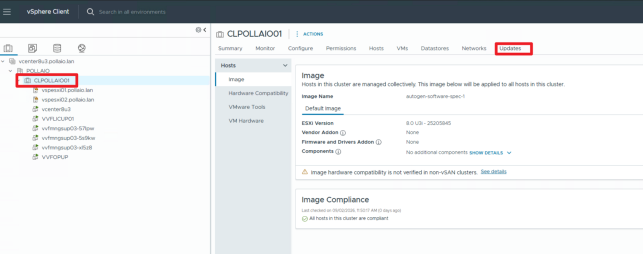
Go to Inventory

Select the cluster and after updates

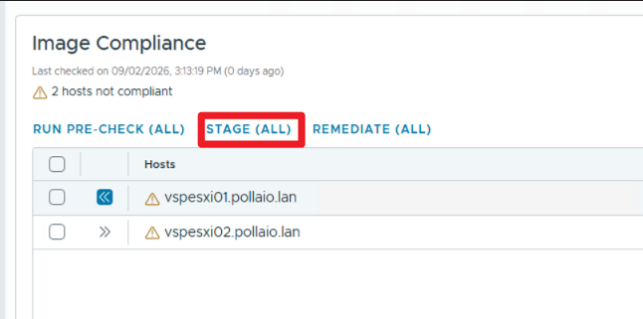
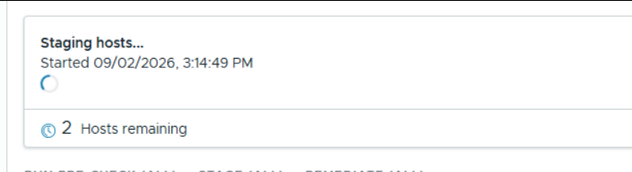
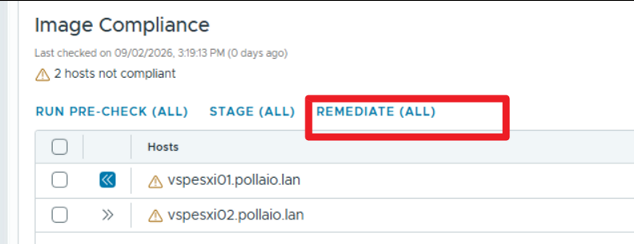
.

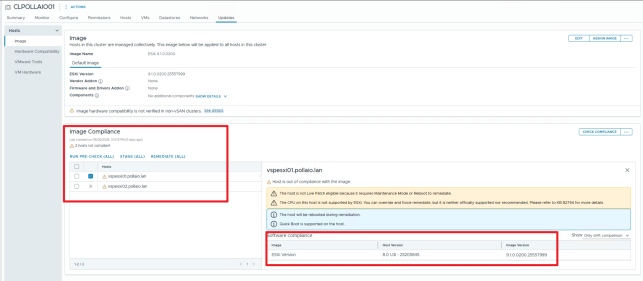
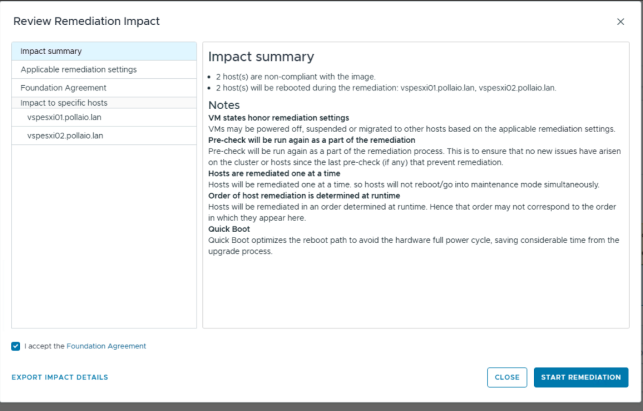
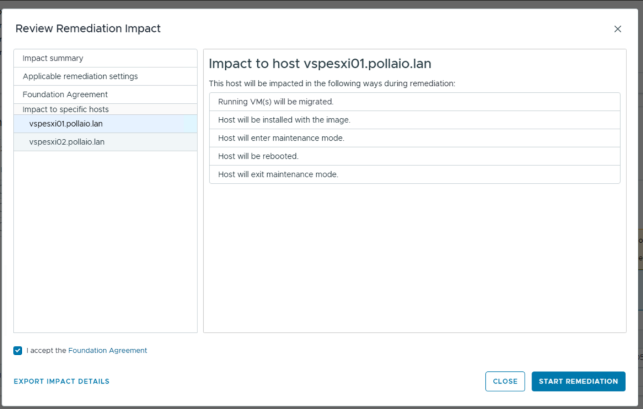
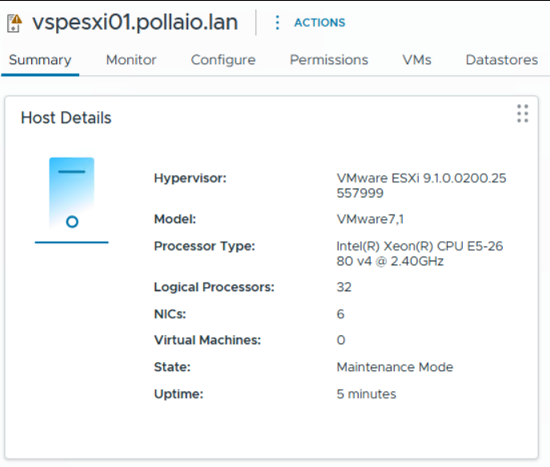
Now the upgrade will start if the cluster is correctly configured

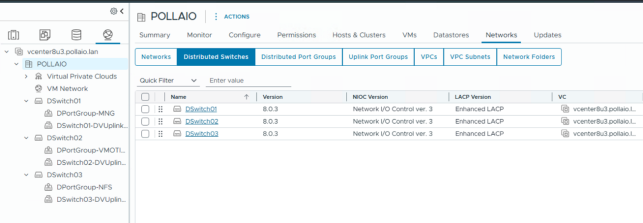
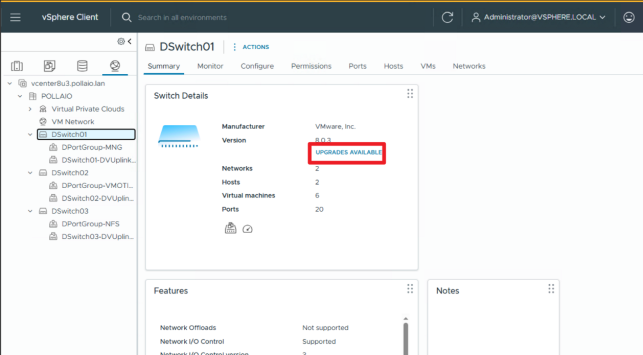
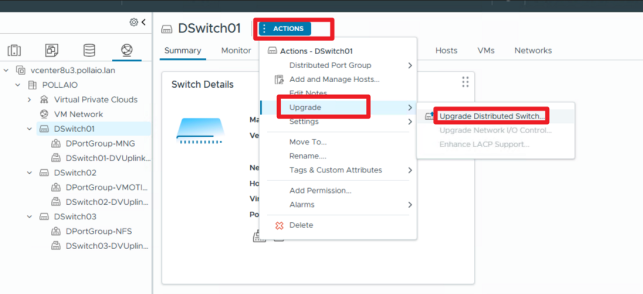
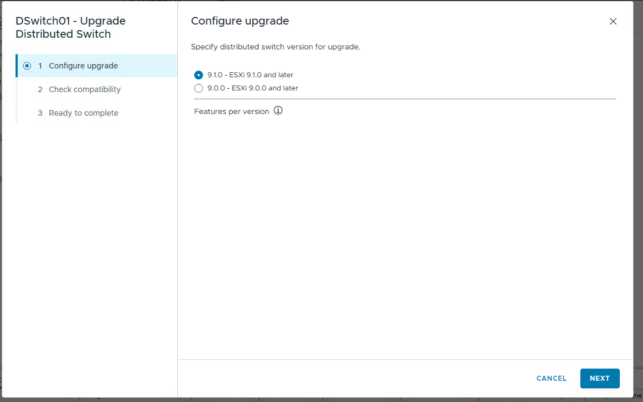
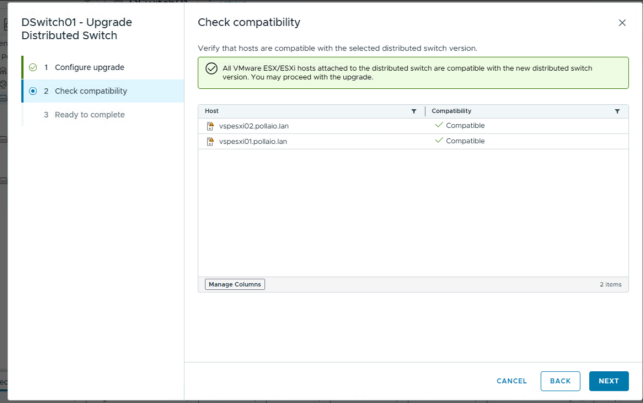
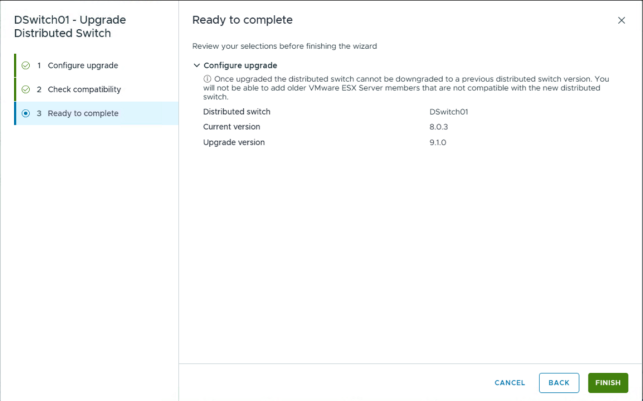
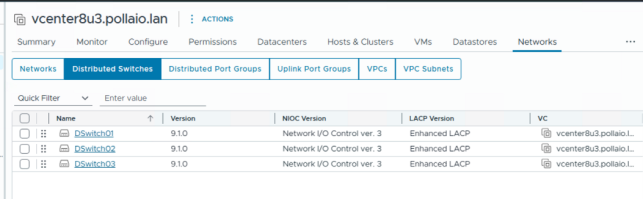
Upgrade Virtual Distributed Switch

.

.

Next step

Upgrade VMware Tools

Upgrade Virtual Hardware

.

Converge vSphere 8 to VMware vSphere Foundation 9.1.x

Migrating Horizon from VMware to Omnissa: Why a Parallel Connection Server Deployment Is Often the Safest Approach

The transition from VMware Horizon to Omnissa Horizon introduced more than just a branding change. Starting with Horizon 2412 and continuing with later releases such as 2503 and 2506, several architectural and configuration elements have been modified.

These changes include licensing format updates, ADAM/AD LDS database modifications, registry key renaming, folder restructuring, and updated group policy templates.

While the official upgrade path works, in many environments a parallel deployment strategy can significantly reduce risk and allow end users to validate the new platform before switching production workloads.

This article outlines the key changes introduced by Omnissa and explains why building a new Horizon pod alongside the existing one can be a practical migration strategy.

.

Key Changes Introduced with Omnissa Horizon

1. New Licensing Model

Beginning with Horizon 2412, Omnissa introduced a new licensing mechanism and licensing portal.

During the transition phase, both VMware and Omnissa license keys are temporarily accepted, but this compatibility window is limited. Later releases, such as 2503.1 ESB and 250,6 rely entirely on the Omnissa License Module (OLM).

If a valid Omnissa license key is not installed after upgrading, the Horizon Console may enter a restricted or degraded mode.

Relevant KB and documentation references include:

• KB 6000212 – Horizon licensing transition guidance
• KB 6000745 – Omnissa rebranding changes and affected components

.

2. ADAM / AD LDS Database Changes

One of the most important backend changes affects the Horizon LDAP (ADAM/AD LDS) database.

Historically, Horizon used application partitions referencing the VMware namespace.
With the Omnissa rebranding, new environments now use the
horizon namespace.

Example:

Old partition naming:

dc=vdi,dc=vmware,dc=int

dc=vdiglobal,dc=vmware,dc=int

New partition naming:

dc=vdi,dc=horizon,dc=internal

dc=vdiglobal,dc=horizon,dc=internal

Omnissa provides a migration script to update the partition names after upgrading all pods to newer versions, such as 2503.

Relevant documentation:

• KB 6000797 – ADLDS partition migration for Horizon

.

3. Registry Key and File System Changes

The rebranding also impacted multiple components of the Horizon installation:

Component

Previous Location

New Location

Installation folder

C:\Program Files\VMware\VMware View

C:\Program Files\Omnissa\Horizon

Logs

C:\ProgramData\VMware\VDM\logs

C:\ProgramData\Omnissa\Horizon\logs

Registry keys

HKLM\Software\VMware, Inc.\VMware VDM

HKLM\Software\Omnissa\Horizon

ADAM DB instance

VMwareVDMDS

OmnissaHzeDS

Because registry paths changed, Group Policy templates (ADMX) were also updated and must be replaced during upgrades.

Failure to update the ADMX files can lead to policies silently no longer applying.

.

Why a Parallel Horizon Deployment Can Be a Better Migration Strategy

Although a direct upgrade of the Connection Servers is supported, the number of changes introduced with the Omnissa transition makes a greenfield-style deployment attractive.

Instead of upgrading the existing servers, consider deploying new Connection Servers alongside the current environment.

Advantages include:

1. Opportunity to Upgrade Windows Server

New Connection Servers allow administrators to deploy a modern operating system, such as:

• Windows Server 2022 or later (Windows 2025 is a like option)

This avoids performing multiple upgrades on the same system.

.

2. User Acceptance Testing

With a parallel deployment, you can:

• publish test desktop pools
• provide pilot users access
• validate authentication flows
• verify DEM and App Volumes integration

Users can test the environment before the production switch.

.

3. Reduced Upgrade Risk

Upgrading in place modifies:

• ADAM database
• registry keys
• services
• folder paths

A clean installation avoids potential issues caused by legacy configurations.

.

Example Parallel Migration Architecture

A typical migration architecture might look like this:

Existing Environment

• Horizon Connection Servers
• Unified Access Gateways
• Instant Clone pools
• DEM and App Volumes

New Environment

• New Omnissa Connection Servers
• New Omnissa Unified Access Gateways
• Same vCenter Server
• Same Active Directory
• Same desktop images
• Same DEM*
• Same App Volumes*

*After migration, it will be upgraded.

This allows a staged migration.

Key points:

• vCenter Server can remain unchanged
• Desktop pools can be recreated or migrated
• User profiles continue to work through DEM

.

Migrating Instant Clone Desktop Pools

In environments heavily using Instant Clones, rebuilding pools manually can be time-consuming.

Automation scripts can accelerate the process by exporting and recreating pools through the Horizon APIs.

In my environment, I use a PowerShell-based migration script that reads the configuration of Instant Clone pools and recreates them on the new pod.

This allows administrators to migrate:

• pool configuration
• entitlements
• naming patterns
• provisioning settings

with minimal manual effort.

This is the link to the script

OMNISSA/OMNISSA – Export and Import Desktop and Entitlements v7.ps1 at main · fabio1975/OMNISSA

.

Reusing DEM and App Volumes

Existing deployments of

• Omnissa Dynamic Environment Manager
• Omnissa App Volumes

can usually remain unchanged during migration.

However, compatibility must always be validated using the official interoperability matrix.

Relevant documentation:

• Horizon interoperability matrix
• App Volumes compatibility with Horizon
• DEM compatibility with Horizon

Official documentation:

These matrices confirm supported combinations between:

• Horizon versions
• App Volumes
• Dynamic Environment Manager
• vCenter Server
• ESXi

.

Suggested Migration Workflow

A practical migration process could look like this:

    1. Deploy new Connection Servers with Omnissa Horizon
    2. Deploy new Unified Access Gateways
    3. Connect the new pod to the existing vCenter
    4. Validate App Volumes and DEM compatibility
    5. Recreate or migrate Instant Clone pools
    6. Perform pilot user testing
    7. Switch production access
    8. Decommission legacy Connection Servers
    9. Create the news GPO for Horizon (we need use the new GPO Templates)
    10. Upgrade the Horizon Agent, DEM and App Volumes

    .

    Final Thoughts

    The transition from VMware Horizon to Omnissa Horizon introduces several structural changes that go beyond simple branding.

    Changes in licensing, LDAP partitions, registry paths, and policy templates can complicate traditional upgrade workflows.

    For many environments, especially large VDI deployments, deploying new Connection Servers in parallel offers a safer and more flexible migration strategy.

    It provides an opportunity to modernize the infrastructure, validate compatibility with components such as App Volumes and DEM, and allow users to test the platform before the final cutover.

    .

    .

    Migrating Horizon from VMware to Omnissa: Why a Parallel Connection Server Deployment Is Often the Safest Approach

    Horizon – Agent Update – Unable to see the last version

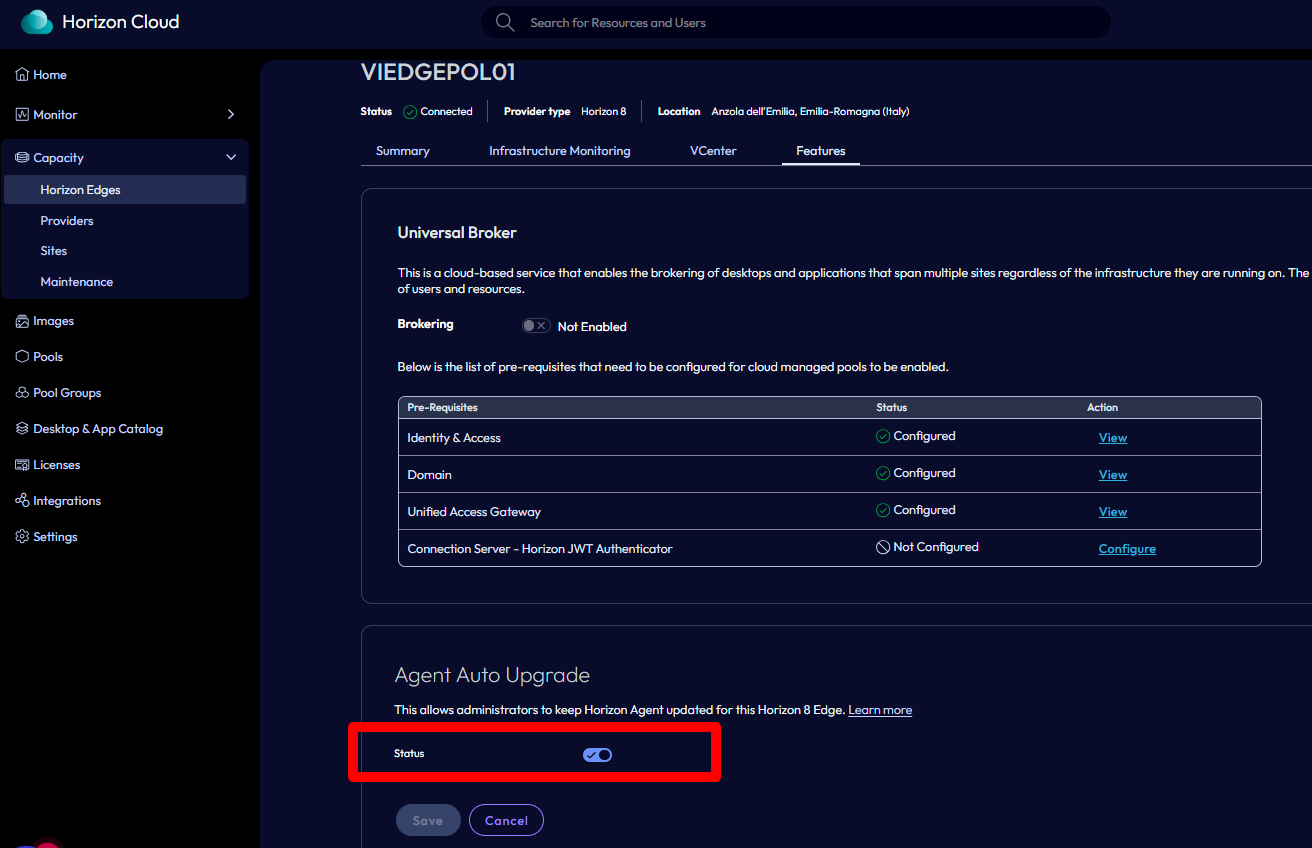
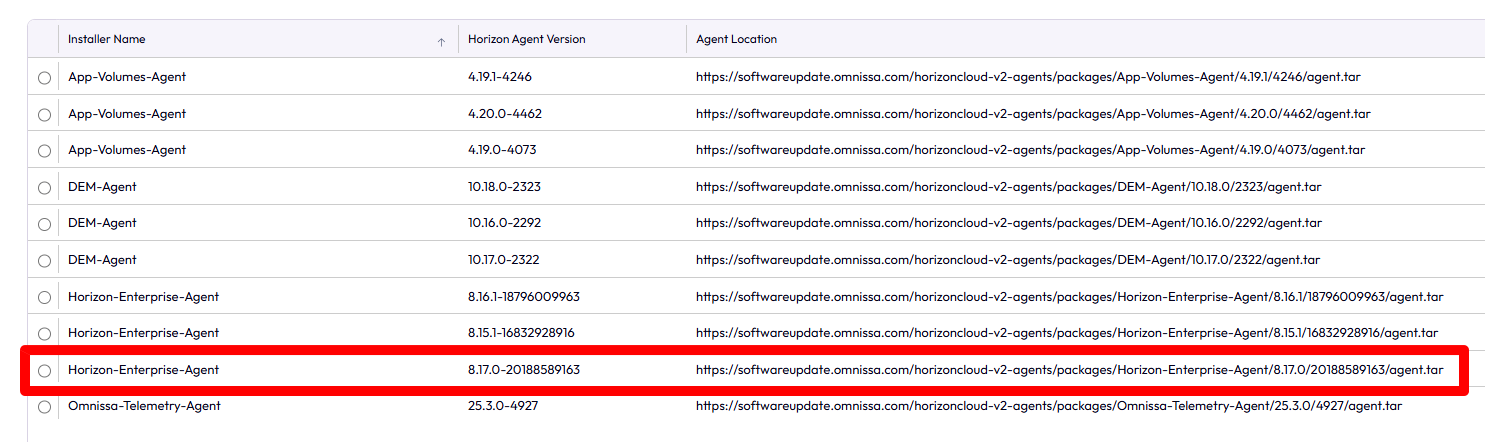
    After updating Horizon to version 2512, I noticed that the latest versions (8.17) weren’t being displayed in the Agent Updates section.
     

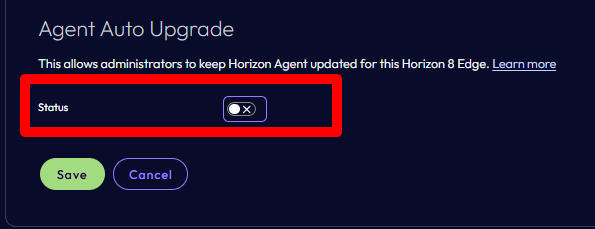
    To see the latest versions, I had to disable the Agent Update service on the Omnissa Connect side. Simply go to the Capacity section, select the relevant edge gateway,
    and disable the specific option in the Features section.


    Re-enable it after a few minutes.

    After a few minutes, the latest versions also appeared in the Horizon console.

    Horizon – Agent Update – Unable to see the last version

    vCenter Server Preupgrade check result error: “VMDir Replication between partners is not working”

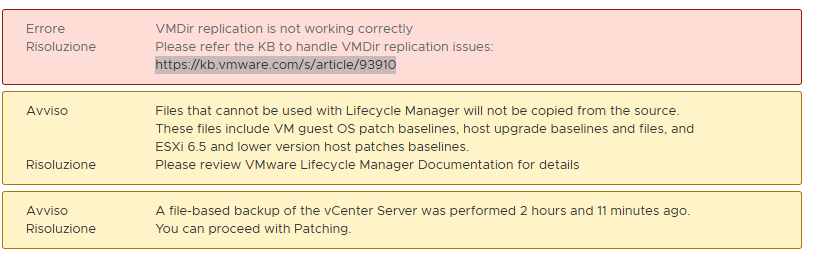
    vCenter upgrade Pre-Check fail with “VMDir replication is not working correctly”

    When I tried to upgrade my vCenter to the last version of 8u3 on the pre-check command, I found this error

    A screenshot of a computer error message

AI-generated content may be incorrect.

    Because I attached another vCenter at the same PSC, it is now broken.

    For deleting the missed vCenter:

    Take a vCenter snapshot

    Check the vCenter name:

    The name is vcenter02.pollaio.lan

    Remove the old vCenter:

    A computer screen with white text

AI-generated content may be incorrect.

    After automatic service restart

    Now the upgrade pre-check does not have an alert message

    A screenshot of a computer

AI-generated content may be incorrect.

    Reference

    vCenter Server Preupgrade check result error: “VMDir Replication between partners is not working”

    vCenter Server Preupgrade check result error: “VMDir Replication between partners is not working”

    Approach to updating a horizon infrastructure

    When approaching the upgrade of an infrastructure in the EUC world (as with most technologies in the IT world) it is necessary to define a roadmap of activities and follow it carefully. In many cases, IT technology vendors already have update procedures in place that should be followed carefully. When I started working as a consultant, the documentation was very scarce (we are talking about the end of the 20th century and the beginning of the 21st…) and the procedures were poorly documented and only those who took courses or had experience could approach with a certain “tranquility” updates of production environments.

    Going back to EUC infrastructures and focusing on the VMware by Broadcom world (still for a while….given the transfer of the technology in question) we have a precise update sequence, especially if we talk about + technologies that interact with each other, and the need to verify the interoperability between the various technologies.

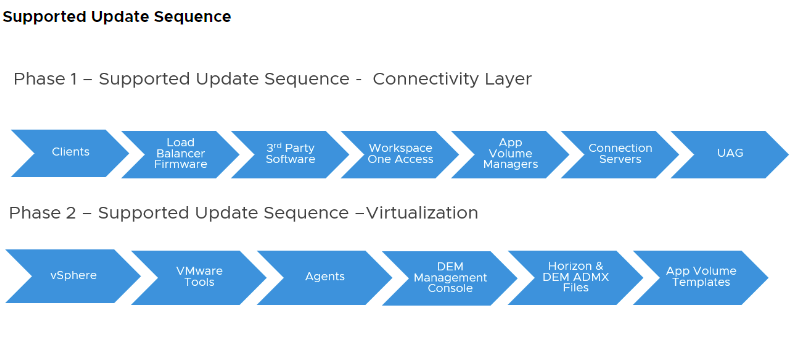
    For example, we have this KB that gives us the upgrade sequence of a Horizon 8 infrastructure:

    Update sequence for Horizon 7, Horizon 8, and compatible VMware products (78445)

    A diagram of software

Description automatically generated

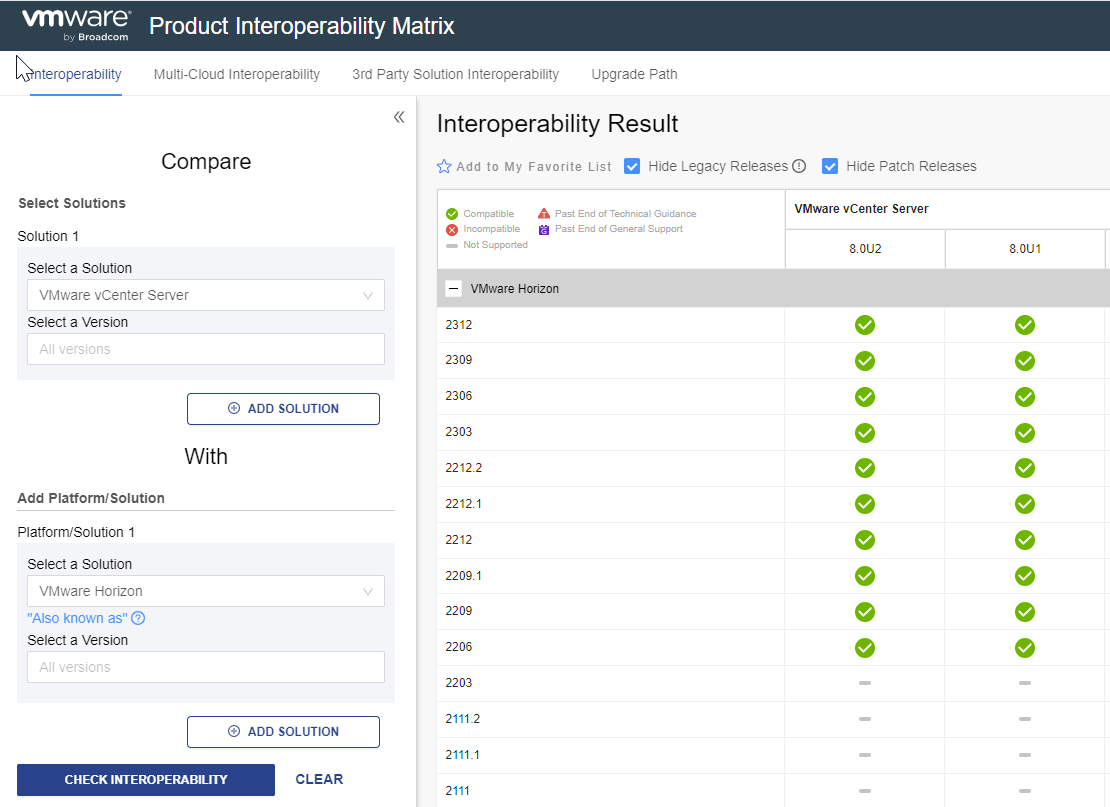
    And the ability to use the interoperability portal:

    https://interopmatrix.vmware.com/Interoperability

    A screenshot of a computer

Description automatically generated

    In my ten-year experience in updates and maintenance of vSphere and Horizon infrastructures, it has often happened that I have had to intervene and manage post-upgrade problems, where in most cases the problems were generated by the fact that I did not perform the update in the correct order or even did not complete all the upgrade steps.

    For example, I have experienced situations where, following upgrades, the copy and glue to and from VDI sessions no longer worked correctly in a Horizon infrastructure.

    In the end, the problem was solved by also performing the update step of the Horizon ADMX templates in Active Directory, something that the customer or whoever had done the update for him had not done.

    Approach to updating a horizon infrastructure

    Steps for Upgrade Horizon 23xx to the next version

    The release of new versions of VMware Horizon 8 each quarter of the year (to provide new features and resolve any security holes) entails the need to have a consolidated, conservative update procedure with the least impact on users.
    Below I report the procedure that I am using successfully.

    User impact:

    • Users already connected to the VDI do not encounter problems or disconnections
    • Users who need to connect during update activities may have problems (normally a maintenance window is declared)

    Steps

    • Restarting the Connection Servers Operating System (One at a time is a step preparatory for committing any pending Windows updates), after each reboot check from the Horizon web console that everything is ok
    • Disable Provisioning
    • Shut down all three Connection Servers
    • Snapshot of the VMs hosting the Server connection
    • Turn on the Connection Server (One at a time), after each reboot check from the Horizon web console that everything is ok
    • Backup DB Adam (C:\Program Files\VMware\VMware View\Server\tools\bin\vdmexport.exe > vdmconfig.ldf)
    • Disable and Updating one Connection Server ( disabling the Connection Server being updated puts the connection server offline for the load balancer on the top of the connection servers and it is not used for authenticating users and assigning VDI) and after upgrade enable the Connection Server.
    • Repeat the previous step for all Connection Servers
    • If necessary, reapply the customizations
    • Check from the console that everything is ok

    After the horizon upgrade, test the Desktop Pool:

    • Try a connection from internal
    • Try a connection from external
    • Delete a VDI machine
    • Publish a new Master Image

    For upgrading three Connection servers all steps necessity of two hours
    During the activities, the users connected to the VDI do not encounter any problems

    The next step, after complete the Connection Servers upgrade, is to update the Horizon agent on the master image and delete the Connection Servers snapshot

    Steps for Upgrade Horizon 23xx to the next version

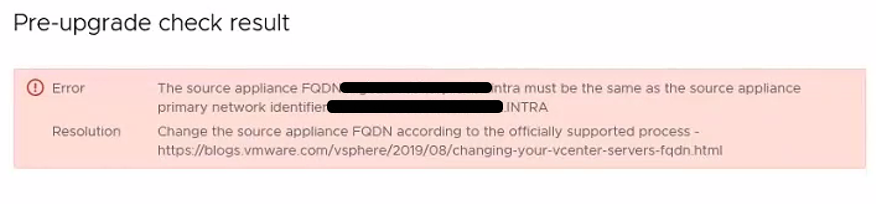
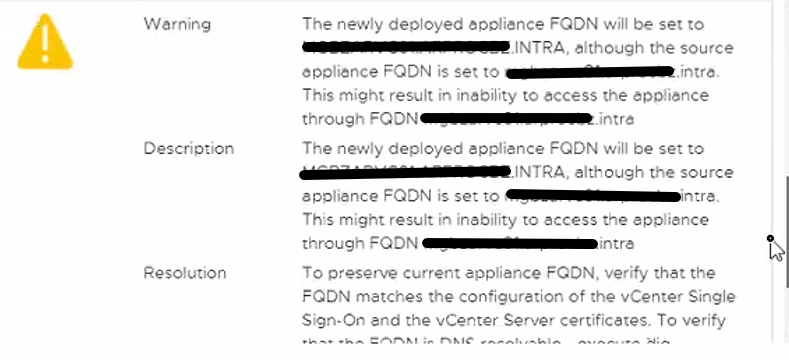
    Prechecks fail during upgrade to vCenter Server 7.0 with the following message “The source appliance FQDN must be the same as the source appliance primary network identifier”

    When upgrading vCenter 6.5x to version 7u3x we encountered the following problem

    Text

Description automatically generated

    Following this KB

    Upgrading to vCenter Server 7.0 fails when case differs between FQDN and PNID (84355) (vmware.com)

    We identify the problem in the fact that we have the hostname that differs from the PNID because one is all uppercase and the other lowercase.

    From the following KB we find that we can not on vCenter 6.5 updatethe hostname

    Cannot change the vCenter Server or Platform Service Controller 6.x hostname on versions prior to vCenter Server 6.7 Update 3 (2130599) (vmware.com)

    To solve we proceed first with the update to the version of vcenter 6.7u3 that fixes the part of FQDN

    Graphical user interface, text

Description automatically generated

    Once updated to 6.7 relaunch the commands indicated by KB and see that the PNID and hostname coincide

    Then we update to the vCenter version 7u3

    Prechecks fail during upgrade to vCenter Server 7.0 with the following message “The source appliance FQDN must be the same as the source appliance primary network identifier”

    Upgrade Unified Access Gateway

    VMware Horizon infrastructures often have the Unified Access Gateway (UAG) component to enable a secure connection from outside your corporate network to VDI.

    This positioning makes the UAG subject to frequent updates, today we will see how to update it.

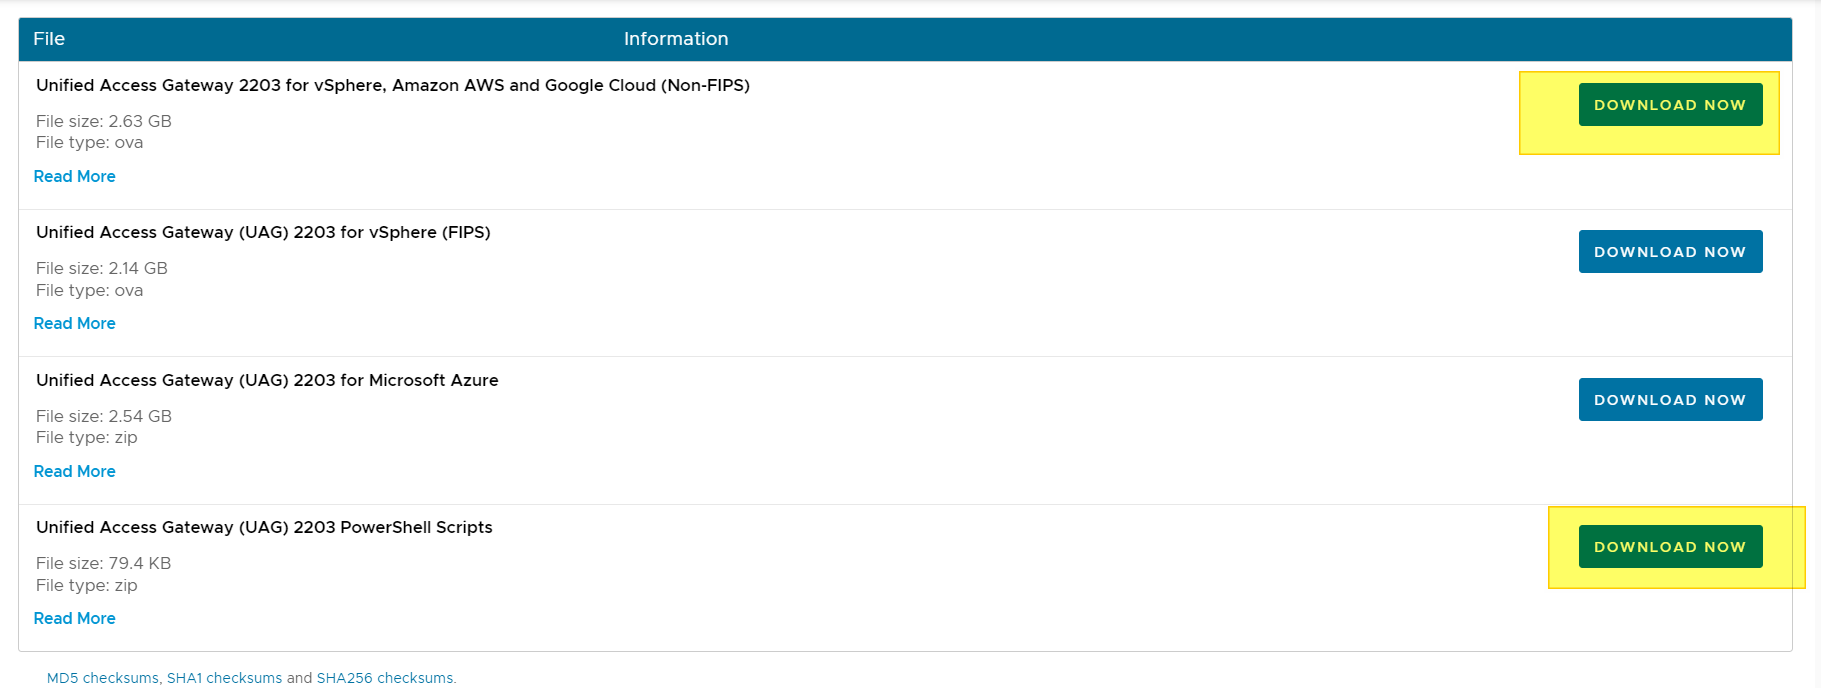
    Download the ISO file of the version we want to update from the VMware Customer Site:

    File 
Information 
Unified Access Gateway 2203 for vSphere, Amazon AWS and Google Cloud (Non-FIPS) 
DOWNLOAD NOW 
File size: 2.63 
File type: Ova 
Read More 
Unified Access Gateway (UAG) 2203 for vSphere (FIPS) 
DOWNLOAD NOW 
File size: 2.14 Ga 
File type: ova 
Read More 
Unified Access Gateway WAG) 2203 for Microsoft Azure 
DOWNLOAD Now 
File size: 2.54 GB 
File type: zip 
Read More 
Unified Access Gateway WAG) 2203 PowerShell Scripts 
DOWNLOAD NOW 
File size: 79.4 KB 
File type: zip 
Read More 
MDS checksums. SHAI checksums and SdA256 checksums

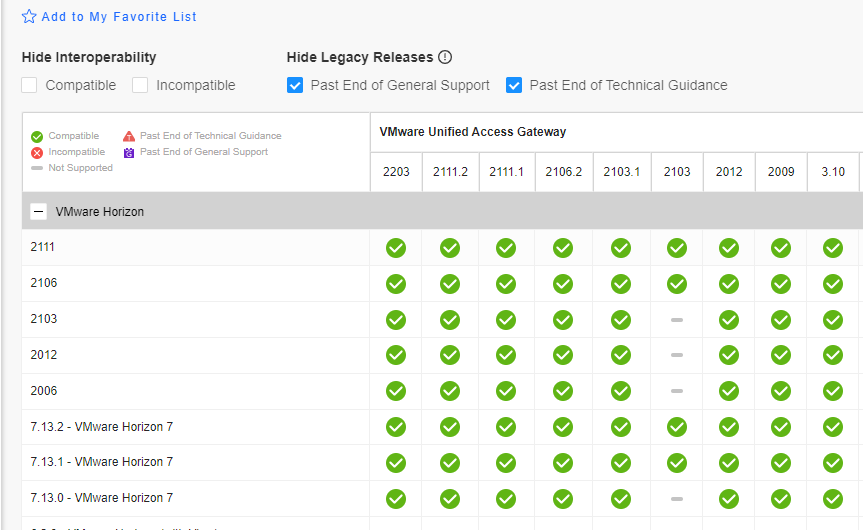
    Check compatibility with your Horizon infrastructure:

    Product Interoperability Matrix (vmware.com)

    Add to My Favorite List 
Hide Interoperability 
Compatible IV Incompatible 
Com*tible Put End of 
a 
Put End of 
Not S upgnrted 
VMwere Horizon 
2111 
2106 
2103 
2012 
T 132 - VMwere Horizon 7 
713 1 - VMwere Horizon 7 
T 13 0 - VMwere Horizon 7 
Hide Legacy Releases O 
Past End ot General Support Past End at Technical Guidance 
VMware Unified Access Gateway 
2203 
and 
21112 
and 
2111.1 
and 
2106.2 
and 
2103.1 
and 
2103 
2012 
and 
2009 
3.10

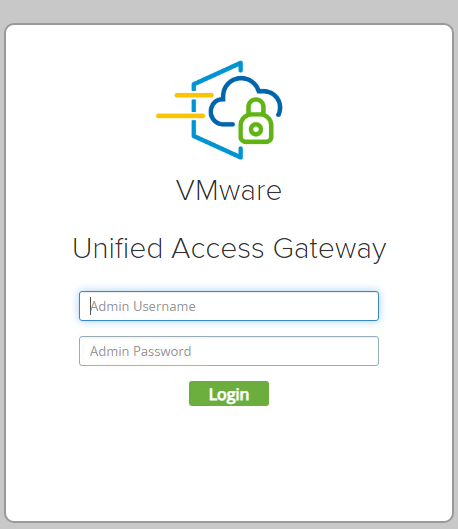
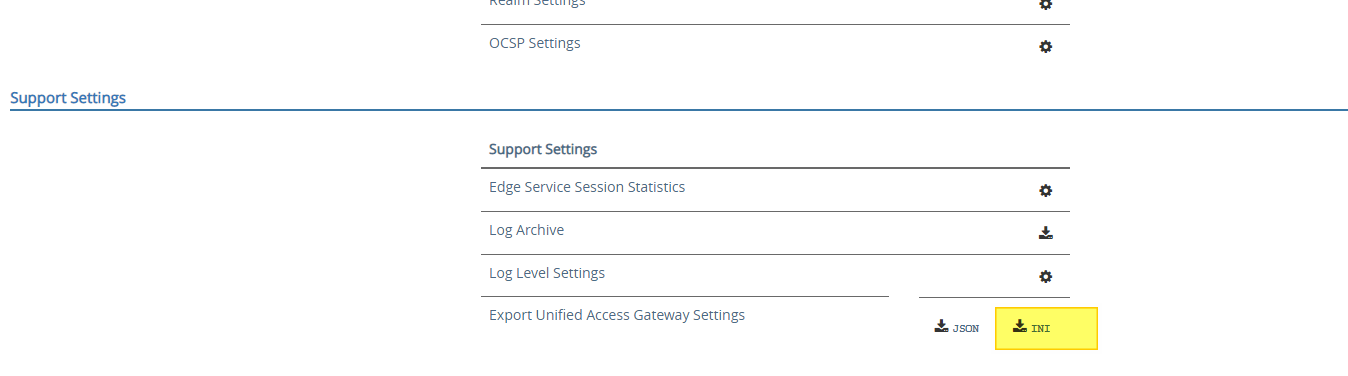
    Download the INI file containing the current UAG configuration

    • Access the Unified Access Gateway interface
      • HTTPS://<fqdnUAG>:9443

    Using the credentials of the admin user

    or 
VMware 
Unified Access Gateway 
dmin Username 
Admin Password 
Login

    Once logged in, download the .ini file

    A picture containing chart

Description automatically generated

    OCSP Settings 
Support Settings 
Support Settings 
Edge Service Session Statistics 
Log Archive 
Log Level Settings 
Export Unified Access Gateway Settings

    Retrieving the information needed to complete the configuration file:

    • Certificate for public access and password
    • Certificate for the admin center and its password
    • SAML component XML if integration with AZURE MFA
    • Information on where to deploy (vCenter, Cluster, virtual network, datastore ) the Virtual Appliance of the new UAG

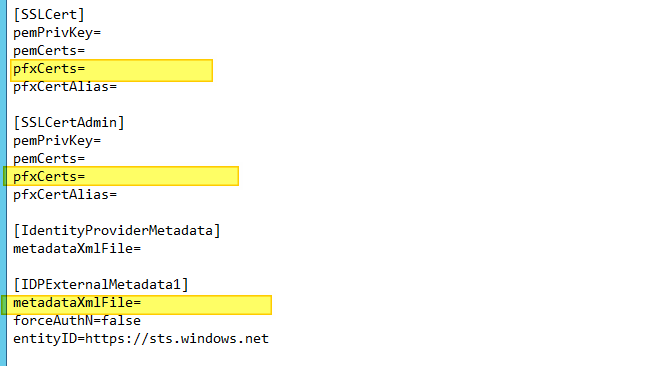
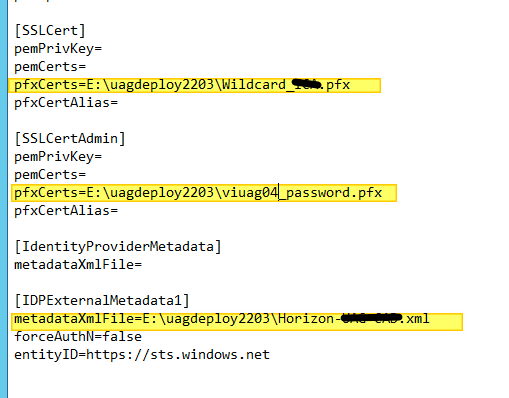
    The data indicated will serve me to fill in the fields of the downloaded ini file

    Notepad 
File Edit Format 
[General] 
netlnternet= 
View 
Help 
ipø=192.168.247.54 
diskMode= 
ip1=192,168,246.54 
defaultGateway=192.168.247.1 
target= 
ds= 
routes 
2.168.246.1,192.168.4.0/24 192.168.246.1,172.25.2.0/23 192.168.246.1,172.25.6 
netmaskØ=255.255.255. or 
netManagement etwor 
net3ackendNetwork 
• pØA110cationMode=STATICV4 
name= 
deploymentOption=twonic 
forceNetmaskØ=255.255.255. or 
forceNetmask1=255.255.255. or

    I summarize the info required in this table

    Sector Field Description
    General netInternet PortGroup on which to certify the network card that communicates to the internet world *
    General diskmode Thin or Thick
    General Source Absolute path where the ISO resides
    General Target Path of the vSphere infrastructure where we will deploy the virtual appliance
    General Ds Datastore where the VM will be created
    General netManagementNetwork Portgroup on which to certify the network adapter for UAG management *
    General netBackendNetwork Portgroup on which to certify the network adapter for UAG management *
    General Name Virtual Machine Name
    General uagName Hostname of the UAG (normally to be left that of the UAG to be replaced)
    SSLCert pfxCerts Property Path where the SSL Certificate generated by a public CA in password protected PFX format used to access VDI by Horizon Clients resides
    SSLCertAdmin pfxCerts Property Path where the SSL Certificate generated by a CA (normally Microsoft and Private) used to secure and validate access to the UAG Management Interface resides
    IDPExternalMetadata1 metadataXmlFile Property XML file of the Identity Provider (In this case Azure AD) to enable Azure MFA for access

    *VMware recommends at least two network adapters in two different segments for production environments

    • One for internet traffic (I call it the EXT-DMZ)
    • One for traffic to the internal LAN (I call it the INT-DMZ)

    It is possible to create environments with 1 or 3 network adapters, in the first case VMware recommends only one card only for test environments, and in the second to also differentiate the management traffic that otherwise, in the two-card configuration would pass through the card that communicates with the internal LAN.

    Notepad 
File Edit Format View Help 
l[Generate1] 
net Internet—DPG - EXT•4Zjjj) 
ipe=192.168.247.55 
diskMode—thick 
source—E : - unified - access - gateway- 22.03. 1955Ø 91_OVFI Ø. Ova 
ip1=192,168,246.55 
default-Gateway=192.168.247.1 
target—vi : / /vcaØ7 
ds=vsanDatastore 
routes1=172.16.e.Ø/16 192.168.246.1,192.168.4.0/24 192.168.246.1,172.25.2.0/23 192.168.246.1,172 
netmaskØ=255.255.255. and 
netManagementUetwork 
net8ackendNetwork=DPG - INT - C*IZ 
ipeA110cationMode=STATICV4 
name-VilJAGØ3-22Ø3 
deploymentOption=twonic 
forceNetmaskØ=255.255.255. and 
forceNetmask1-255.255.255. and 
ip1A110cationMode=STATICV4 
net-maski=255,255,255. and 
authenticationT imeout—3ØØØØe 
fipsEnab1ed—fa1se 
sys L ogType=UDP 
uagName=viuage3 
clockSkewT01erance=6Øe

    At this point we can proceed with the deployment of the virtual appliance:

    • The first step is Shutdown the old UAG Virtual Appliance (I suppose do you have at least two UAGs with a Load Balancer in front and at least a DNS round-robin for balancing the traffic to the Connection server)

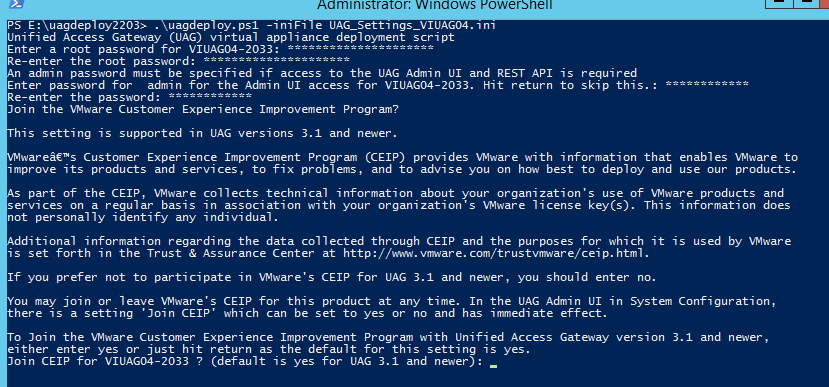
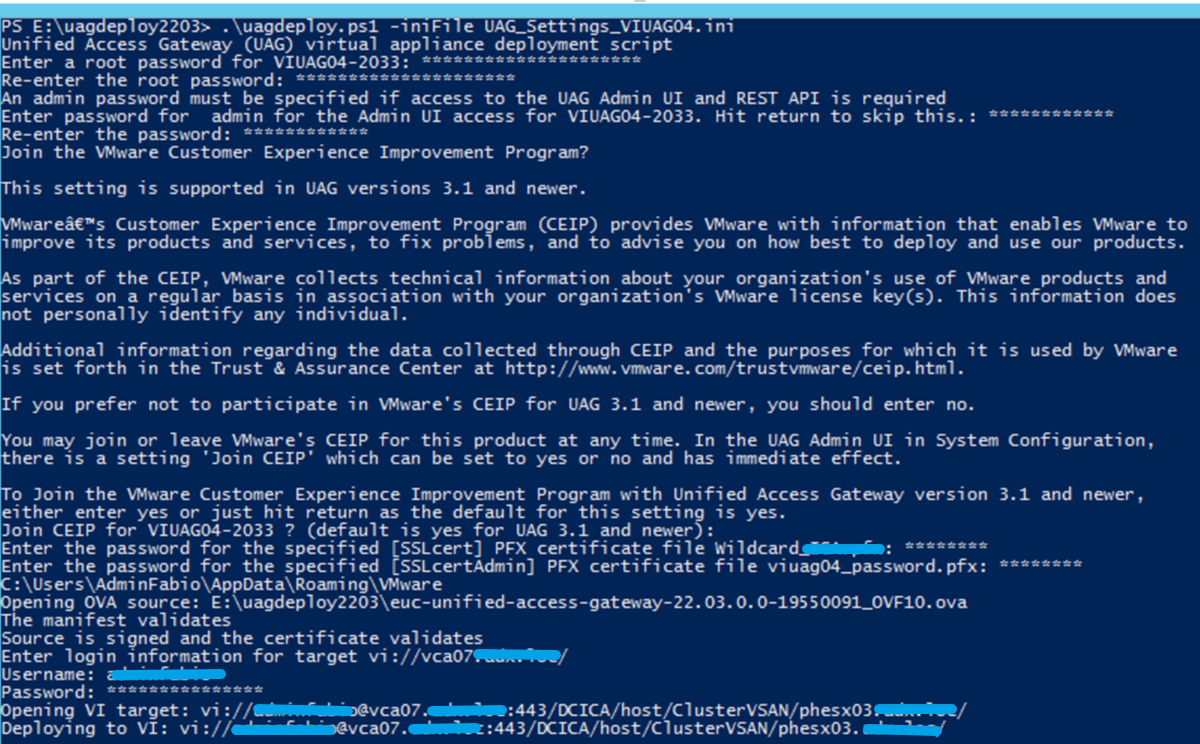
    .\uagdeploy.ps1 -iniFile UAG_Settings_VIUAG04.ini

    Administrator: Windows PowerShell 
uag ep oy2203> 
uag ep oy. PSI

    Allow CEIP

    Insert password for PFX Certificate File

    Insert a new (or reuse the old) password for the Root account (for access to UAG OS) and Admin account (for access to UAG WEB admin console)

    Waiting to complete the UAG Deploy (You can check the process from the vCenter task)

    Now the new UAG virtual appliance is up and running!! Test it and apply the same step for all UAG virtual appliances of your VMware Horizon Infrastructure.

    Upgrade Unified Access Gateway

    Upgrade Standalone ESXi 7.0 to 7.0b

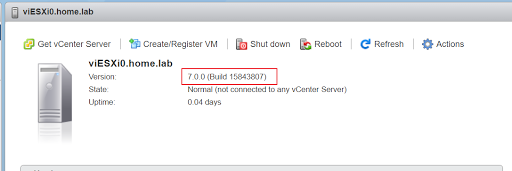
     Check ESXi version:

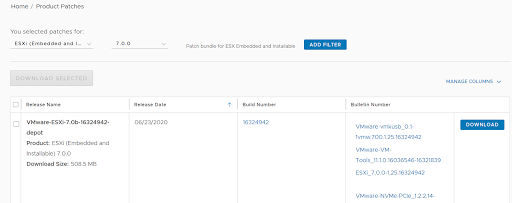
    Check on https://my.vmware.com/group/vmware/patch if there are new patches

    There is a new patch (7.0b), download it

    After download upload file to ESXi host

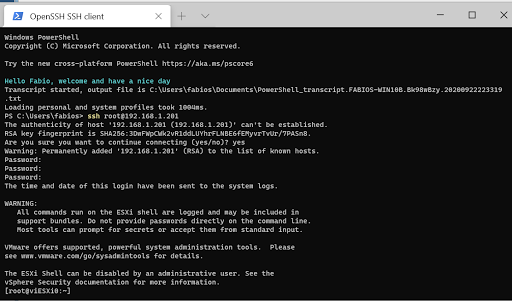
    Create a SSH connection to ESXi Host

    Put in maintenance mode

    esxcli system maintenanceMode set --enable true

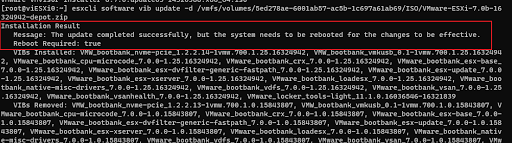
    Update Host 

    esxcli software vib update -d /vmfs/volumes/5ed278ae-6001ab57-ac5b-1c697a61ab69/ISO/VMware-ESXi-7.0b-16324942-depot.zip

    and finally

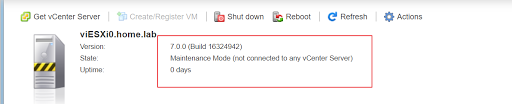
    After reboot the version is:
    exit to maintenance mode….
    #####

    or update from internet

    esxcli software profile update -p ESXi-7.0b-16324942-standard -d https://hostupdate.vmware.com/software/VUM/PRODUCTION/main/vmw-depot-index.xml

    Upgrade Standalone ESXi 7.0 to 7.0b

    AKS – Aggiornamento in arrivo a inzio Luglio

    Come ogni 3 Mesi sono in arrivo degli aggiornamenti per il servio AKS (Azure Kubernetes Services):

    • Nuova versione la 1.17  disponibile dal 1 Luglio (Sempre da quella data non saranno più in supporto le versioni 1.14)
    • L’annuncio che a breve verranno rilasciati i nodi AKS con ubuntu 18.04 (Una volta rilasciata la nuova versione dei nodi tutti i successivi aggiornamenti di AKS si porteranno dietro anche l’aggiornamento di versione di Ubuntu)
    Tutti i dettagli in questo link
    AKS – Aggiornamento in arrivo a inzio Luglio