Migrate VMware Horizon Client settings to Omnissa Horizon Client with DEM

With the rebranding of VMware Horizon Client to Omnissa Horizon Client, one of the often overlooked aspects is the migration of user settings.

In the context in which I had to operate, the main need was to replicate the Horizon Client settings (from VMware to Omnissa version) in a VDI context. The basic settings to be copied were those of “Drive & Folder Sharing”

In enterprise environments – especially non-persistent VDI managed with Omnissa Dynamic Environment Manager (DEM) – it is critical to ensure that:

• The user’s settings are retained

• The migration takes place only once

• There is no impact on subsequent logons

In this article, we look at how to automatically migrate Horizon client settings:

• by:

%AppData%\VMware\VMware Horizon View Client

•at:

%AppData%\Omnissa\Omnissa Horizon Client

using a PowerShell script that is properly integrated into Omnissa DEM.

Prerequisites

Configuring DEM to export customizations of:

• VMware Horizon Client
• Omnissa Horizon Client
• Audit registry key

Precisely:

.

.

Approach

The solution is based on three key concepts:

1.PowerShell script in user context

2.Logon Task in Flex Configuration (DEM)

3.Condition based on HKCU registry key to ensure one-time execution

The registry key is saved in the user profile and managed by DEM, making the solution compatible with:

• Floating VDI

• Non-persistent desktops

• DEM profiles

.

PowerShell Scripts

The following script:

• Check if the migration has already taken place

• Copy settings, if any

•writes a registry key to block subsequent executions

# ==============================
# Omnissa Horizon Client Migration
# ==============================

$SourcePath = Join-Path $env:APPDATA "VMware\VMware Horizon View Client"
$DestinationPath = Join-Path $env:APPDATA "Omnissa\Omnissa Horizon Client"

# Registry key (per-utente)
$RegPath = "HKCU:\Software\Omnissa\Migrations"
$RegName = "HorizonClientSettingsMigrated"

# ---- Controllo se già eseguito ----
if (Test-Path $RegPath) {
    $Migrated = Get-ItemProperty -Path $RegPath -Name $RegName -ErrorAction SilentlyContinue
    if ($Migrated.$RegName -eq 1) {
        exit 0
    }
}

# ---- Verifica sorgente ----
if (-not (Test-Path $SourcePath)) {
    # Scriviamo comunque la chiave per evitare retry inutili
    New-Item -Path $RegPath -Force | Out-Null
    New-ItemProperty -Path $RegPath -Name $RegName -Value 1 -PropertyType DWORD -Force | Out-Null
    exit 0
}

# ---- Creazione destinazione ----
New-Item -Path $DestinationPath -ItemType Directory -Force | Out-Null

# ---- Copia contenuto ----
Copy-Item -Path "$SourcePath\*" `
          -Destination $DestinationPath `
          -Recurse `
          -Force `
          -ErrorAction SilentlyContinue

# ---- Scrittura chiave di completamento ----
New-Item -Path $RegPath -Force | Out-Null
New-ItemProperty -Path $RegPath -Name $RegName -Value 1 -PropertyType DWORD -Force | Out-Null

exit 0

We place the script in the DEM Config share by creating a folder calling it script. In my case

C:\DEMConfig\Script

.

Configuration in Omnissa DEM

The script must be configured as a Logon Task so from the DEM console:

• User Environment→ Logon Tasks

• Name:

Migrate Horizon Client Settings (VMware → Omnissa)

• Command:

powershell.exe -ExecutionPolicy Bypass -NoProfile -File \\fs02.poultry.lan\DEMConfig\Scripts\Migrate-HorizonClientSettings.ps1

Condition (fundamental)

• Hive: HKEY_CURRENT_USER

• Key: Software\Omnissa\Migrations

• Value: HorizonClientSettingsMigrated

is not equal to 1

This is the video where I try all the steps

.

Migrate VMware Horizon Client settings to Omnissa Horizon Client with DEM

Replacing the Self-Signed Certificate on Omnissa Connection Server with a Microsoft CA-Issued Certificate (or replacing the certificate to end to validation date)

.

Let’s be honest — that shiny self-signed certificate your Omnissa Connection Server came with is fine… until your browser or Horizon client starts screaming “Untrusted!” at every login. 😅

A screenshot of a computer error AI-generated content may be incorrect.


It’s time to fix that properly — by replacing it with a trusted certificate issued by your internal Microsoft CA.

In this guide, we’ll walk through the process step-by-step, ending up with a PFX certificate you can deploy to all your Connection Servers.

.

Why One Certificate for All Connection Servers?

Because simplicity is beautiful.
Maintaining a single certificate across all your Connection Servers reduces management overhead and avoids those awkward “name mismatch” warnings.

In the certificate, we’ll include all relevant hostnames as Subject Alternative Names (SANs):

• The hostname and FQDN of each Connection Server
• The VIP name (if you’re using a load balancer for internal access)

Example SAN list (2 Connection Servers and 1 VIP):

connection01.company.local

connection02.company.local

horizon-vip.company.local

connection01

connection02

horizon-vip

.

.

Step 1: Require the certificate as a PFX File

1. The certificate will be exported into a PFX file with:
◦ Exporting the private key
◦ Protect it with a strong password
◦ Save it somewhere safe (seriously, treat it like a password)

.

Step 2: Deploy the Certificate on All Connection Servers

Now that you have your shiny, trusted .pfx file, it’s time to put it to work.

Repeat the following steps on each Connection Server:

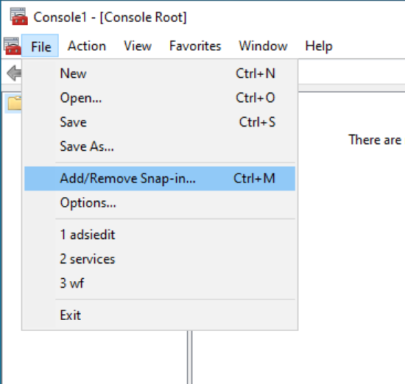
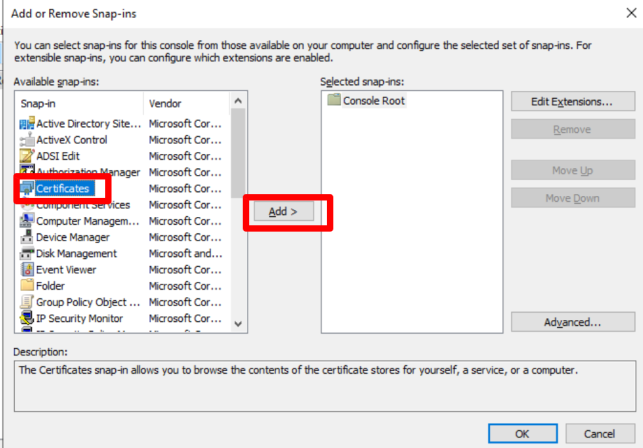
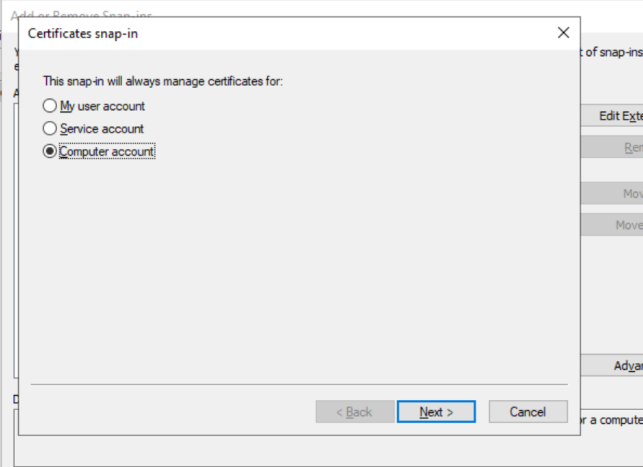
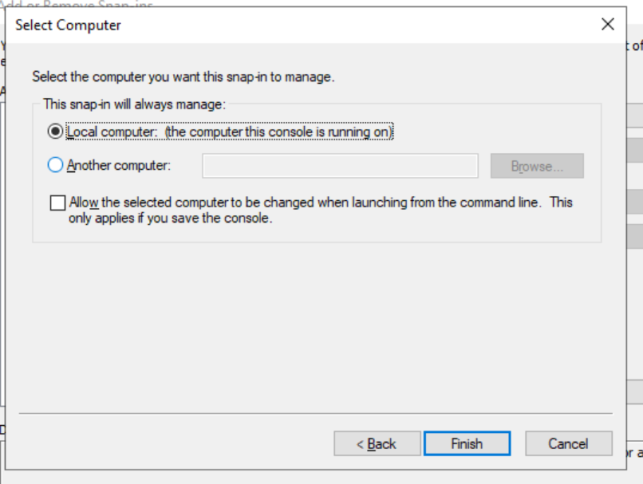
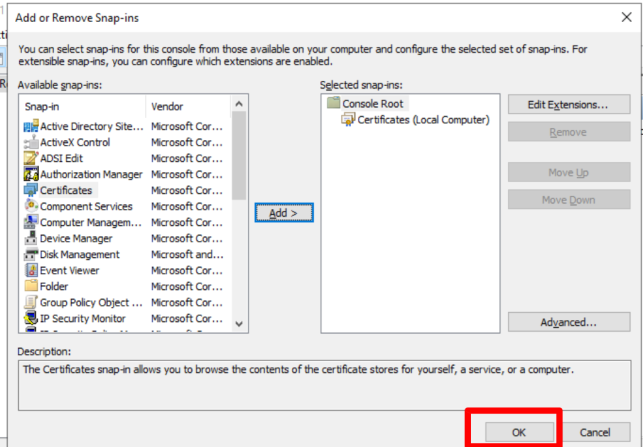
1.Open MMC → Certificates (Local Computer) again.

A screenshot of a computer AI-generated content may be incorrect.

A screenshot of a computer program AI-generated content may be incorrect.

A screenshot of a computer AI-generated content may be incorrect.

A screenshot of a computer AI-generated content may be incorrect.

A screenshot of a computer AI-generated content may be incorrect.

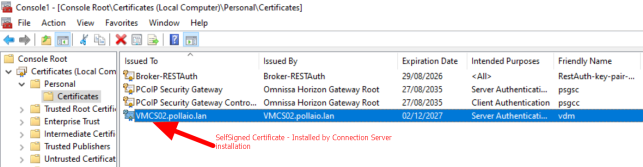
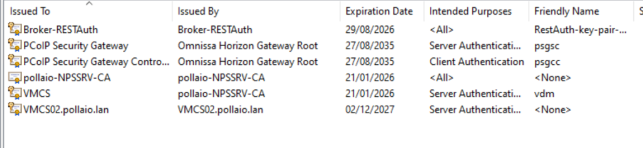
In Personal, there is a self-signed certificate (or an old certificate) installed by the Connection Server installation process

A screenshot of a computer AI-generated content may be incorrect.

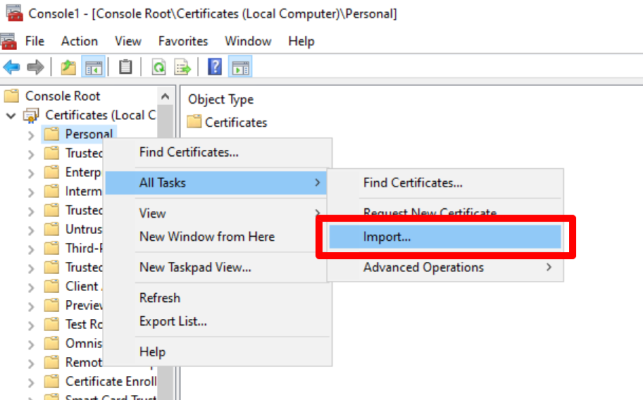
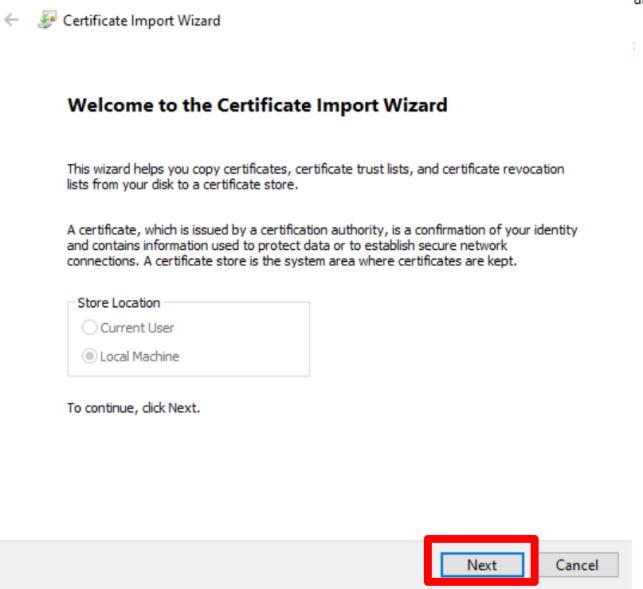
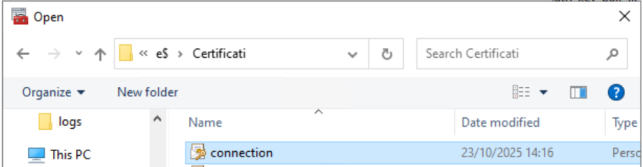
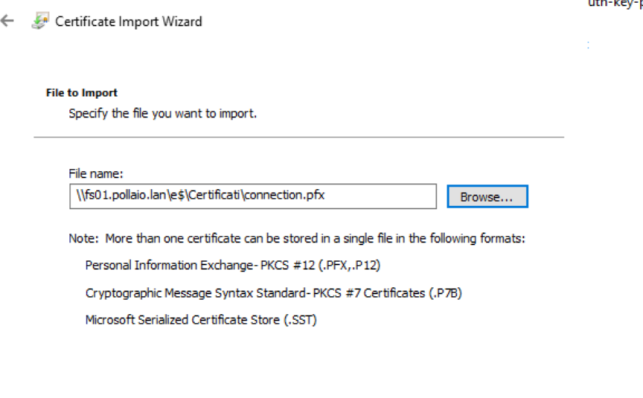
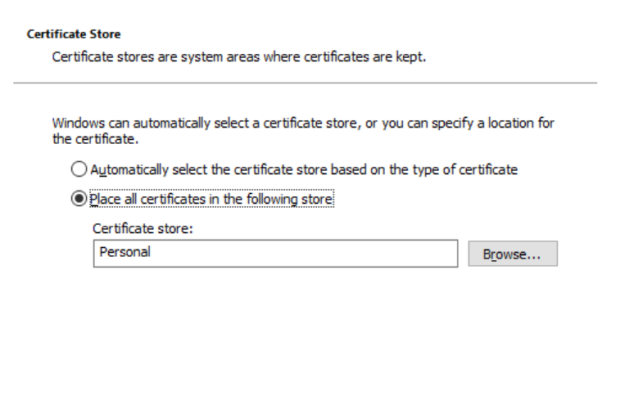
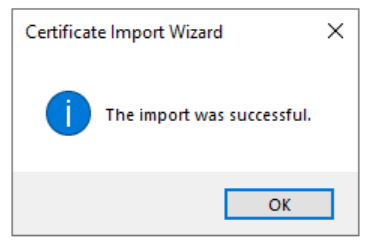
2. Import the .pfx file under:

Personal > CertificatesA screenshot of a computer AI-generated content may be incorrect.

.

A screenshot of a certificate AI-generated content may be incorrect.

A screenshot of a computer AI-generated content may be incorrect.

A screenshot of a computer AI-generated content may be incorrect.

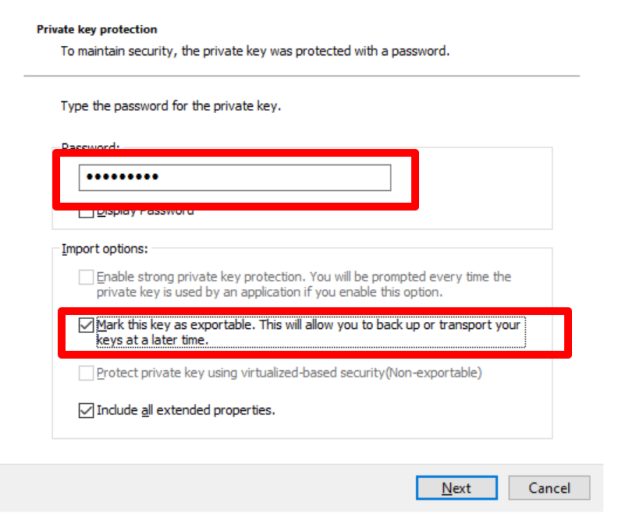
3. When prompted, provide the password you used during export and select “Mark this key as exportable….”

A screenshot of a computer screen AI-generated content may be incorrect.

A screenshot of a certificate AI-generated content may be incorrect.

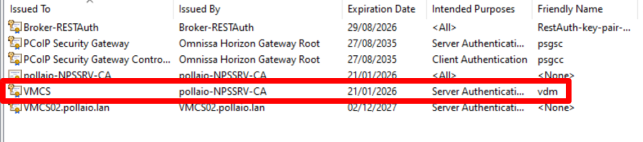
4. Verify that the certificate appears in the list with the private key (the certificate icon has a key)

A screenshot of a computer AI-generated content may be incorrect.

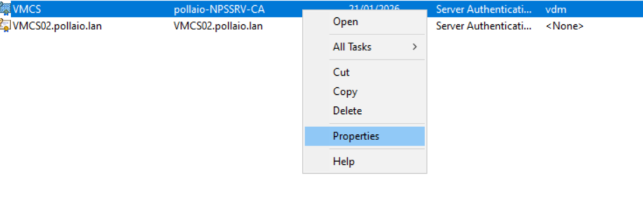
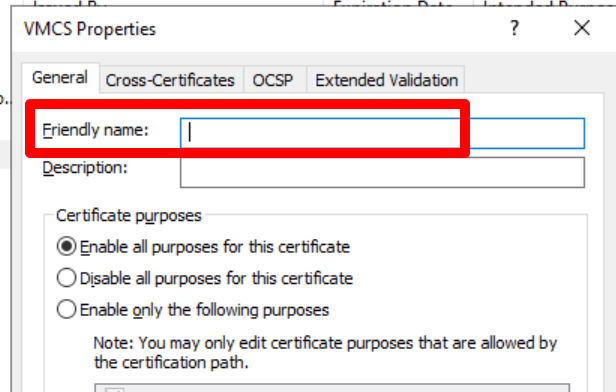
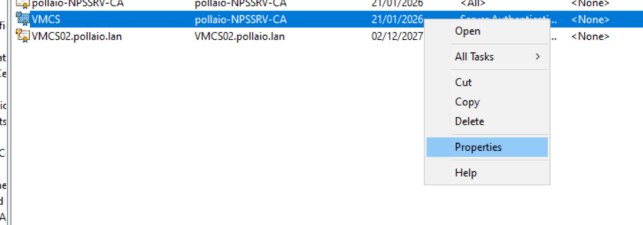
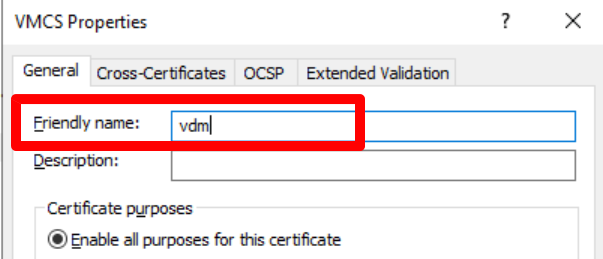
5. Remove the friendly name VDM from the self-signed certificate or the old certificate

A screenshot of a computer AI-generated content may be incorrect.

A screenshot of a computer AI-generated content may be incorrect.

6.Add friendly name VDM to new certificate

A screenshot of a computer AI-generated content may be incorrect.

A screenshot of a computer AI-generated content may be incorrect.

A red lines with black text AI-generated content may be incorrect.

.

.

Step 3: Restart the Horizon Connection Server Service

To make the change effective:

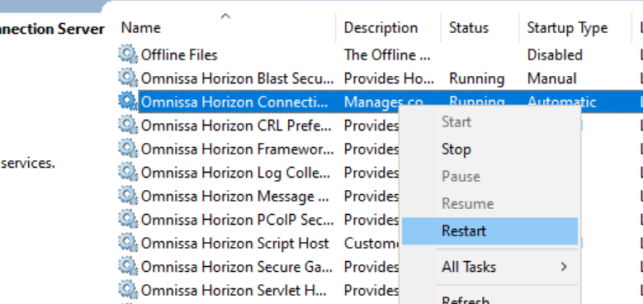
1. Open Services.msc
2 . Restart the VMware Horizon Connection Server service.
3 . Alternatively, you can simply reboot the server if you’re feeling extra cautious.

A screenshot of a computer screen AI-generated content may be incorrect.

Once restarted, the Connection Server should automatically pick up the new certificate.

You can confirm by opening the Horizon Administrator Console in your browser and checking that your connection is now secure and trusted ✅

We need to repeat steps 4 and 5 on all Omnissa Connection servers

.

Bonus: Keeping Things Clean

• Make sure all old or expired certificates are removed from the Personal store.
• Keep a note of the certificate expiration date and plan your next renewal ahead of time (trust me, future-you will thank you).
• If the Horizon is behind the Unified Access Gateway (for external connection and network segmentation, remember to change the Thumbprint on the UAG configuration)
IMPORTANT: Once you’ve changed the certificate, always verify that it works. Especially if you have thin clients, make sure they have loaded the necessary certificates (RootCA and SubCA) to validate the new certificate.

.

Done!

You’ve successfully banished the self-signed gremlin and brought your Horizon environment into the trusted world of PKI.

From now on, your users will enjoy clean, warning-free connections — and your security team will silently thank you for doing things the right way.

.

Replacing the Self-Signed Certificate on Omnissa Connection Server with a Microsoft CA-Issued Certificate (or replacing the certificate to end to validation date)

VMware Horizon 2106

VMware a few days ago released a new Horizon Version.
The new build 2106 (8.3) brings with it some very interesting features from some relating to the security of intellectual property to those related to the Teams collaboration tool, here is a list of those that I consider the most interesting:

  • Implementation of GPO for blocking the ability to take screenshots of VDI sessions from Windows and MAC Clients
  • Possibility in the instant clone to use the Microsoft Sysprep (this function slows down the deployment of an IC by performing a series of reboots)
  • Functionality for applications of run indefinitely
  • Possibility to use TrueSSO SAML authentication for non-Trust domains
  • Horizon Agent has support for Windows Server 2022 (Currently in Preview)
  • The Horizon Client for Linux has the optimization for Teams (as in some versions the functionality for the Windows client was present)
  • Cloud Burst support to extend your on-prem workload to the Cloud in case of a high load.

More details in this video

VMware Horizon 8 (2106) What’s New – YouTube

VMware Horizon 2106