In the various activities carried out in the year that is ending, load balancing and the other availability of Horizon solutions for both access from the Internet and from the company LAN were among the activities that required multi-handed work between the teams that deal with IT technologies within the company (Security, Network, EUC, Servers …).
While these synergies are easy to manage in the context of small companies, when working with large companies, timely planning and design become very important to avoid infrastructural changes (even minimal) that can convert into delays in the delivery of the infrastructure due to the need to re-engage a different team.
One of solutions used to balance access to Omnissa Horizon services is NSX Advanced Load Balancer.
Normally, the publication of Omnissa VDI solutions is carried out using the virtual appliances Unified Access Gateway (UAG) where “Omnissa Unified Access Gateway enables secure remote access from an external network to a variety of internal resources provided by Omnissa Workspace ONE and Horizon deployments.”
Natively UAGs have their own HA solution, but it has the requirement of having 3 Public IP Addresses and creating three public FQDNs.
The use of NSX Advanced Load balancer allows various UAG balancing solutions:
Single VIP with Two Virtual Services
Single L4 Virtual Service
(n+1) VIP
In my HomeLab I have tested the various solutions indicated above,
the most interesting is the one that I propose you try for the following reasons:
• Robust enough to handle the persistence issues
• Works well in environments where users come behind the NAT
• Ease of configuration
• Better visibility and logs
Additionally, the standard ports of the Blast and PCo protocols will not be used, as this can easily expose the solutions to potentially malicious individuals.
The infrastructure that I will propose also requires a change to the “classic” UAG configurations on the URLs used for the Blast and PCOIP protocols.
In the implementation that we will do, we will take as an example only the part of the Blast protocol
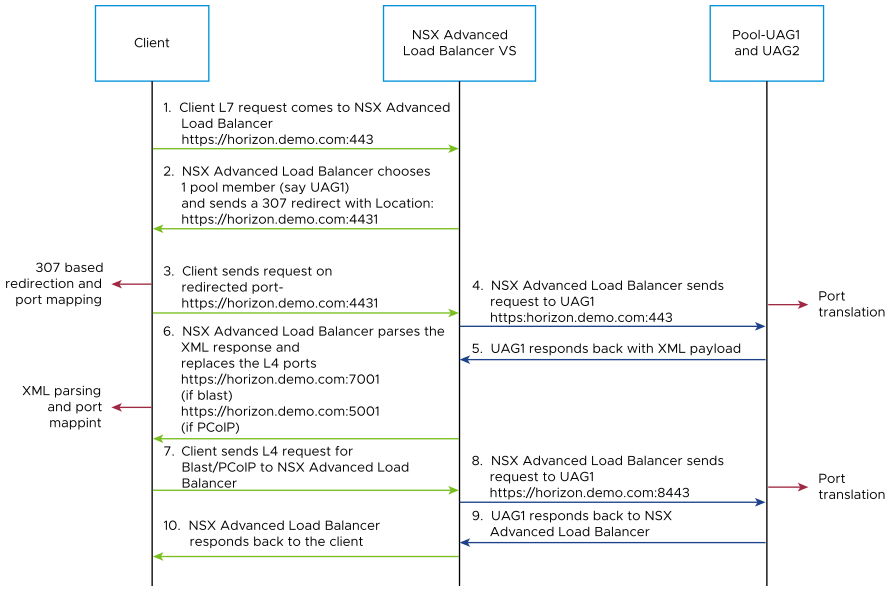
The following flow explains the step when a user tries to access Omnissa VDI, the flow has two ports opened for primary and secondary traffic:
-
- Port 443 – This is for XML API traffic
- Ports 5001 to 5002 – Horizon internal ports opened for L7 primary XML traffic to handle redirected traffic
- Ports 30001 to 30002 – Blast
Where:
- Client L7 request comes to AVI LB
https://horizon.pollaio.site/ - AVI LB chooses 1 pool member (say UAG1) and send back to client a 307 redirect Location
https://horizon.pollaio.site:5001 - Client sends request on redirected port
https:// horizon.pollaio.site:5001 - AVI LB (L7) sends requests to UAG1
https:// horizon.pollaio.site:5001
(Port Traslation)* - UAG1 responds back with XML payload
- AVI LB parses the XML response and replace the L4 ports (to client)
https:// horizon.pollaio.site:30001 (blast) - Client sends L4 request for Blast to AVI LB
- AVI LB sends request to UAG
https:// horizon.pollaio.site:30001* - UAG1 responds back to AVI LB
- AVI LB responds back to client
The main aspect is the correct configuration of TCP and UDP ports between the various corporate network segments:
|
Source |
Destination |
Protocol |
Port |
|
Unified Access Gateway |
Horizon Agent |
UDP |
22443 |
|
Unified Access Gateway |
Horizon Agent |
TCP |
22443 |
|
Unified Access Gateway |
Horizon Connection Server |
TCP |
443 |
|
Horizon Client |
Virtual Service AVI |
TCP |
443 |
|
Horizon Client |
Virtual Service AVI |
UDP |
443 |
|
Horizon Client |
Virtual Service AVI |
TCP |
5001 |
|
Horizon Client |
Virtual Service AVI |
UDP |
5001 |
|
Horizon Client |
Virtual Service AVI |
TCP |
5002 |
|
Horizon Client |
Virtual Service AVI |
UDP |
5002 |
|
Horizon Client |
Virtual Service AVI |
TCP |
30001 |
|
Horizon Client |
Virtual Service AVI |
UDP |
30001 |
|
Horizon Client |
Virtual Service AVI |
TCP |
30002 |
|
Horizon Client |
Virtual Service AVI |
UDP |
30002 |
Configurazione NSX ALB
- Create a Virtual IP
- Create a Custom Health Monitor for UAG
- Create a UAG Pool
- Install the SSL certificate Required for L7 VIP
- Create a Virtual Service for UAG
- Binding DataScripts to the Virtual Service
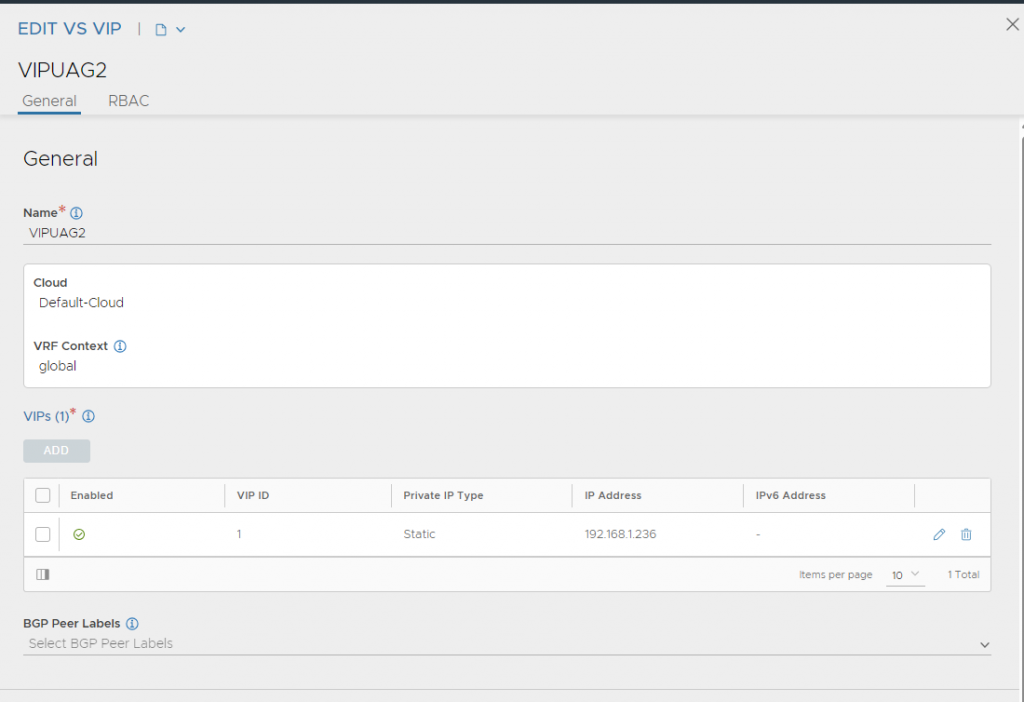
Create a Virtual IP
- To create a custom health monitor, navigate to Applications > VS VIPs.
- Click Create.
Create a Custome Health Monitor
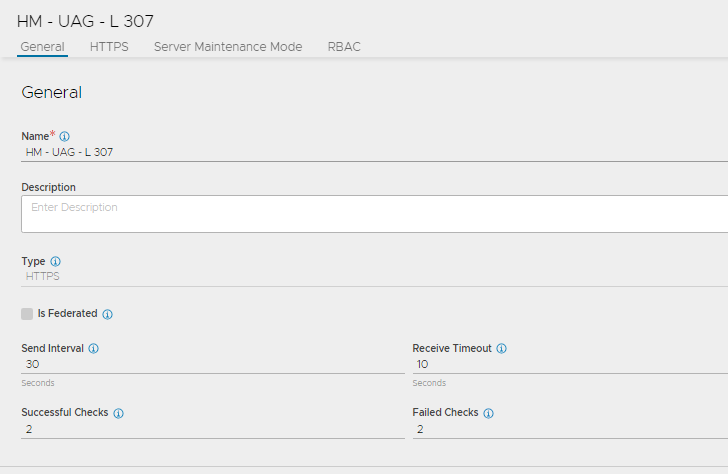
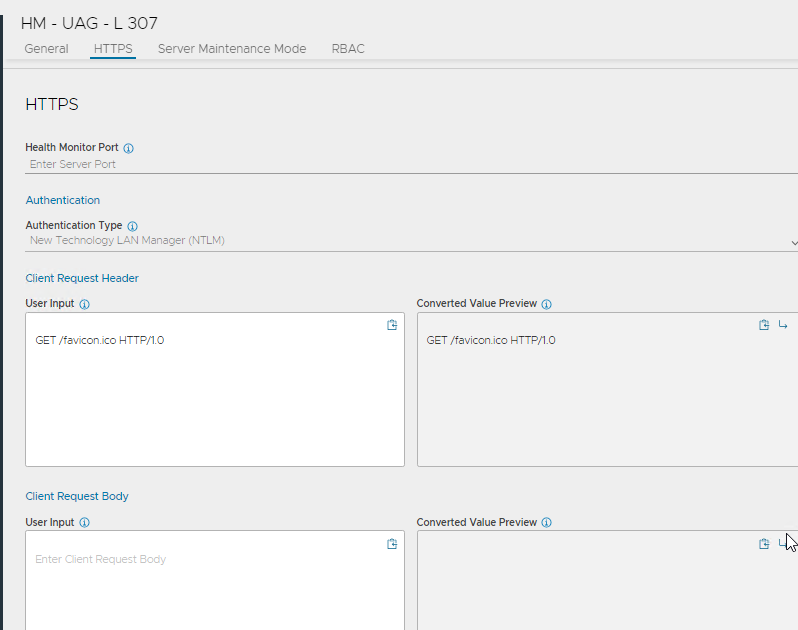
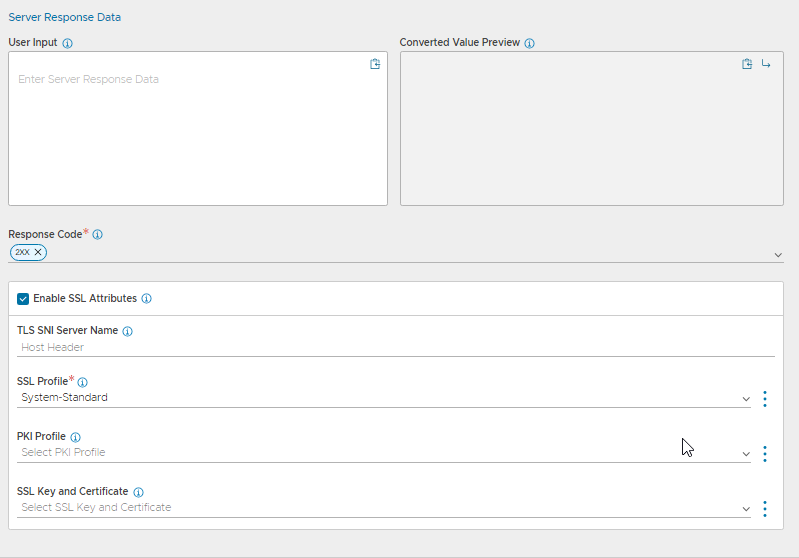
- To create a custom health monitor, navigate to Templates > Profiles > Health Monitors.
- Click Create.
- Select the VMware Cloud that was created for Horizon.
Enter the following details in the New Health Monitor screen
Create UAG Pool
- Navigate to Applications > Pools.
- Select the cloud from the Select Cloud window.
- Click Next.
- Click Create Pool.
- In the CREATE POOL screen, update the details as shown below:
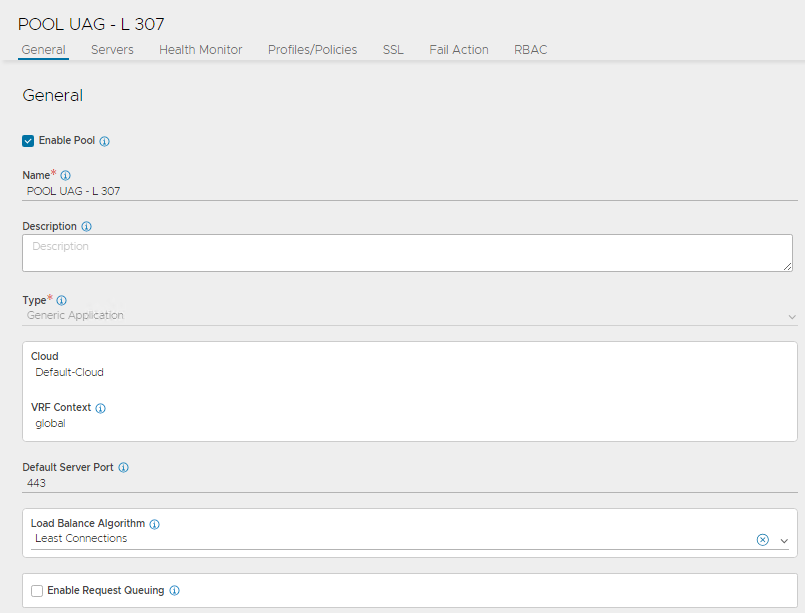
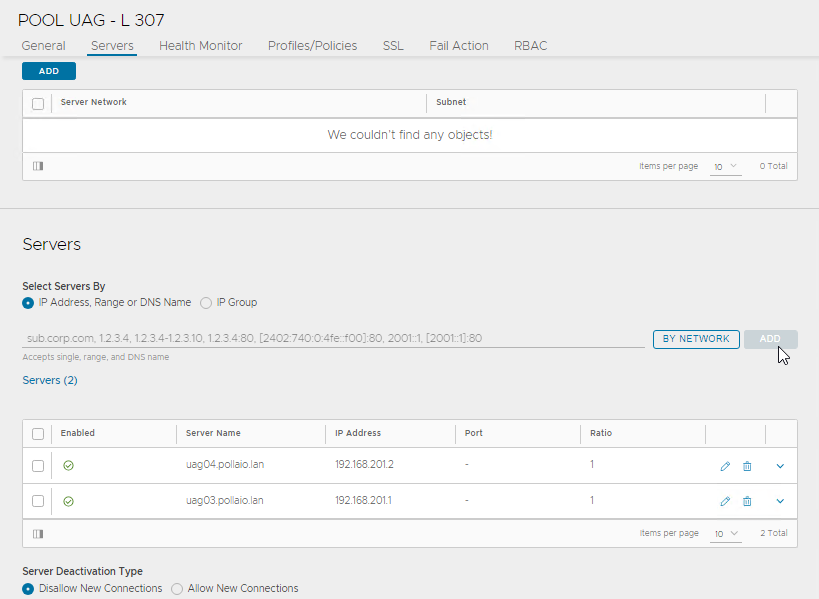
- In the Servers tab, add the Server IP Address of the UAG servers.
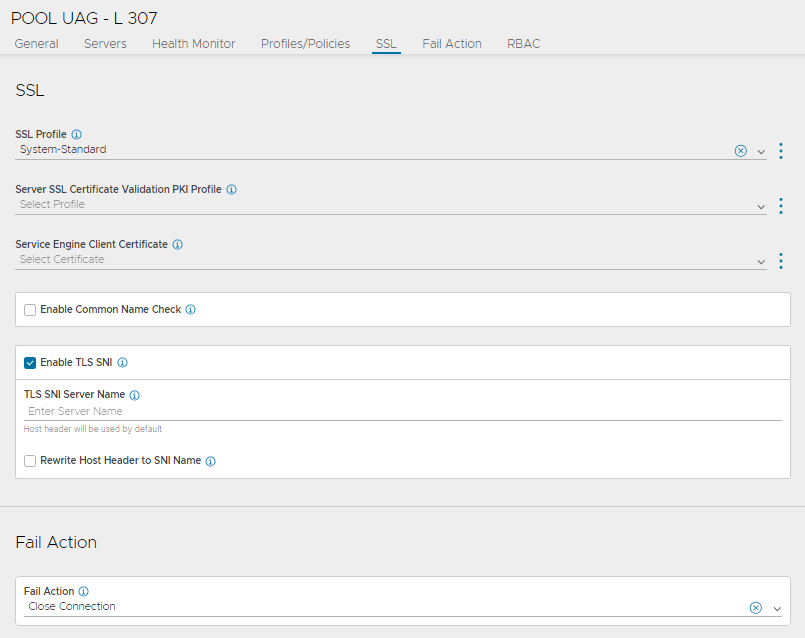
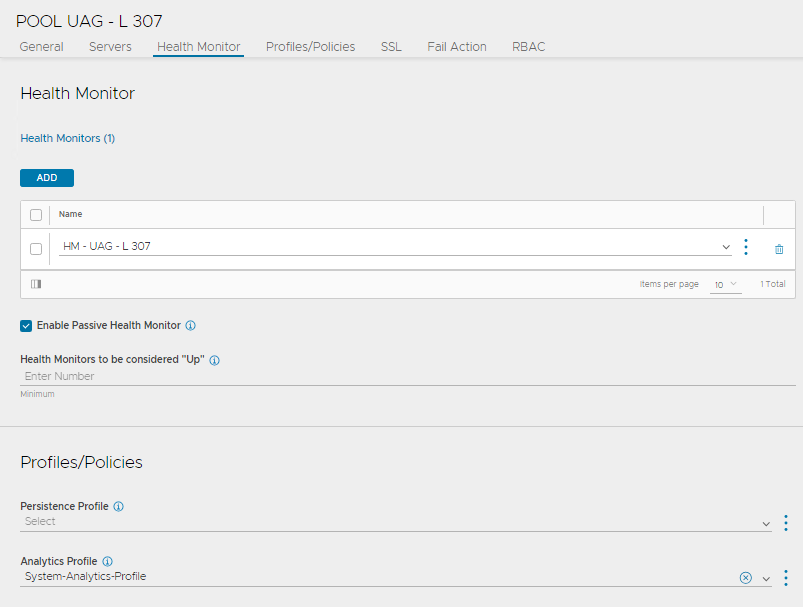
- In Health Monitor tab, select the appropriate Health profile as shown below:
Installing the SSL certificate Required for L7 VIP
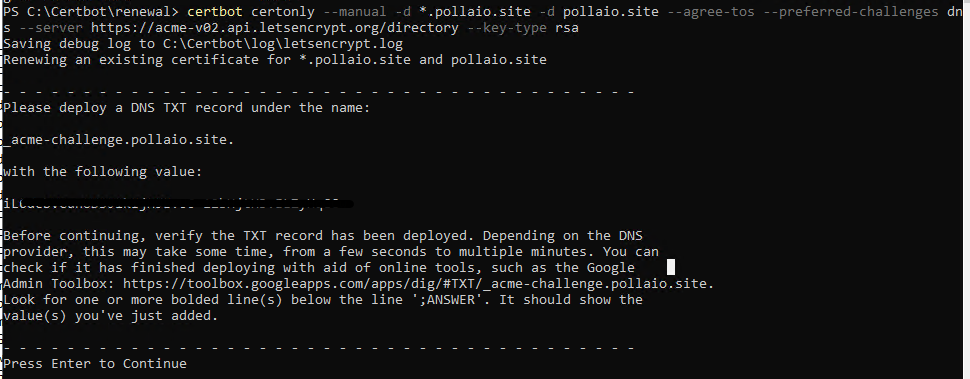
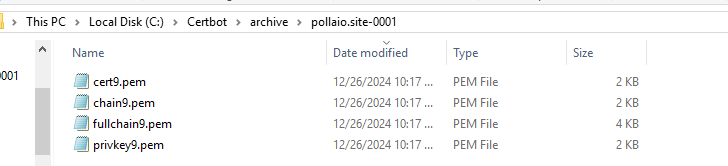
The public certificate must be imported into AVI LB it need the same imported in to UAG.
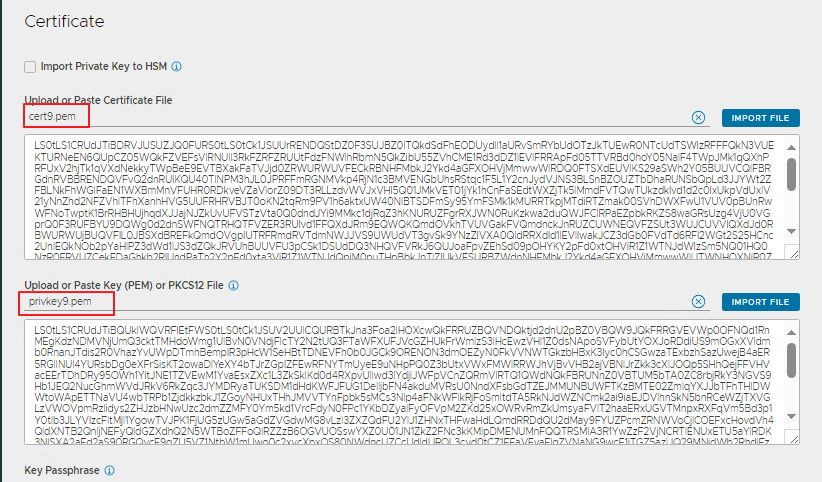
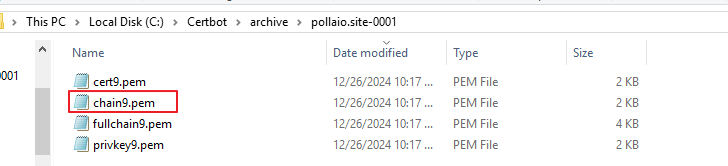
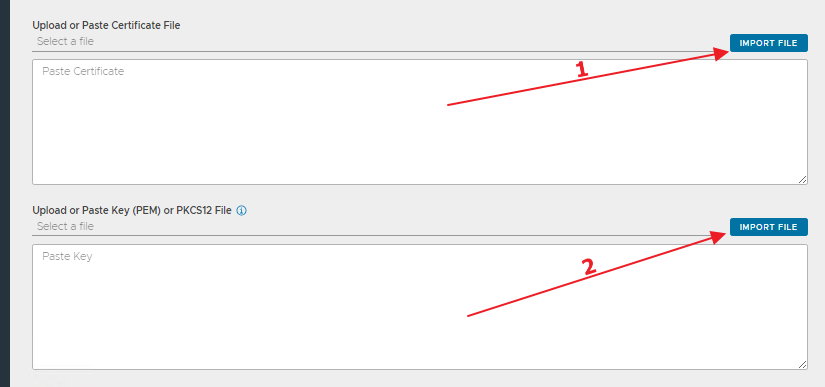
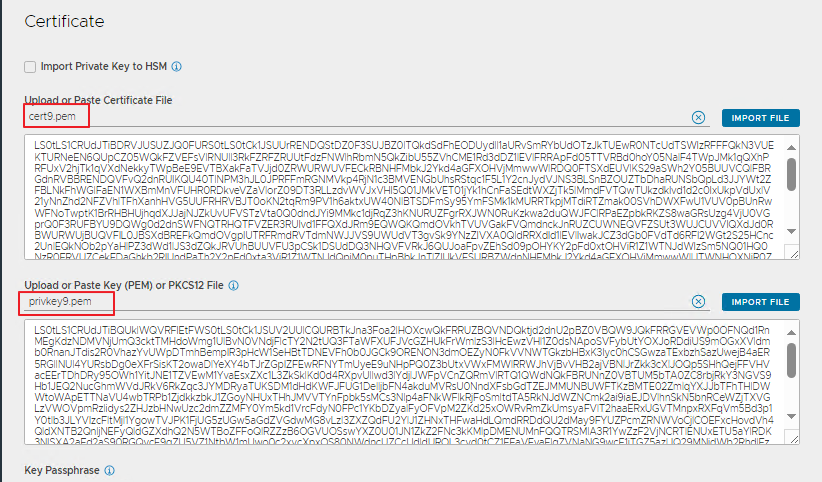
The certificate to be imported must be in PEM format.
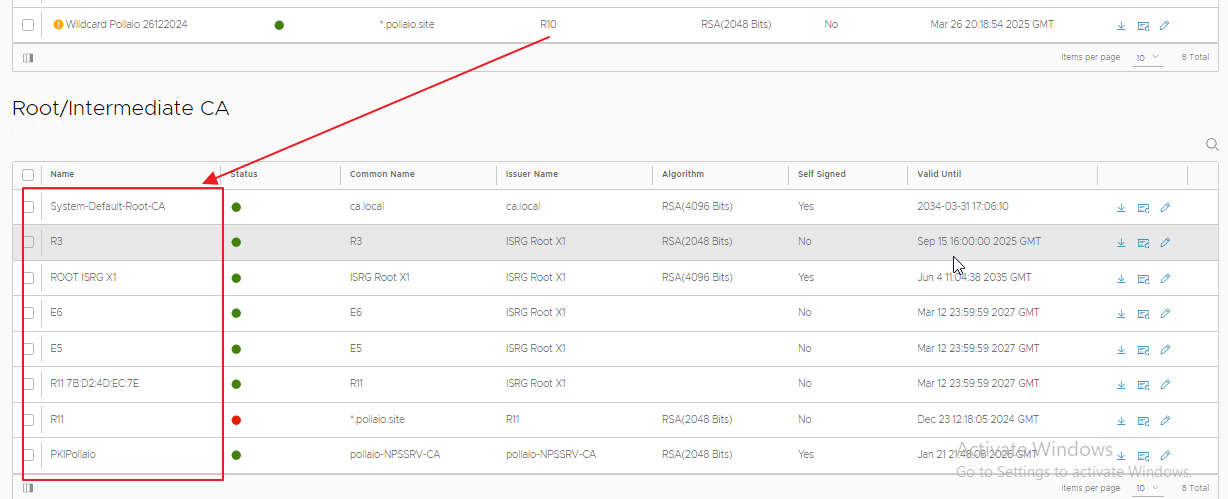
Once imported, ensure that the CA certificate is properly linked.
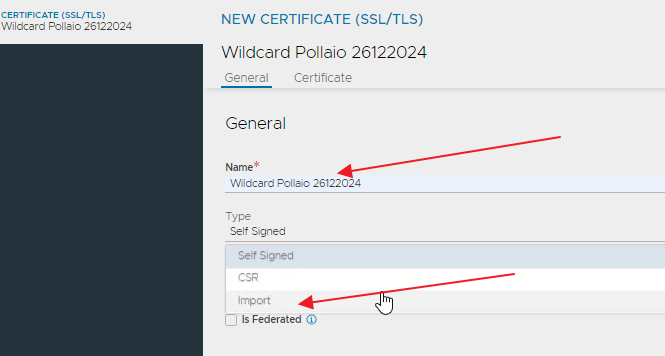
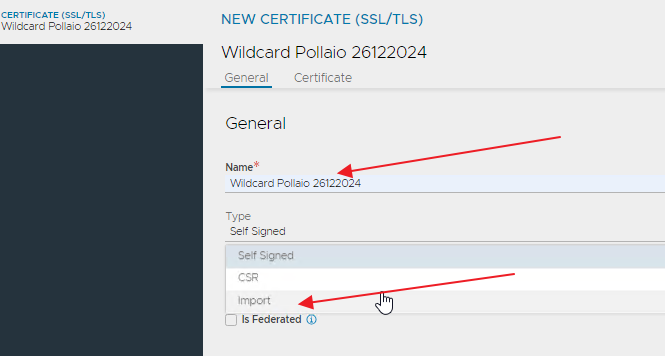
Here are the steps to import the certificate
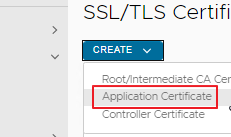
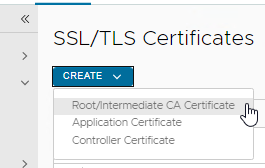
- To import a CA Certificate, navigate to Templates > Security > SSL/TLS Certificates.
- Click Create.
- Select Root/Intermediate CA Certificate.
- Provide a name to identify the certificate later
- Upload or Paste Certificate File
VALIDATE and SAVE
Creating Virtual Service for UAG
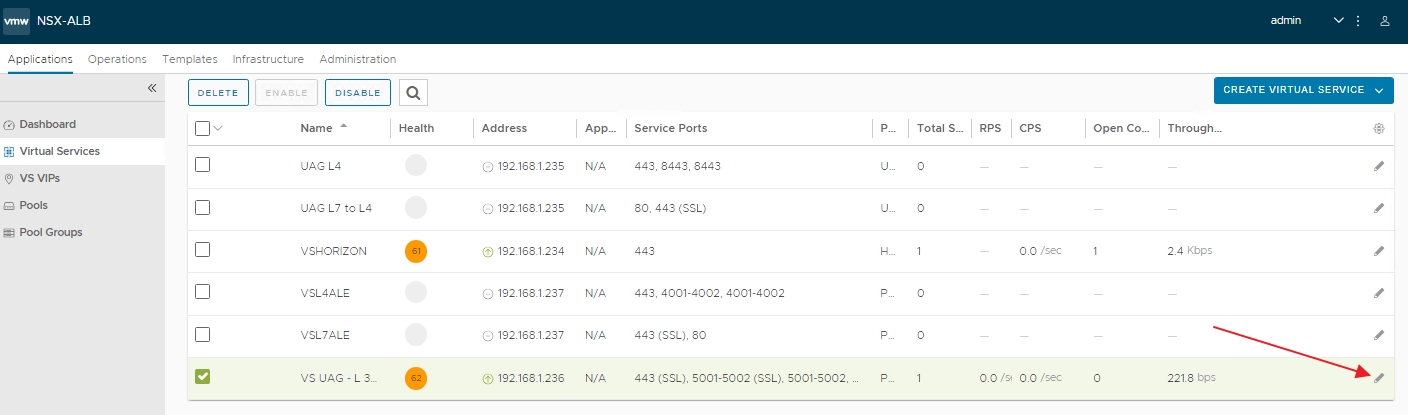
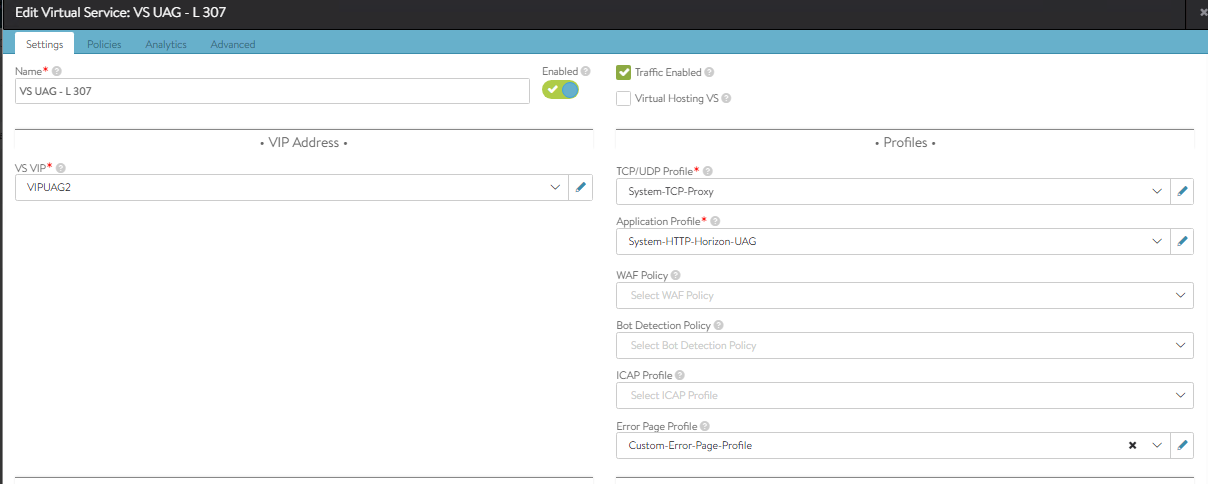
To create the new virtual service,
- Navigate to Applications > Virtual Services.
- Click CREATE VIRTUAL SERVICE > Advanced Setup.
- Bind the virtual service VIP.
- Use the System-HTTP-Horizon-UAG as the Application Profile.
- Configure the virtual service as shown below:
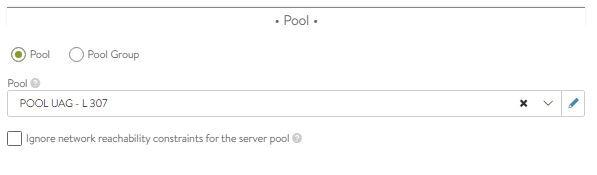
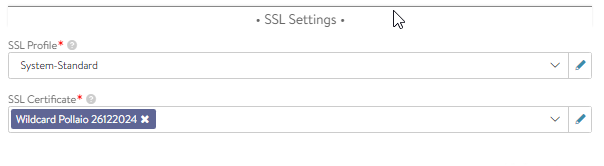
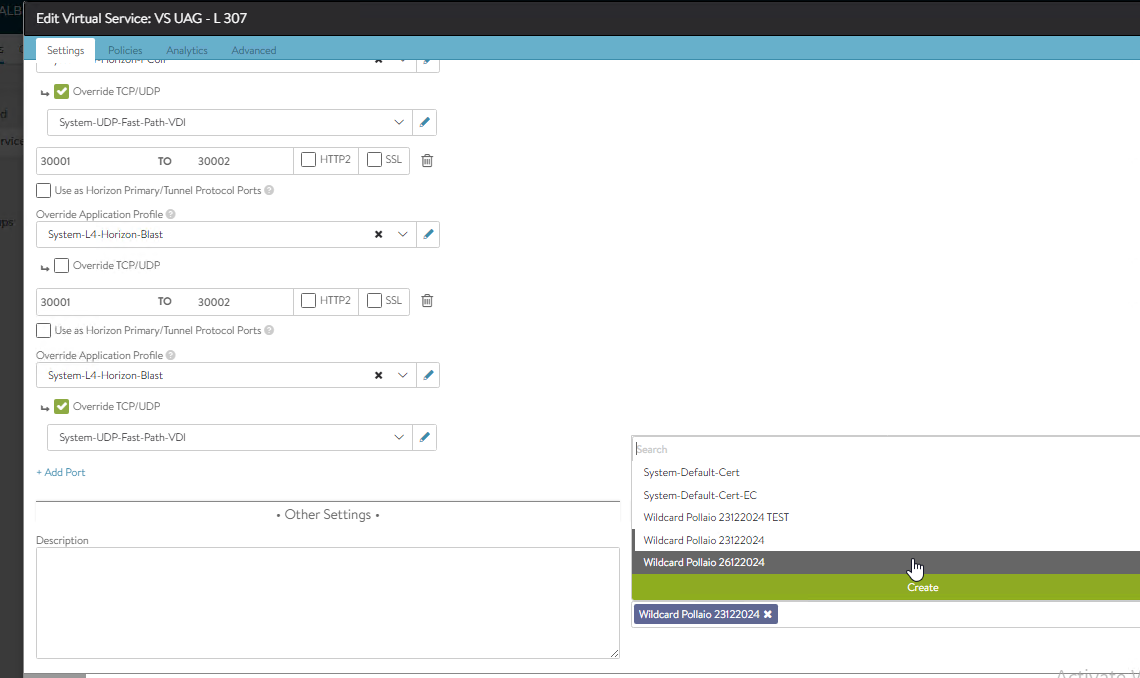
- In the Service Port section, click Switch to Advanced and configure the service ports.
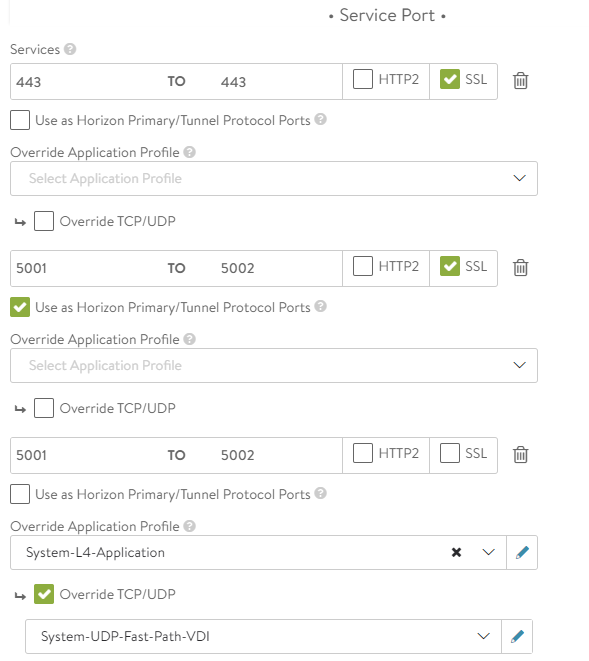
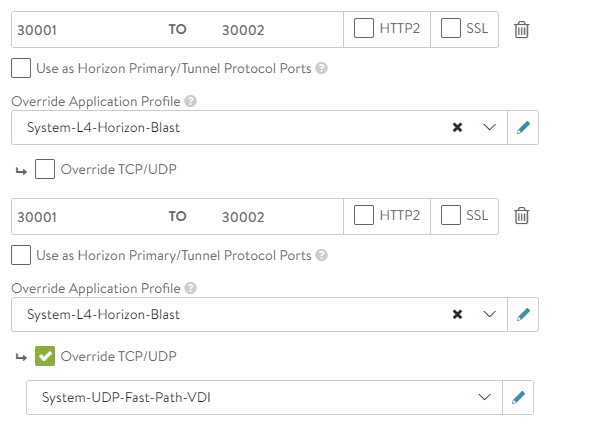
- Bind the pool and the SSL certificate added,
- Click Next.
Click Next and Save the configuration.
NOTE:
Two ports are opened for primary and secondary traffic:
-
- Port 443 – This is for XML API traffic
- Ports 5001 to 5002 – Horizon internal ports opened for L7 primary XML traffic to handle redirected traffic
- Ports 30001 to 30002 – Blast
Configure DataScript
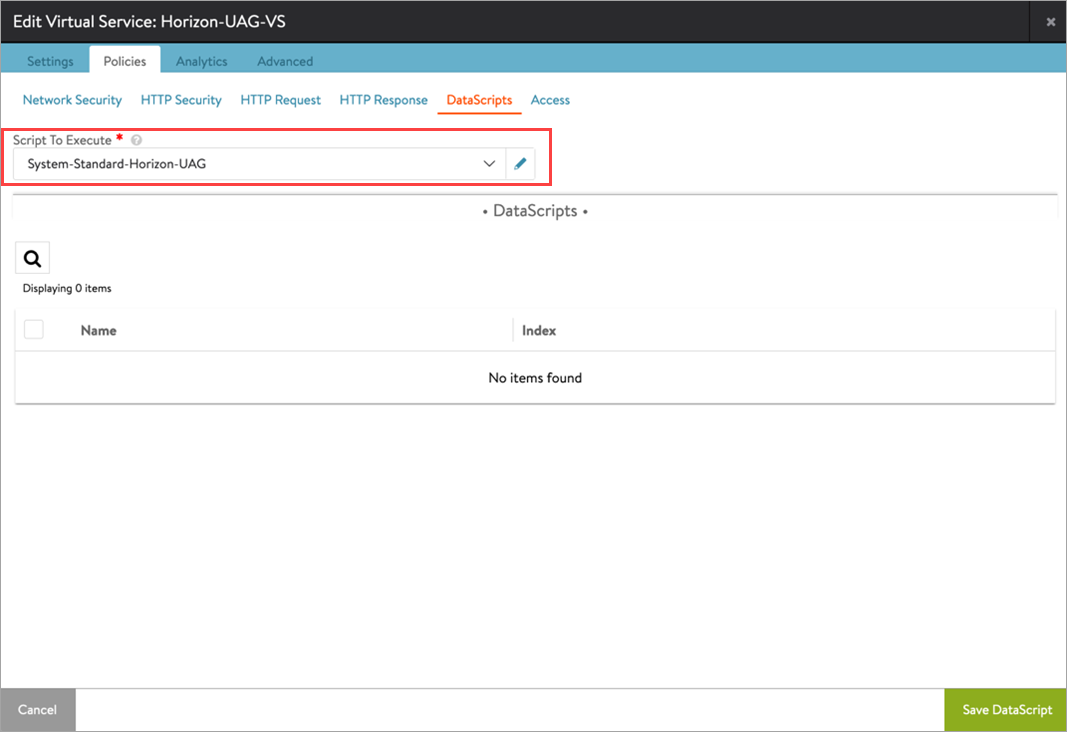
- Binding the Horizon DataScript on the Virtual Service
- From the UI, navigate to Applications > Virtual Services.
- Edit the virtual service that was created.
- Go to Policies > DataScripts.
- Click Add DataScripts.
- Under Script To Execute, select System-Standard-Horizon-UAG.
- Click Save DataScript and click Save.
System-Standard-Horizon-UAG is embedded AVI Load Balancer Datascript
UAG Configuration
Modify each UAG’s Blast and PCoIP external URL fields to use the custom ports added in the NSX Advanced Load Balancer port map (From the UI, Edit Pool > Servers tab under New Pool or Edit Pool page).
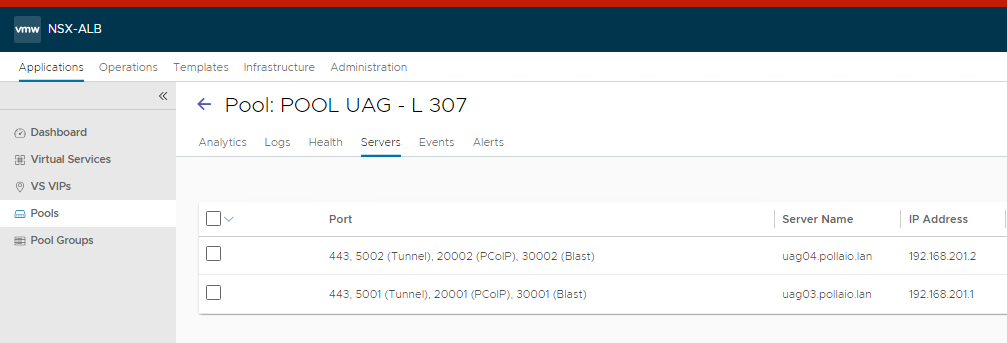
Modify the Blast external URL to include the custom port for UDP.
For example, https://<ENAV_PUBLIC_FQDN>.com:<BLAST-CUSTOM-PORT>/?UDPPort=<BLAST-CUSTOM-PORT>.
https://horizon.pollaio.site/:30001?udpport=30001
https://horizon.pollaio.site/:30002?udpport=30002

Verify the Tunnel External URL

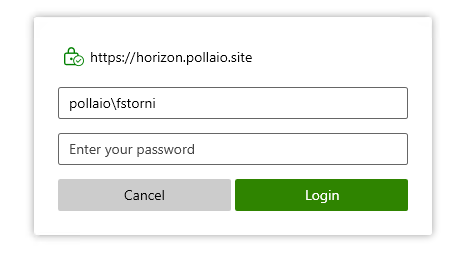
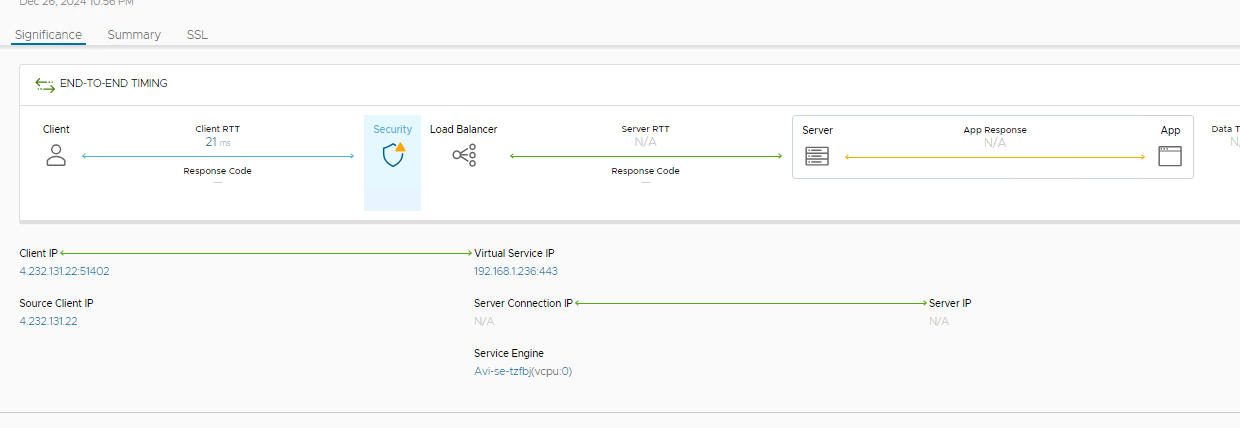
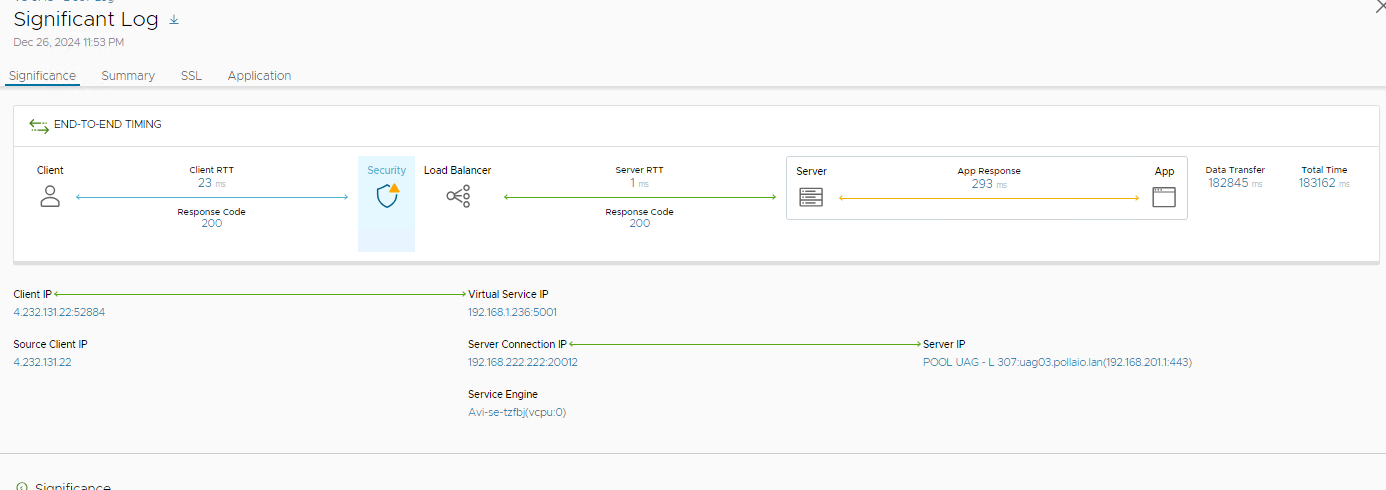
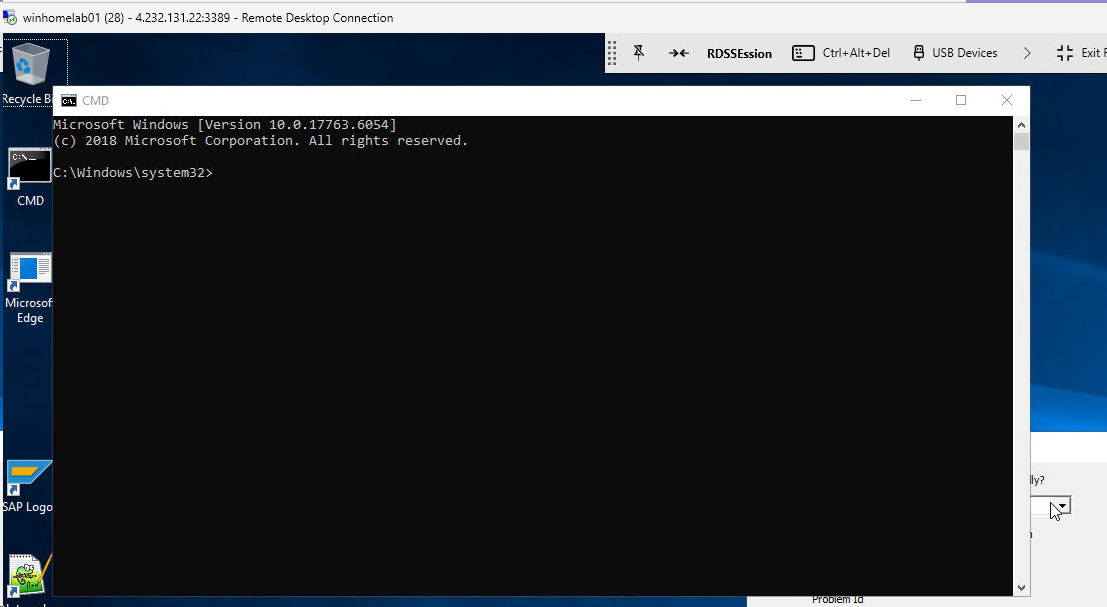
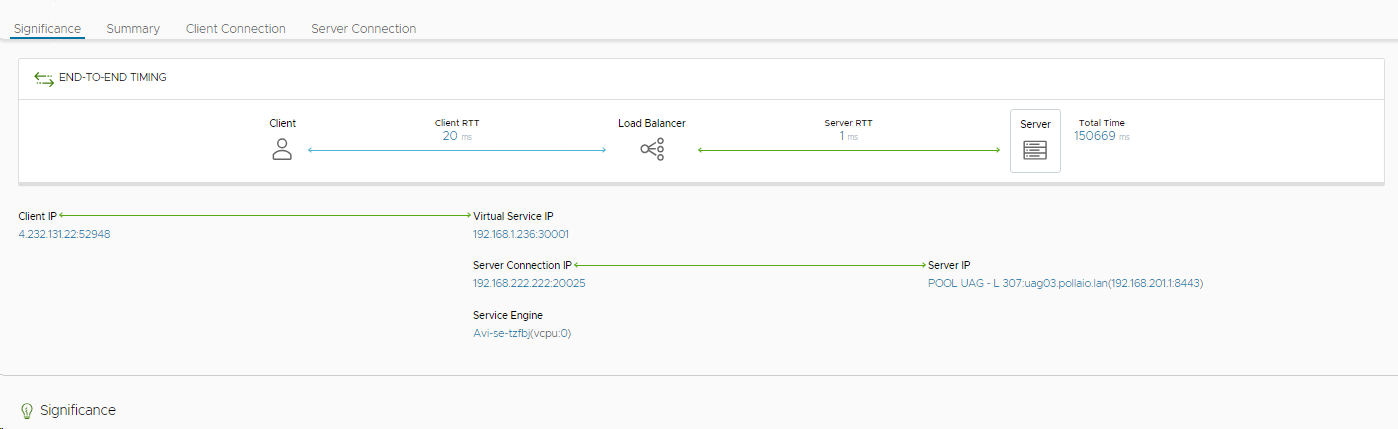
Now we are ready to test and verify the access flow to my VDI.
-
- Port 443 – This is for XML API traffic
- Ports 5001 to 5002 – Horizon internal ports opened for L7 primary XML traffic to handle redirected traffic
- Ports 30001 to 30002 – Blast
Where:
-
- Port 443 – This is for XML API traffic
- Ports 5001 to 5002 – Horizon internal ports opened for L7 primary XML traffic to handle redirected traffic
- Ports 30001 to 30002 – Blast
Refer: