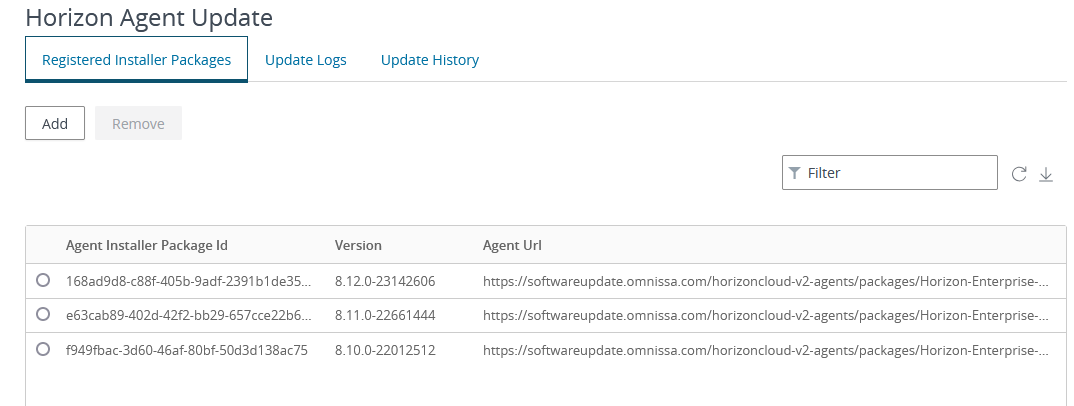
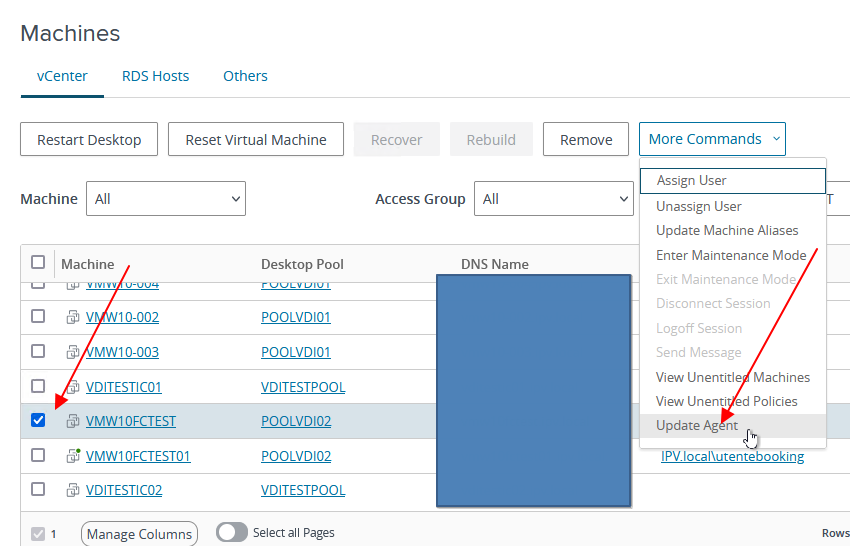
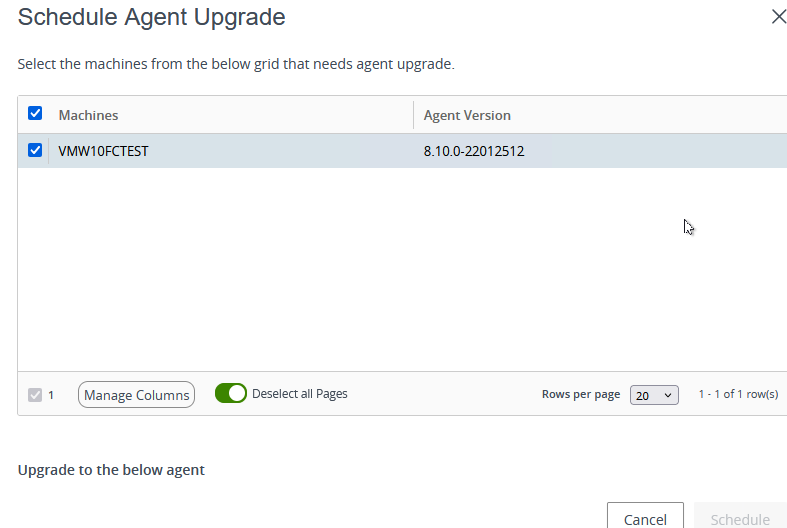
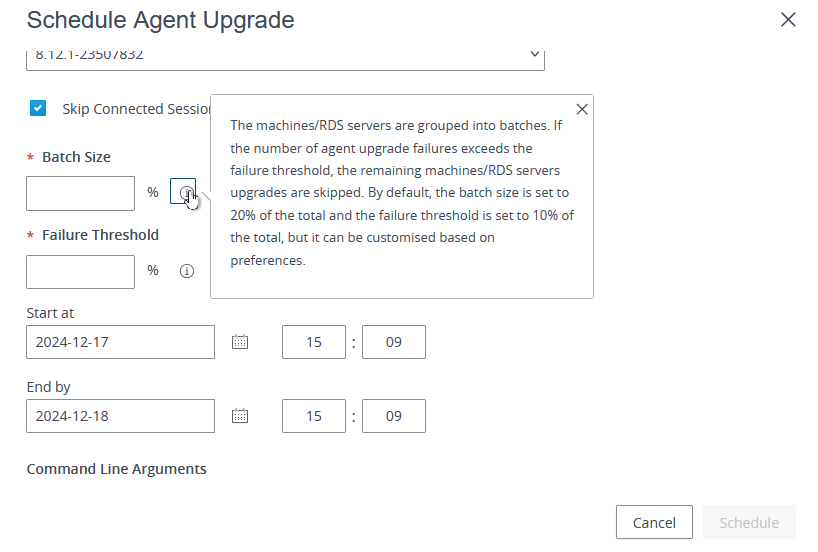
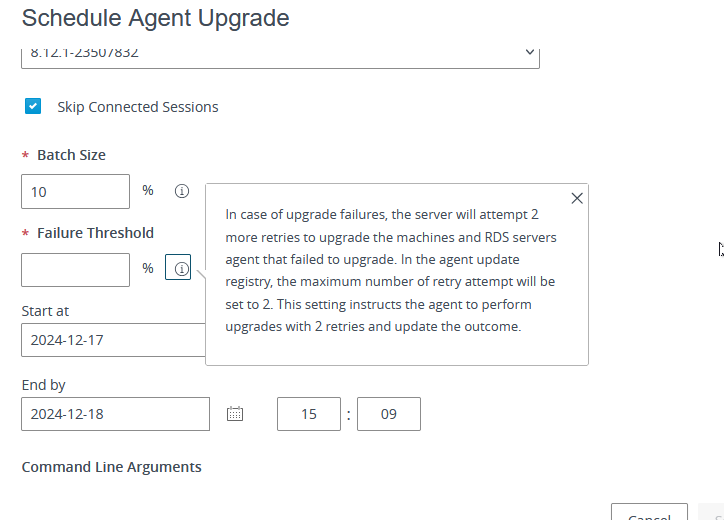
If you have a Horizon Enterprise Plus or Horizon Universal subscription license, the last Horizon versions have a function to manage the Horizon Agent Update.
You have two scenarios:
Automatic map the upgrade to your Connection server infrastructure
Manually add the Agent upgrade package
I tested this feature in my Home Lab
Enable Automatic upgrade to your Connection server infrastructure
Enable Omnissa Horizon Cloud Portal form of Horizon Agent Auto Upgrade feature
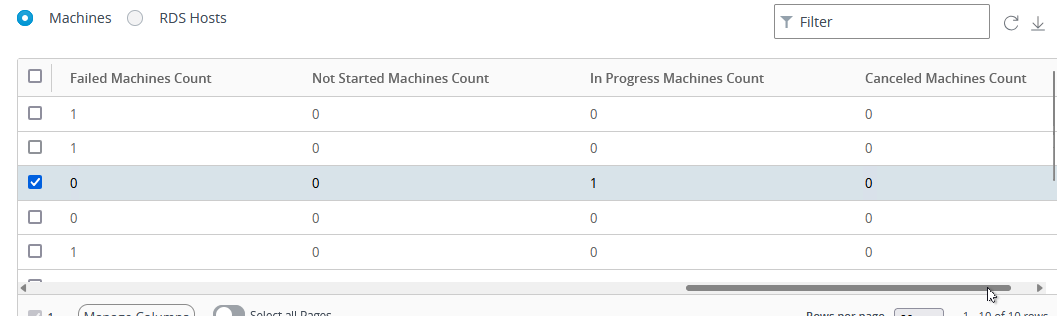
With enabling the Agent Auto Upgrade you can see, without any action, the Horizon package to use for upgrade (this new package is directly downloaded from the Omnissa Site)
If you use this method you can skip the next paragraph and go to Schedule Agent upgrade
Manually loaded the JSON and agent file
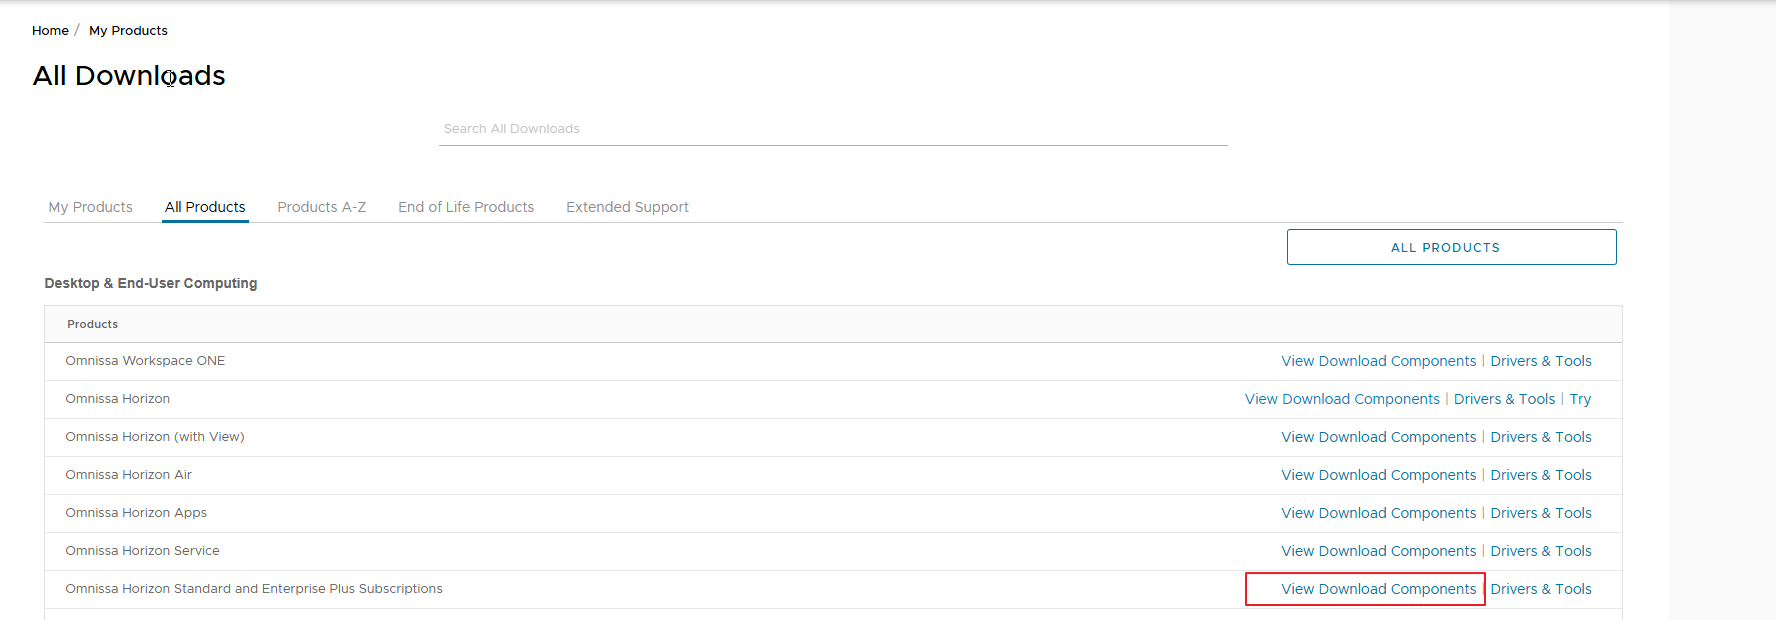
Otherwise, you can manually download the JSON file from the customer portal by Omnissa
Omnissa Horizon Standard and Enterprise Plus Subscriptions
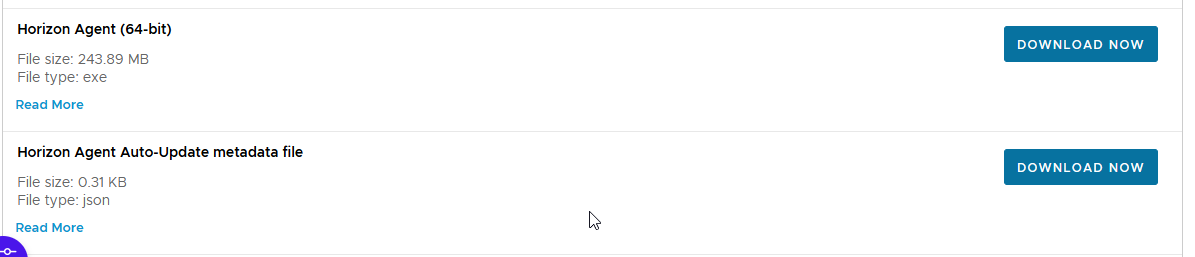
Download the files you need
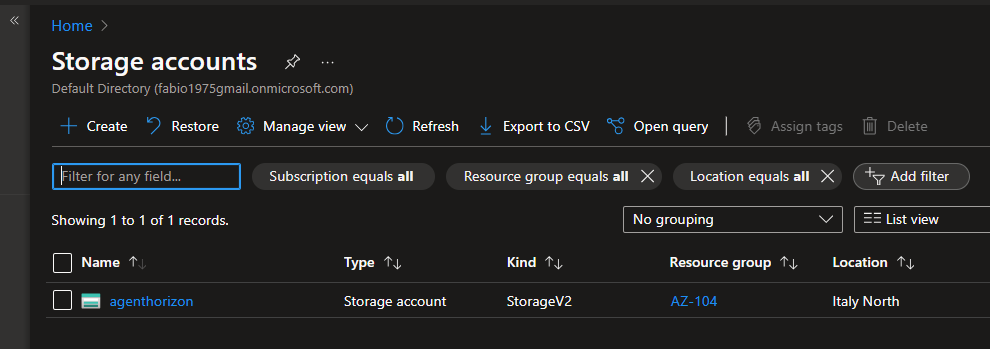
Upload them to a WEB site (Local/Internal or Public), in my case I use an Azure storage account
As blob containers
Which are accessible via WEB (obviously I recommend putting special restrictions)
Let’s configure our POD by entering the appropriate section of the interface via WEB of the connection servers
Enter the URL of our storage account with the name of the JSON file indicated
In the various activities carried out in the year that is ending, load balancing and the other availability of Horizon solutions for both access from the Internet and from the company LAN were among the activities that required multi-handed work between the teams that deal with IT technologies within the company (Security, Network, EUC, Servers …).
While these synergies are easy to manage in the context of small companies, when working with large companies, timely planning and design become very important to avoid infrastructural changes (even minimal) that can convert into delays in the delivery of the infrastructure due to the need to re-engage a different team.
One of solutions used to balance access to Omnissa Horizon services is NSX Advanced Load Balancer.
Normally, the publication of Omnissa VDI solutions is carried out using the virtual appliances Unified Access Gateway (UAG) where “Omnissa Unified Access Gateway enables secure remote access from an external network to a variety of internal resources provided by Omnissa Workspace ONE and Horizon deployments.”
Natively UAGs have their own HA solution, but it has the requirement of having 3 Public IP Addresses and creating three public FQDNs.
The use of NSX Advanced Load balancer allows various UAG balancing solutions:
Single VIP with Two Virtual Services
Single L4 Virtual Service
(n+1) VIP
In my HomeLab I have tested the various solutions indicated above,
the most interesting is the one that I propose you try for the following reasons:
• Robust enough to handle the persistence issues
• Works well in environments where users come behind the NAT
• Ease of configuration
• Better visibility and logs
Additionally, the standard ports of the Blast and PCo protocols will not be used, as this can easily expose the solutions to potentially malicious individuals.
The infrastructure that I will propose also requires a change to the “classic” UAG configurations on the URLs used for the Blast and PCOIP protocols.
In the implementation that we will do, we will take as an example only the part of the Blast protocol
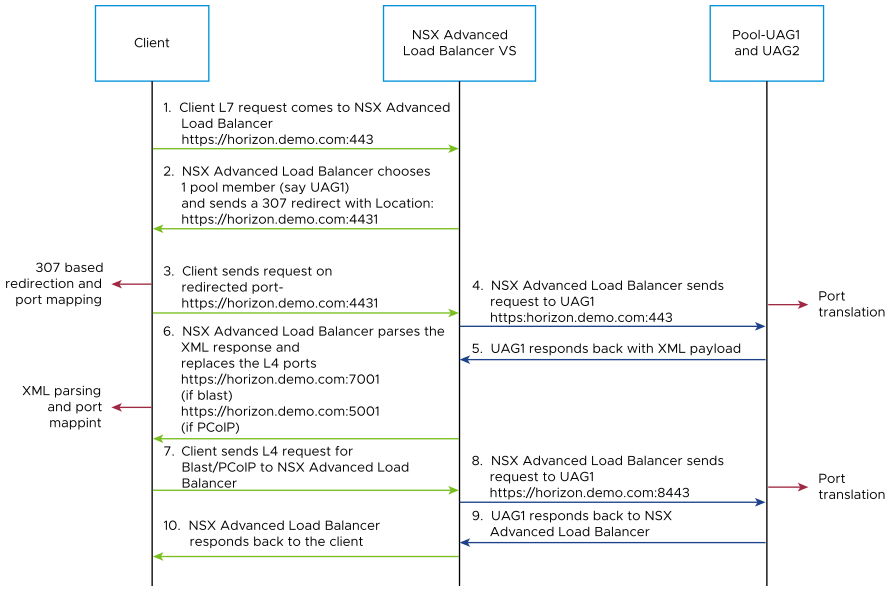
The following flow explains the step when a user tries to access Omnissa VDI, the flow has two ports opened for primary and secondary traffic:
Port 443 – This is for XML API traffic
Ports 5001 to 5002 – Horizon internal ports opened for L7 primary XML traffic to handle redirected traffic
Ports 30001 to 30002 – Blast
Where:
Client L7 request comes to AVI LB https://horizon.pollaio.site/
AVI LB chooses 1 pool member (say UAG1) and send back to client a 307 redirect Location https://horizon.pollaio.site:5001
Client sends request on redirected port https:// horizon.pollaio.site:5001
AVI LB (L7) sends requests to UAG1 https:// horizon.pollaio.site:5001 (Port Traslation)*
UAG1 responds back with XML payload
AVI LB parses the XML response and replace the L4 ports (to client) https:// horizon.pollaio.site:30001 (blast)
Client sends L4 request for Blast to AVI LB
AVI LB sends request to UAG https:// horizon.pollaio.site:30001*
UAG1 responds back to AVI LB
AVI LB responds back to client
The main aspect is the correct configuration of TCP and UDP ports between the various corporate network segments:
Source
Destination
Protocol
Port
Unified Access Gateway
Horizon Agent
UDP
22443
Unified Access Gateway
Horizon Agent
TCP
22443
Unified Access Gateway
Horizon Connection Server
TCP
443
Horizon Client
Virtual Service AVI
TCP
443
Horizon Client
Virtual Service AVI
UDP
443
Horizon Client
Virtual Service AVI
TCP
5001
Horizon Client
Virtual Service AVI
UDP
5001
Horizon Client
Virtual Service AVI
TCP
5002
Horizon Client
Virtual Service AVI
UDP
5002
Horizon Client
Virtual Service AVI
TCP
30001
Horizon Client
Virtual Service AVI
UDP
30001
Horizon Client
Virtual Service AVI
TCP
30002
Horizon Client
Virtual Service AVI
UDP
30002
Configurazione NSX ALB
Create a Virtual IP
Create a Custom Health Monitor for UAG
Create a UAG Pool
Install the SSL certificate Required for L7 VIP
Create a Virtual Service for UAG
Binding DataScripts to the Virtual Service
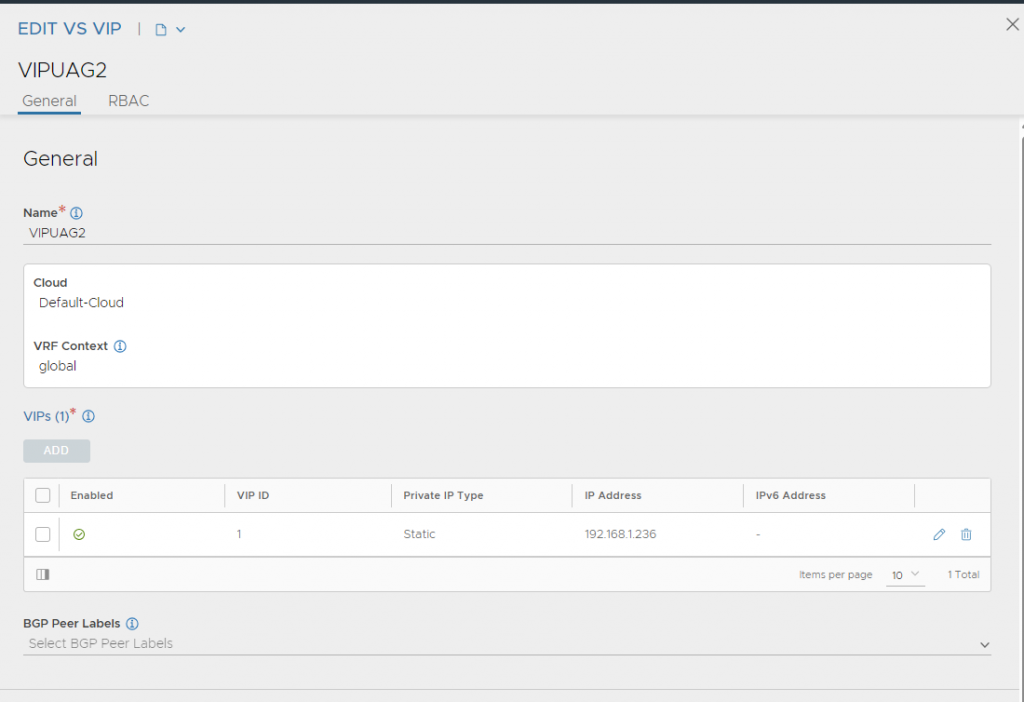
Create a Virtual IP
To create a custom health monitor, navigate to Applications > VS VIPs.
Click Create.
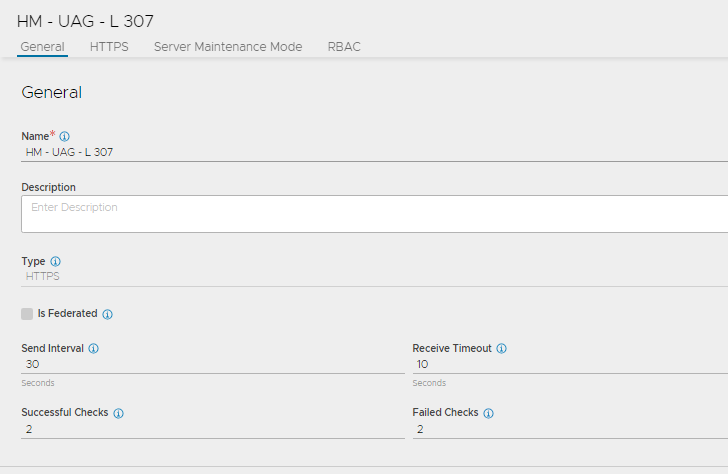
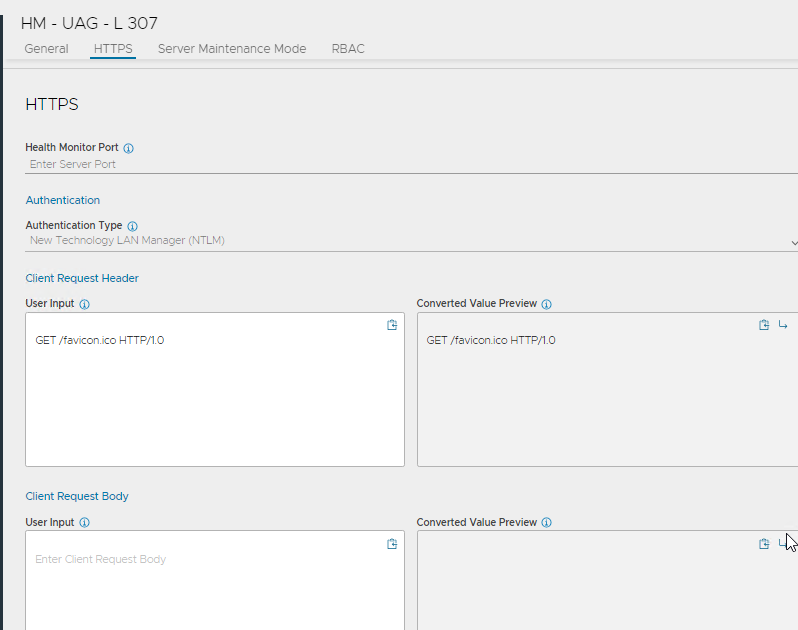
Create a Custome Health Monitor
To create a custom health monitor, navigate to Templates > Profiles > Health Monitors.
Click Create.
Select the VMware Cloud that was created for Horizon.
Enter the following details in the New Health Monitor screen
Create UAG Pool
Navigate to Applications > Pools.
Select the cloud from the SelectCloud window.
Click Next.
Click Create Pool.
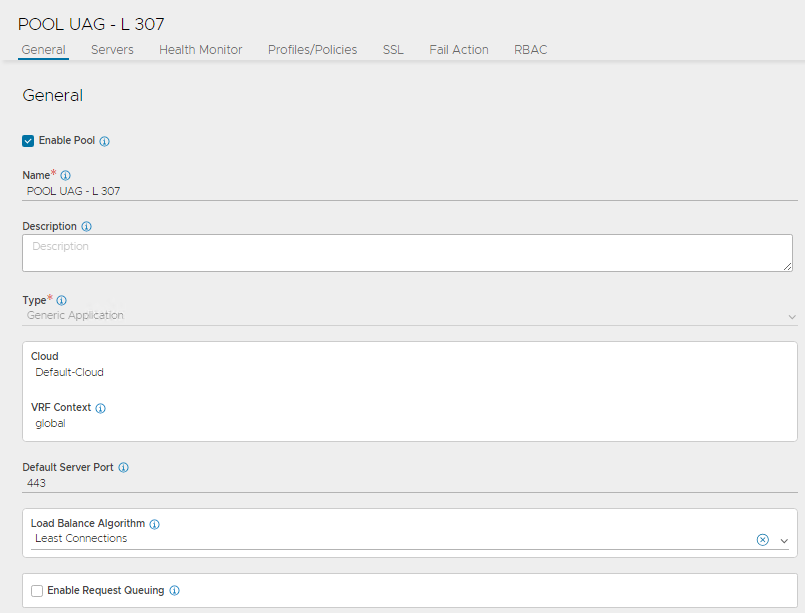
In the CREATE POOL screen, update the details as shown below:
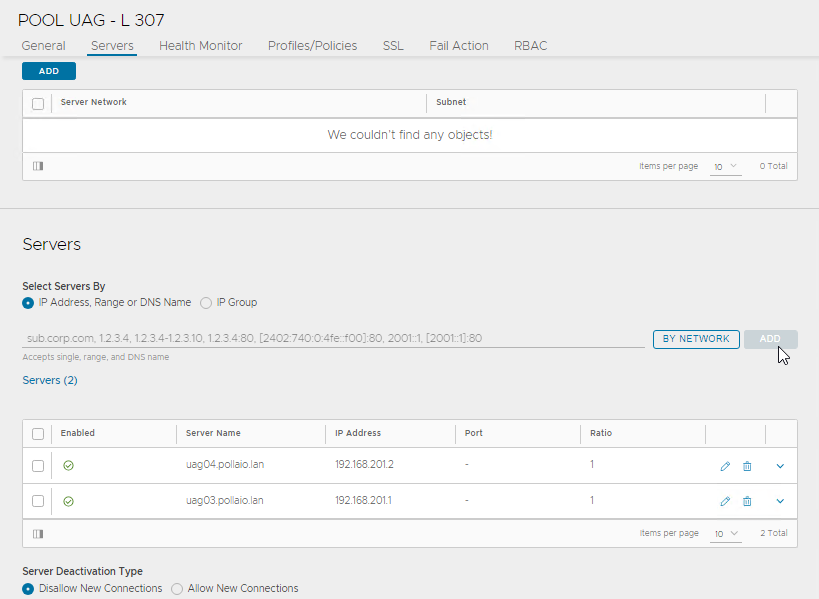
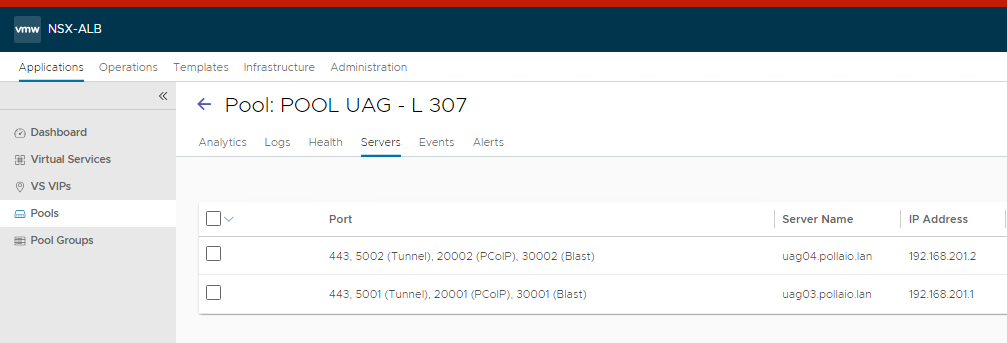
In the Servers tab, add the Server IP Address of the UAG servers.
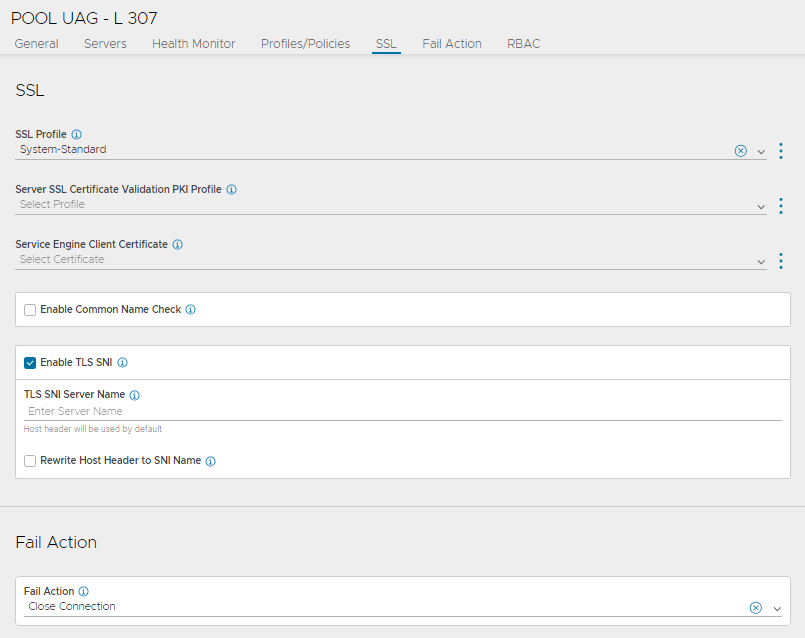
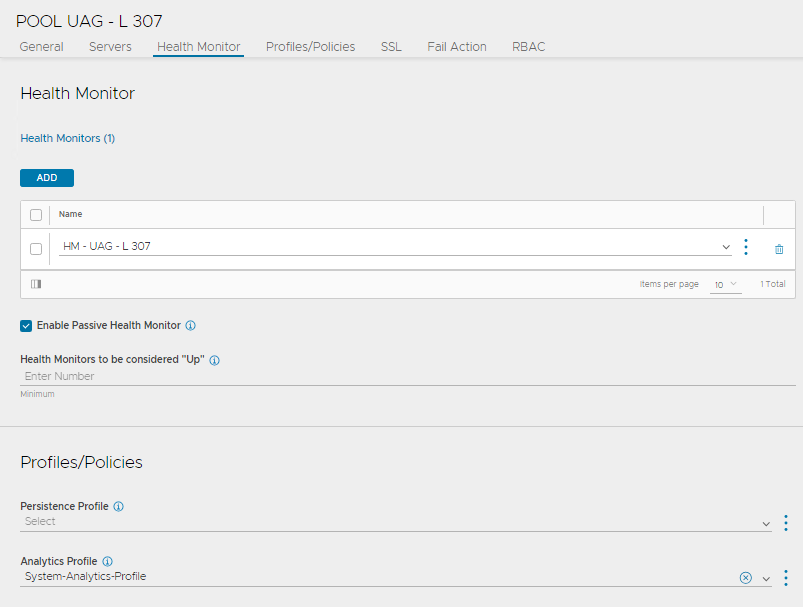
In Health Monitor tab, select the appropriate Health profile as shown below:
Installing the SSL certificate Required for L7 VIP
The public certificate must be imported into AVI LB it need the same imported in to UAG.
The certificate to be imported must be in PEM format.
Once imported, ensure that the CA certificate is properly linked.
Here are the steps to import the certificate
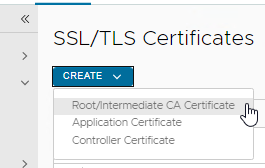
To import a CA Certificate, navigate to Templates > Security > SSL/TLS Certificates.
Click Create.
Select Root/Intermediate CA Certificate.
Provide a name to identify the certificate later
Upload or Paste Certificate File
VALIDATE and SAVE
Creating Virtual Service for UAG
To create the new virtual service,
Navigate to Applications > Virtual Services.
Click CREATE VIRTUAL SERVICE > Advanced Setup.
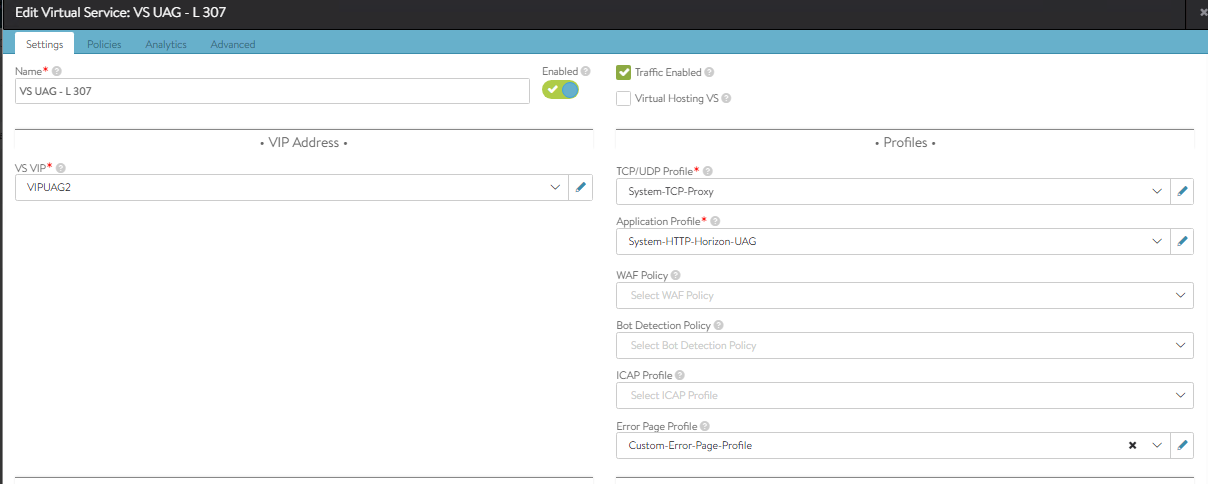
Bind the virtual service VIP.
Use the System-HTTP-Horizon-UAG as the Application Profile.
Configure the virtual service as shown below:
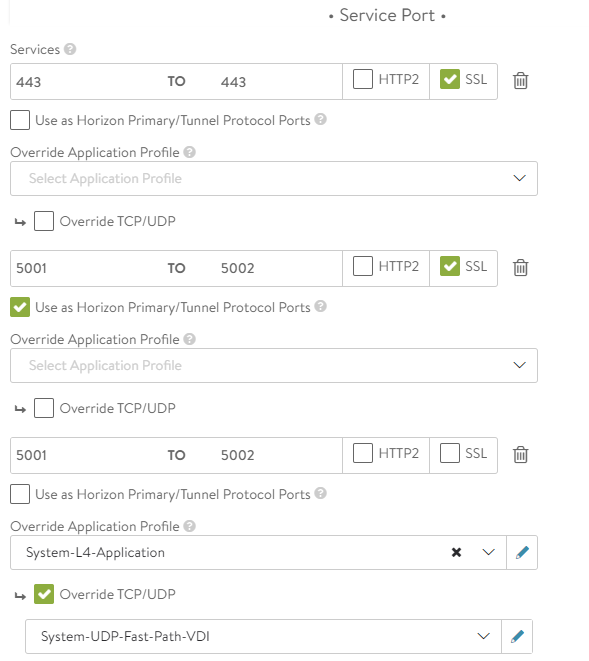
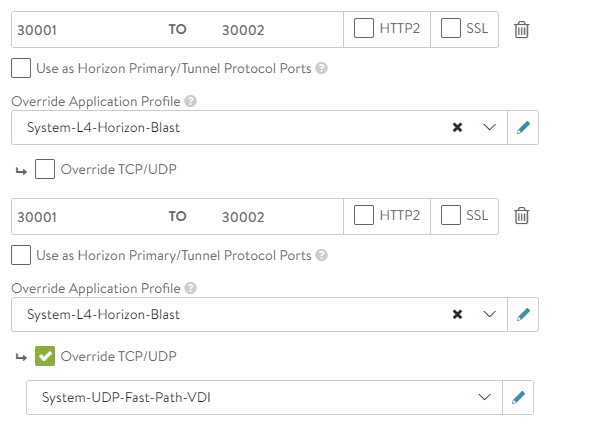
In the Service Port section, click Switch to Advanced and configure the service ports.
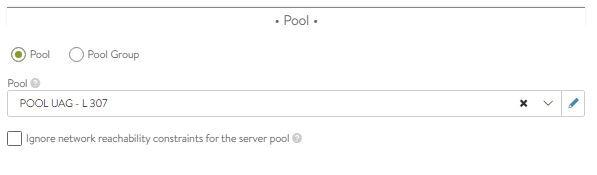
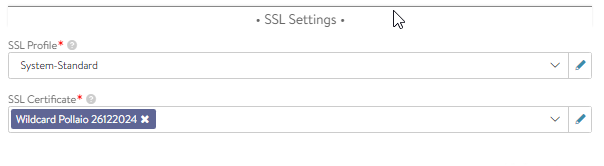
Bind the pool and the SSL certificate added,
Click Next.
Click Next and Save the configuration.
NOTE:
Two ports are opened for primary and secondary traffic:
Port 443 – This is for XML API traffic
Ports 5001 to 5002 – Horizon internal ports opened for L7 primary XML traffic to handle redirected traffic
Ports 30001 to 30002 – Blast
Configure DataScript
Binding the Horizon DataScript on the Virtual Service
From the UI, navigate to Applications > Virtual Services.
Edit the virtual service that was created.
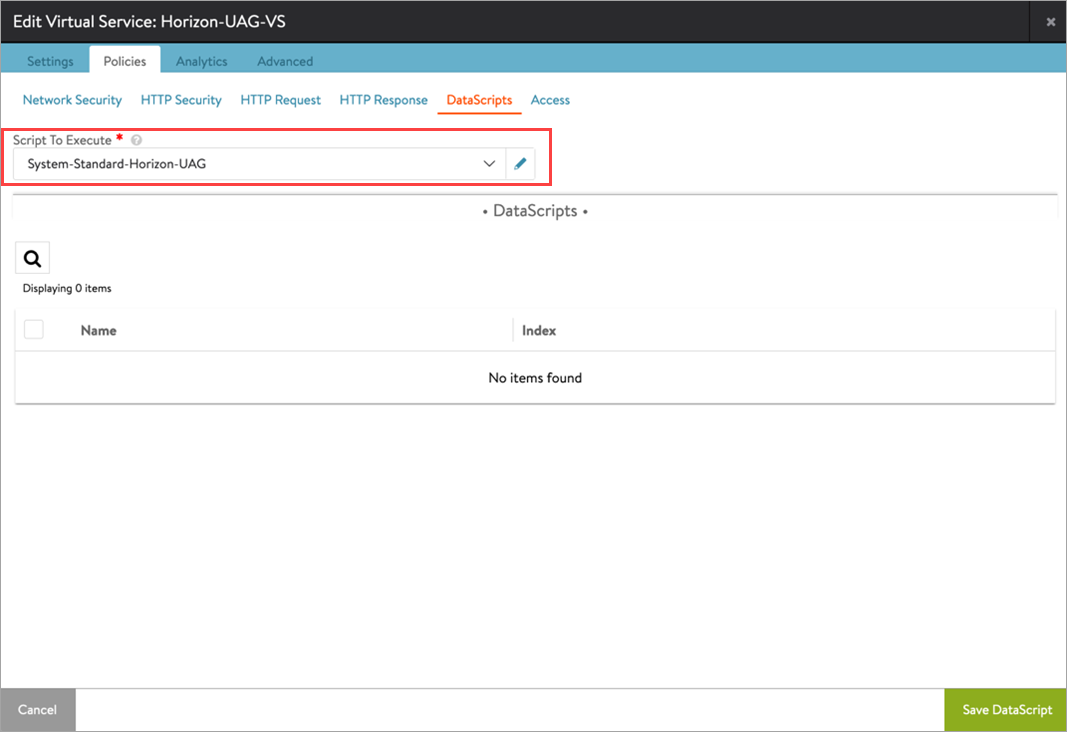
Go to Policies > DataScripts.
Click Add DataScripts.
Under Script To Execute, select System-Standard-Horizon-UAG.
Click Save DataScript and click Save.
System-Standard-Horizon-UAG is embedded AVI Load Balancer Datascript
UAG Configuration
Modify each UAG’s Blast and PCoIP external URL fields to use the custom ports added in the NSX Advanced Load Balancer port map (From the UI, Edit Pool > Servers tab under New Pool or Edit Pool page).
Modify the Blast external URL to include the custom port for UDP.
For example, https://<ENAV_PUBLIC_FQDN>.com:<BLAST-CUSTOM-PORT>/?UDPPort=<BLAST-CUSTOM-PORT>.
In the production and home lab environments, the SSL Certificate is a point of attention that is especially important when the certificate is nearing its expiration date.
Normally, the expiration date is important to note in an Outlook calendar or other tool as a reminder to renew (a few days before, because if a Public CA generates the certificate, the renew requires waiting some days to have the certificate file). It is important to renew the certificate because some applications can stop running, and for the visibility of our business, it may have a bad reputation.
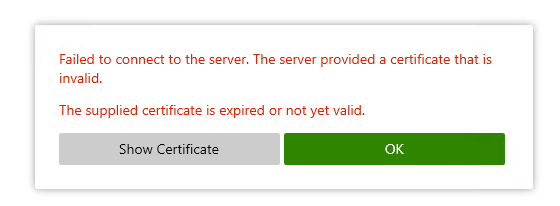
Well in my home lab, where I use the NSX Advanced Load Balancer for Omnissa Horizon, at this time (Christmas Day) my wildcard SSL expired.
Well, I use a Let’s Encrypted certificate (free certificate) and I use Cerbot tool for the renewal.
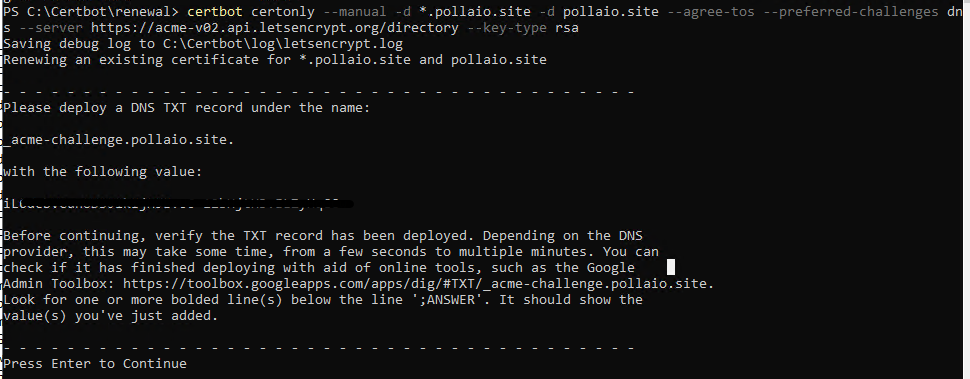
On my PC where I installed the Cerbot tool I use this command to renew and create the certificate file:
and I need to add a new TXT record on my DNS provider.
After adding the TXT record I can continue
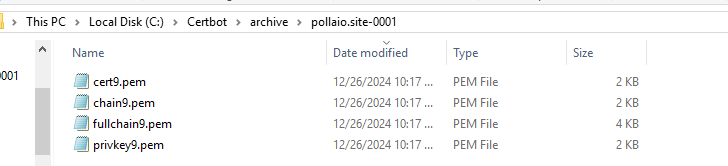
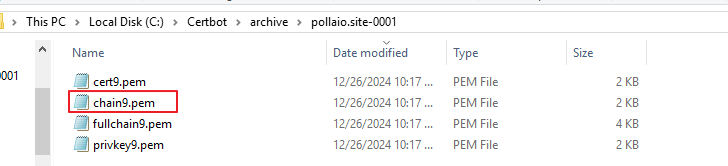
Now I have in my Cerbot directory this new file:
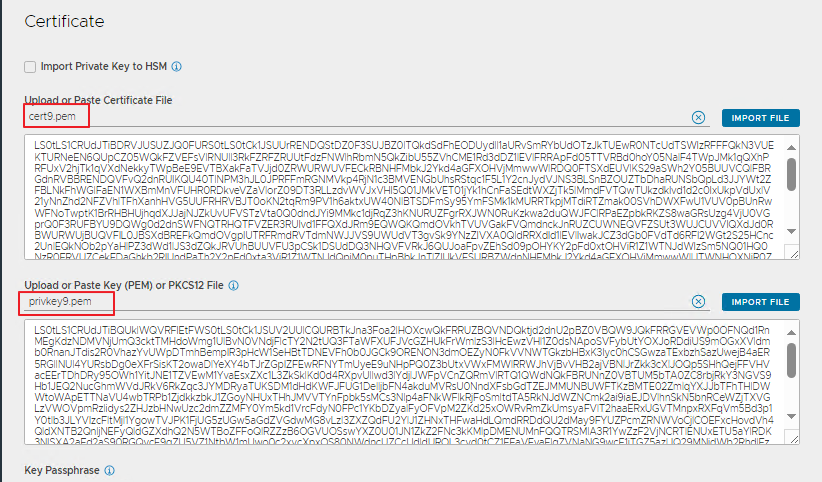
Well, I will use the cer9.pem, chain9.pem and privkey9.pem for the certificate renewal on NSX ALB.
Access NSX ALB console, go to templates zone and under Security select SSL/TLS Certificates
We need to add the new certificate, I suggest to create a new entry and not replace the actual certificate.
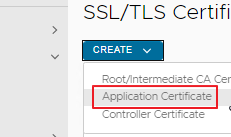
Under Create select Application Certificate
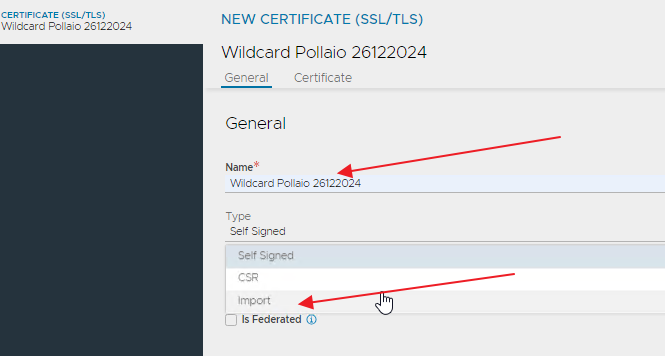
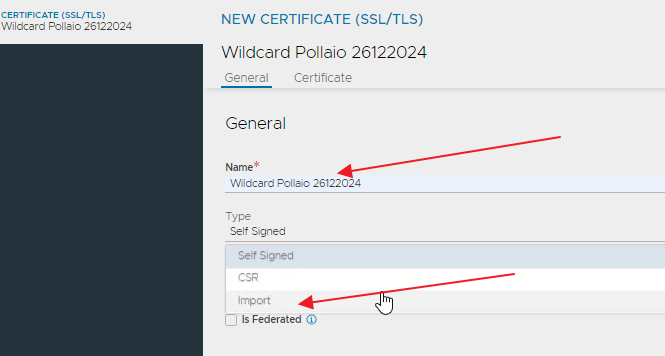
Add the certificate name (I normally add the name and the expiration date or the creation date) and how certificate type select Import
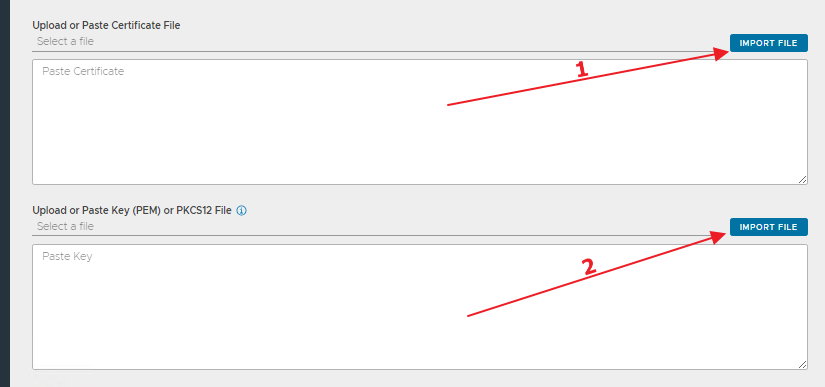
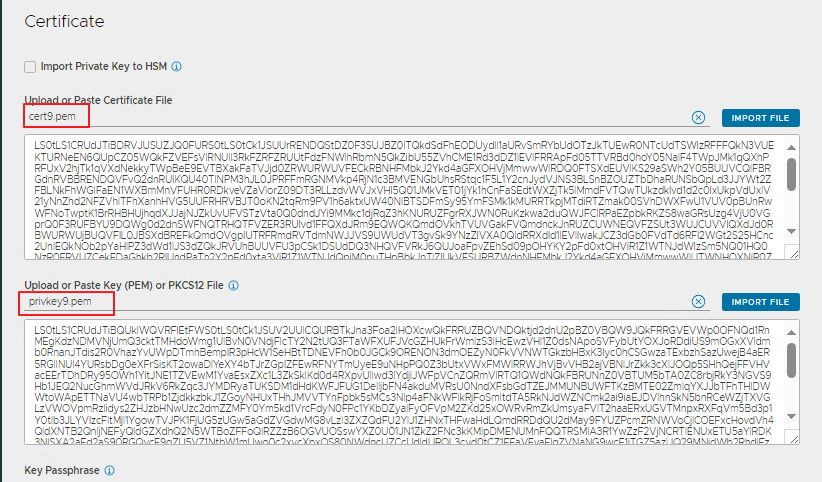
In the first import select the certificate file, in the second import the private key.
Validate and Save the change.
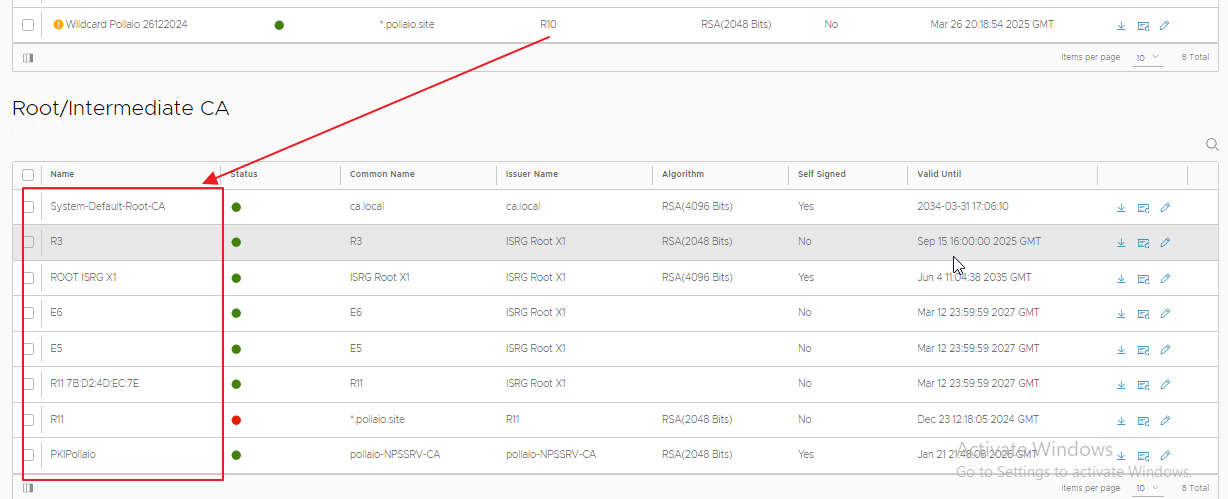
Now in to the certificate list we have the new SSL certificate
If the certificate has an orange warning it is probably because we don’t have the full certificate chain and we need to load the root and sub ca on NSX ALB.
In the same console page where we show the uploaded SSL certificate we have at the bottom a section where we see the Root and Sub CA and we don’t watch the R10
Ok, no problem we have the chain9.pem file …
Select Create the root/intermediate CA Certificate
and import the pem chain file, Validate and Save
Now the row with the new certificate doesn’t show any warning or error
Now we are ready to replace the SSL certificate on Virtual Service.
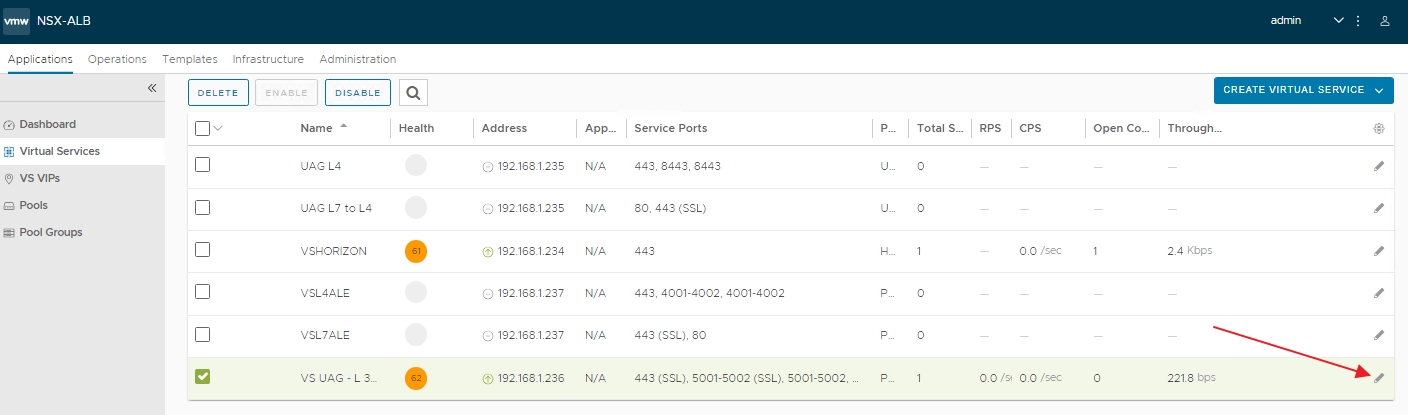
Go to Application Menu, Virtual Service and edit the VS where we want to change the SSL certificate
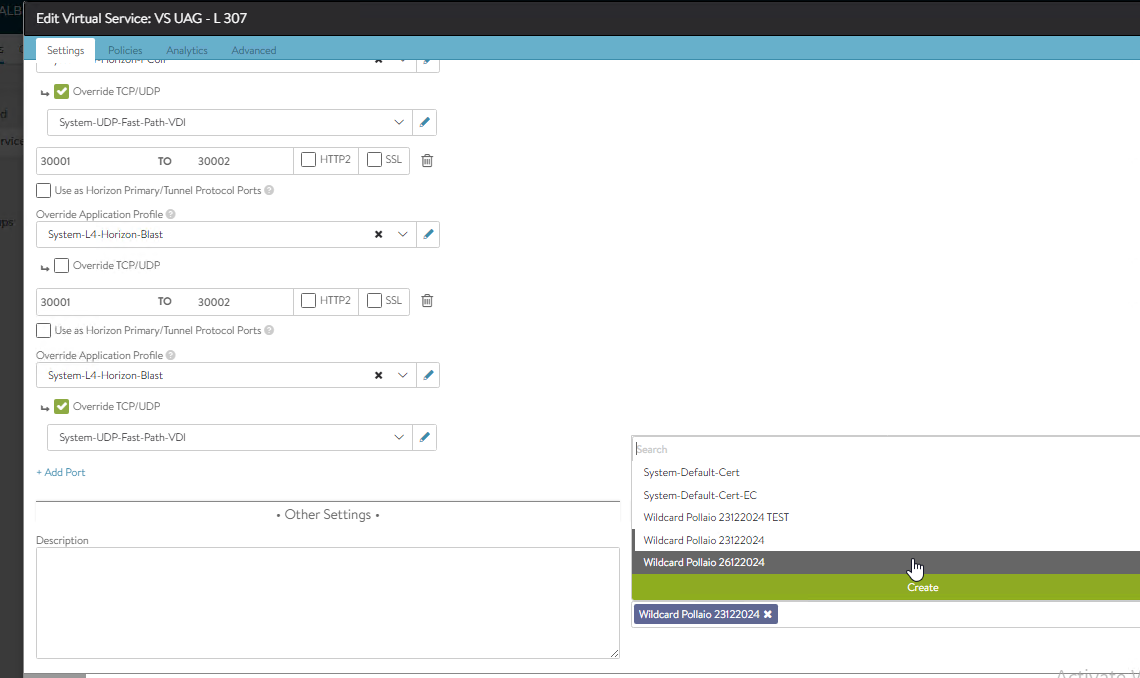
On the bottom select the correct certificate form menu and remove the old certificate, after Save the change.
Now the SSL certificate is validated and I can connect to my VDI
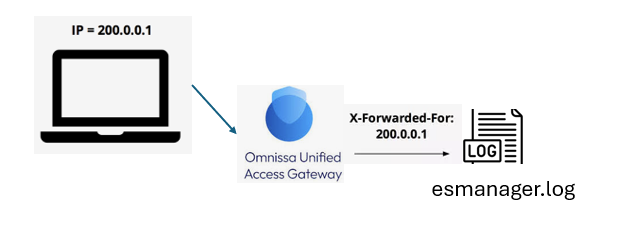
About the 2312 Unified Access Gateway version there is a new log function to increase the Readable of the esmanager.log (default log level).
This function is HeadersToBeLogged and is enabled by default from 2312. The default value for this field is set to X-Forwarded-For and includes the details for Username, Client build, and Client version.
These details will be added to the esmanager.log file.
For example for connection to VDI from the Internet :
Where:
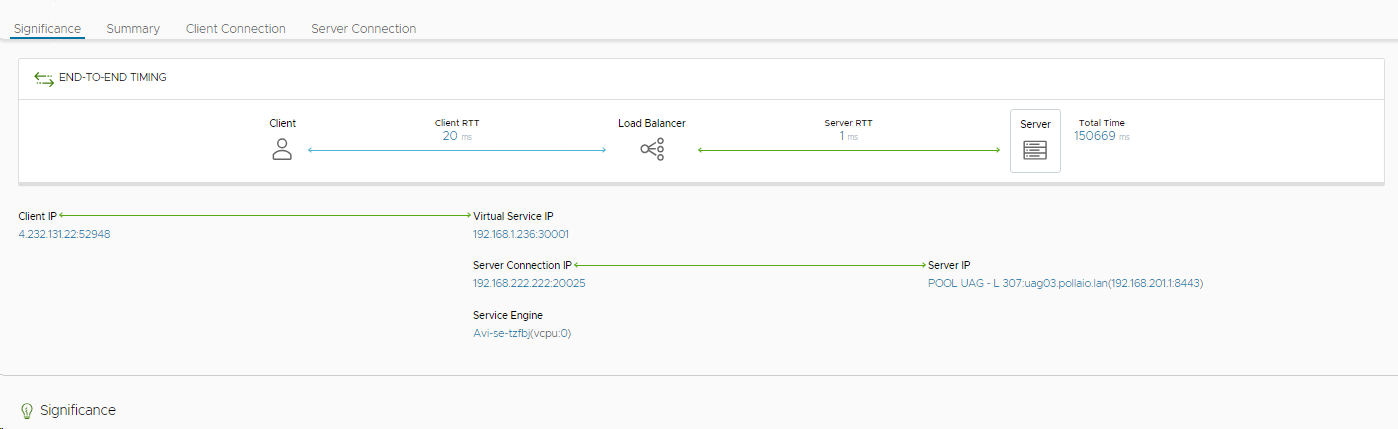
4.232.131.22 is the public IP of my OS from I try to connect
192.168.222.222 is the IP of My LB in front of UAG
pbrividi is my username
VMware-Horizon-Client-Win32-Windows is the type of client
8.13.0-9986028157 is the Horizon Client Build
To modify the logged information I need to change the JSON or ini file:
This is the default configuration for headersToBeLogged