VMware a few days ago released a new Horizon Version. The new build 2106 (8.3) brings with it some very interesting features from some relating to the security of intellectual property to those related to the Teams collaboration tool, here is a list of those that I consider the most interesting:
Implementation of GPO for blocking the ability to take screenshots of VDI sessions from Windows and MAC Clients
Possibility in the instant clone to use the Microsoft Sysprep (this function slows down the deployment of an IC by performing a series of reboots)
Functionality for applications of run indefinitely
Possibility to use TrueSSO SAML authentication for non-Trust domains
Horizon Agent has support for Windows Server 2022 (Currently in Preview)
The Horizon Client for Linux has the optimization for Teams (as in some versions the functionality for the Windows client was present)
Cloud Burst support to extend your on-prem workload to the Cloud in case of a high load.
vSphere use TLS Certificates for protect and security communication from vCenter to ESXi host and when the user access to vCenter WEB GUI.
There are many possible configurations:
Full Managed Mode -> All certificates are managed from VMCA
Hybrid Mode -> The communication certificates for traffic from vCenter to ESXi are managed from VMCA. The Admin user import from Private PKI only the SSL certificate for Access to WEB GUI
Subordinate CA Mode -> Configure the VMCA as a Subordinate CA of Private PKI
Full Custom Mode –> All Certificates are generated and managed from the local Private PKI
The best solution is Hybrid Mode for correct balance of Security and effort for implementation.
We have three option to create a shortcut on Windows 10 to connect a Virtual Machine running on ESXi:
Use VMware Workstation
Use VMware Player
Use VMRC Console
In all of that options, we need have installed the correspondent application. With Workstation and Player, we can open the session with remote VM on FULL-Screen mode.
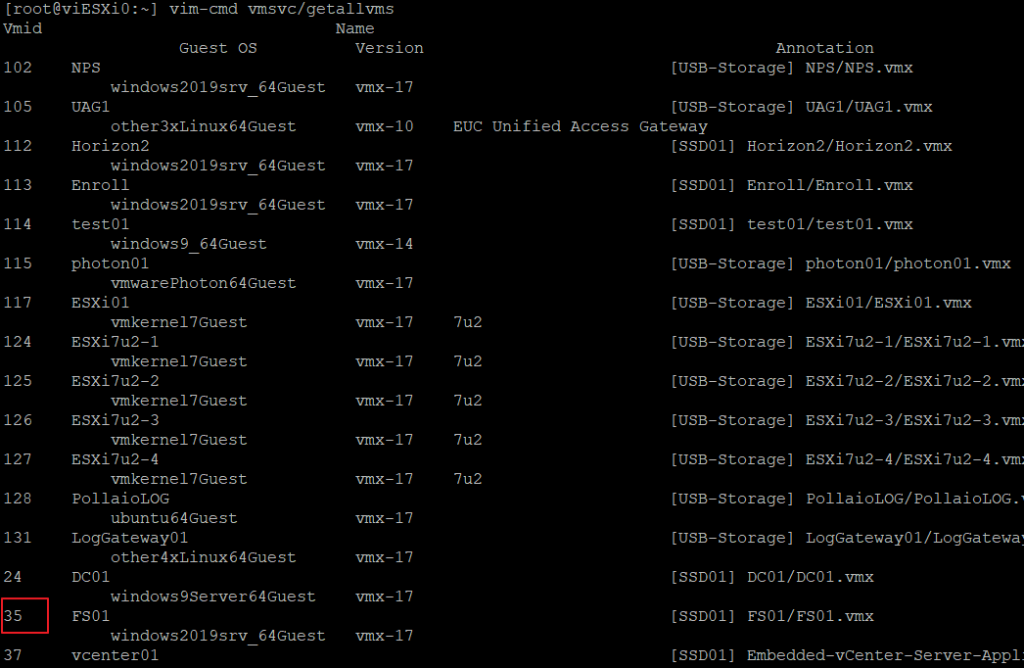
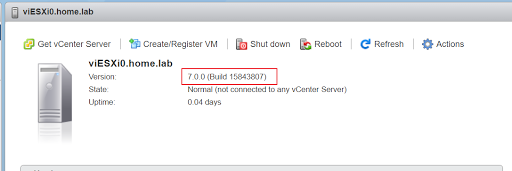
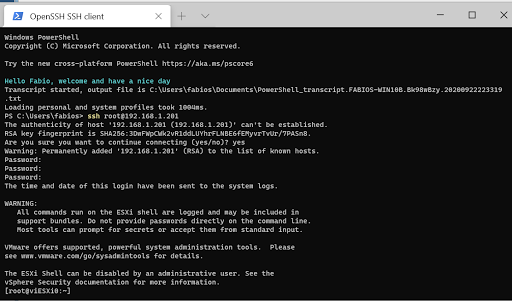
First, we need to recover the MOID identification of VM, connect with SSH to ESXi where is running the VM and launch this command:
[root@viESXi0:~] vim-cmd vmsvc/getallvms
The output show the VM inventory on the ESXi and the relative MOID
Microsoft Azure Sentinel is a scalable, cloud-native, security information event management (SIEM) and security orchestration automated response (SOAR) solution. Azure Sentinel delivers intelligent security analytics and threat intelligence across the enterprise, providing a single solution for alert detection, threat visibility, proactive hunting, and threat response.
Azure Sentinel ingests data from services and apps by connecting to the service and forwarding the events and logs to Azure Sentinel. For physical and virtual machines, you can install the Log Analytics agent that collects the logs and forwards them to Azure Sentinel. For Firewalls and proxies, Azure Sentinel installs the Log Analytics agent on a Linux Syslog server, from which the agent collects the log files and forwards them to Azure Sentinel.
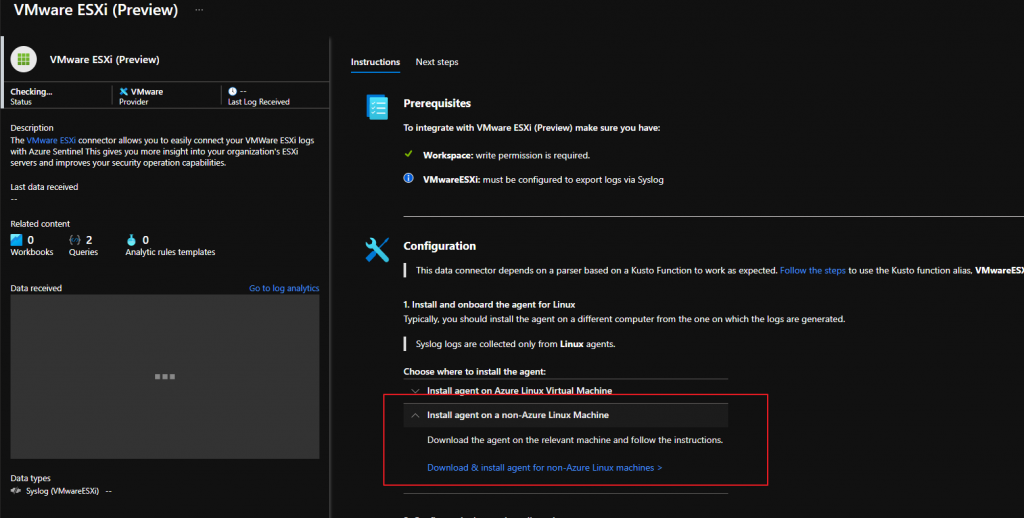
How connect VMware ESXi to Azure Sentinel?
Integration between VMware ESXi and Azure Sentinel makes use of a Syslog server with the Log Analytics agent installed. It also uses a custom-built log parser based on a Kusto function.
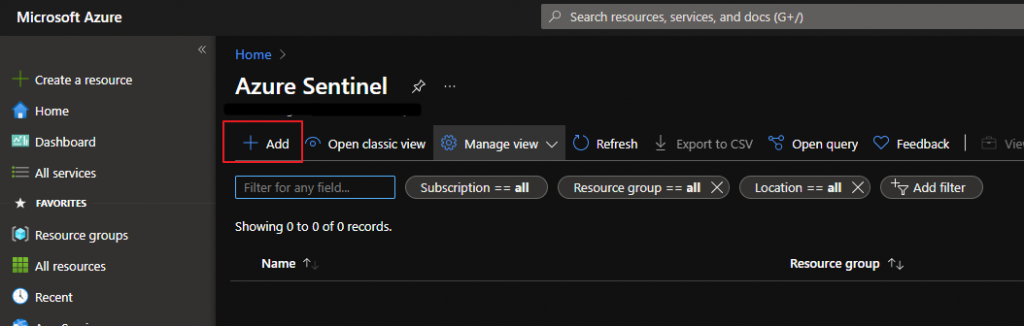
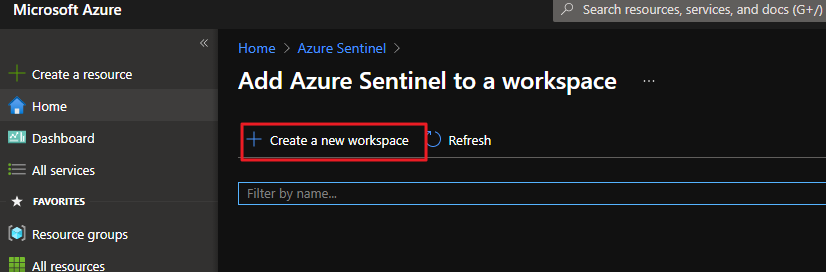
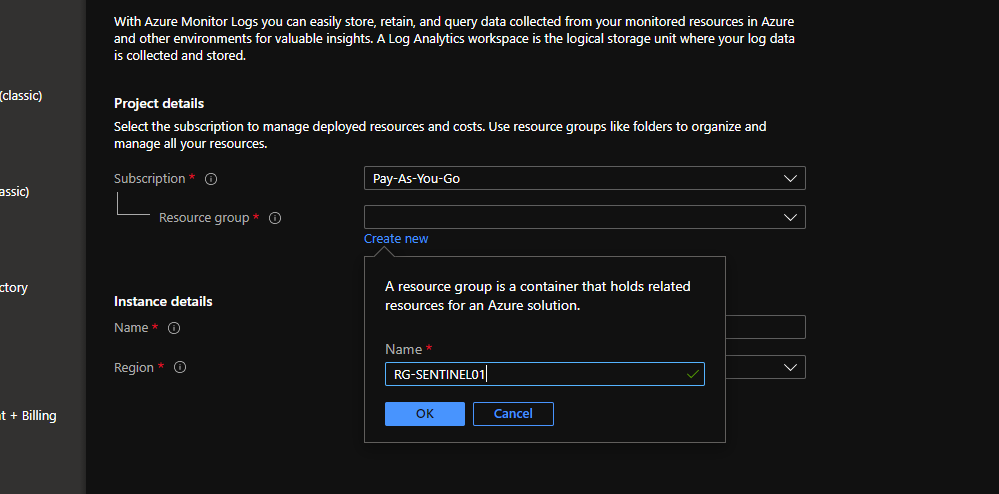
For the onboarding of ESXi on Azure Sentinel, these are the step:
Have up and running a Azure Sentinel service.
Prepare a Linux Syslog Server
Install Log Analytics Agent
Create the VMwareESXi Kusto function
Configure your ESXi Hosts to forward log to Syslog server
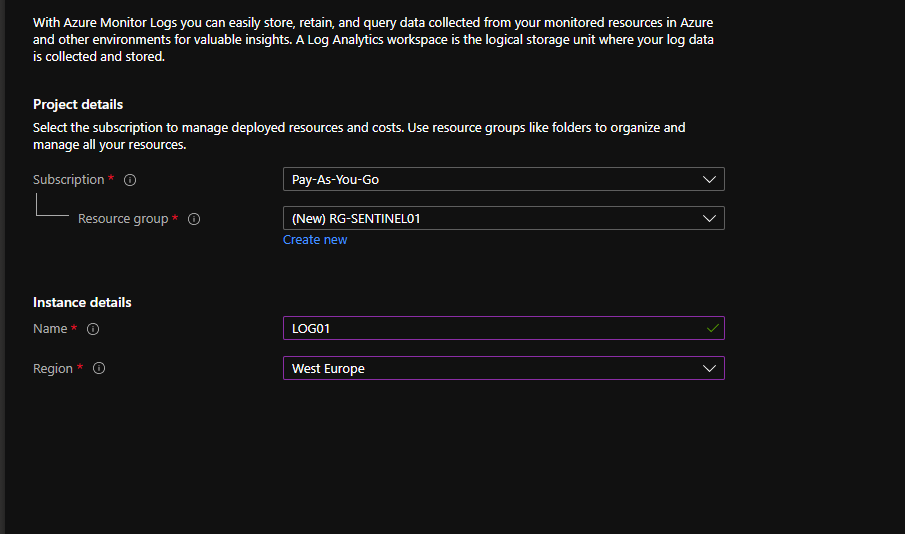
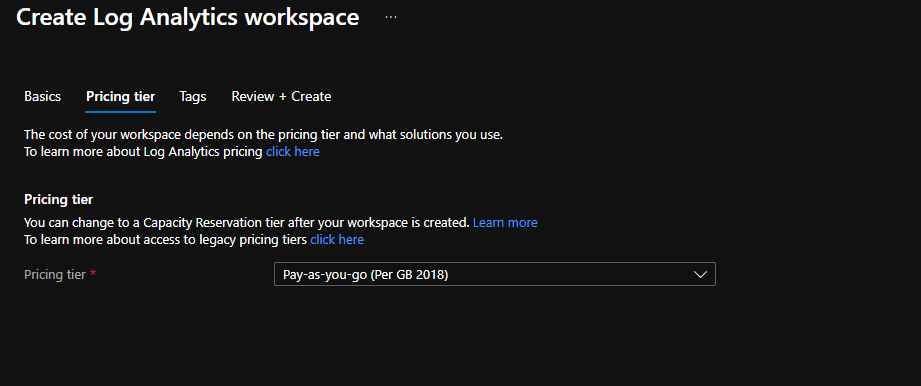
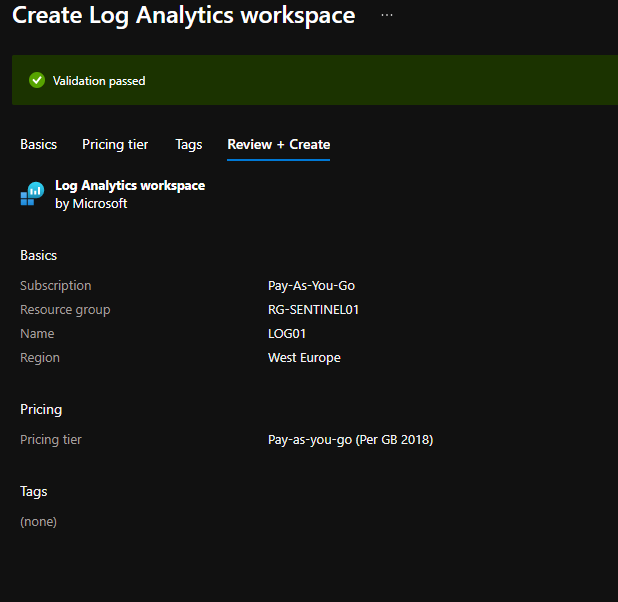
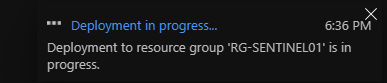
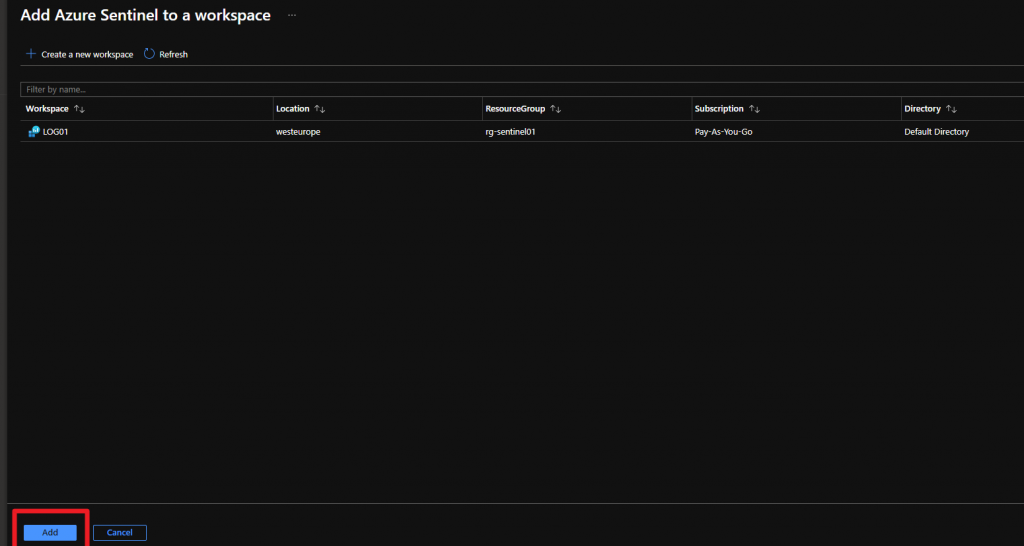
Create a Azure Sentinel Service
This example is related to a basic configuration of the Azure Sentinel infrastructure, for more information and details for sizing and costs check in the respective guides from Microsoft.
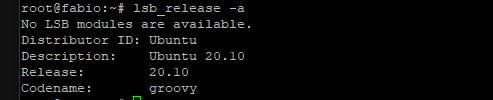
I have installed a virtual machine with Ubuntu Guest OS
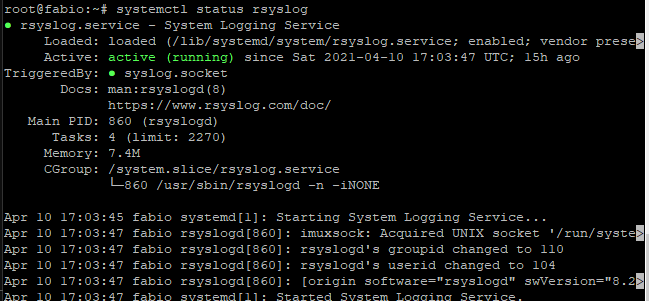
I have checked if rsyslog is installed and running
if rsyslog is not installed run the following installation command
apt-get install rsyslog
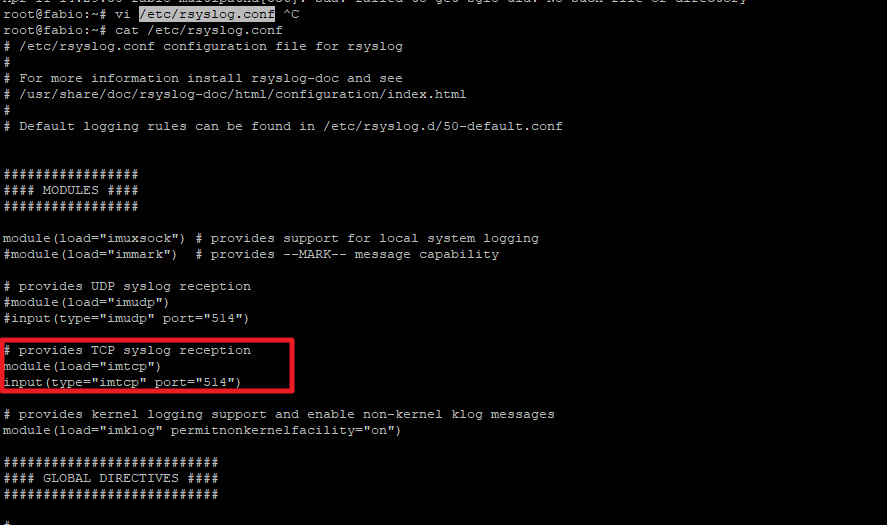
Configure rsyslog
Verify the tcp port used from syslog server
Cat /etc/rsyslog.conf
Configure Kusto function alias
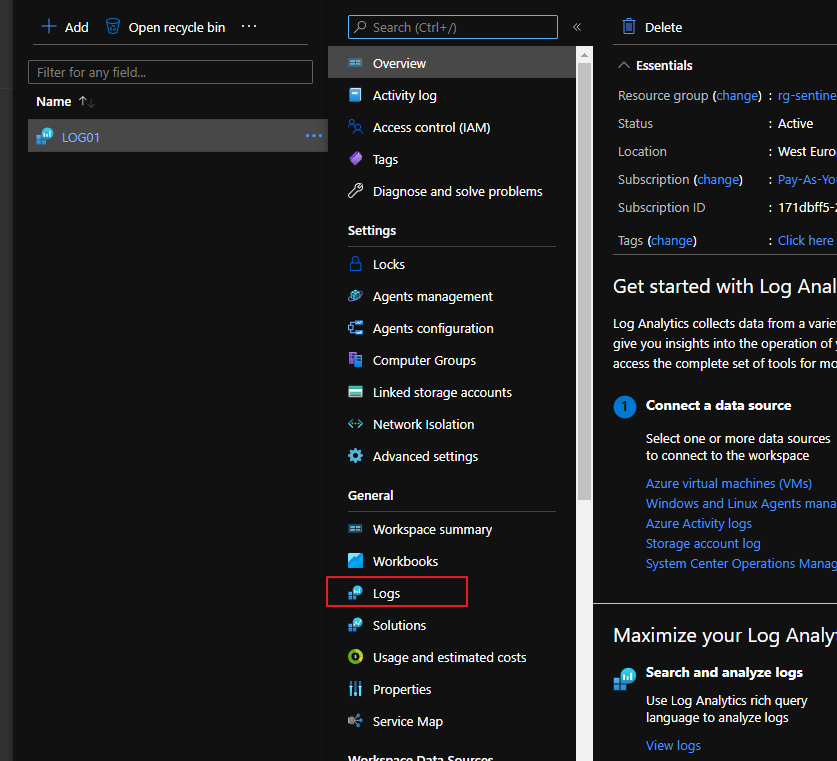
On log analytics workspace
create this function:
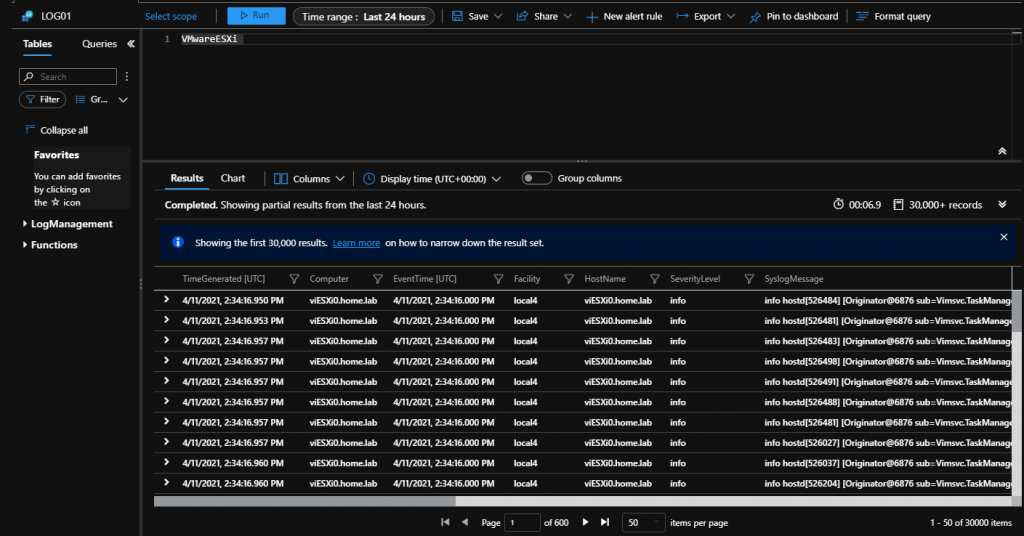
/ Title: VMWare ESXi
// Author: Microsoft
// Version: 1.0
// Last Updated: 11/13/2020
// Comment: Inital Release
//
// DESCRIPTION:
// This parser takes raw VMWare ESXi logs from a Syslog stream and parses the logs into a normalized schema.
//
// USAGE:
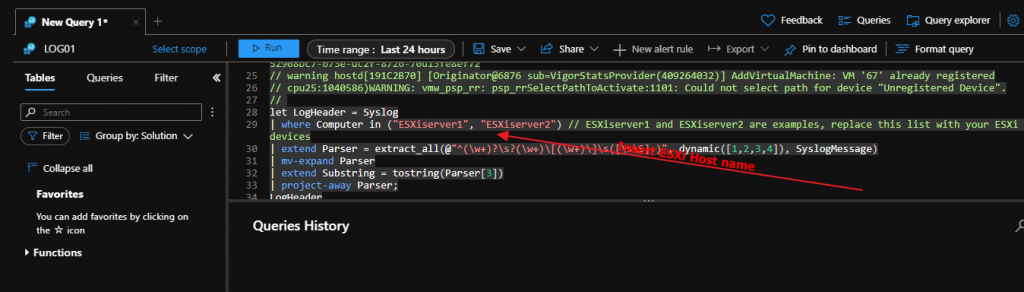
// 1. Open Log Analytics/Azure Sentinel Logs blade. Copy the query below and paste into the Logs query window.
// 2. In the query window, on the second line of the query, enter the hostname(s) of your VMWare ESXi device(s) and any other unique identifiers for the logstream.
// For example: | where Computer in ("server1", "server2")
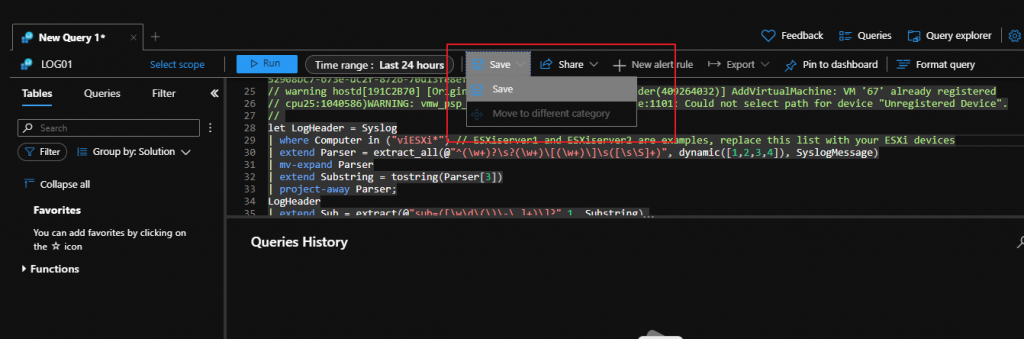
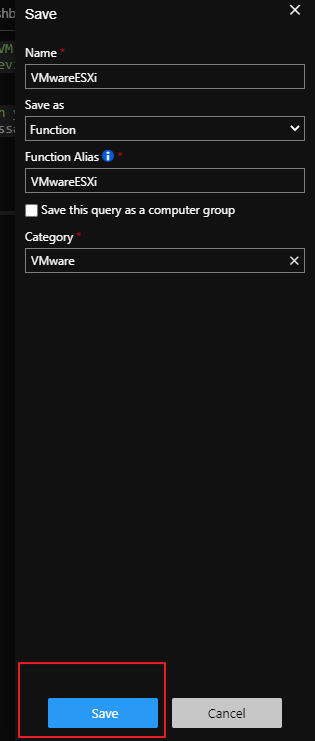
// 3. Click the Save button above the query. A pane will appear on the right, select "as Function" from the drop down. Enter a Function Name.
// It is recommended to name the Function Alias, as VMwareESXi
// 4. Kusto Functions can typically take up to 15 minutes to activate. You can then use Function Alias for other queries.
//
// REFERENCES:
// Using functions in Azure monitor log queries: https://docs.microsoft.com/azure/azure-monitor/log-query/functions
//
// LOG SAMPLES:
// This parser assumes the raw log are formatted as follows:
//
// info vpxa[D089B70] [Originator@6876 sub=vpxLro opID=HB-host-89929@3678594-5d55f348-40] [VpxLRO] -- BEGIN session[52908bc7-673e-dc2f-8726-70d13fe8ef72]521881cd-707e-cf9b-01c4-f0fd16d7444d -- vpxa -- vpxapi.VpxaService.retrieveChanges -- 52908bc7-673e-dc2f-8726-70d13fe8ef72
// warning hostd[191C2B70] [Originator@6876 sub=VigorStatsProvider(409264032)] AddVirtualMachine: VM '67' already registered
// cpu25:1040586)WARNING: vmw_psp_rr: psp_rrSelectPathToActivate:1101: Could not select path for device "Unregistered Device".
//
let LogHeader = Syslog
| where Computer in ("ESXiserver1", "ESXiserver2") // ESXiserver1 and ESXiserver2 are examples, replace this list with your ESXi devices
| extend Parser = extract_all(@"^(\w+)?\s?(\w+)\[(\w+)\]\s([\s\S]+)", dynamic([1,2,3,4]), SyslogMessage)
| mv-expand Parser
| extend Substring = tostring(Parser[3])
| project-away Parser;
LogHeader
| extend Sub = extract(@"sub=([\w\d\(\)\-\.]+)\]?",1, Substring),
OpId = extract(@"opID=([\w\d\(\)\-@]+)\s?\]?",1, Substring),
UserName = extract(@"\suser=([\w\d\(\)\-]+)\]",1, Substring)
| extend Message = extract(@"\[([\S\s]+)\]\s([\S\s]+)",2, Substring)
| extend Message = iif(isempty(Message),SyslogMessage,Message)
| extend Message = trim(@"^-- ", Message)
| project-away Substring
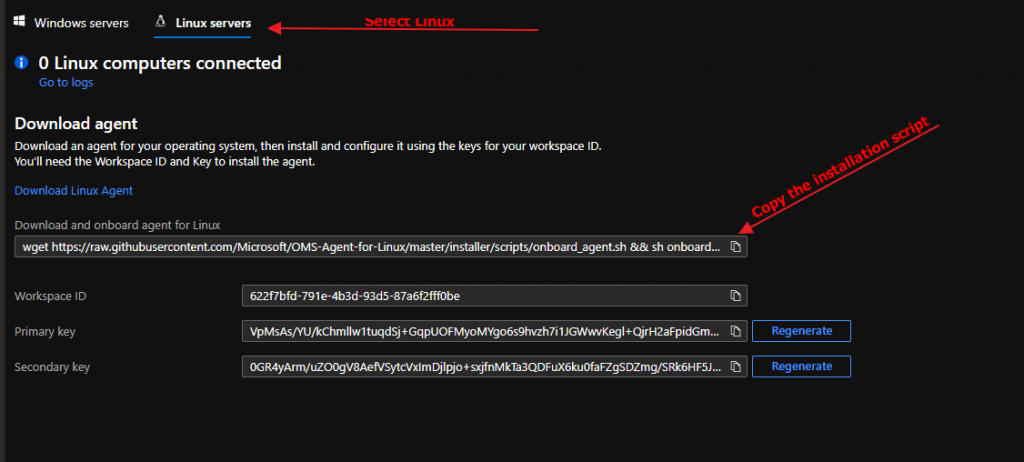
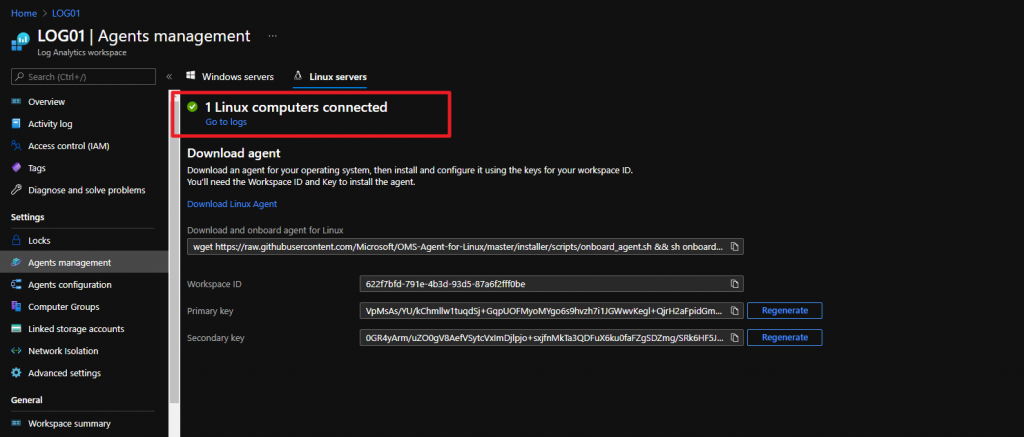
Install Log Analytics Agent
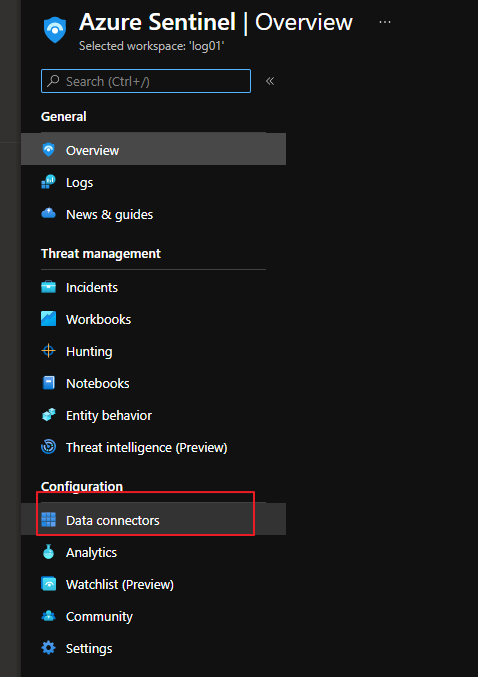
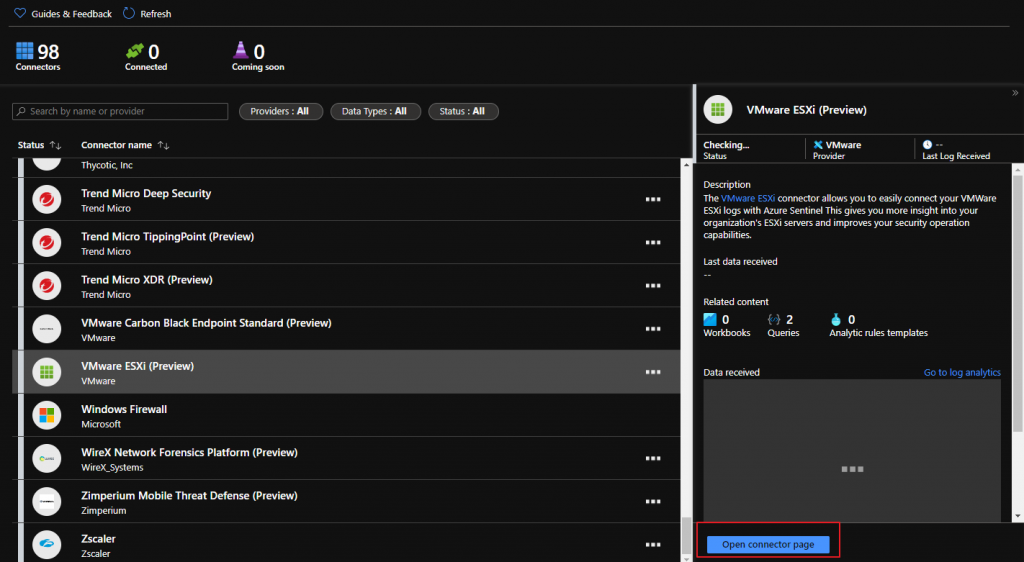
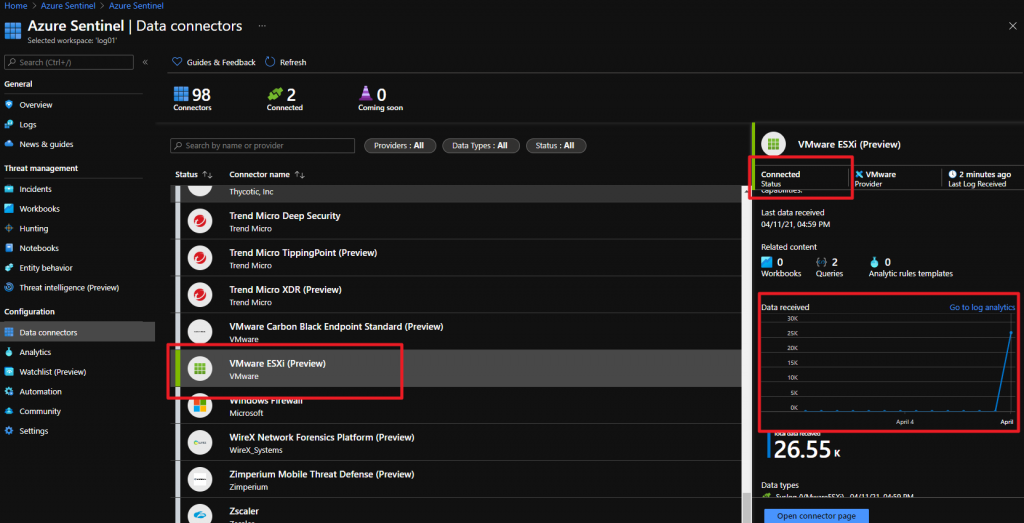
Go to Vmware ESXi Connector on Azure Sentinel
Go to linux syslog server and paste it the code for onboard agent to sentinel
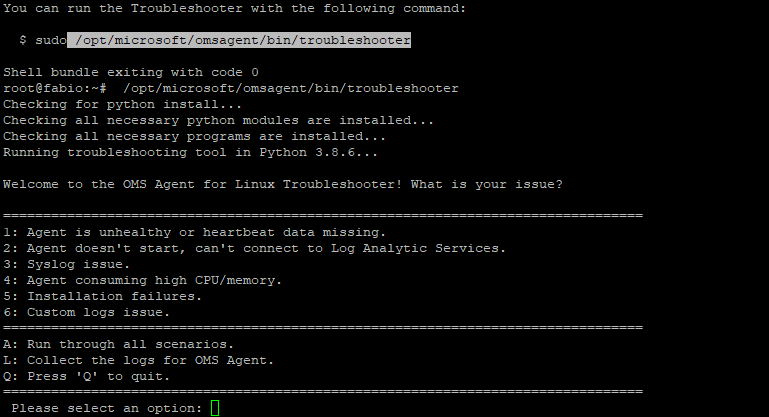
For troubleshooting
/opt/microsoft/omsagent/bin/troubleshooter
In my installation was missing :
And i have installed it
apt-get install gdb
If the installation is ok
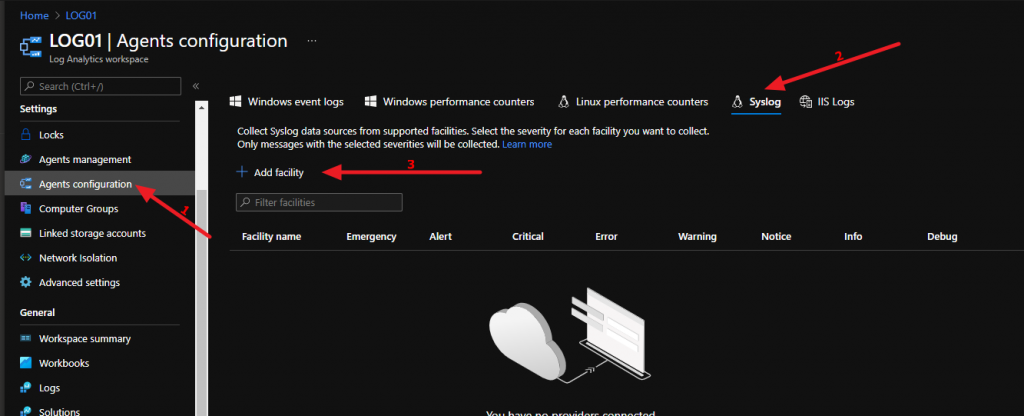
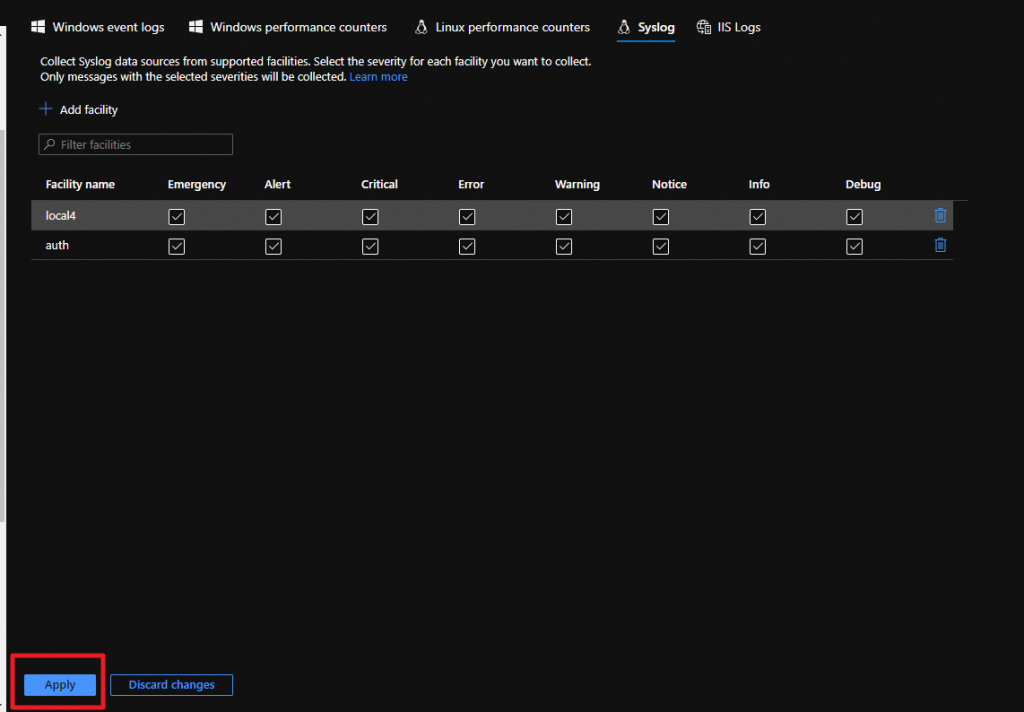
now we set which logs the linux agent must send to our workspace
And add local4 e auth
automatically this information will be sent to our agent
Configure ESXi to send data to Linux Syslog Gateway (Where is installed the Log Analytics Agent)
We configure our esxi hosts to send logs to our linux syslog with this powercli script:
Connect-ViServer
$vmHosts = Get-VMHost
$remoteSyslog = 'tcp://<linuxlogserver>'
$syslogport = '514'
# Show current config
$vmHosts | ForEach-Object {
    Write-Host $_.Name
    Get-VMHostSysLogServer -VMHost $_
}
# Set syslog config in hypervisors
$vmHosts | ForEach-Object {
    Write-Host $_.Name
    Set-VMHostSysLogServer -SysLogServer $remoteSyslog":"$syslogPort -VMHost $_
}
# Restart syslog and set the allow rules in the ESXi
$vmHosts | ForEach-Object {
    Write-Host $_.Name
    (Get-Esxcli -v2 -VMHost $_).system.syslog.reload.Invoke()
    (Get-Esxcli -v2 -VMHost $_).network.firewall.ruleset.set.Invoke(@{rulesetid='syslog'; enabled=$true})
    (Get-Esxcli -v2 -VMHost $_).network.firewall.refresh.Invoke()
}
# Show current config
$vmHosts | ForEach-Object {
    Write-Host $_.Name
    Get-VMHostSysLogServer -VMHost $_
}
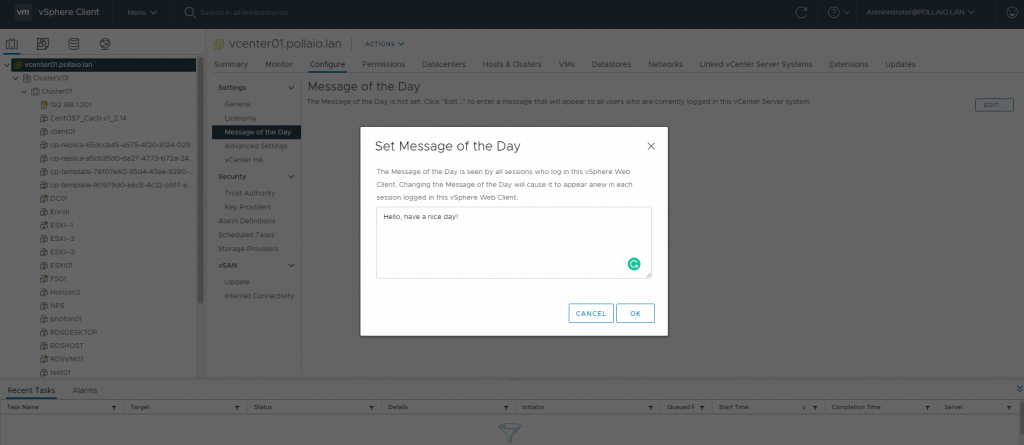
I have always liked the welcome messages that are usually found on Linux systems when logging in with SSH. Well the message of the day can also be set on the vCenter
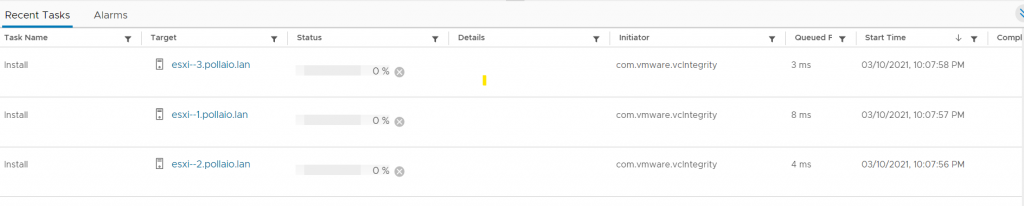
Let’s see one of the new functions of vSphere 7u2 and precisely the possibility of parallelizing the remediation function with LifeCycle Manager
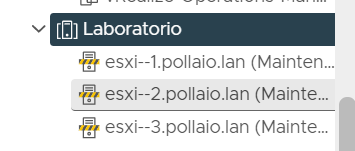
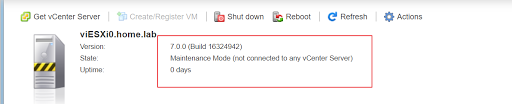
We must use the new version of vCenter 7u2 and once we have performed the stage on all the nodes of a cluster we can proceed to remediate by putting first the nodes we want to update in maintenance mode manually
In my case we put three hosts in maintenance mode
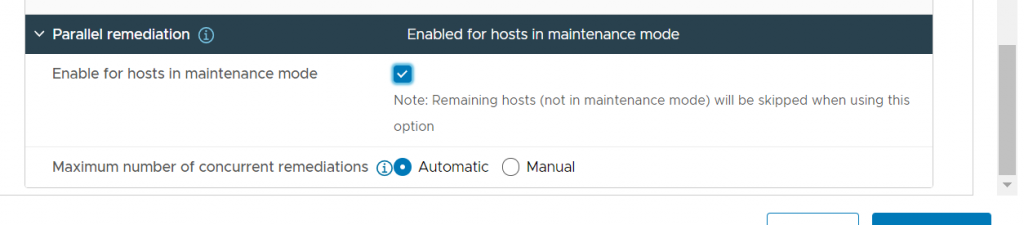
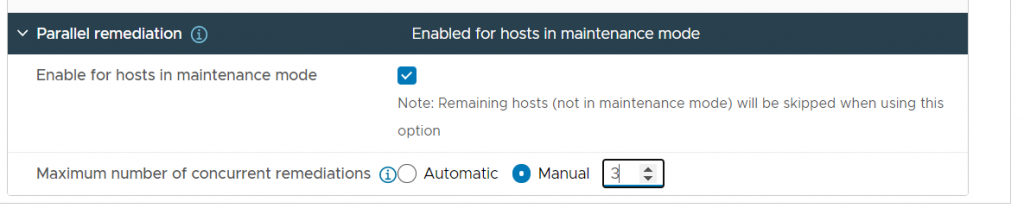
Among the additional options, of the remediate phase, we enable parallelism and we can choose whether the number of contemporary hosts on which the update will be made is managed automatically….
Non sono certo io a dover spiegare che parlare di security è ormai entrato nel day by day dei consulenti dei manager IT. Anche VMware da alcuni anni sta rilasciando guide di come rafforzare l’hardening degli ambienti vSphere. Ormai è da diffidare di chi considera l’installazione di ESXi e vCenter come dei semplici avanti avanti avanti ….
Riporto qui sotto il link alla guida di VMware per l’hardening degli ambienti vSphere 7 comprensivo anche dei dettagli dei parametri da configurare e dei comandi per modificarli.
Per procedere all’integrazione con Azure MFA è necessario eseguire delle configurazioni su Azure Active Directory (non entrerò nel dettaglio di queste configurazioni) ma per procedere nell’abilitazione dell’autenticazione a più fattori sull’UAG è necessario accedere all’Enterprise Application creata e scarica il file XML con i metadata. Inoltre verificare che nella Basic SAML Configuration ci siano i riferimenti alla mia infrastruttura UAG pubblica.
Scarico il file XML con i metadata da utilizzare per configurare l’UAG
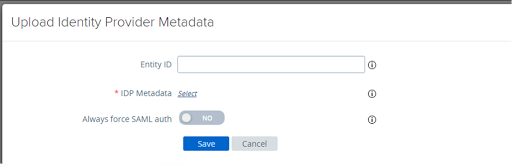
Importo il file XML nella infrastruttura UAG nelle configurazioni manuali in Identity Bridging Settings
Importo il file XML contenente i metadata selezionado Select
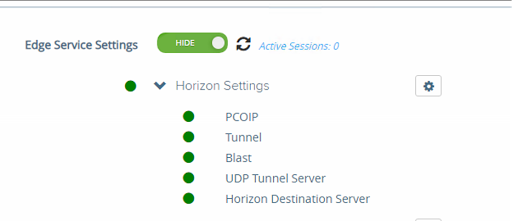
Una volta caricato sull’UAG il file XML con i metadata vado negli edge service settings ed entro nei nelle configurazioni
E configuro l’Auth Methods e l’identity Provider (che mi compare in automatico dopo aver caricato il file XML)
A questo punto posso procedere ad accedere e testare l’accesso con MFA.