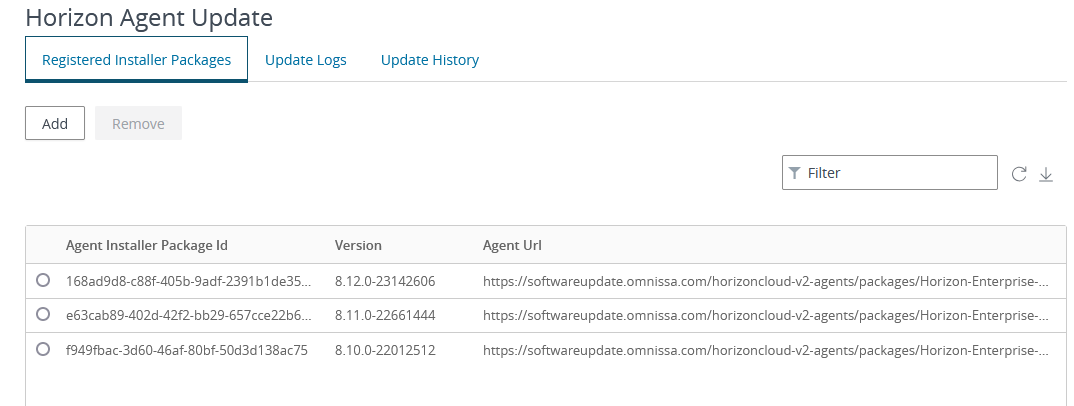
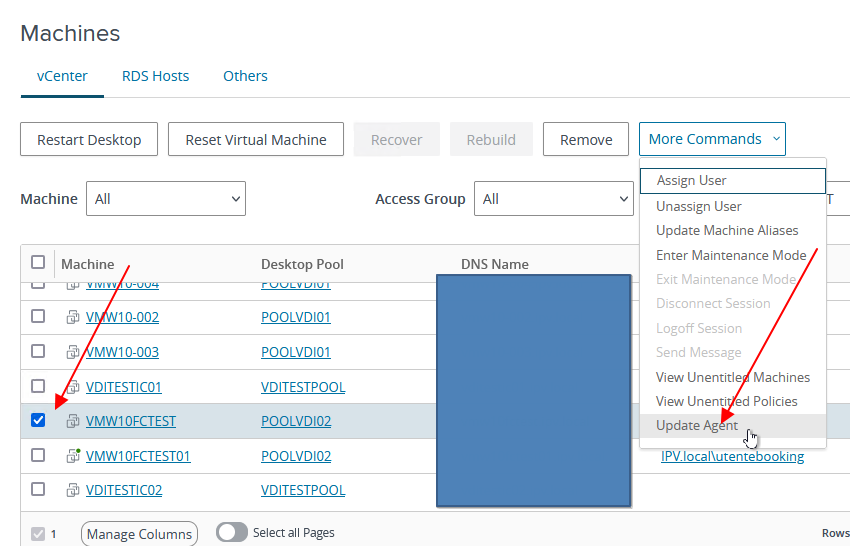
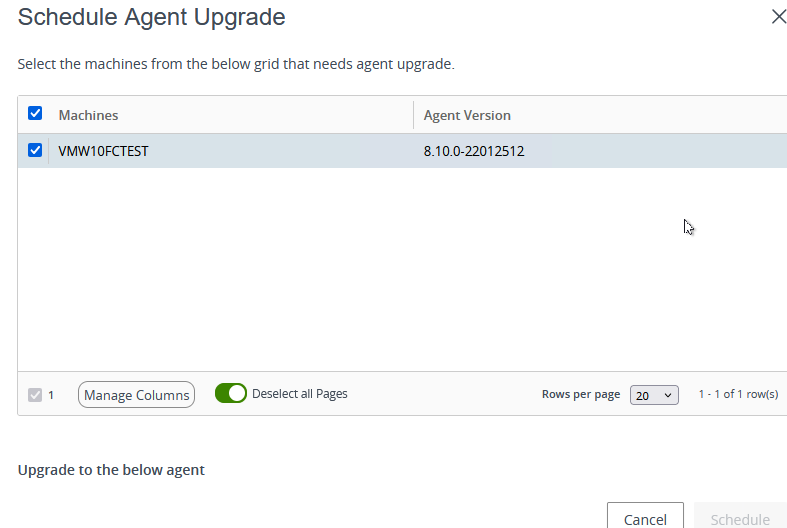
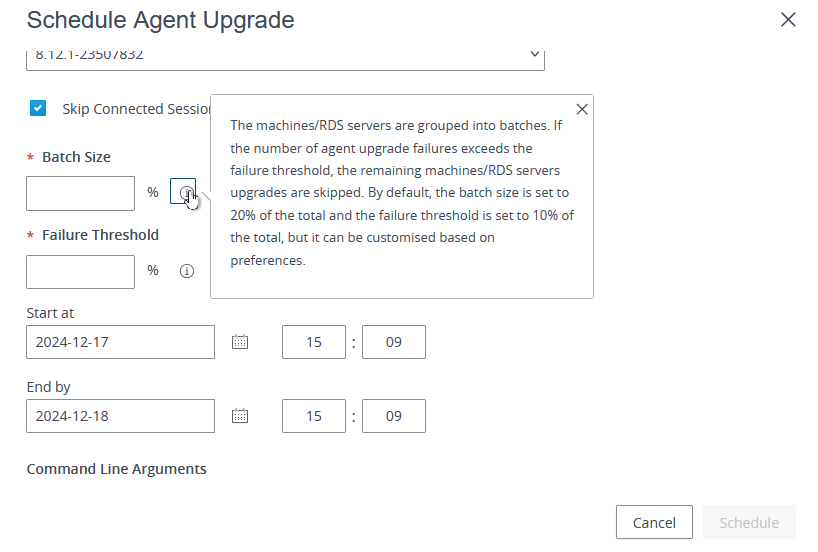
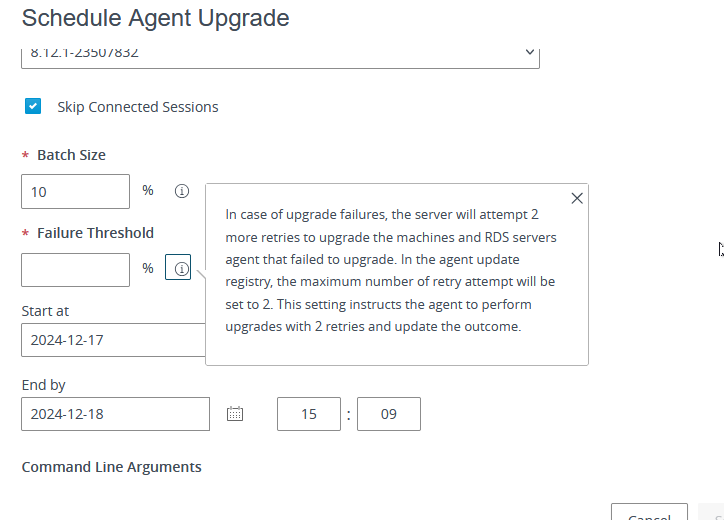
If you have a Horizon Enterprise Plus or Horizon Universal subscription license, the last Horizon versions have a function to manage the Horizon Agent Update.
You have two scenarios:
Automatic map the upgrade to your Connection server infrastructure
Manually add the Agent upgrade package
I tested this feature in my Home Lab
Enable Automatic upgrade to your Connection server infrastructure
Enable Omnissa Horizon Cloud Portal form of Horizon Agent Auto Upgrade feature
With enabling the Agent Auto Upgrade you can see, without any action, the Horizon package to use for upgrade (this new package is directly downloaded from the Omnissa Site)
If you use this method you can skip the next paragraph and go to Schedule Agent upgrade
Manually loaded the JSON and agent file
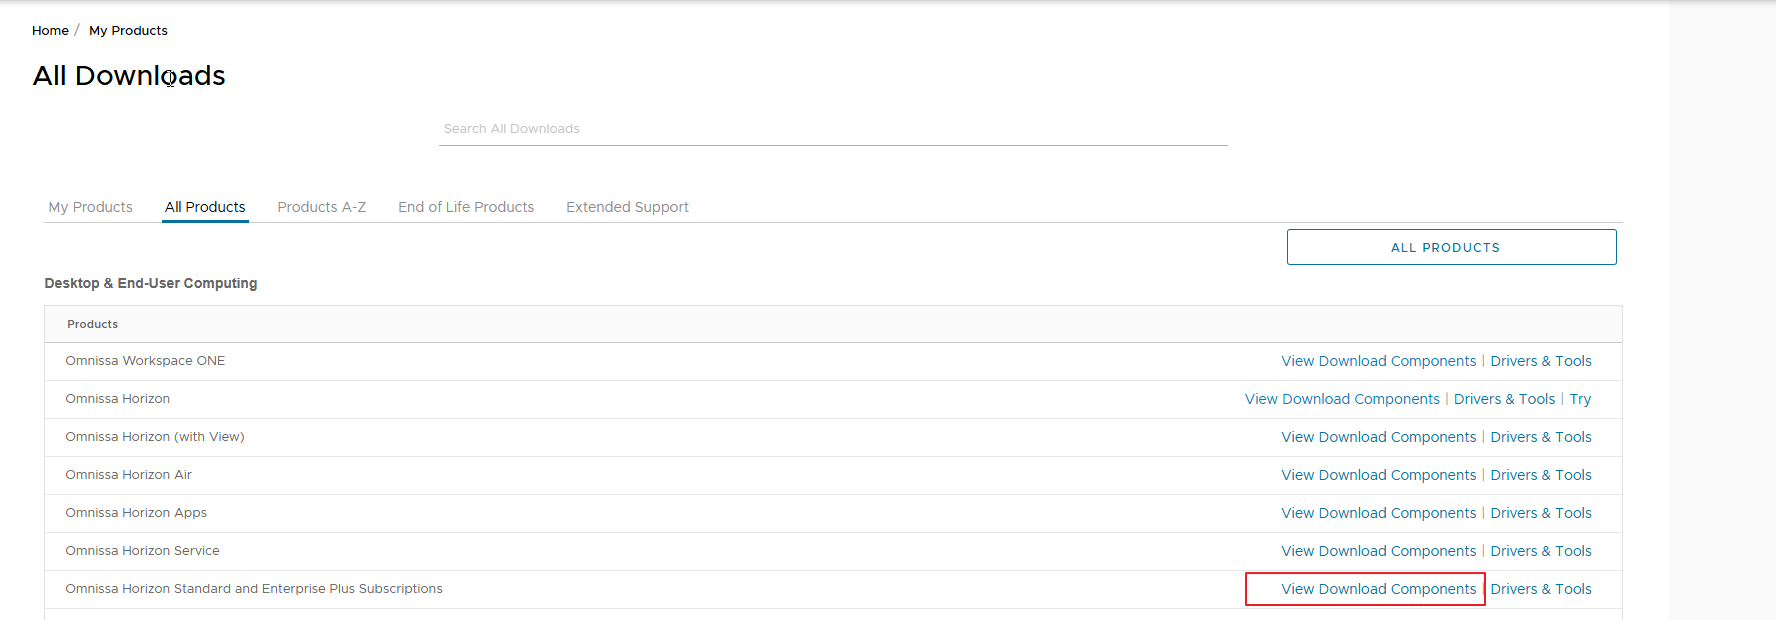
Otherwise, you can manually download the JSON file from the customer portal by Omnissa
Omnissa Horizon Standard and Enterprise Plus Subscriptions
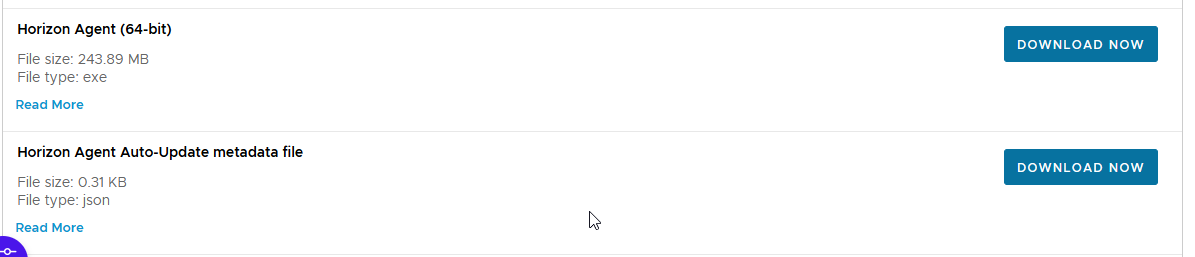
Download the files you need
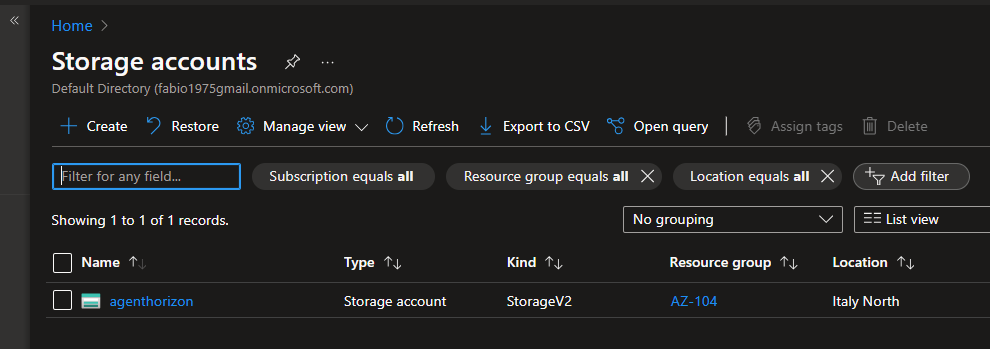
Upload them to a WEB site (Local/Internal or Public), in my case I use an Azure storage account
As blob containers
Which are accessible via WEB (obviously I recommend putting special restrictions)
Let’s configure our POD by entering the appropriate section of the interface via WEB of the connection servers
Enter the URL of our storage account with the name of the JSON file indicated
In the various activities carried out in the year that is ending, load balancing and the other availability of Horizon solutions for both access from the Internet and from the company LAN were among the activities that required multi-handed work between the teams that deal with IT technologies within the company (Security, Network, EUC, Servers …).
While these synergies are easy to manage in the context of small companies, when working with large companies, timely planning and design become very important to avoid infrastructural changes (even minimal) that can convert into delays in the delivery of the infrastructure due to the need to re-engage a different team.
One of solutions used to balance access to Omnissa Horizon services is NSX Advanced Load Balancer.
Normally, the publication of Omnissa VDI solutions is carried out using the virtual appliances Unified Access Gateway (UAG) where “Omnissa Unified Access Gateway enables secure remote access from an external network to a variety of internal resources provided by Omnissa Workspace ONE and Horizon deployments.”
Natively UAGs have their own HA solution, but it has the requirement of having 3 Public IP Addresses and creating three public FQDNs.
The use of NSX Advanced Load balancer allows various UAG balancing solutions:
Single VIP with Two Virtual Services
Single L4 Virtual Service
(n+1) VIP
In my HomeLab I have tested the various solutions indicated above,
the most interesting is the one that I propose you try for the following reasons:
• Robust enough to handle the persistence issues
• Works well in environments where users come behind the NAT
• Ease of configuration
• Better visibility and logs
Additionally, the standard ports of the Blast and PCo protocols will not be used, as this can easily expose the solutions to potentially malicious individuals.
The infrastructure that I will propose also requires a change to the “classic” UAG configurations on the URLs used for the Blast and PCOIP protocols.
In the implementation that we will do, we will take as an example only the part of the Blast protocol
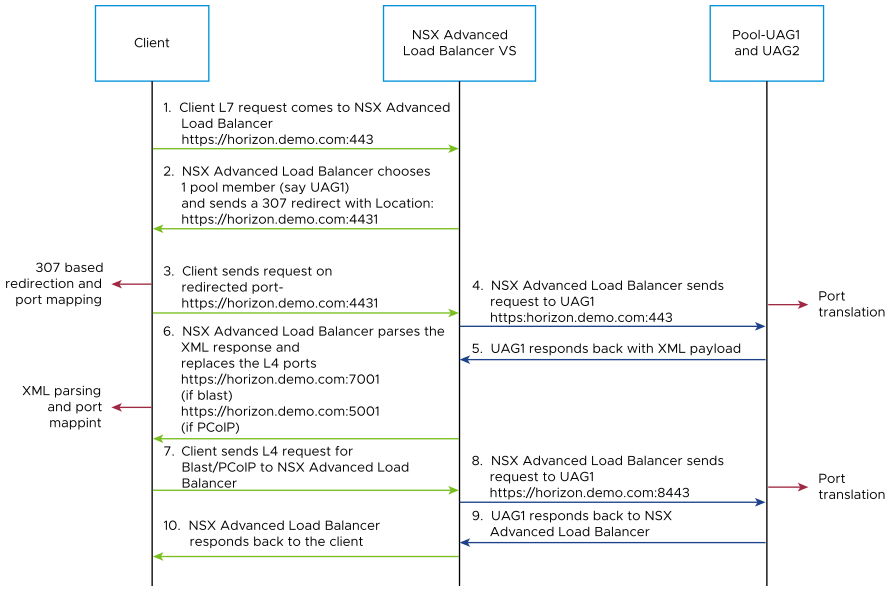
The following flow explains the step when a user tries to access Omnissa VDI, the flow has two ports opened for primary and secondary traffic:
Port 443 – This is for XML API traffic
Ports 5001 to 5002 – Horizon internal ports opened for L7 primary XML traffic to handle redirected traffic
Ports 30001 to 30002 – Blast
Where:
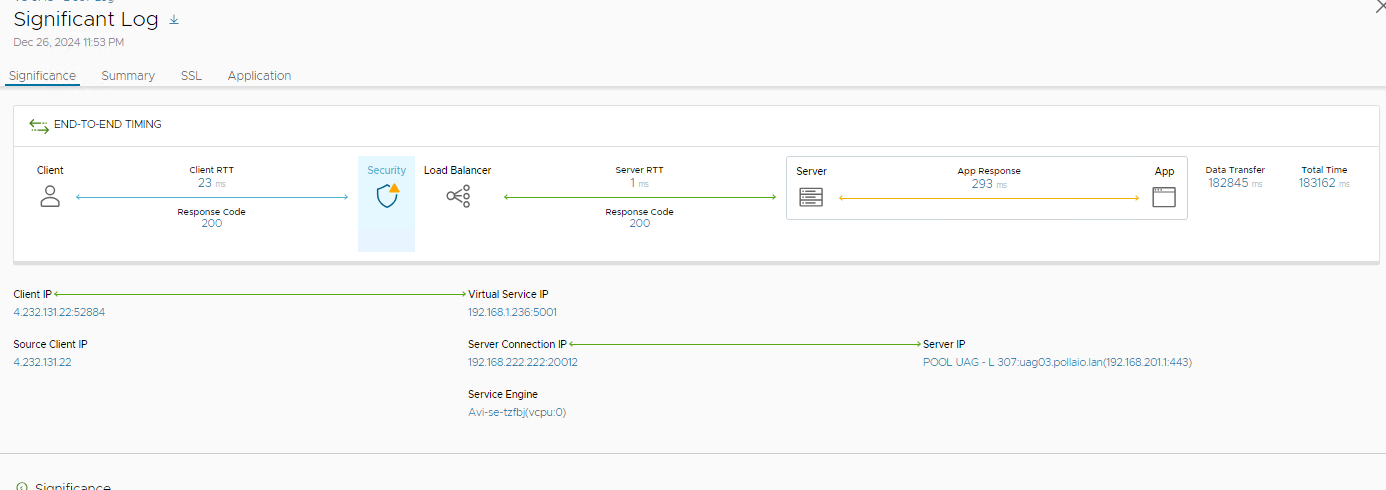
Client L7 request comes to AVI LB https://horizon.pollaio.site/
AVI LB chooses 1 pool member (say UAG1) and send back to client a 307 redirect Location https://horizon.pollaio.site:5001
Client sends request on redirected port https:// horizon.pollaio.site:5001
AVI LB (L7) sends requests to UAG1 https:// horizon.pollaio.site:5001 (Port Traslation)*
UAG1 responds back with XML payload
AVI LB parses the XML response and replace the L4 ports (to client) https:// horizon.pollaio.site:30001 (blast)
Client sends L4 request for Blast to AVI LB
AVI LB sends request to UAG https:// horizon.pollaio.site:30001*
UAG1 responds back to AVI LB
AVI LB responds back to client
The main aspect is the correct configuration of TCP and UDP ports between the various corporate network segments:
Source
Destination
Protocol
Port
Unified Access Gateway
Horizon Agent
UDP
22443
Unified Access Gateway
Horizon Agent
TCP
22443
Unified Access Gateway
Horizon Connection Server
TCP
443
Horizon Client
Virtual Service AVI
TCP
443
Horizon Client
Virtual Service AVI
UDP
443
Horizon Client
Virtual Service AVI
TCP
5001
Horizon Client
Virtual Service AVI
UDP
5001
Horizon Client
Virtual Service AVI
TCP
5002
Horizon Client
Virtual Service AVI
UDP
5002
Horizon Client
Virtual Service AVI
TCP
30001
Horizon Client
Virtual Service AVI
UDP
30001
Horizon Client
Virtual Service AVI
TCP
30002
Horizon Client
Virtual Service AVI
UDP
30002
Configurazione NSX ALB
Create a Virtual IP
Create a Custom Health Monitor for UAG
Create a UAG Pool
Install the SSL certificate Required for L7 VIP
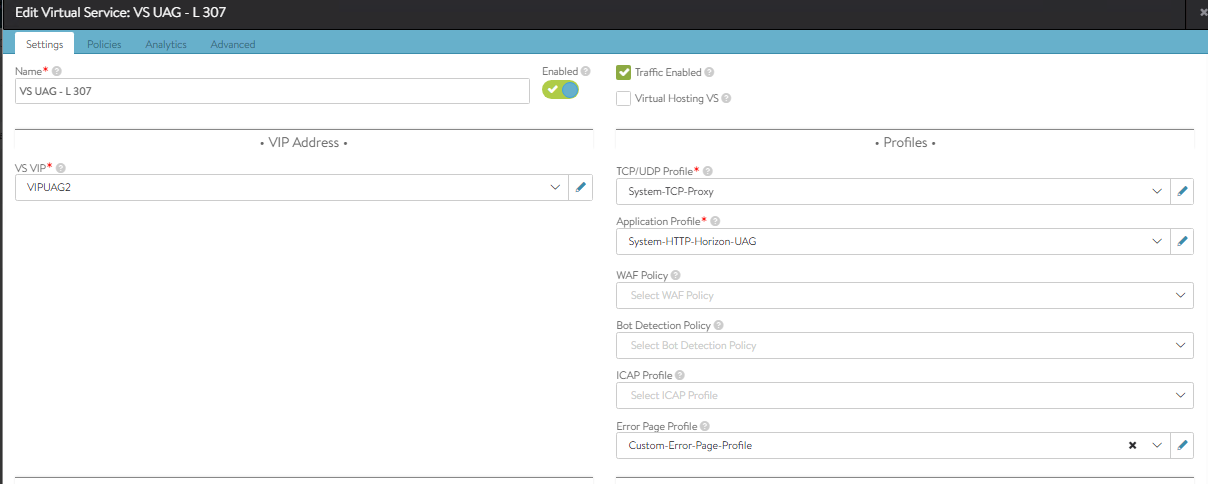
Create a Virtual Service for UAG
Binding DataScripts to the Virtual Service
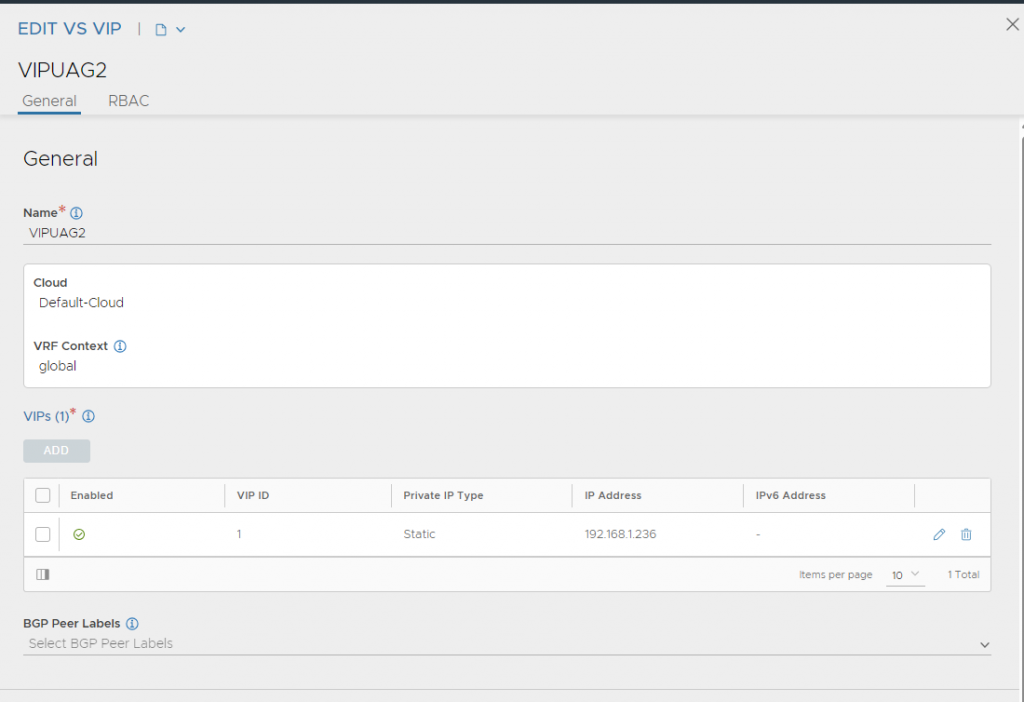
Create a Virtual IP
To create a custom health monitor, navigate to Applications > VS VIPs.
Click Create.
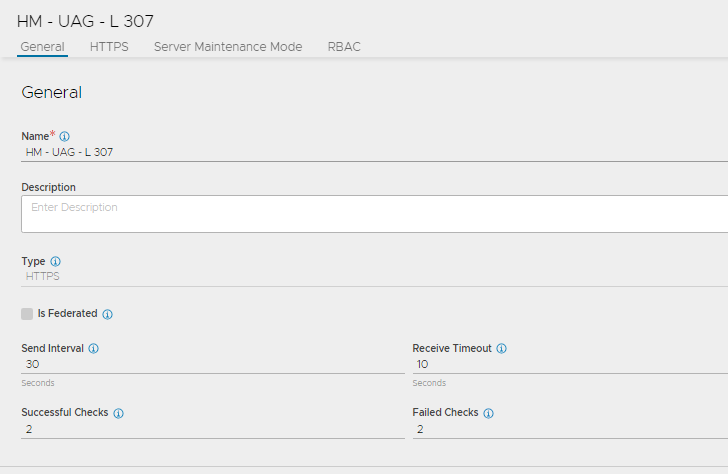
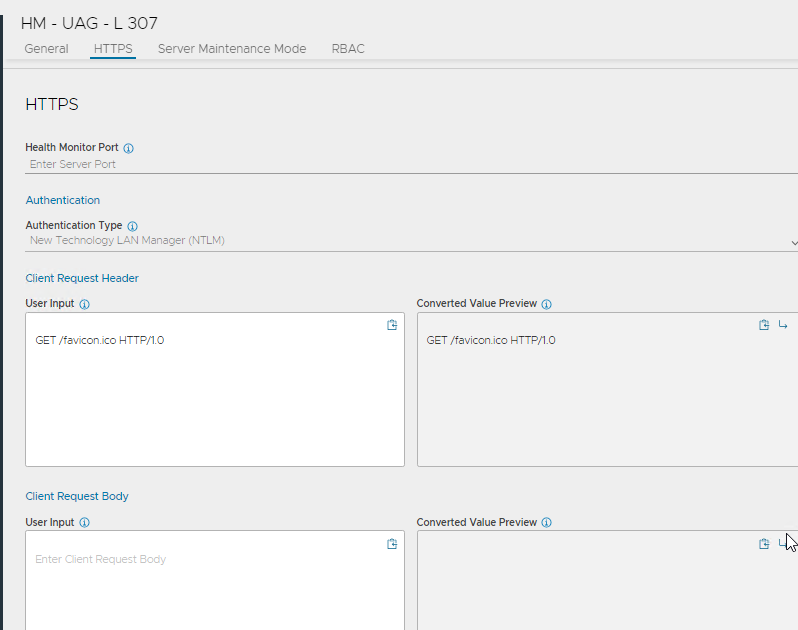
Create a Custome Health Monitor
To create a custom health monitor, navigate to Templates > Profiles > Health Monitors.
Click Create.
Select the VMware Cloud that was created for Horizon.
Enter the following details in the New Health Monitor screen
Create UAG Pool
Navigate to Applications > Pools.
Select the cloud from the SelectCloud window.
Click Next.
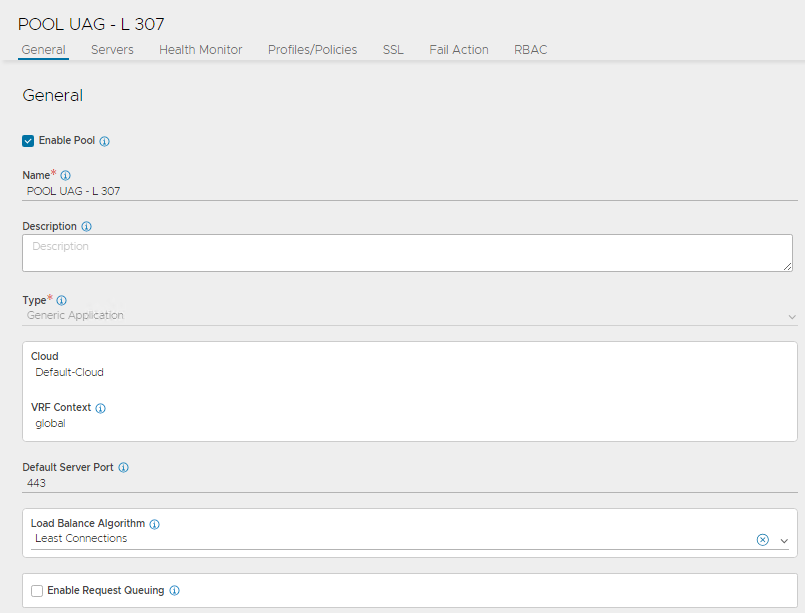
Click Create Pool.
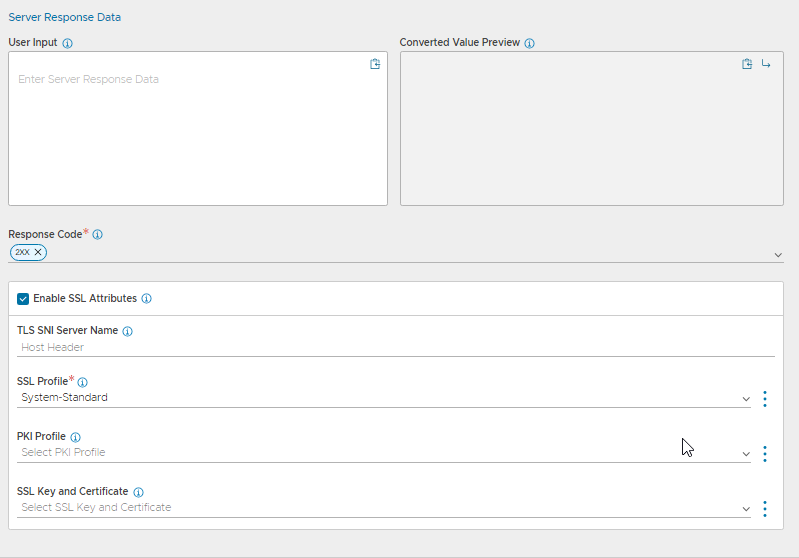
In the CREATE POOL screen, update the details as shown below:
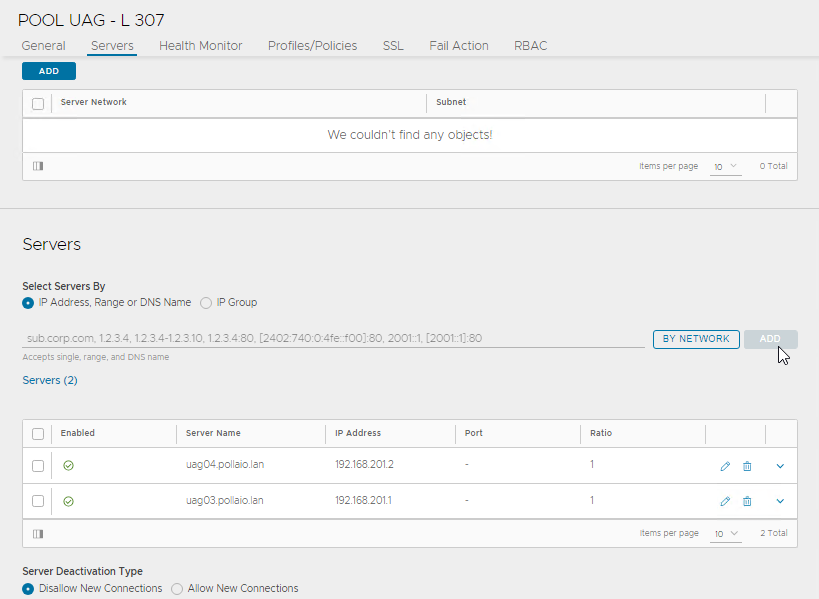
In the Servers tab, add the Server IP Address of the UAG servers.
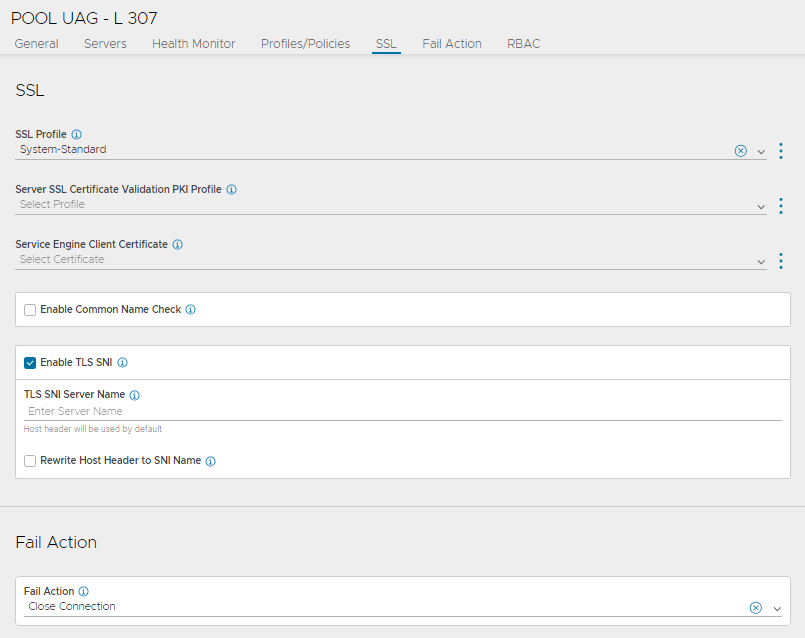
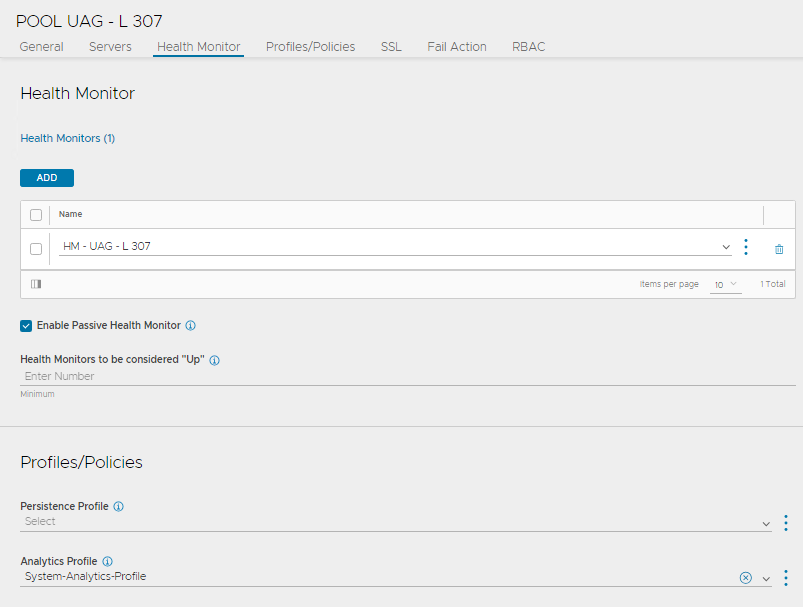
In Health Monitor tab, select the appropriate Health profile as shown below:
Installing the SSL certificate Required for L7 VIP
The public certificate must be imported into AVI LB it need the same imported in to UAG.
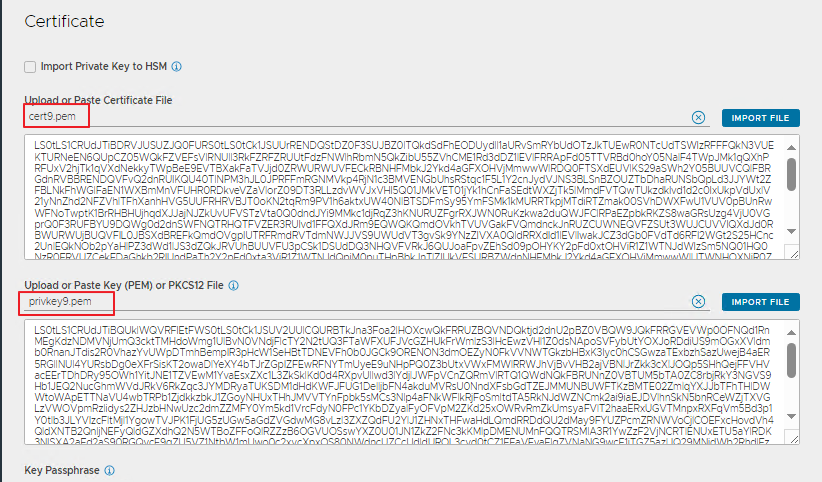
The certificate to be imported must be in PEM format.
Once imported, ensure that the CA certificate is properly linked.
Here are the steps to import the certificate
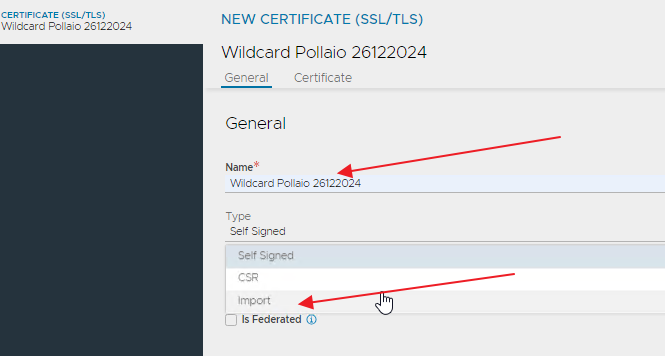
To import a CA Certificate, navigate to Templates > Security > SSL/TLS Certificates.
Click Create.
Select Root/Intermediate CA Certificate.
Provide a name to identify the certificate later
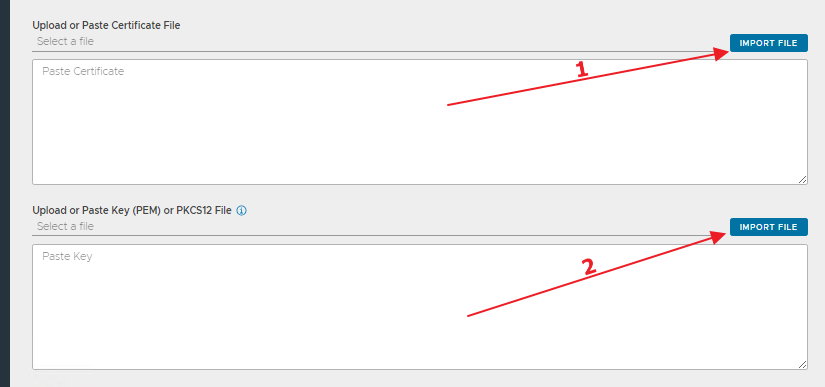
Upload or Paste Certificate File
VALIDATE and SAVE
Creating Virtual Service for UAG
To create the new virtual service,
Navigate to Applications > Virtual Services.
Click CREATE VIRTUAL SERVICE > Advanced Setup.
Bind the virtual service VIP.
Use the System-HTTP-Horizon-UAG as the Application Profile.
Configure the virtual service as shown below:
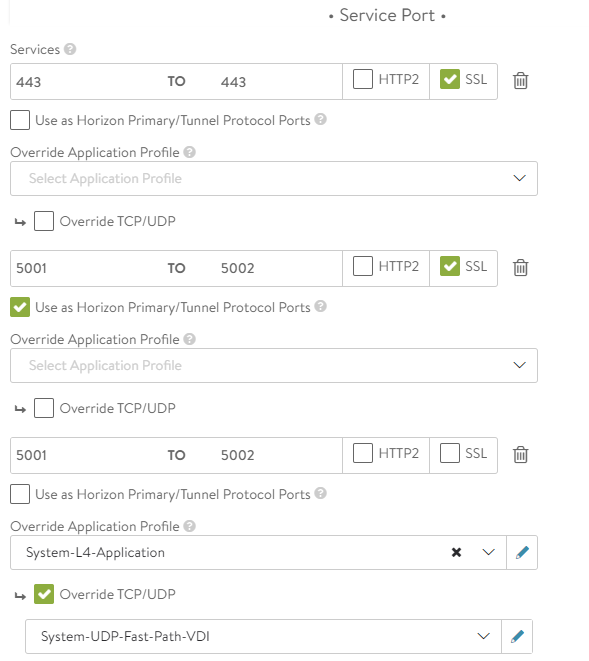
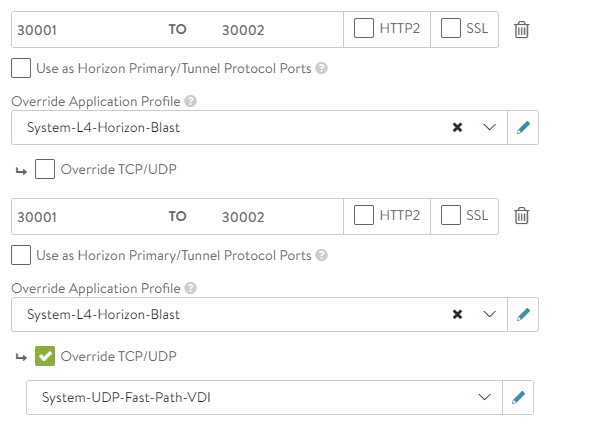
In the Service Port section, click Switch to Advanced and configure the service ports.
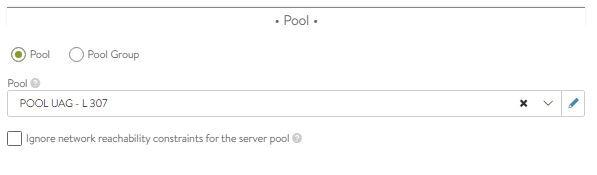
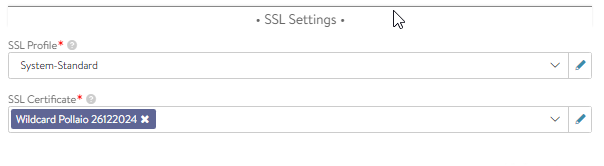
Bind the pool and the SSL certificate added,
Click Next.
Click Next and Save the configuration.
NOTE:
Two ports are opened for primary and secondary traffic:
Port 443 – This is for XML API traffic
Ports 5001 to 5002 – Horizon internal ports opened for L7 primary XML traffic to handle redirected traffic
Ports 30001 to 30002 – Blast
Configure DataScript
Binding the Horizon DataScript on the Virtual Service
From the UI, navigate to Applications > Virtual Services.
Edit the virtual service that was created.
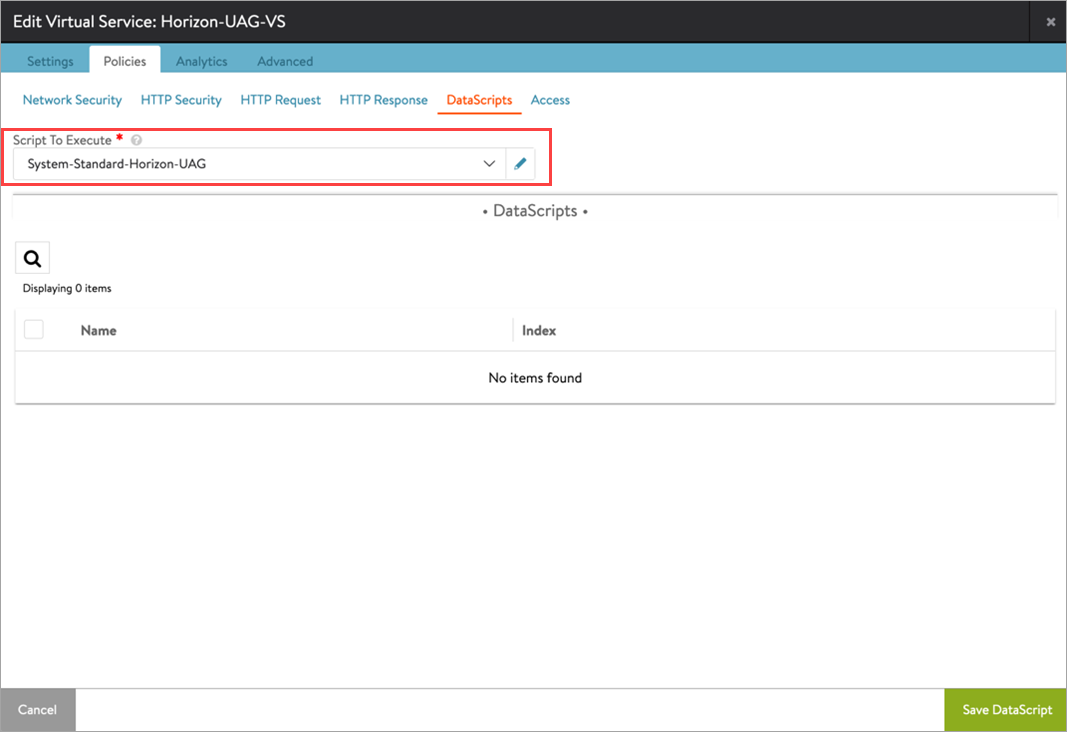
Go to Policies > DataScripts.
Click Add DataScripts.
Under Script To Execute, select System-Standard-Horizon-UAG.
Click Save DataScript and click Save.
System-Standard-Horizon-UAG is embedded AVI Load Balancer Datascript
UAG Configuration
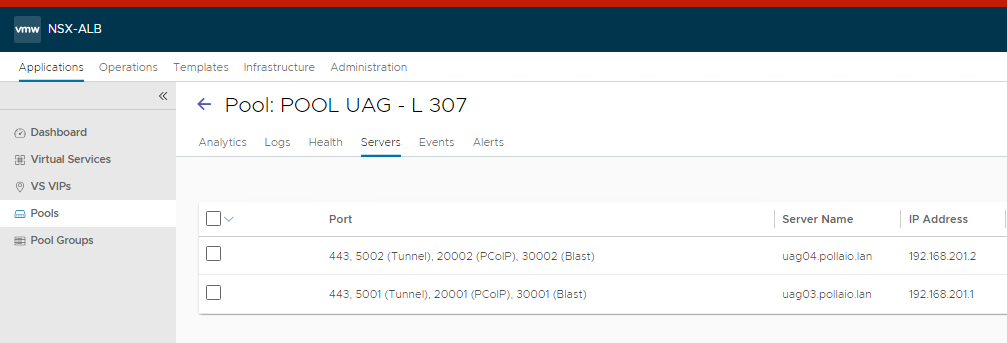
Modify each UAG’s Blast and PCoIP external URL fields to use the custom ports added in the NSX Advanced Load Balancer port map (From the UI, Edit Pool > Servers tab under New Pool or Edit Pool page).
Modify the Blast external URL to include the custom port for UDP.
For example, https://<ENAV_PUBLIC_FQDN>.com:<BLAST-CUSTOM-PORT>/?UDPPort=<BLAST-CUSTOM-PORT>.
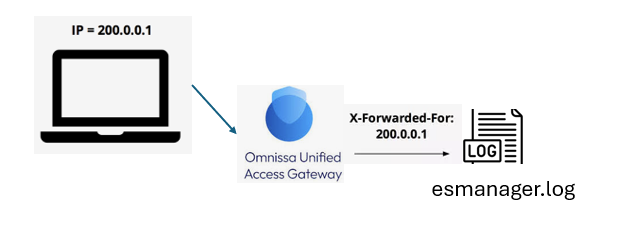
About the 2312 Unified Access Gateway version there is a new log function to increase the Readable of the esmanager.log (default log level).
This function is HeadersToBeLogged and is enabled by default from 2312. The default value for this field is set to X-Forwarded-For and includes the details for Username, Client build, and Client version.
These details will be added to the esmanager.log file.
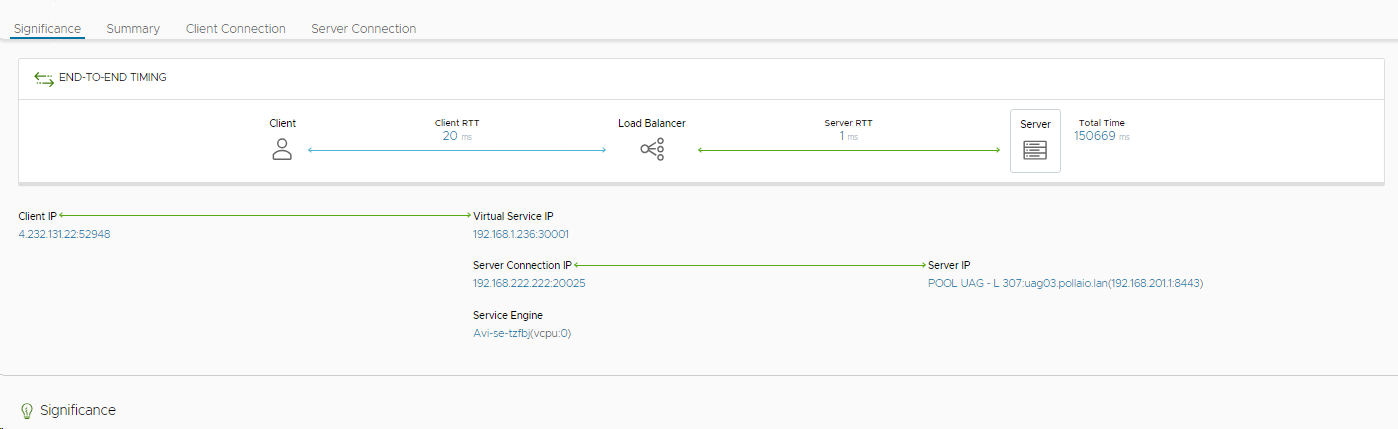
For example for connection to VDI from the Internet :
Where:
4.232.131.22 is the public IP of my OS from I try to connect
192.168.222.222 is the IP of My LB in front of UAG
pbrividi is my username
VMware-Horizon-Client-Win32-Windows is the type of client
8.13.0-9986028157 is the Horizon Client Build
To modify the logged information I need to change the JSON or ini file:
This is the default configuration for headersToBeLogged
When implementing and publishing an application with Horizon infrastructure a classic situation is the request from the users to reduce the time of waiting until the application is ready to use.
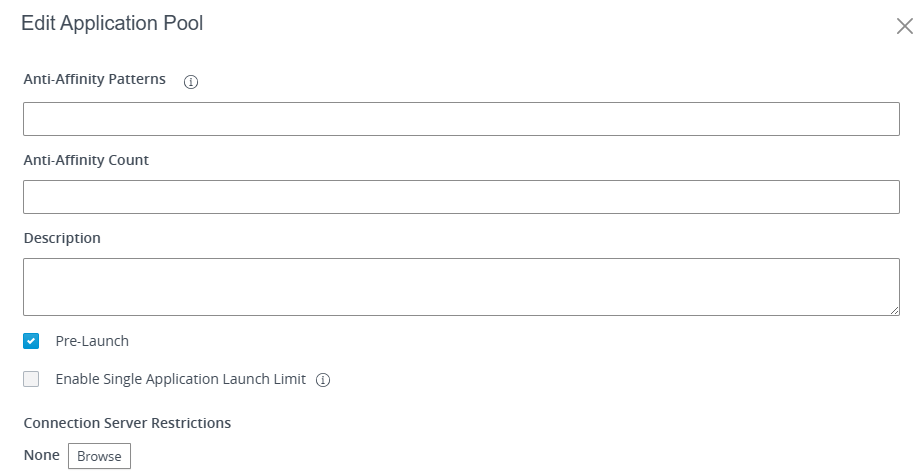
Well we have a feature to speed up the application start, this functionality is the “Pre-Launch option”
A little recap:
When a user start a Publish Application we have two step:
The first step, the login to the RDS host assigned
The Second step, the application start
With the “Pre-Launch” Option we can remove the First step because this option does that when the user login to Horizon Infrastructure, if the user is entitled to Application Pool (with the pre-launch option enabled), an automatic session (login) starts on a RDS Host.
We
This improves the start of the application because the RDS user Session is just running on the RDS farm.
We can see my video where I tested this function (Sorry it is in the Italian language, but it is very clear with only seeing the video)
I want to write about the “User-Managed Auto-Start Shortcuts”.
To use this new function it is necessary to:
upgrade FlexEngine Agent to 2406 on VDI (Master Image or VDI Full Clone):
For AD agent install -> update the ADMX template (On Active Directory Central Store)
We need to modify or create a GPO (assigned to the OU where the VDI are allocated) and enable the “User-Managed Auto-Start Shortcuts”
User Configuration -> Policies -> Administrative Templates: Policy Definitions -> VMware DEM -> FlexEngine -> Self-Support -> Allow managing auto-start shortcuts and set it to Enable
For NOAD agent Install -> Use this parameter ManageAutoStartShortcuts, on the upgrade step, and set it to 1 to configure properly the self-support tools
upgrade DEM console to 2406
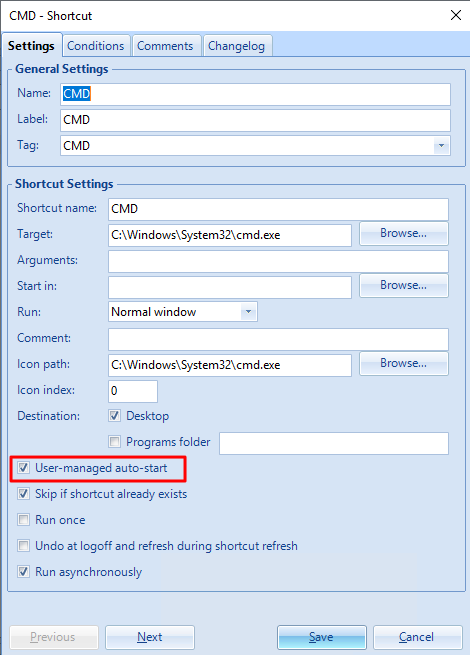
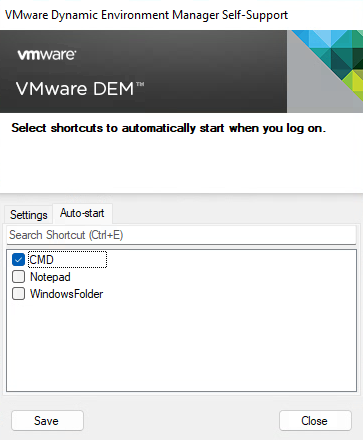
Now in DEM Console (under User Environment), we need to create ShortCuts like this
We need to enable “User-managed auto-start”
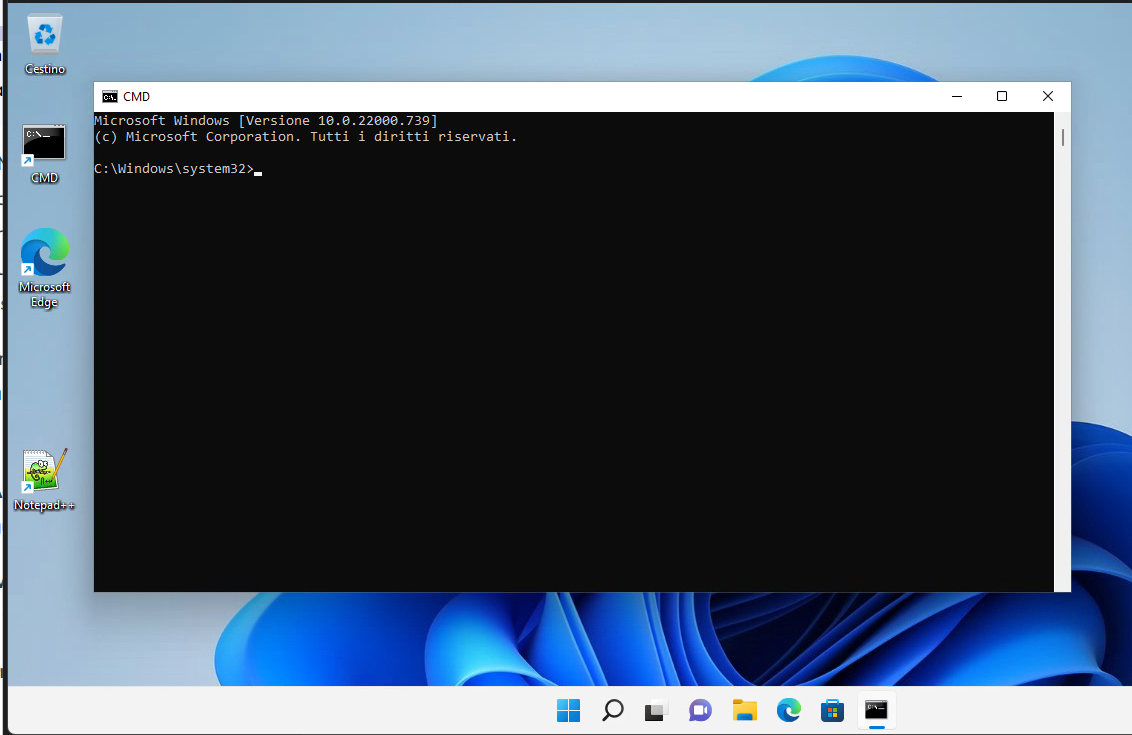
Now when the users log in to their VDI and launch the DEM Self-support program, they can select which shortcut applications automatically start when they log on:
I have updated Horizon to 2406 and I see the following banner?
I upgraded Horizon to 2406 and have a subscription license, do I have to install the Edge Gateway to activate the licenses?
Well, I recommend you read this post of mine.
New features in Horizon version 2406 include changes to license management, including:
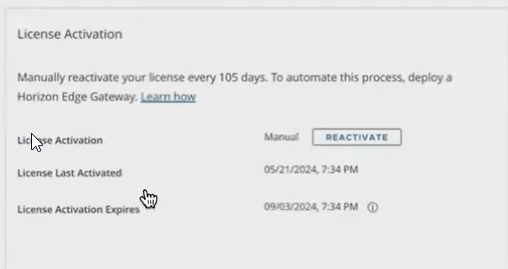
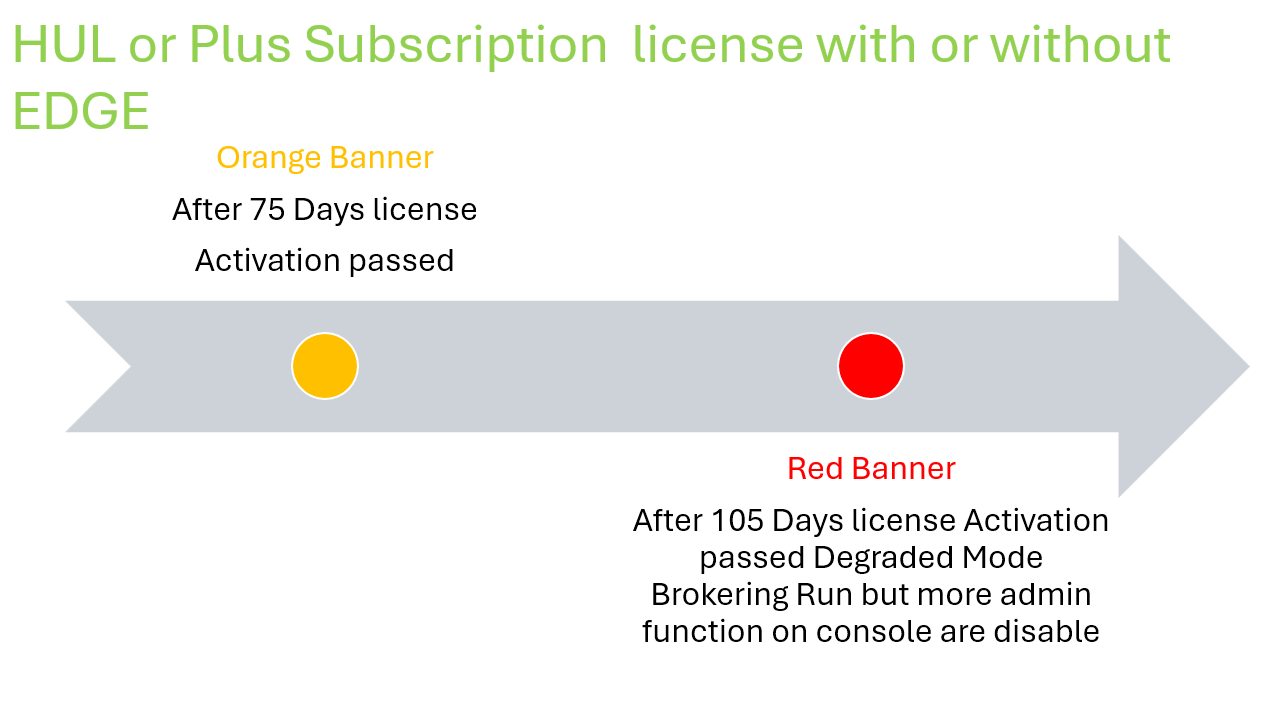
The ability to activate subscription Plus and HUL licenses even without deploying the EDGE Gateway (we will see the details in a future post)
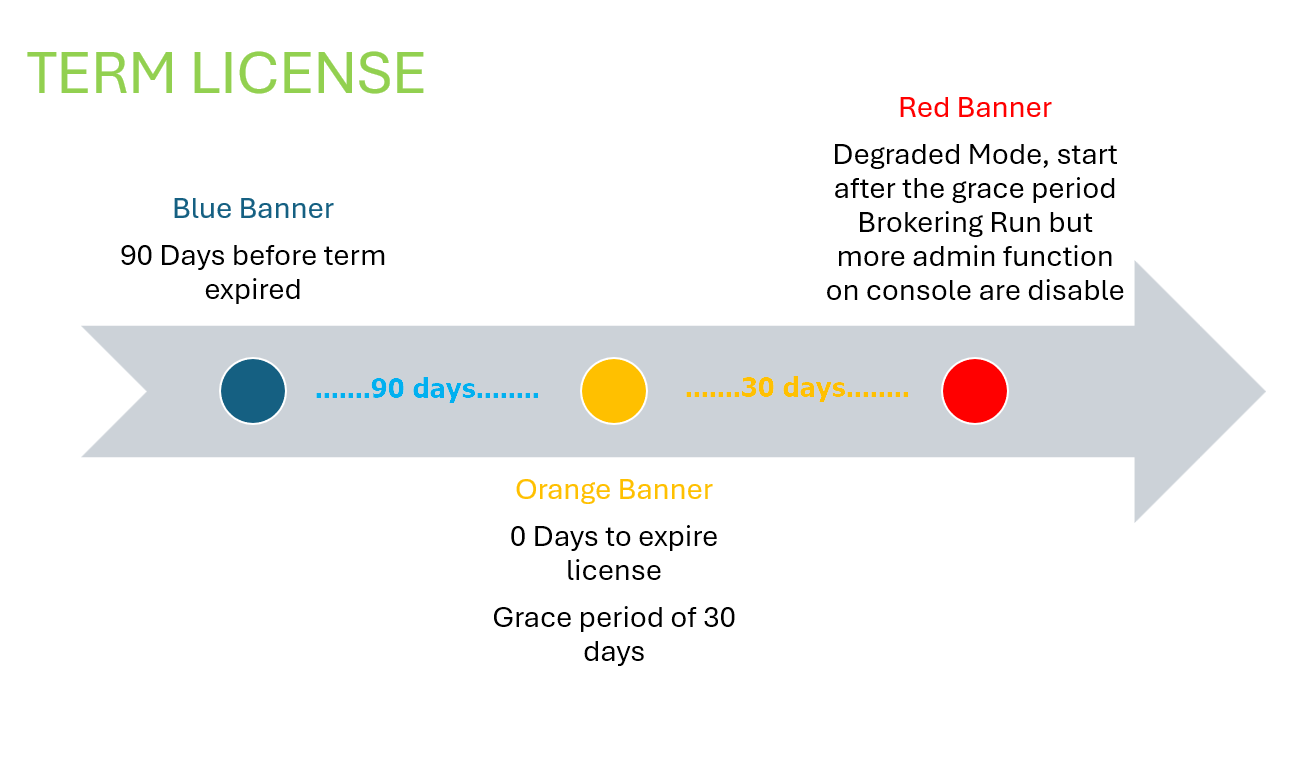
The degraded mode
Activation without EDGE Gateway
we will have the following advantages:
Due to corporate or administrative policies, some customers cannot have production environments that send data to the cloud. With this new feature, they will be able to enjoy the benefits of subscription Plus licenses to HUL without sending data
They will not have to dedicate resources to the Edge Gateway (8 vCPUs and 32 GB RAM)
The only activity to do, if you do not have the EDGE gateway installed, is to remember to reactivate the license every 105 days in a very simple way by clicking on the button on the licenses page
Degraded Mode
When Horizon console switch to degraded mode?
When there are no Horizon licenses installed (see first-time installation)
When a perpetual customer upgrades their connection server to version 2406
When the term/subscription license expires
What does it involve?
Entering the degraded state involves the following situations:
In the Inventory -> Desktops – Add button will be disabled
In the Inventory -> Farms – Add button will be disabled
In the Inventory -> Desktops -> Automated Desktop Pool -> Edit -> Provisioning Settings -> Desktop Pool Sizing – Maximum Machines input field will be disabled
In the Inventory -> Farms -> Automated Farms -> Edit -> Provisioning Settings -> Farm Sizing – Maximum Machines input field will be disabled
In the Inventory -> Desktops -> Pools Summary -> Maintain -> Schedule button will be disabled
In the Inventory -> Farms -> Farms Summary -> Maintain -> Schedule button will be disabled
In the Inventory -> Desktops -> Duplicate button will be disabled.
The features will be re-enabled when you adjust the license
So you ask me, what happens if we upgrade the version of Horizon to version 2406 and have perpetual licenses?
The following banner appears on the first access (the status is degraded mode with the restrictions indicated above)
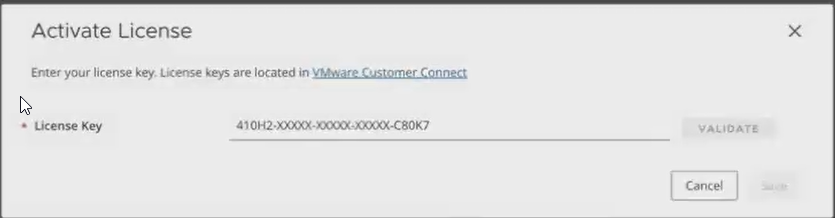
You will need to reactivate your license by opting for one of the following options:
In the case of perpetual licenses, select Term or Perpetual license and enter the code
The inclusion of the degraded mode also changes the management of the expiration of the so-called TERM licenses from version 2406:
While for subscription HUL or Plus licenses it is also necessary to think about the failure to verify licenses through the EDGE or manual reactivation without the EDGE.
As anticipated in my previous posts, version 2406 of Omnissa’s EUC products (the company that took over VMware’s EUC products) has been released. New versions of the following are present:
App Volumes
Horizon
Unified Access Gateway
Dynamic Environment Manager
In the next posts I present some of the most interesting new features that are present in these new releases.
Let’s start with App Volumes and talk about:
Volumes App for Persistent Desktop
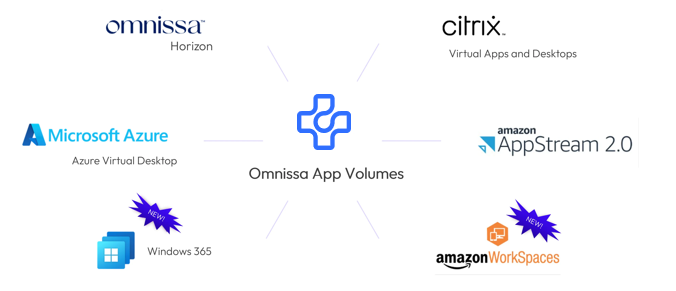
Extending the App Volumes solution to other platforms
Assign different versions of the same application to a user
Volumes App for Persistent Desktop
The solution until the version before 2406 was only available for non-persistent desktops (Instant Clone)
From the 2406 it is also possible to use it with persistent desktops
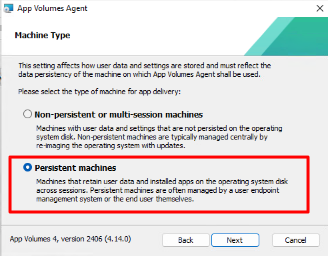
The main difference is present in the installation of the agent where it is asked on which type of desktop we are installing the App Volumes agent
In its nature of profile management, the use of App Volumes on a persistent machine is only possible with App Stacks and not with Writable Volumes
Extending the App Volumes solution to other platforms
The ability to use App Volumes with VDI is not only of Horizon infrastructure, from version 2406 it is possible to use with Windows 365 and with Amazon WorkSpaces
Assign different versions of the same application to a user
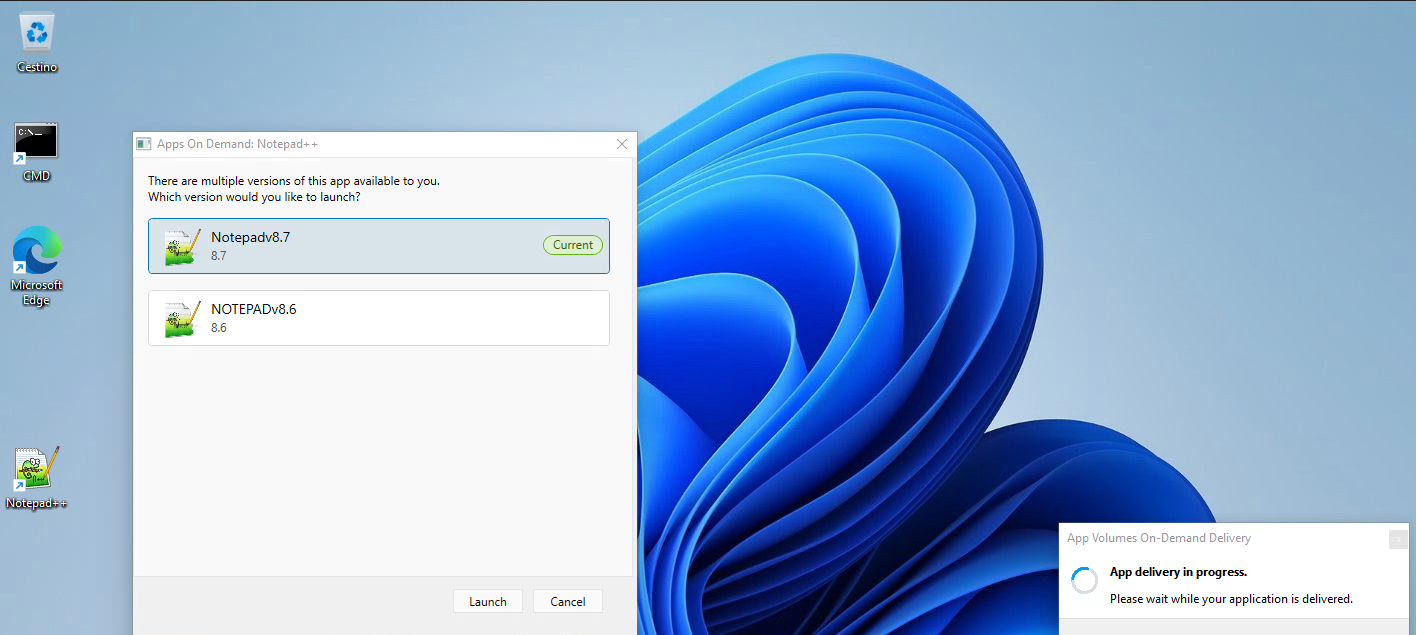
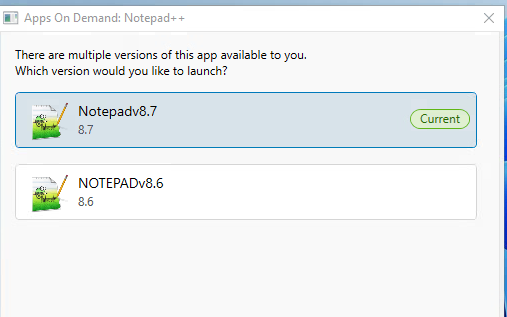
Leveraging Apps on Demand, end users can now select from multiple packages of an application at launch, providing flexibility to try out new versions or launch specific ones
Other assignment options: “Marker,” and “Package,”, now we are the “Multiple,” option enhancing application management and deployment flexibility.
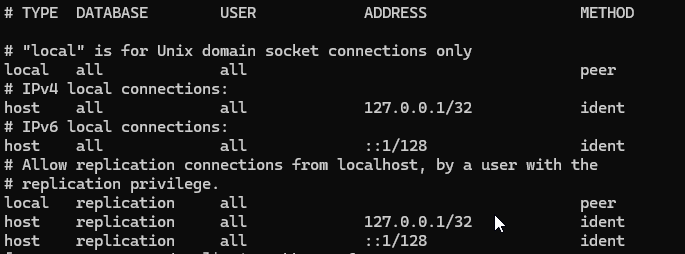
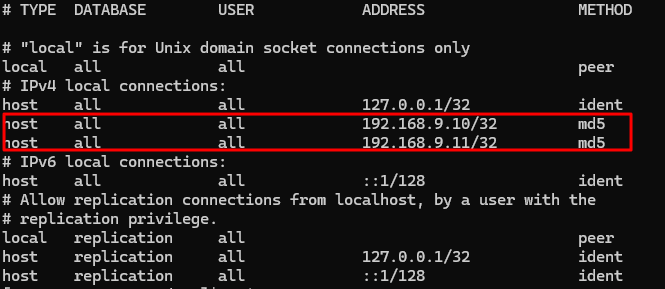
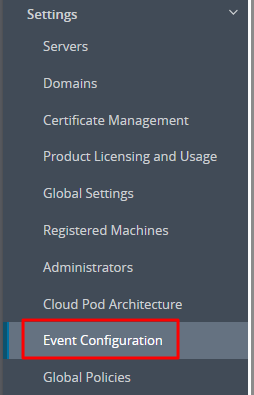
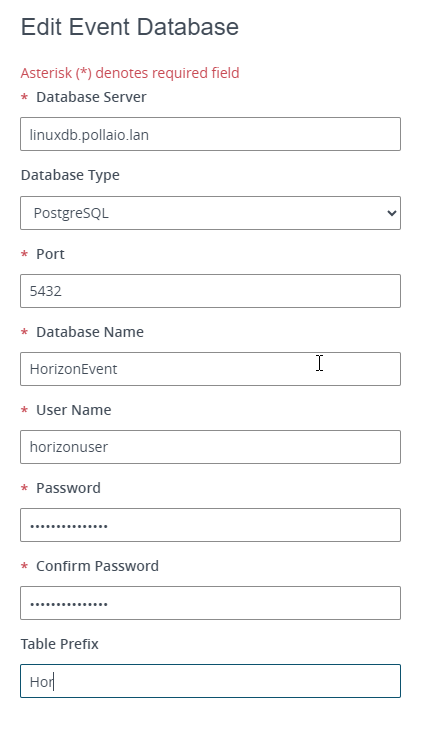
In most Horizon infrastructure Microsoft SQL is used to host the event DB. It is possible to use Oracle and also PostgreSQL, this last possibility allows us to reduce the costs by using a free Linux version as OS (See Oracle Linux) and not add costs for the DB.
All of VMware’s EUC products were continuously updated (in recent years almost always every 3 months) to add new features, fix bugs and mitigate security vulnerabilities.
The move to Broadcom and the subsequent sell of EUC products in Omnissa has brought a few months of stabilization… but I’m happy to announce that versions 2406 of the App Volumes and Unified Access Gateway products are out.
What do we find new?
App Volumes
Persistent Desktop Support
Expanded Use Cases: New support for classic Windows desktop environments, a significant enhancement to our Apps Everywhere strategy. This new feature extends our efficient one-to-many provisioning model, previously available only for non-persistent desktops, to persistent virtual desktop environments.
And more…
Replicate Application Packages in Specific Stages
We are excited to introduce the Replicate Application Packages in Specific Stages feature, designed to enhance the life cycle management of applications across multiple instances of App Volumes Manager
And more…
Select a specific Package Version when Launching an App (Technology Preview)